【C#/WPF】调节图像的对比度(Contrast)
关于对比度:
调节对比度直观感受是,高对比度的图像明暗关系更明显,色彩更鲜艳;低对比度的图像表面像是蒙上一层灰,色彩不鲜艳。
需求:
制作一个面板,一个滑动条,拖动滑动条可以修改目标图片的对比度。
资料参考:
界面滑动条两端的值是-30~30,默认处于中间位置0。已知目标图像的Bitmap数据。
- 修改Bitmap的对比度。
- 将修改之后的Bitmap重新赋值给界面Image控件显示。
        /// <summary>

        /// 调节对比度

        /// </summary>

        /// <param name="sender"></param>

        /// <param name="e"></param>

        private void Contrast_ValueChanged(object sender, RoutedPropertyChangedEventArgs<double> e)

        {

            // 滑动条是值是-30~30

            // originalBitmap是目标图像的Bitmap

            int threshold = (int)e.NewValue;

            Bitmap newBitmap = BitmapHelper.Contrast(originalBitmap, threshold);

            // 重新给Image控件赋值新图像

            image.Source = SystemUtils.ConvertBitmapToBitmapImage(newBitmap);

        }
下面调节图像对比度的工具方法:
    /// <summary>

    /// 代码来自:https://softwarebydefault.com/2013/04/20/image-contrast/

    /// </summary>

    public static class BitmapHelper

    {

        /// <summary>

        /// 调节图像的对比度

        /// </summary>

        /// <param name="sourceBitmap"></param>

        /// <param name="threshold">阈值,通过该参数控制调节</param>

        /// <returns></returns>

        public static Bitmap Contrast(this Bitmap sourceBitmap, int threshold)

        {

            BitmapData sourceData = sourceBitmap.LockBits(new Rectangle(, ,

                                        sourceBitmap.Width, sourceBitmap.Height),

                                        ImageLockMode.ReadOnly, System.Drawing.Imaging.PixelFormat.Format32bppArgb);

            byte[] pixelBuffer = new byte[sourceData.Stride * sourceData.Height];

            Marshal.Copy(sourceData.Scan0, pixelBuffer, , pixelBuffer.Length);

            sourceBitmap.UnlockBits(sourceData);

            double contrastLevel = Math.Pow((100.0 + threshold) / 100.0, );

            double blue = ;

            double green = ;

            double red = ;

            for (int k = ; k +  < pixelBuffer.Length; k += )

            {

                blue = ((((pixelBuffer[k] / 255.0) - 0.5) *

                            contrastLevel) + 0.5) * 255.0;

                green = ((((pixelBuffer[k + ] / 255.0) - 0.5) *

                            contrastLevel) + 0.5) * 255.0;

                red = ((((pixelBuffer[k + ] / 255.0) - 0.5) *

                            contrastLevel) + 0.5) * 255.0;

                if (blue > )

                { blue = ; }

                else if (blue < )

                { blue = ; }

                if (green > )

                { green = ; }

                else if (green < )

                { green = ; }

                if (red > )

                { red = ; }

                else if (red < )

                { red = ; }

                pixelBuffer[k] = (byte)blue;

                pixelBuffer[k + ] = (byte)green;

                pixelBuffer[k + ] = (byte)red;

            }

            Bitmap resultBitmap = new Bitmap(sourceBitmap.Width, sourceBitmap.Height);

            BitmapData resultData = resultBitmap.LockBits(new Rectangle(, ,

                                        resultBitmap.Width, resultBitmap.Height),

                                        ImageLockMode.WriteOnly, PixelFormat.Format32bppArgb);

            Marshal.Copy(pixelBuffer, , resultData.Scan0, pixelBuffer.Length);

            resultBitmap.UnlockBits(resultData);

            return resultBitmap;

        }

    }
下面是将Bitmap转换为BitmapImage的工具方法,以供WPF的Image控件使用图像:
    public static class SystemUtils
    {

        /// <summary>

        /// 转换类型:Bitmap --> BitmapImage

        /// <summary>

        /// <returns></returns>

        public static BitmapImage ConvertBitmapToBitmapImage(Bitmap bitmap)

        {

            using (MemoryStream stream = new MemoryStream())

            {

                bitmap.Save(stream, ImageFormat.Png);

                stream.Position = ;

                BitmapImage bi = new BitmapImage();

                bi.BeginInit();

                // According to MSDN, "The default OnDemand cache option retains access to the stream until the image is needed."

                // Force the bitmap to load right now so we can dispose the stream.

                bi.CacheOption = BitmapCacheOption.OnLoad;

                bi.StreamSource = stream;

                bi.EndInit();

                bi.Freeze();

                return bi;

            }

        }

    }
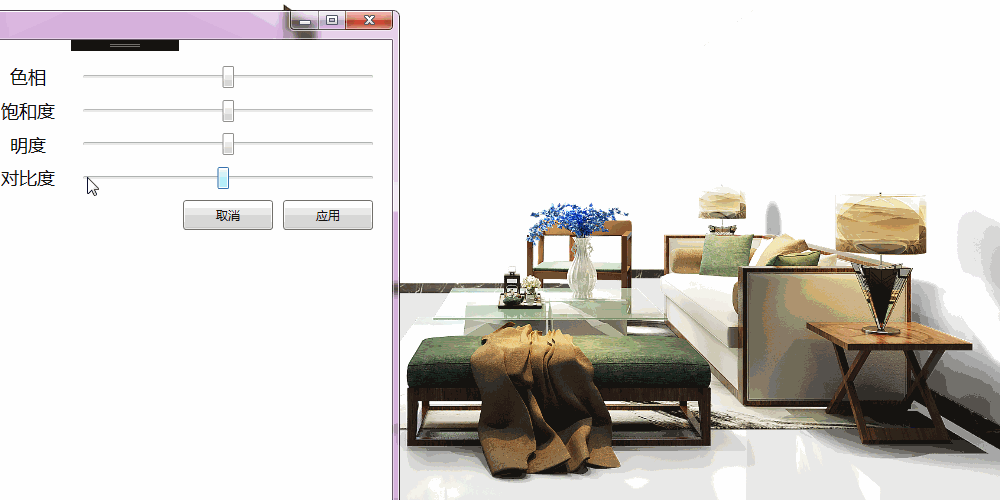
测试效果如下:
另外,关于图像的HSL(色相、饱和度、明度)的调节,可参考在下的另一篇博文:
参考资料:
【C#/WPF】调节图像的对比度(Contrast)的更多相关文章
- 【C#/WPF】调节图像的HSL(色相Hue、饱和度Saturation、明亮度Lightness)
先说概念: HSL是一种描述颜色的方式,其他颜色描述方式还有大家熟悉的RGB值.HSL三个字母分别表示图像的Hue色相.Saturation饱和度.Lightness明亮度. 需求: 制作一个面板,包 ...
- 【C#/WPF】调节图像的HSL(色相、饱和度、明亮度)
原文:[C#/WPF]调节图像的HSL(色相.饱和度.明亮度) 先说概念: HSL是一种描述颜色的方式(其他颜色描述方式还有大家熟悉的RGB值).HSL三个字母分别表示图像的Hue色相.Saturat ...
- OpenCV学习:改变图像的对比度和亮度
本实例演示简单地改变图像的对比度和亮度,使用了如下线性变换来实现像素值的遍历操作: The parameters α > 0 and β often called the gain and bi ...
- Python: PS 图像调整--对比度调整
本文用 Python 实现 PS 里的图像调整–对比度调整.具体的算法原理如下: (1).nRGB = RGB + (RGB - Threshold) * Contrast / 255 公式中,nRG ...
- OpenCV --- 修改图像的对比度、亮度 、RGB转Gray图像、修改图像的尺寸
#include <opencv2/core.hpp> #include <opencv2/imgcodecs.hpp> #include <opencv2/highgu ...
- 借助Photoshop,Illustrator等设计软件进行WPF图形图像的绘制
原文:借助Photoshop,Illustrator等设计软件进行WPF图形图像的绘制 本文所示例子是借助第三方设计软件,制作复杂的矢量图形,转成与XAML酷似的SVG,再转换成xaml而实现的. 这 ...
- theano 实现图像局部对比度归一化
很多时候我们需要对图像进行局部对比度归一化,比如分块CNN的预处理阶段.theano对此提供了一些比较方便的操作. 局部归一化的一种简单形式为: 其中μ和σ分别为局部(例如3x3的小块)的均值和标准差 ...
- WPF图形图像相关类
BitmapMetadata类: 继承自抽象类ImageMetadata,包含图像的原数据信息,如相机型号.图像修改程序名称.拍照日期.拍照地点等.ImageSoure类包含ImageMetadata ...
- OpenCV 改变图像的对比度和亮度
#include <opencv2/core/core.hpp> #include <opencv2/highgui/highgui.hpp> #include <ios ...
随机推荐
- iOS利用SDWebImage实现缓存的计算与清理
概述 可以仅仅清理图片缓存, 也可以清理所有的缓存文件(包括图片.视频.音频等). 详细 代码下载:http://www.demodashi.com/demo/10717.html 一般我们项目中的缓 ...
- 架构-LAMP特级学习(网站加速解决方案)
1.Squid代理缓存技术 2.页面静态化缓存技术 3.Memcache.Redis等缓存服务器 4.Sphinx搜索加速
- Servlet线程安全性
问题:使用以下的代码演示servlet的线程安全问题? public class MultiThreadQuestion extends HttpServlet { public int count ...
- PS_Form个性化选择Block自动查询和查询条件排序实现(案例)
2014-06-01 BaoXinjian
- PLSQL_Oracle基本概念总结(汇总)
2014-08-16 Created By BaoXinjian
- 利用ARP和ICMP协议解释ping命令
一.MTU 以太网和IEEE 802.3对数据帧的长度都有限制,其最大值分别是1500和1492字节,将这个限制称作最大传输单元(MTU,Maximum Transmission Unit).如果IP ...
- Linux中断 - IRQ Domain介绍
一.概述 在linux kernel中,我们使用下面两个ID来标识一个来自外设的中断: 1.IRQ number.CPU需要为每一个外设中断编号,我们称之IRQ Number.这个IRQ number ...
- Python count() 方法
描述 count() 方法用于统计字符串中某个子字符串出现的次数,可选参数为开始搜索与结束搜索的位置索引. 语法 count() 方法语法: S.count(sub[,start=0[,end=len ...
- POJ 3670 Eating Together 二分解法O(nlgn)和O(n)算法
本题就是一题LIS(最长递增子序列)的问题.本题要求求最长递增子序列和最长递减子序列. dp的解法是O(n*n),这个应该大家都知道.只是本题应该超时了. 由于有O(nlgn)的解法. 可是因为本题的 ...
- java的多线程(一)
我们知道我们打开个程序(或者说运行一款软件)其实也就是创建了一个进程,只不过程序是静态指令的集合,而进程是正在系统中运行的指令集合,进程是系统进行资源分配与调度的一个独立单位.进程具有独立性,动态性, ...