
小试牛刀——爬topit.me的图片,附github简易上传教程
接触了scrapy ,发现爬虫效率高了许多,借鉴大神们的文章,做了一个爬虫练练手:
我的环境是:Ubuntu14.04 + python 2.7 + scrapy 0.24
目标 topit.me
一、创建project
scrapy startproject topit
二、定义Item
import scrapy

class TopitItem(scrapy.Item):

    # define the fields for your item here like:

    # name = scrapy.Field()

    url = scrapy.Field()
三、在spider 文件夹中创建 topit_spider.py
# -*- coding: utf-8 -*-

#!/usr/bin/env python

#File name :topit_spider.py

#Author:Mellcap

from scrapy.contrib.spiders import CrawlSpider,Rule

from scrapy.contrib.linkextractors.sgml import SgmlLinkExtractor

from topit.items import TopitItem

import re

from scrapy.http import Request

from scrapy.selector import Selector

class TopitSpider(CrawlSpider):

    name = "topit"

    allowed_domains = ["topit.me"]

    start_urls=["http://www.topit.me/"]

    rules = (Rule(SgmlLinkExtractor(allow=('/item/\d*')),  callback = 'parse_img', follow=True),)

    def parse_img(self, response):

        urlItem = TopitItem()

        sel = Selector(response)

        for divs in sel.xpath('//a[@rel="lightbox"]'):

            img_url=divs.xpath('.//img/@src').extract()[0]

            urlItem['url'] = img_url

            yield urlItem
四、定义pipelines
# -*- coding: utf-8 -*-

# Define your item pipelines here

#

# Don't forget to add your pipeline to the ITEM_PIPELINES setting

# See: http://doc.scrapy.org/en/latest/topics/item-pipeline.html

from topit.items import TopitItem

class TopitPipeline(object):

    def __init__(self):

        self.mfile = open('test_topit.html', 'w')

    def process_item(self, item, spider):

        text = '<img src="' + item['url'] + '" alt = "" />'

        self.mfile.writelines(text)

    def close_spider(self, spider):

        self.mfile.close()
五、设置一下 setting.py
在后面加入一行:
ITEM_PIPELINES={'topit.pipelines.TopitPipeline': 1,}
保存后就大功告成了/
接着打开终端
运行:
cd topit

scrapy crawl topit
然后会在topit文件夹中发现test_topit 文件
打开之后在浏览器就可以看到图片了

接下来传到Github上:
爬虫已经做好了,在远程建立一个空库
一、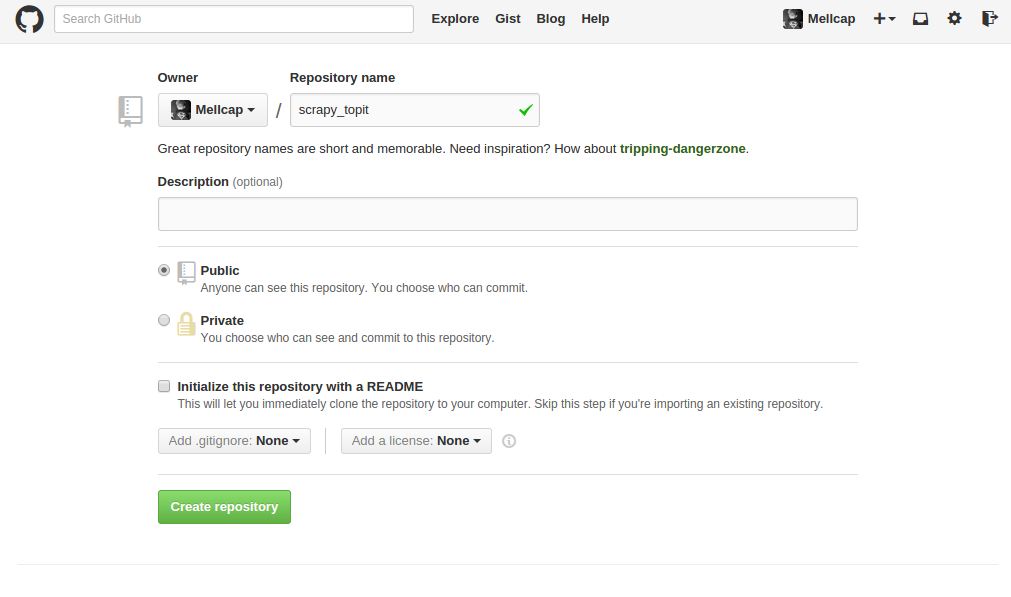
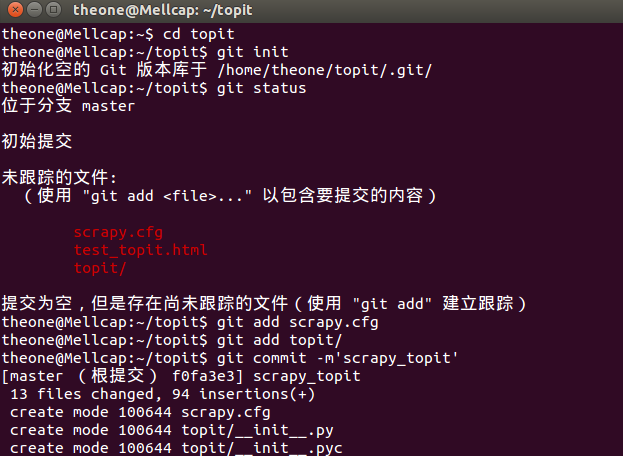
二、在本地建立版本库
theone@Mellcap:~$ cd topit

theone@Mellcap:~/topit$ git init

初始化空的 Git 版本库于 /home/theone/topit/.git/

theone@Mellcap:~/topit$ git status

位于分支 master

初始提交

未跟踪的文件:

  (使用 "git add <file>..." 以包含要提交的内容)

    scrapy.cfg

    test_topit.html

    topit/

提交为空,但是存在尚未跟踪的文件(使用 "git add" 建立跟踪)

theone@Mellcap:~/topit$ git add scrapy.cfg

theone@Mellcap:~/topit$ git add topit/

theone@Mellcap:~/topit$ git commit -m'scrapy_topit'
三、跟远程库建立连接
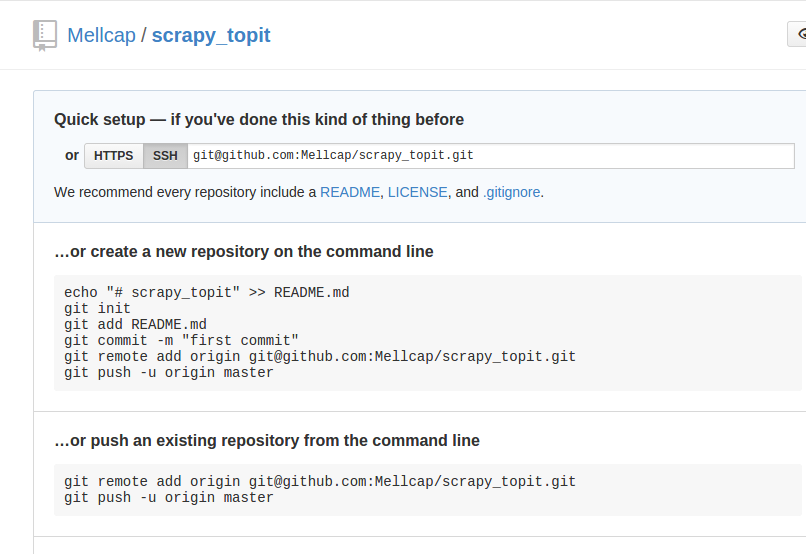
theone@Mellcap:~/topit$ git remote add origin git@github.com:Mellcap/scrapy_topit.git

theone@Mellcap:~/topit$ git push -u origin master
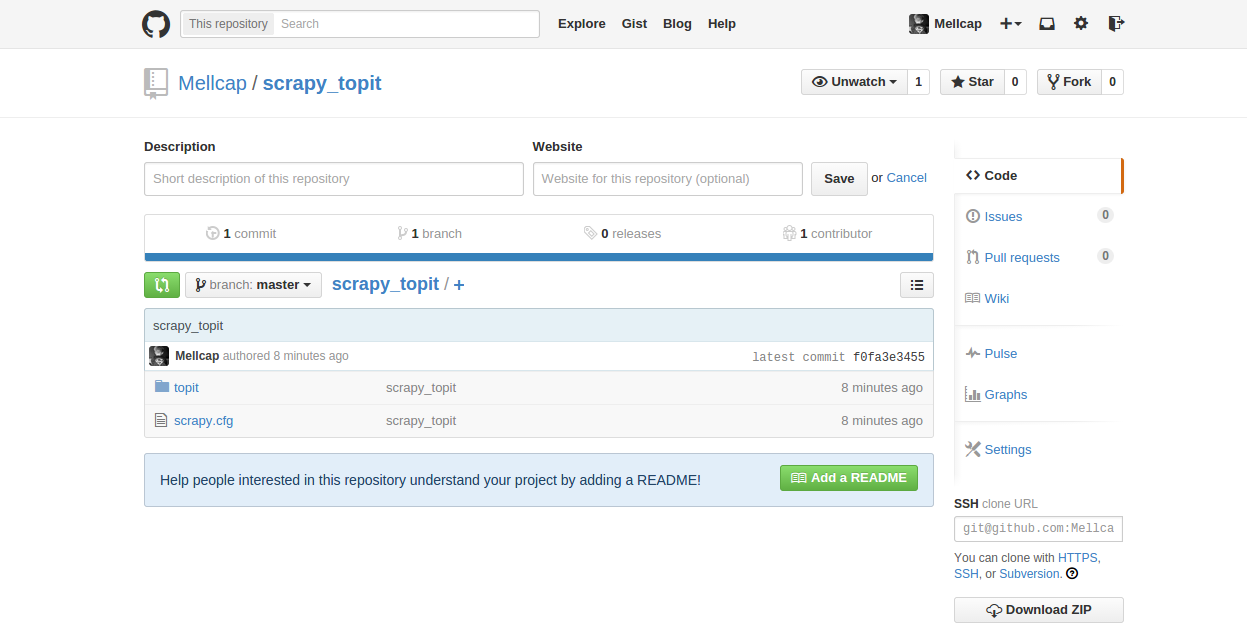
四、完成
在github上看到了自己的爬虫了。
小试牛刀——爬topit.me的图片,附github简易上传教程的更多相关文章
- github代码上传教程
github 上传代码步骤 一.git以及Github Git是个正快速成长的版本控制系统,它由GitHub维护. 优势: 1.支持离线开发,离线Repository. 2.强大的分支功能,适合多个独 ...
- 【Android实战】----基于Retrofit实现多图片/文件、图文上传
本文代码详见:https://github.com/honghailiang/RetrofitUpLoadImage 一.再次膜拜下Retrofit Retrofit不管从性能还是使用方便性上都非常屌 ...
- 使用html5 FileReader获取图片,并异步上传到服务器(不使用iframe)
使用html5 FileReader获取图片,并异步上传到服务器(不使用iframe) 原理: 1.使用FileReader 读取图片的base64编码 2.使用ajax,把图片的base64编码 ...
- #添加图片,最多只能上传9张.md
#添加图片,最多只能上传9张.md 前端页面: ```javascript <form id="imgForm" enctype="multipart/form-d ...
- 适应各浏览器图片裁剪无刷新上传jQuery插件(转)
看到一篇兼容性很强的图片无刷新裁剪上传的帖子,感觉很棒.分享下!~ 废话不多说,上效果图. 一.首先建立如下的一个page <!DOCTYPE html> <html xmlns=& ...
- puzz: 图片和表单上传的不一致问题
1. 方向1 用户提交表单, 图片和表单同步上传.(由同一服务器处理, 服务器压力大. 没有分离) 2. 方向2 图片和表单分开上传. 如图片访问ftp,表单提交后台(图片和后台分离) 2 ...
- [IDEA_3] IDEA 配置 GitHub 并上传项目
0. 说明 参考 Git & GitHub 的安装配置 IDEA 配置 GitHub 并上传项目 1. 安装配置 Git & GitHub 参照 Git & GitHub 的安 ...
- 本地项目通过github客户端上传到github网站上
一.github客户端上传步骤 一.github客户端上传步骤1.百度搜索关键字: GitHub 离线安装包 ==> Github_3.3.4.0版本链接:https://pan.baidu.c ...
- github客户端上传代码
在window下安装github客户端上传代码 第一步:创建Github新账户 第二步:新建仓库 第三步:安装Github shell程序,地址:http://windows.github.com/ ...
随机推荐
- CSS太阳月亮地球三角恋旋转效果
纯粹玩一下,好像没有什么实际的卵用,but,纯玩买不了上当,纯玩买不了受骗........ 地月旋转的一个css效果,无聊玩玩,可以复制到记事本试试 <!DOCTYPE html>< ...
- python 如何重新加载有修改过的模块(module)
写 Python 程序的时候,一边写模块一边调试.调试是在 Python 自身的命令行终端进行的.但当对模块里的代码进行修改后,在原调试终端上执行到模块中新修改上去的内容. 我之前是一直用退出再重新进 ...
- pyqt5通过文本对话框打开文件
点击按钮,打开文本对话框,找一人文件,打开并显示内容 QFIleDialog ...
- soapUI通过groovy脚本设置超时时间
import com.eviware.soapui.SoapUI import com.eviware.soapui.settings.HttpSettings import com.eviware. ...
- Chrome下的语音控制框架MyVoix.js使用篇(一)
日前因工作需求,着手研究了语音识别技术,发现github上有网友发布了一款叫做voix.js的javascript框架.在拜读voix.js的源码后发现了不少问题,于是自己写了一款语音识别框架MyVo ...
- 勾选checkbox之后,button按钮可用
js:function chkClick() { if (document.getElementById("chkBox").checked == true) { ...
- WCF服务实现客户端Cookie共享,表单验证的解决方案
基于前几篇的文章,如果理解了通道 拦截器 服务转发的概念,相信你肯定也能理解咋的玩了. 说白了就是创建客户端的拦截器: 实现接口:IClientMessageInspector. 里面的方法就是客户 ...
- Windows 8.1下使用IE 64位
Internet Options -> Advanced -> Settings Security组 对Enable 64-bit processes for Enhanced Prote ...
- 【POJ2777】Count Color(线段树)
以下是题目大意: 有水平方向上很多块板子拼成的墙,一开始每一块都被涂成了颜色1,有C和P两个操作,代表的意思是:C X Y Z —— 从X到Y将板子涂成颜色ZP X Y —— 查询X到Y的板子共 ...
- POJ2367 Genealogical tree (拓扑排序)
裸拓扑排序. 拓扑排序 用一个队列实现,先把入度为0的点放入队列.然后考虑不断在图中删除队列中的点,每次删除一个点会产生一些新的入度为0的点.把这些点插入队列. 注意:有向无环图 g[] : g[i] ...