为Android系统内置Java应用程序测试Application Frameworks层的硬件服务
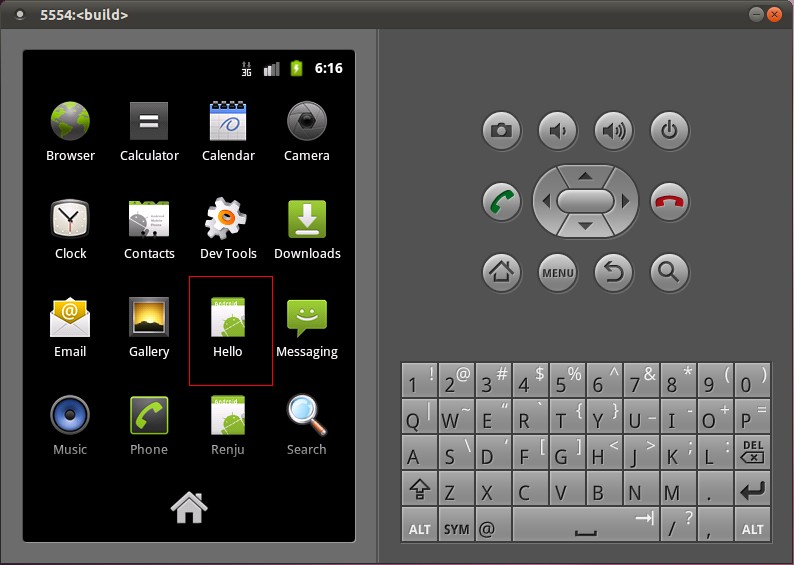
我们在Android系统增加硬件服务的目的是为了让应用层的APP能够通过Java接口来访问硬件服务。那么, APP如何通过Java接口来访问Application Frameworks层提供的硬件服务呢?在这一篇文章中,我们将在Android系统的应用层增加一个内置的应用程序,这个内置的应用程序通过 ServiceManager接口获取指定的服务,然后通过这个服务来获得硬件服务。
一. 参照在Ubuntu上为Android系统的Application Frameworks层增加硬件访问服务一文,在Application Frameworks层定义好自己的硬件服务HelloService,并提供IHelloService接口提供访问服务。
二. 为 了方便开发,我们可以在IDE环境下使用Android SDK来开发Android应用程序。开发完成后,再把程序源代码移植到Android源代码工程目录中。使用Eclipse的Android插件ADT 创建Android工程很方便,这里不述,可以参考网上其它资料。工程名称为Hello,下面主例出主要文件:
主程序是src/shy/luo/hello/Hello.java:
- package shy.luo.hello;
- import shy.luo.hello.R;
- import android.app.Activity;
- import android.os.ServiceManager;
- import android.os.Bundle;
- import android.os.IHelloService;
- import android.os.RemoteException;
- import android.util.Log;
- import android.view.View;
- import android.view.View.OnClickListener;
- import android.widget.Button;
- import android.widget.EditText;
- public class Hello extends Activity implements OnClickListener {
- private final static String LOG_TAG = "shy.luo.renju.Hello";
- private IHelloService helloService = null;
- private EditText valueText = null;
- private Button readButton = null;
- private Button writeButton = null;
- private Button clearButton = null;
- /** Called when the activity is first created. */
- @Override
- public void onCreate(Bundle savedInstanceState) {
- super.onCreate(savedInstanceState);
- setContentView(R.layout.main);
- helloService = IHelloService.Stub.asInterface(
- ServiceManager.getService("hello"));
- valueText = (EditText)findViewById(R.id.edit_value);
- readButton = (Button)findViewById(R.id.button_read);
- writeButton = (Button)findViewById(R.id.button_write);
- clearButton = (Button)findViewById(R.id.button_clear);
- readButton.setOnClickListener(this);
- writeButton.setOnClickListener(this);
- clearButton.setOnClickListener(this);
- Log.i(LOG_TAG, "Hello Activity Created");
- }
- @Override
- public void onClick(View v) {
- if(v.equals(readButton)) {
- try {
- int val = helloService.getVal();
- String text = String.valueOf(val);
- valueText.setText(text);
- } catch (RemoteException e) {
- Log.e(LOG_TAG, "Remote Exception while reading value from device.");
- }
- }
- else if(v.equals(writeButton)) {
- try {
- String text = valueText.getText().toString();
- int val = Integer.parseInt(text);
- helloService.setVal(val);
- } catch (RemoteException e) {
- Log.e(LOG_TAG, "Remote Exception while writing value to device.");
- }
- }
- else if(v.equals(clearButton)) {
- String text = "";
- valueText.setText(text);
- }
- }
- }
程序通过ServiceManager.getService("hello")来获得HelloService,接着通过 IHelloService.Stub.asInterface函数转换为IHelloService接口。其中,服务名字“hello”是系统启动时加 载HelloService时指定的,而IHelloService接口定义在android.os.IHelloService中,具体可以参考在Ubuntu上为Android系统的Application Frameworks层增加硬件访问服务一文。这个程序提供了简单的读定自定义硬件有寄存器val的值的功能,通过IHelloService.getVal和IHelloService.setVal两个接口实现。
- <?xml version="1.0" encoding="utf-8"?>
- <LinearLayout xmlns:android="http://schemas.android.com/apk/res/android"
- android:orientation="vertical"
- android:layout_width="fill_parent"
- android:layout_height="fill_parent">
- <LinearLayout
- android:layout_width="fill_parent"
- android:layout_height="wrap_content"
- android:orientation="vertical"
- android:gravity="center">
- <TextView
- android:layout_width="wrap_content"
- android:layout_height="wrap_content"
- android:text="@string/value">
- </TextView>
- <EditText
- android:layout_width="fill_parent"
- android:layout_height="wrap_content"
- android:id="@+id/edit_value"
- android:hint="@string/hint">
- </EditText>
- </LinearLayout>
- <LinearLayout
- android:layout_width="fill_parent"
- android:layout_height="wrap_content"
- android:orientation="horizontal"
- android:gravity="center">
- <Button
- android:id="@+id/button_read"
- android:layout_width="wrap_content"
- android:layout_height="wrap_content"
- android:text="@string/read">
- </Button>
- <Button
- android:id="@+id/button_write"
- android:layout_width="wrap_content"
- android:layout_height="wrap_content"
- android:text="@string/write">
- </Button>
- <Button
- android:id="@+id/button_clear"
- android:layout_width="wrap_content"
- android:layout_height="wrap_content"
- android:text="@string/clear">
- </Button>
- </LinearLayout>
- </LinearLayout>
- <?xml version="1.0" encoding="utf-8"?>
- <resources>
- <string name="app_name">Hello</string>
- <string name="value">Value</string>
- <string name="hint">Please input a value...</string>
- <string name="read">Read</string>
- <string name="write">Write</string>
- <string name="clear">Clear</string>
- </resources>
- <?xml version="1.0" encoding="utf-8"?>
- <manifest xmlns:android="http://schemas.android.com/apk/res/android"
- package="shy.luo.hello"
- android:versionCode="1"
- android:versionName="1.0">
- <application android:icon="@drawable/icon" android:label="@string/app_name">
- <activity android:name=".Hello"
- android:label="@string/app_name">
- <intent-filter>
- <action android:name="android.intent.action.MAIN" />
- <category android:name="android.intent.category.LAUNCHER" />
- </intent-filter>
- </activity>
- </application>
- </manifest>
三. 将Hello目录拷贝至packages/experimental目录,新增Android.mk文件:
USER-NAME@MACHINE-NAME:~/Android/packages/experimental$ vi Android.mk
Android.mk的文件内容如下:
四. 编译:
五. 重新打包系统镜像文件system.img:
重新打包后的system.img文件就内置了Hello.apk文件了。

此,我们就完整地学习了在Android的Linux内核空间添加硬件驱动程序、在Android的硬件抽象层添加硬件接口、在Android的
Application
Frameworks层提供硬件服务以及在Android的应用层调用硬件服务的整个过程了,希望能为读者进入Android系统提供入门帮助。重新学习
整个过程,请参考Android硬件抽象层(HAL)概要介绍和学习计划。
为Android系统内置Java应用程序测试Application Frameworks层的硬件服务的更多相关文章
- 在Ubuntu上为Android系统内置Java应用程序测试Application Frameworks层的硬件服务(老罗学习笔记6)
一:Eclipse下 1.创建工程: ---- 2.创建后目录 3.添加java函数 4.在src下创建package,在package下创建file 5.res---layout下创建xml文件,命 ...
- 在Ubuntu上为Android系统的Application Frameworks层增加硬件访问服务(老罗学习笔记5)
在数字科技日新月异的今天,软件和硬件的完美结合,造就了智能移动设备的流行.今天大家对iOS和Android系统的趋之若鹜,一定程度上是由于这两个系统上有着丰富多彩的各种应用软件.因此,软件和硬件的关系 ...
- 在Ubuntu上为Android系统的Application Frameworks层增加硬件访问服务
文章转载至CSDN社区罗升阳的安卓之旅,原文地址:http://blog.csdn.net/luoshengyang/article/details/6578352 在数字科技日新月异的今天,软件和硬 ...
- 为Android系统的Application Frameworks层增加硬件访问服务
在数字科技日新月异的今天,软件和硬件的完美结合,造就了智能移动设备的流行.今天大家对iOS和Android系统的趋之若鹜,一定程度上是由于这两 个系统上有着丰富多彩的各种应用软件.因此,软件和硬件的关 ...
- 在Ubuntu上为Android系统的Application Frameworks层增加硬件访问服务【转】
本文转载自:http://blog.csdn.net/luoshengyang/article/details/6578352 在数字科技日新月异的今天,软件和硬件的完美结合,造就了智能移动设备的流行 ...
- 开发Android系统内置应用小记
Android系统内置应用可以使用更多的API.更高的权限,与开发普通应用最大的差别在于编译,内置应用编译需要用到Android.mk文件.下面是我在开发过程中的一些小记. 1.在AndroidMai ...
- 《Java应用程序(Application)》
在编写Java应用程序(Application)时可以这样: 1,定义包名. 2, 导入相关的包. 3, 定义一个类. 4,定义相关变量. 5,定义构造函数.(在构造函数内调用init()方法和add ...
- 《java小应用程序(Applet)和java应用程序(Application)分别编写的简单计算器》
Application和Java Applet的区别.Java语言是一种半编译半解释的语言.Java的用户程序分为两类:Java Application和Java Applet.这两类程序在组成结构和 ...
- 在Ubuntu上为Android系统内置C可执行程序测试Linux内核驱动程序(老罗学习笔记2)
在前一篇文章中,我们介绍了如何在Ubuntu上为Android系统编写Linux内核驱动程序.在这个名为hello的Linux内核驱动程序中,创建三个不同的文件节点来供用户空间访问,分别是传统的设备文 ...
随机推荐
- Openjudge-NOI题库-垂直直方图
题目描述 Description 写一个程序从输入文件中去读取四行大写字母(全都是大写的,每行不超过72个字符),然后用柱状图输出每个字符在输入文件中出现的次数.严格地按照输出样例来安排你的输出格式. ...
- 洛谷-乘积最大-NOIP2000提高组复赛
题目描述 Description 今年是国际数学联盟确定的“2000――世界数学年”,又恰逢我国著名数学家华罗庚先生诞辰90周年.在华罗庚先生的家乡江苏金坛,组织了一场别开生面的数学智力竞赛的活动,你 ...
- Mysql索引基础
Mysql索引基础 基本概念: 索引是一种特殊的数据库结构,可以用来快速查询数据库表中的特定记录.索引是提高数据库性能的重要方式.索引创建在表上,是对数据库表中一列或多列的值进行排序的一种结构.可以提 ...
- C89, C99, C11: All the specifics that I know
before anything.. sizeof is an operand! sizeof is an operand! sizeof is an operand! 重要なことは三回にしませんね! ...
- mac下配置gdb调试golang
mac下配置gdb调试golang 原文链接 https://sourceware.org/gdb/wiki/BuildingOnDarwin Building GDB for Darwin Crea ...
- Ubuntu配置Samba
一.安装Ubuntu samba服务器 $ sudo apt-get install samba $ sudo apt-get install smbclient # Linux客户端测试用 二.创建 ...
- HDU2571 命运 动态规划
好久没更新博客了. 校内练习的一道水题 HDU2571 命运. 简单DP. 穿过幽谷意味着离大魔王lemon已经无限接近了! 可谁能想到,yifenfei在斩杀了一些虾兵蟹将后,却再次面临命运大迷宫 ...
- java 移位运算
移位运算 :将整数转化为二进制(以补码的形式),按位平移. << 左移 >> 右移 >>> 无符号右移 << 右移: 按位做平 ...
- 项目管理-SVN服务器的搭建
Subversion是优秀的版本控制工具,其具体的的优点和详细介绍,这里就不再多说. 首先来下载和搭建SVN服务器. 现在Subversion已经迁移到apache网站上了,下载地址: http:// ...
- HBase常见问题答疑解惑【持续更新中】
HBase常见问题答疑解惑[持续更新中] 本文对HBase开发及使用过程中遇到过的常见问题进行梳理总结,希望能解答新加入的HBaser们的一些疑惑. 1. HTable线程安全吗? HTable不是线 ...