
electron 安装使用
1.安装 node.js
链接:http://pan.baidu.com/s/1o7W7BIy 密码:y6od
一路next
我安装在F:\Program Files\node.js下
2.检查node.js和npm是否安装成功
- 命令行:node -v
- 命令行:npm -v

建议把npm的仓库切换到国内taobao仓库,
注册cnpm命令,如下
npm install -g cnpm --registry=https://registry.npm.taobao.org

3. Electron的安装
cnpm install -g electron

electron是否安装成功可通过命令 electron -v 查看。

4. 打包输出工具
cnpm install -g electron-packager

5.electron 客户端工具
Electron.exe
链接:http://pan.baidu.com/s/1mieJnLI 密码:x2i8
安装完成双击electron.exe文件

6.新建一个程序
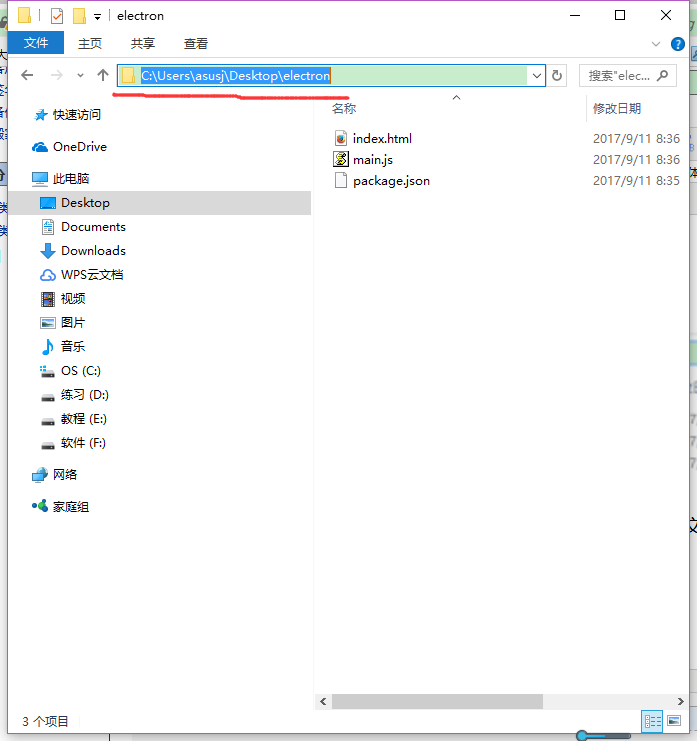
新建一个文件夹,命名为electron,在文件夹目录下,创建三个文件,package.json,main.js,index.html
文件夹目录的结构如下:

package.json
1 {

2   "name"    : "your-app",

3   "version" : "0.1.0",

4   "main"    : "main.js"

5 }

6

7
main.js
 1 const electron = require('electron');

 2 // Module to control application life.

 3 const {app} = electron;

 4 // Module to create native browser window.

 5 const {BrowserWindow} = electron;

 6

 7 // Keep a global reference of the window object, if you don't, the window will

 8 // be closed automatically when the JavaScript object is garbage collected.

 9 let win;

10

11 function createWindow() {

12   // Create the browser window.

13   win = new BrowserWindow({width: 800, height: 600});

14

15   // and load the index.html of the app.

16   win.loadURL(`file://${__dirname}/index.html`);

17

18   // Open the DevTools.

19   win.webContents.openDevTools();

20

21   // Emitted when the window is closed.

22   win.on('closed', () => {

23     // Dereference the window object, usually you would store windows

24     // in an array if your app supports multi windows, this is the time

25     // when you should delete the corresponding element.

26     win = null;

27   });

28 }

29

30 // This method will be called when Electron has finished

31 // initialization and is ready to create browser windows.

32 // Some APIs can only be used after this event occurs.

33 app.on('ready', createWindow);

34

35 // Quit when all windows are closed.

36 app.on('window-all-closed', () => {

37   // On OS X it is common for applications and their menu bar

38   // to stay active until the user quits explicitly with Cmd + Q

39   if (process.platform !== 'darwin') {

40     app.quit();

41   }

42 });

43

44 app.on('activate', () => {

45   // On OS X it's common to re-create a window in the app when the

46   // dock icon is clicked and there are no other windows open.

47   if (win === null) {

48     createWindow();

49   }

50 });

51

52 // In this file you can include the rest of your app's specific main process

53 // code. You can also put them in separate files and require them here.
index.html
 1 <!DOCTYPE html>

 2 <html>

 3   <head>

 4     <meta charset="UTF-8">

 5     <title>Hello World!</title>

 6   </head>

 7   <body>

 8     <h1>Hello World!</h1>

 9     We are using node <script>document.write(process.versions.node)</script>,

10     Chrome <script>document.write(process.versions.chrome)</script>,

11     and Electron <script>document.write(process.versions.electron)</script>.

12   </body>

13 </html>
7.运行程序
两种方法
1.命令行
在cmd里面写

Electron.exe安装路径

自己的文件夹的路径


2.拖
把你写的文件夹直接拖到electron.exe里面。


electron 安装使用的更多相关文章
- electron 安装
1.从网上下载的是nodejs的v0.10.42版本的安装文件,安装node-v0.10.42-x86.msi都使用默认安装,安装完成后会安装在C:\Program Files\nodejs\目录下, ...
- Electron安装过程深入解析(读完此文解决Electron应用无法启动,无法打包的问题)
1. 安装Electron依赖包 开发者往往通过npm install(或 yarn add)指令完成为Node.js工程安装依赖包的工作, 安装Electron也不例外,下面是npm和yarn的安装 ...
- Electron安装
1.安装nodejs和npm 官网下载地址:https://nodejs.org/en/download/ 安装包:下载.msi 安装完成后: nodejs.npm都会安装好,path环境变量也自动设 ...
- electron安装+运行+打包成桌面应用+打包成安装文件+开机自启动
1.初始化node项目,生成package.json文件 npm init 2.安装electron,并保存为开发依赖项 npm install electron -D 3.根目录下新建index.j ...
- electron安装到第一个实例
1.node.js下载,然后安装.下载地址:链接:http://pan.baidu.com/s/1o7TONhS 密码:fosa 2.cmd下输入:npm install electron-prebu ...
- Electron 安装与使用
Electron是使用 JavaScript, HTML 和 CSS 构建跨平台的桌面应用 本文基于Windows进行开发的过程,记录下来,以便日后使用,Electron官网:https://elec ...
- electron安装与使用
系统 WIN10 X64 1. python-2.7.15.amd64.msi 2. node-v10.4.1-x64.msi 3. VS2015 community(社区版) 4. npm conf ...
- electron 安装失败解决办法
1.安装node https://nodejs.org/en/download/2.安装镜像工具npm install -g cnpm --registry=https://registry.npm. ...
- 为Electron 安装 vue-devtool等扩展
相关代码: https://github.com/WozHuang/Barrage-helper/blob/master/src/main/index.dev.js 在SPA逐渐成为构建优秀交互体验应 ...
随机推荐
- centos使用--supervisor使用
目录 1 下载程序并安装 2 编辑配置文件 3 supervisor的使用 4 配置文件详细解析 参考资料 supervisor是用Python开发的一套通用的进程管理程序,能将一个普通的命令行进程变 ...
- 2016年后web开发趋势是什么?
2016 年后 Web开发趋势是什么 来源:yafeilee.me 发布时间:2016-05-06 阅读次数:1378 3 近二年的进展 前端发展日新月异, 甚至有一句戏言: "每六星期 ...
- 关于mac ox node安装报 npm ERR! registry error parsing json
想安装grunt 遇到2个问题 让npm重新设置一下config: npm config set registry http://registry.cnpmjs.org 然后还报 npm ERR! E ...
- 打包成apk,生成apk文件,上传到网站服务器提供链接下载
Android开发把项目打包成apk: 做完一个Android项目之后,如何才能把项目发布到Internet上供别人使用呢?我们需要将自己的程序打包成Android安装包文件--APK(Android ...
- ACM二分搜索算法
二分搜索算法就是把要搜索的数据在搜索文本中根据情况进行折半,比如要在2 6 4 9 3 8 7 3 5中找到找到4的位置,那么可以考虑先把数据进行排序,然后把拍好后的数据的中间的那个数据和要查找的数据 ...
- mysql用root账户建立用户和赋予权限
1.创建用户 create user guest_test@localhost identified by "root";-- 创建名为guest_test的用户 2.赋予权限 - ...
- unity灯光Lightmapping、LightProbes
1.为什么要用Lightmapping? 简单来说就是实时灯光计算十分耗时,随着光源越多,计算耗时会倍增.使用Lightmap模拟灯光带来的效果,便不用去计算灯光,会带来性能上的大大提升. 当然一个复 ...
- a链接点击下载图片到本地(php)
$url="http://pan.baidu.com/share/qrcode?w=150&h=150&url=http://gandao.my".U('Quest ...
- IPMITool driver
官网链接: https://docs.openstack.org/ironic/latest/admin/drivers/ipmitool.html IPMITool driver 概述IPMI(In ...
- 简述Shiro验证过程
如果让我们自己实现用户登录验证我们都需要哪些步骤? 很简单,根据用户提供的账号从数据库中查询该账户的密码以及一些其他信息,然后拿这个密码与用户输入的密码相比较,因为保存在数据库中的密码一般是经过加密的 ...