使用百度的富文本编辑器UEditor遇到的问题总结
1、下载地址:http://ueditor.baidu.com/website/download.html(我下载的是.net版本)
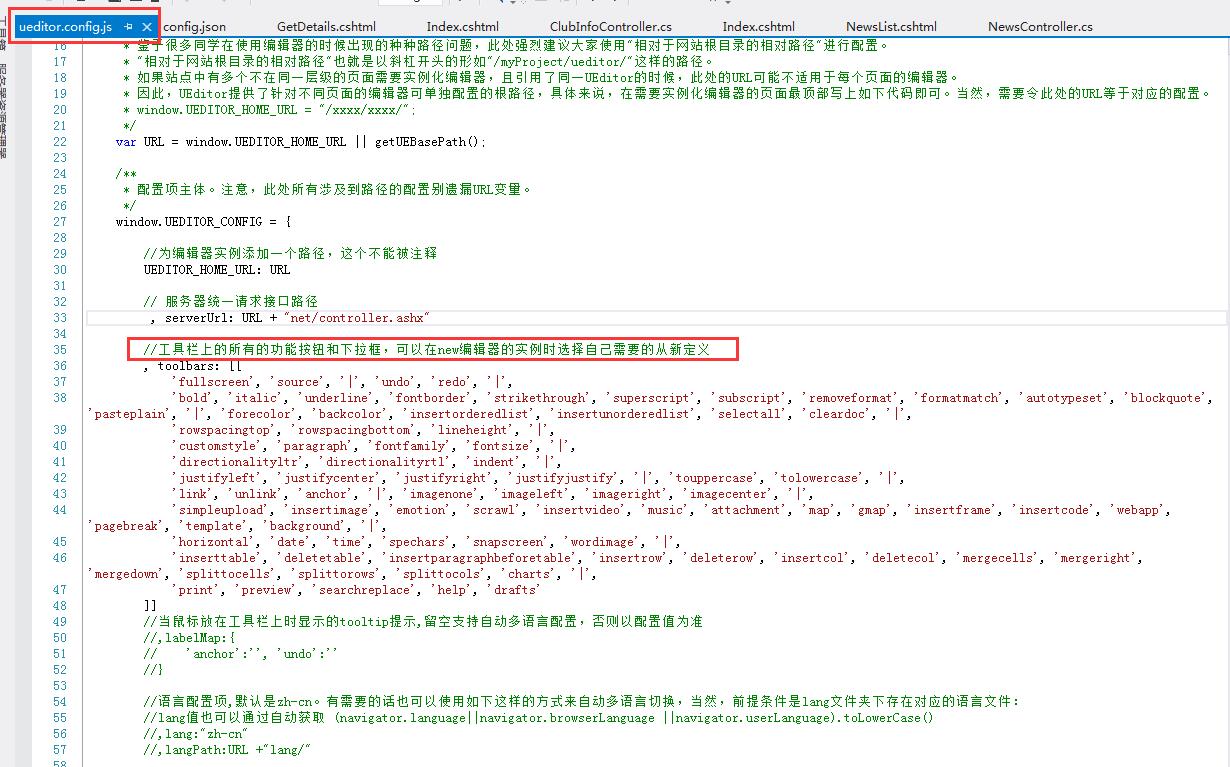
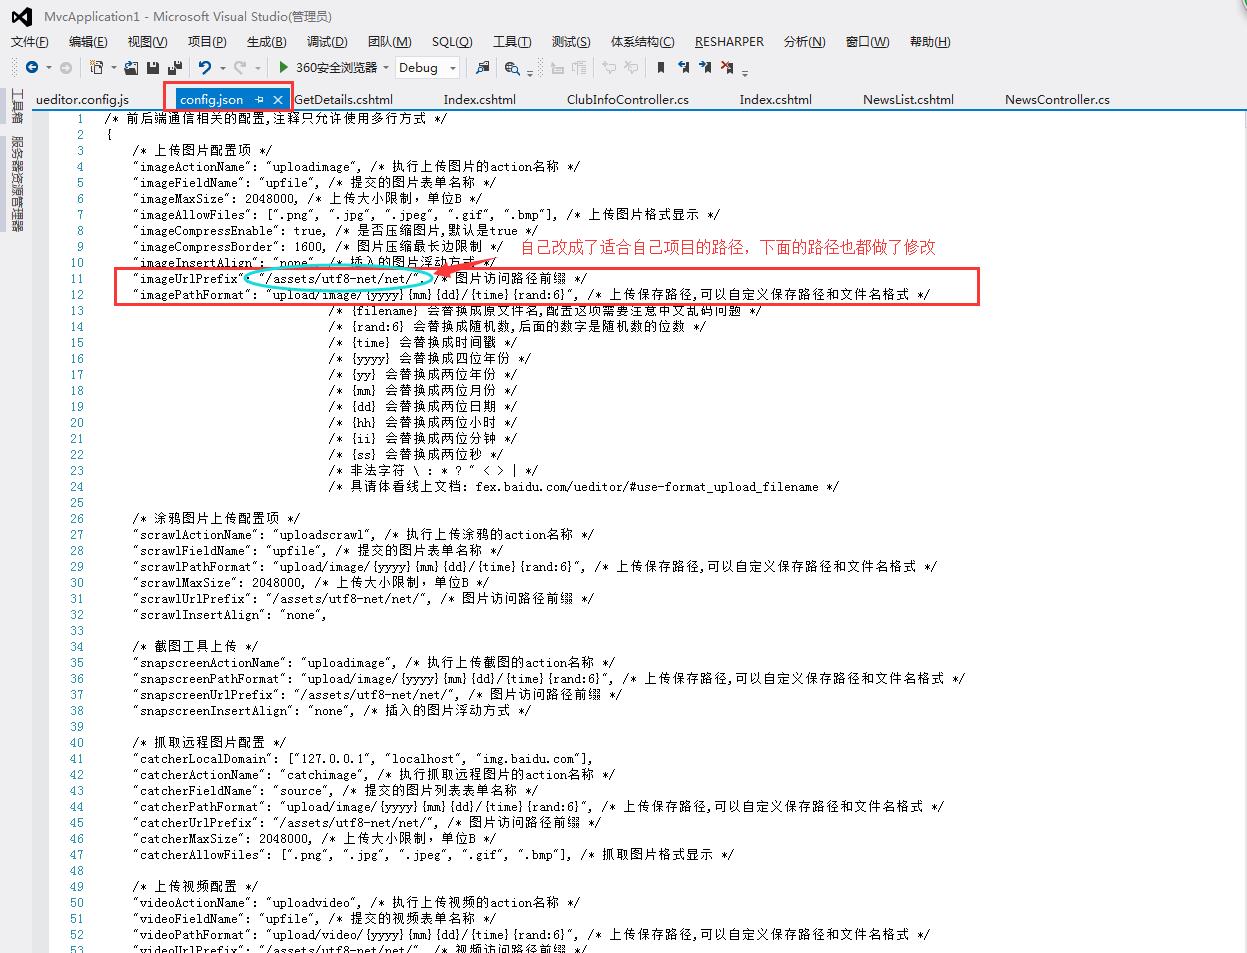
下载后要先看一下ueditor.config.js和 net/config.json的文件,里面是关于图片上传和其他方法的一些路径配置
2、显示编辑页面(一定要看使用文档:http://fex.baidu.com/ueditor/#server-deploy)
- 引入所需的js文件

- 初始化编辑器 html代码:
 <div class="form-group has-warning">

                 <textarea class="A4page" id="myEditor" name="NewsContent"></textarea>

             </div>
jquery代码:
  var ue = UE.getEditor('myEditor', {

             toolbars: [

                 ['fullscreen', 'source', '|', 'undo', 'redo', '|',

             'bold', 'italic', 'underline', 'fontborder', 'strikethrough', 'superscript', 'subscript', 'removeformat', 'formatmatch', 'autotypeset', 'blockquote', 'pasteplain', '|', 'forecolor', 'backcolor', 'insertorderedlist', 'insertunorderedlist', 'selectall', 'cleardoc', '|',

             'rowspacingtop', 'rowspacingbottom', 'lineheight', '|',

             'customstyle', 'paragraph', 'fontfamily', 'fontsize', '|',

             'directionalityltr', 'directionalityrtl', 'indent', '|',

             'justifyleft', 'justifycenter', 'justifyright', 'justifyjustify', '|', 'touppercase', 'tolowercase', '|',

             'link', 'unlink', 'anchor', '|', 'imagenone', 'imageleft', 'imageright', 'imagecenter', '|',

             'simpleupload', 'insertimage', 'emotion', 'scrawl', 'insertframe', 'insertcode', 'pagebreak', 'template', 'background', '|',

             'horizontal', 'date', 'time', 'spechars', 'snapscreen', 'wordimage', '|',

             'inserttable', 'deletetable', 'insertparagraphbeforetable', 'insertrow', 'deleterow', 'insertcol', 'deletecol', 'mergecells', 'mergeright', 'mergedown', 'splittocells', 'splittorows', 'splittocols', 'charts', '|',

             'print', 'preview', 'searchreplace', 'help', 'drafts']

             ],

             allHtmlEnabled: false,//提交到后台的数据是否包含整个html字符串

             autoHeightEnabled: false,

             autoFloatEnabled: true,

             allowDivTransToP: false//阻止div标签自动转换为p标签

         });
说明:修改配置项的方法: 1. 方法一:修改 ueditor.config.js 里面的 toolbars 2. 方法二:实例化编辑器的时候传入 toolbars 参数(详情参考:http://fex.baidu.com/ueditor/#start-toolbar)
- 前端配置基本上配置好了,下面是后端配置(如果后端配置不好,上传图片功能将无法使用。网址:http://fex.baidu.com/ueditor/#server-net)我配置了好久才配置好的,按照文档上说的做就行了
- 当你的编辑器可以使用的时候,获取编辑器里的内容(网址:http://fex.baidu.com/ueditor/#api-common)
 //实例化编辑器到id为 container 的 dom 容器上:

 var ue = UE.getEditor('container');

 //设置编辑器内容:

 ue.ready(function() {

     ue.setContent('<p>hello!</p>');

 });

 //追加编辑器内容:

 ue.ready(function() {

     ue.setContent('<p>new text</p>', true);

 });

 //获取编辑器html内容:

 ue.ready(function() {

     var html = ue.getContent();

 });

 //获取纯文本内容:

 ue.getContentTxt();

 //获取保留格式的文本内容:

 ue.getPlainTxt();

 //获取纯文本内容:

 ue.getContentTxt();

 //判断编辑器是否有内容:

 ue.hasContents();

 //让编辑器获得焦点:

 ue.focus();

 //让编辑器获得焦点

 ue.blur();

 //判断编辑器是否获得焦点:

 ue.isFocus();

 //设置当前编辑区域不可编辑:

 ue.setDisabled();

 //设置当前编辑区域可以编辑:

 ue.setEnabled();

 //隐藏编辑器:

 ue.setHide();

 //显示编辑器:

 ue.setShow();

 //获得当前选中的文本:

 ue.selection.getText();

 //常用命令:

 //在当前光标位置插入html内容

 ue.execCommand('inserthtml', '<span>hello!</span>');

 //设置当前选区文本格式:

 ue.execCommand('bold'); //加粗

 ue.execCommand('italic'); //加斜线

 ue.execCommand('subscript'); //设置上标

 ue.execCommand('supscript'); //设置下标

 ue.execCommand('forecolor', '#FF0000'); //设置字体颜色

 ue.execCommand('backcolor', '#0000FF'); //设置字体背景颜色

 //回退编辑器内容:

 ue.execCommand('undo');

 //撤销回退编辑器内容:

 ue.execCommand('redo');

 //切换源码和可视化编辑模式:

 ue.execCommand('source');

 //选中所有内容:

 ue.execCommand('selectall');

 //清空内容:

 ue.execCommand('cleardoc');

 //读取草稿箱

 ue.execCommand('drafts');

 //清空草稿箱

ue.execCommand('clearlocaldata');- 输入的数据是这样的:
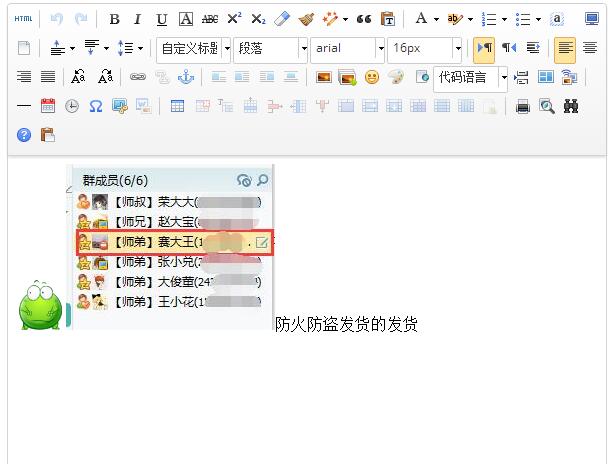
获取到的数据是这样的:<p><img src="http://img.baidu.com/hi/jx2/j_0015.gif"/><img src="/assets/utf8-net/net/upload/image/20160427/6359737678078530983400002.jpg" title="QQ截图20160427144629.jpg" alt="QQ截图20160427144629.jpg"/>防火防盗发货的发货</p>
- 将数据存到数据库中了,那么怎么让数据原样显示到编辑器里呢?(这个问题我试了一天,开始我以为是这个函数uParse,但是我试了好多路径都不管用,如果谁用这个方法实现了,一定要告诉我一声哦,先qqq了)
- 后台获取数据:
  public ActionResult GetDetails(string NewsId)

         {

             int id = Int32.Parse(NewsId);

             NewsInfo news = db.NewsInfoes.Find(id);

             ViewData["news"] = news;

             return View();

         }
前台html代码:
<div class="col-sm-6">
<div class="panel">
<div class="panel-body">
<div class="form-group has-success">
<label class="control-label" for="NewsName">新闻标题:</label>
<input type="text" class="form-control" id="NewsName" name="NewsName" placeholder="新闻标题" style="width:600px" value="@(((NewsInfo)ViewData["news"]).NewsName)" />
</div>
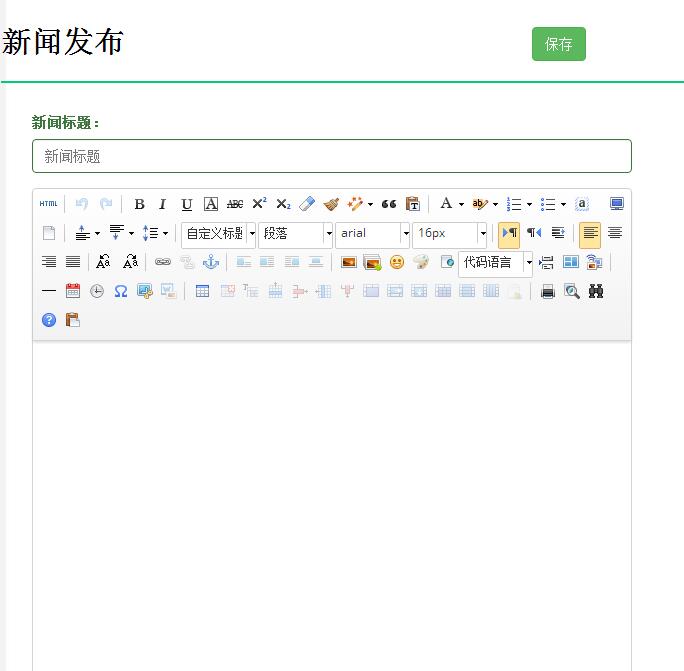
<div class="form-group has-warning">
<textarea class="A4page" id="myEditor" name="NewsContent">@(((NewsInfo)ViewData["news"]).NewsContent)</textarea>
</div>
</div>
</div>
</div>jquery代码:
    function load() {

             var ue = UE.getEditor('myEditor', {

                 toolbars: [

                     ['fullscreen', 'source', '|', 'undo', 'redo', '|',

                 'bold', 'italic', 'underline', 'fontborder', 'strikethrough', 'superscript', 'subscript', 'removeformat', 'formatmatch', 'autotypeset', 'blockquote', 'pasteplain', '|', 'forecolor', 'backcolor', 'insertorderedlist', 'insertunorderedlist', 'selectall', 'cleardoc', '|',

                 'rowspacingtop', 'rowspacingbottom', 'lineheight', '|',

                 'customstyle', 'paragraph', 'fontfamily', 'fontsize', '|',

                 'directionalityltr', 'directionalityrtl', 'indent', '|',

                 'justifyleft', 'justifycenter', 'justifyright', 'justifyjustify', '|', 'touppercase', 'tolowercase', '|',

                 'link', 'unlink', 'anchor', '|', 'imagenone', 'imageleft', 'imageright', 'imagecenter', '|',

                 'simpleupload', 'insertimage', 'emotion', 'scrawl', 'insertframe', 'insertcode', 'pagebreak', 'template', 'background', '|',

                 'horizontal', 'date', 'time', 'spechars', 'snapscreen', 'wordimage', '|',

                 'inserttable', 'deletetable', 'insertparagraphbeforetable', 'insertrow', 'deleterow', 'insertcol', 'deletecol', 'mergecells', 'mergeright', 'mergedown', 'splittocells', 'splittorows', 'splittocols', 'charts', '|',

                 'print', 'preview', 'searchreplace', 'help', 'drafts']

                 ],

                 autoHeightEnabled: false,

                 autoFloatEnabled: true,

                 allowDivTransToP: false//阻止div标签自动转换为p标签

             });

         }

  $(function () {

             load();

         });
然后就可以了,O(∩_∩)O哈哈~
- 我的流程:先添加数据
- 在新闻列表里点击新闻标题,传递新闻id获取新闻详细内容

- 最后将数据展示到新闻修改页面的编辑器上

使用百度的富文本编辑器UEditor遇到的问题总结的更多相关文章
- 百度Web富文本编辑器ueditor在ASP.NET MVC3项目中的使用说明
====================================================================== [百度Web富文本编辑器ueditor在ASP.NET M ...
- 百度开源富文本编辑器 UEditor配置:图片上传和文件上传独立使用方法
使用UEditor编辑器自带的插件实现图片上传和文件上传功能,这里通过配置UEditor单独使用其内置的第三方插件swfupload来实现图片和文件的上传,通过对UEditor配置轻松实现图片批量上传 ...
- 百度的富文本编辑器UEditor批量添加图片自动加上宽度和高度的属性
若是没有对编辑器做任何配置直接添加图片的话,显示的html内容如下图所示:它会显示出原图片尺寸 所以必须要对图片的初始显示尺寸做控制:ueditor文件中找到image.js文件 在image.js中 ...
- 百度的富文本编辑器UEDITOR
还是百度的ueditor 比较好用,文件导入后,基本不用配置就可以直接使用图片,文件上传等功能. CKeditor要注意的地方太多了 .但是相对ckeditor 样式比较好看.
- 百度富文本编辑器UEditor安装配置全过程
网站开发时富文本编辑器是必不可少的,他可以让用户自行编辑内容的样式然后上传到后台!下面我们来介绍如何安装使用百度富文本编辑器 一.下载并且设置百度富文本编辑器的样式 你可以去百度UEditor ...
- 百度富文本编辑器ueditor使用总结
最近做的项目用到了ueditor这个东东,但是他的一些配置文档对初次使用者来说很难以理解,故作此总结 相关详细操作链接地址: http://blog.csdn.net/wusuopubupt/arti ...
- 百度富文本编辑器ueditor使用启示
百度富文本编辑器ueditor使用启示 一.总结 一句话总结:使用工具,多去看官方demo,非常详细. 二.百度富文本编辑器ueditor使用启示 官方完整demo 官方完整demo对应的源代码 &l ...
- springboot+layui 整合百度富文本编辑器ueditor入门使用教程(踩过的坑)
springboot+layui 整合百度富文本编辑器ueditor入门使用教程(踩过的坑) 写在前面: 富文本编辑器,Multi-function Text Editor, 简称 MTE, 是一 ...
- thinkphp5.1中适配百度富文本编辑器ueditor
百度富文本编辑器ueditor虽然很老,但是功能齐全,我近期需要能批量粘贴图片的功能,但是找不到,很无奈.然后现在就分享一下如何把ueditor适配到thinkphp5.1,有知道如何批量上传图片的艾 ...
随机推荐
- py4测试题
1.8<<2等于? 32 2.通过内置函数计算5除以2的余数 print(divmod(5,2))------>1 3.s=[1,"h",2,"e&qu ...
- laravel 路由缓存
使用路由缓存之前,需要知晓路由缓存只能用于控制器路由,不能用于闭包路由,如果路由定义中包含闭包路由将无法进行路由缓存,只有将所有路由定义转化为控制器路由或资源路由后才能执行路由缓存命令: php ar ...
- python(3):文件操作/os库
文件基本操作 r,以读模式打开, r+=r+w, w, 写模式(清空原来的内容), w+=w+r, a , 追加模式, a+=a+r, rb, wb, ab, b表示以二进制文件打开 想在一段文 ...
- js变量前的+是什么意思
js变量前的+是什么意思 if (+value >= distance) {} 这个+什么意思 可以理解为 Number(value) 会将其按照Number函数的规则转换为数值或者NaN, ...
- 关于使用summernote编辑器提示内容无法汉化临时解决办法
原因:使用汉化summernote-zh-CN.js文件无法汉化 $('#summernote').summernote({ lang: 'zh-CN' }); 解决方法: 打开summernote. ...
- WPF 对控件进行截图且不丢失范围(转载)
原文:Taking WPF “Screenshots” I was recently working on a Surface project at Microsoft (that will be s ...
- tomcat启动成功但是访问方面都是404
1.开发环境与错误情况 开发环境是jdk1.7+maven+git+spring MVC+spring+mybatis+mysql. 楼主做小例子的时候发现,tomcat成功启动,但是访问主页,页面提 ...
- [转] js在浏览器端对二进制流进行AES加密和解密
开始解密 简单了解一下所用的的AES加密算法,我们用的是AES的CFB加密方式,服务端会提供给我一个key和iv的二进制字节串.密文也是二进制字节串. 我用的加密/解密插件: crypto-js 一般 ...
- __attribute__ ((default)) 和 __attribute__ ((hidden))
制作一个共享库 /* a.h */ int func(); /* a.c */ #include <stdio.h> #include "a.h" int func() ...
- django源码分析
原文网址 https://www.jianshu.com/p/17d78b52c732?utm_campaign=maleskine&utm_content=note&utm_medi ...