Windows7 64下搭建Caffe+python接口环境
参考链接:
  http://www.cnblogs.com/yixuan-xu/p/5858595.html

    http://www.cnblogs.com/zf-blog/p/6139044.html

    http://blog.csdn.net/zb1165048017/article/details/51355143?locationNum=6&fps=1    http://blog.csdn.net/zb1165048017/article/details/52980102

搭建一个完整的运行环境,不出错是很难的。尤其是对于我这样的小白。上面是我为搭建此环境参考的前辈博客链接。

这里做下总结,Windows7 64下搭建Caffe+python接口环境。(有些资源是前辈博客里的)

1.软件

    Caffe下载链接(caffe-master):

        https://github.com/Microsoft/caffe

        百度云下载:http://pan.baidu.com/s/1hs8ngpA 密码:ith0

    微软的Windows三方包(Nuget程序包):http://pan.baidu.com/s/1pKQKJJP 密码:2vzy

    VS2013安装包链接:http://pan.baidu.com/s/1dF5OTWH 密码:16fn

    anaconda2下载: 官网下载 https://repo.continuum.io/archive/Anaconda2-4.2.0-Windows-x86_64.exe
           (千万要下载支持python2.7的anaconda2,不然后面会遇到找不到python27.lib,折腾了我一下午时间)

2.软件下载完成之后,开始一步一步来搭建环境。

  (1)首先解压caffe-master.zip压缩包,打开caffe-master文件夹。在windows文件夹下复制CommonSettings.props.example文件,

    重命名为CommonSettings.props文件。


  (2)在windows文件夹下找到Caffe.sln,并用VS2013打开->项目/解决方案。

     在CommonSettings.props文件中修改相应内容:(下面Python路径一定要改为anaconda2的路径,图片中是anaconda3路径)

   由于PC只有CPU没有GPU,修改第7、8行;想要支持Python接口,修改第13行,并添加Python路径,修改第48行

     打开Caffe.sln出现了libcaffe和test_all加载失败。出现这个情况,原因可能和更改配置有关系,就将项目/解决方案关闭,重新打开就好了。


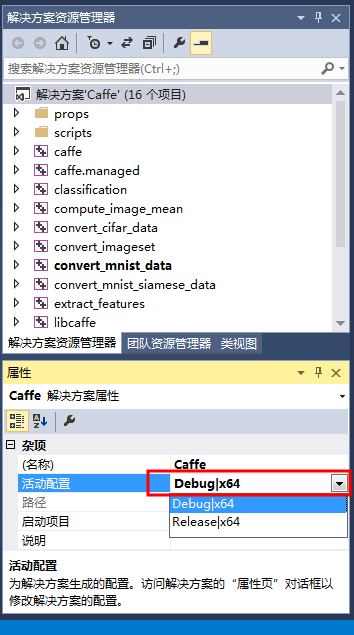
(3)配置文件修改好后,可以编译Caffe了。(有两种Debug和Release活动配置,都可以编译)
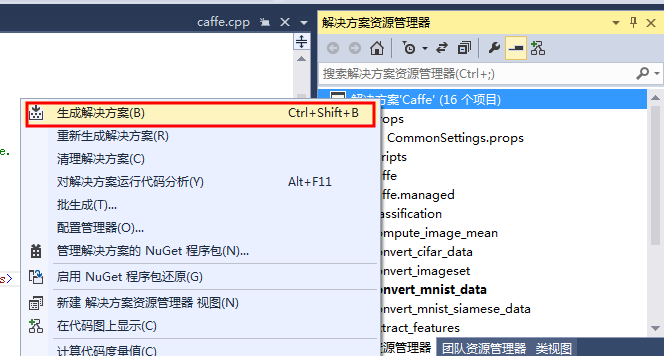
这时,可能会弹出一个对话框,表示正在下载第三方包。
也可以这么做,在编译之前直接将NugetPackages文件夹(由于我们已经下载好NugetPackages),放在与Caffe-Master并列文件夹中。下载完成后,如图。

(4)设置一下运行项。


(5)运行caffe.cpp,直接双击打开caffe.cpp,然后ctrl+F5直接编译。出现如下命令窗口说明编译成功。

 3.用Caffe来测试mnist数据集
(1)去官网http://yann.lecun.com/exdb/mnist/下载数据集。将图里的数据都下载下来,备用。
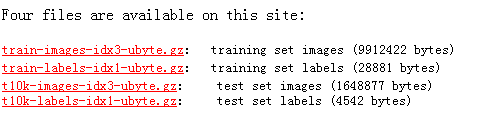
下载后解压到.\caffe-master\data\mnist放在两个文件夹下。


(2)在caffe-master目录下,新建一个create_mnist.bat文件,写入下面代码:
.\Build\x64\Release\convert_mnist_data.exe .\data\mnist\mnist_train_lmdb\train-images.idx3-ubyte  .\data\mnist\mnist_train_lmdb\train-labels.idx1-ubyte .\examples\mnist\mnist_train_lmdb

echo.

.\Build\x64\Release\convert_mnist_data.exe .\data\mnist\mnist_test_lmdb\t10k-images.idx3-ubyte  .\data\mnist\mnist_test_lmdb\t10k-labels.idx1-ubyte .\examples\mnist\mnist_test_lmdb

pause
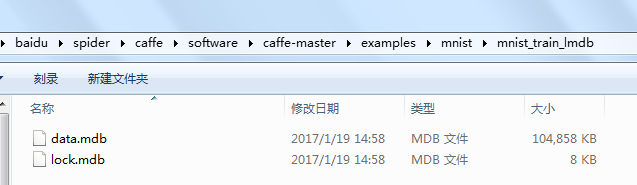
双击该脚本运行,会在.\caffe-master\examples\mnist下生成相应的lmdb数据文件。

    可能会遇到这个问题:

        convert_mnist_data.cpp:103] Check failed: mdb_env_open(mdb_env, db_path, 0, 0664) == 0 (112 vs. 0) mdb_env_open failed

        解决:在convert_mnist_data.cpp第103行代码中

                CHECK_EQ(mdb_env_set_mapsize(mdb_env, 1099511627776), MDB_SUCCESS) //1TB

             将数字改为107374182(100M),再重新生成一下convert_mnist_data.cpp

    再次运行脚本,又出现这个问题:

        convert_mnist_data.cpp:98] Check failed: _mkdir(db_path) == 0 (-1 vs. 0) mkdir .\examples\mnist\mnist_test_lmdbfailed

        解决:前面虽然出现了错误,但数据文件夹同样生成了。在convert_mnist_data.cpp第98行代码中mkdir(db_path, 0744)表示为数据库创建文件夹。

            如果文件夹已经存在,程序会报错退出。程序不会覆盖已有的数据库。已有的数据库如果不要了,需要手动删除。

    (3)修改.\caffe-master\examples\mnist\lenet_solver.prototxt 将最后一行改为solver_mode:CPU

       修改.\caffe-master\examples\mnist\lenet_train_test.prototxt,如下图。

(4)在.\caffe-master目录下,新建train_mnist.bat,然后写入下面代码:.\Build\x64\Release\caffe.exe train --solver=.\examples\mnist\lenet_solver.prototxt
pause
然后双击运行,就会开始训练,训练完毕后会得到相应的准确率和损失率。(用Debug配置运行时,大概要一个小时左右才能训练完) 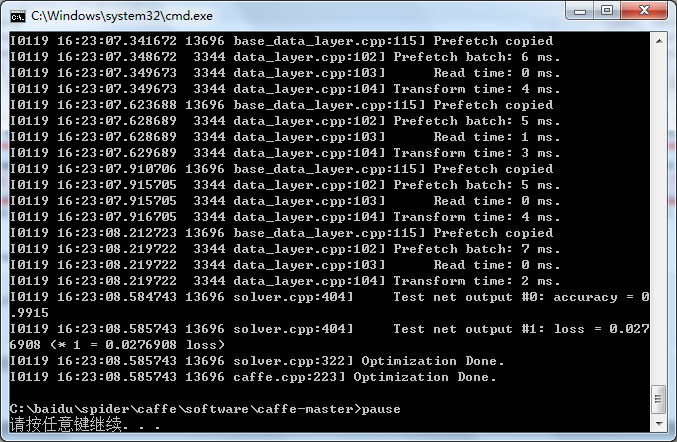
4.配置Python接口
(1)编译caffe接口,确认配置文件CommonSettings.props的参数中第13、48行已修改,如下。
<PythonSupport>true</PythonSupport>
<PythonDir>C:\Anaconda2\</PythonDir>
保存之后,去编译pycaffe,配置模式改为Release
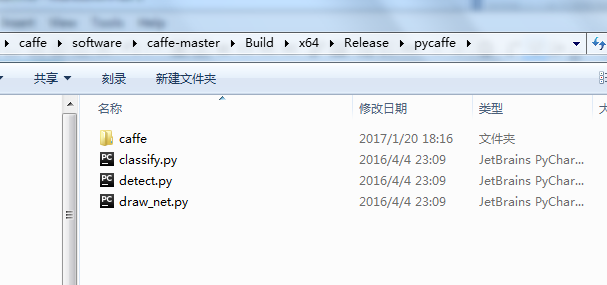
 编译完成以后,会出现.\caffe-master\Build\x64\Release\pycaffe文件夹
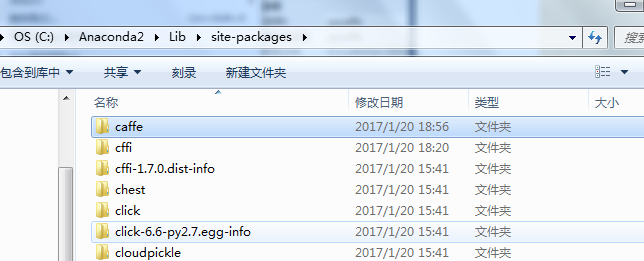
 将caffe文件夹复制到Anaconda2安装目录下C:\Anaconda2\Lib\site-packages
(2)import caffe
由于我PC装了很多版本的Python,在cmd里指定下目录,调用C:\Anaconda2\里的Python.exe
再import caffe

这时会出现 ImportError: No module named google.protobuf.internal 这个错误。
原因是没有protobuf这个模块。使用pip install protobuf(这个安装也需要注意,在cmd里指定下目录,
调用C:\Anaconda2\Scripts\里的pip.exe 即pip.exe install protobuf).

模块安装完成以后,再import caffe,就OK了。

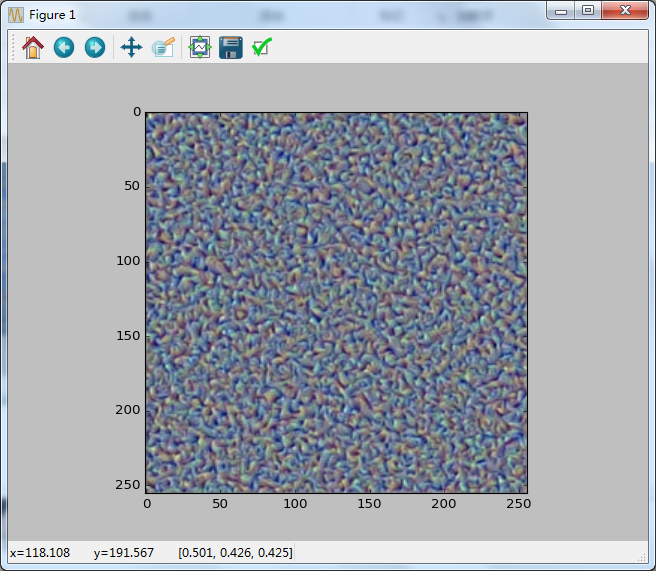
   (3)看一个实例

       实现的是利用噪声生成一张真实图片,使用的实例是Texture Synthesis Using Convolutional Neural Networks

       原文地址: http://blog.csdn.net/zb1165048017/article/details/52980102

       github地址:https://github.com/leongatys/DeepTextures

       下载github的程序,新建一个DeepTextures-master.py文件。
import glob

import sys

import os

from collections import OrderedDict

import caffe

import numpy as np

from matplotlib import pyplot as plt

import qtpy

base_dir1 = os.getcwd()

print base_dir1

sys.path.append(r'C:\Anaconda2\Lib\site-packages\PyQt5')

print sys.path

#How to call custom moudles(DeepTextures-master)?

#1.find the site-packages folder in the python installation directory(.\Lib\site-packages)

#2.create a path file in this directory,such as myPython.pth

#3.open the myPython.pth,write the folder path for the user module(xxx.\DeepTextures-master)

#4.restart python container(IDLE/command line)

#5.from DeepImageSynthesis import *

base_dir = r"C:\baidu\spider\caffe\PDF\example\DeepTextures-master"

from DeepImageSynthesis import *

VGGweights = os.path.join(base_dir,r'Models\vgg_normalised.caffemodel')

VGGmodel = os.path.join(base_dir,r'Models\VGG_ave_pool_deploy.prototxt')

imagenet_mean = np.array([ 0.40760392,  0.45795686,  0.48501961]) #mean for color channels (bgr)

im_dir = os.path.join(base_dir, 'Images/')

caffe.set_mode_cpu() #for cpu mode do 'caffe.set_mode_cpu()'

#if cpu mode we should not call,below 3 line of code is just for using GPU mode.

#gpu = 0

#caffe.set_mode_gpu()

#caffe.set_device(gpu)

#load source image

source_img_name = glob.glob1(im_dir,'pebbles.jpg')[0]

print source_img_name

source_img_org = caffe.io.load_image(im_dir + source_img_name)

im_size = 256.

[source_img,net] = load_image(im_dir + source_img_name, im_size,

                              VGGmodel, VGGweights, imagenet_mean,

                              show_img=True)

im_size = np.asarray(source_img.shape[-2:])

#l-bfgs parameters optimisation

maxiter  = 2000

m = 20

#define layers to include in the texture model and weights w_l

tex_layers = ['pool4', 'pool3', 'pool2', 'pool1', 'conv1_1']

tex_weights = [1e9,1e9,1e9,1e9,1e9]

#pass image through the network and save the constraints on each layer

constraints = OrderedDict()

net.forward(data = source_img)

for l,layer in enumerate(tex_layers):

    constraints[layer] = constraint([LossFunctions.gram_mse_loss],

                                    [{'target_gram_matrix': gram_matrix(net.blobs[layer].data),

                                     'weight': tex_weights[l]}])

#get optimisation bounds

bounds = get_bounds([source_img],im_size)

#generate new texture

result = ImageSyn(net, constraints, bounds=bounds,

                  callback=lambda x: show_progress(x,net),

                  minimize_options={'maxiter': maxiter,

                                    'maxcor': m,

                                    'ftol': 0, 'gtol': 0})

#match histogram of new texture with that of the source texture and show both images

new_texture = result['x'].reshape(*source_img.shape[1:]).transpose(1,2,0)[:,:,::-1]

new_texture = histogram_matching(new_texture, source_img_org)

plt.imshow(new_texture)

pltfigure()

plt.imshow(source_img_org)
       调试可能遇到下面几个问题:

       (1). F0122 16:28:32.843454 14000 common.cpp:75] Cannot use GPU in CPU-only Caffe

            因为在前面caffe配置过程中,只配置了CPU模式。无法使用GPU,代码中已更改。

       (2). This application failed to start because it could not find or load the Qt platform plugin "windows" in "".

            由于没有配置系统的环境变量QT_QPA_PLATFORM_PLUGIN_PATH,找到pyqt的plugin目录

            C:\Anaconda2\Library\plugins(可能每个人安装的路径不同)
不知道是什么问题。结果却不敬人意,待续解决。 Windows7 64下搭建Caffe+python接口环境的更多相关文章
- Windows7下搭建Eclipse+Python开发环境
机器: Windows7_x86_64 前提: 机器已成功安装Python2.7,并配置好环境变量. 步骤: 一.Eclipse的安装 Eclipse是基于java的一个应用程序,因此需要一个java ...
- windows下搭建spark+python 开发环境
有时候我们会在windows 下开发spark程序,测试程序运行情况,再部署到真实服务器中运行. 那么本文介绍如何在windows 环境中搭建简单的基于hadoop 的spark 环境. 我的wind ...
- ubuntu 下搭建apache+python的运行环境
ubuntu下怎么搭建apache+python运行环境,可以参考http://www.01happy.com/ubuntu-apache-mod-python/ ,这里只是简单的记录下步骤,本文主要 ...
- 【转】Eclipse和PyDev搭建完美Python开发环境(Ubuntu篇)
原文网址:http://www.cnblogs.com/Realh/archive/2010/10/10/1847251.html 前两天在Windows下成功地搭好了一个Python开发环境,这次转 ...
- 使用Vagrant搭建本地python开发环境
使用Vagrant搭建本地python开发环境 关于vagrant:Vagrant是一个基于Ruby的工具,用于创建和部署虚拟化开发环境,它使用Oracle的开源VirtualBox虚拟化系统也可以使 ...
- Windows下搭建Spark+Hadoop开发环境
Windows下搭建Spark+Hadoop开发环境需要一些工具支持. 只需要确保您的电脑已装好Java环境,那么就可以开始了. 一. 准备工作 1. 下载Hadoop2.7.1版本(写Spark和H ...
- 在Linux(Ubuntu)下搭建ASP.NET Core环境并运行 继续跨平台
最新教程:http://www.cnblogs.com/linezero/p/aspnetcoreubuntu.html 无需安装mono,在Linux(Ubuntu)下搭建ASP.NET Core环 ...
- 如何在Ubuntu下搭建Android NDK开发环境
1 搭建Android SDK开发环境 参考在在Ubuntu下搭建Android SDK开发环境(图文)首先在Ubuntu下搭建Android SDK开发环境. 2 下载NDK开发包 打开官网: ht ...
- Windows下搭建objective C开发环境
摘自:http://blog.csdn.net/zhanghefu/article/details/18320827 最近打算针对iPhone.iPod touch和iPad开发一些应用,所以,需要开 ...
随机推荐
- Gitlab备份和恢复操作记录
前面已经介绍了Gitlab环境部署记录,这里简单说下Gitlab的备份和恢复操作记录: 1)Gitlab的备份目录路径设置 [root@code-server ~]# vim /etc/gitlab/ ...
- Redis常用操作--------SortedSet(有序集合)
1.ZADD key score member [[score member] [score member] ...] 将一个或多个 member 元素及其 score 值加入到有序集 key 当中. ...
- vue 动态修改 css
<div v-for="i in resultDate" v-if="i.ProjectId>='4'" @click=EveyTesttInfo( ...
- BugPhobia团队篇章:团队管理与Github源代码管理说明
0x00:序言 To the searching tags, you may well fall in love withhttp://xueba.nlsde.buaa.edu.cn/ 再见,无忧时光 ...
- ubuntu——caffe配置deeplab
1. 下载deeplab 2. 安装matio sudo apt-get install libmatio-dev 3. 修改Makefile文件 LIBRARIES += glog gflags p ...
- CI框架在辅助函数中使用配置文件中的变量
问题: 现有一个自定义的辅助函数,想要获取配置文件中的配置项(配置文件路径为application/config/config.php) 分析: 辅助函数并不是定义在一个class中,而是很多个可供外 ...
- PAT 1028 人口普查
https://pintia.cn/problem-sets/994805260223102976/problems/994805293282607104 某城镇进行人口普查,得到了全体居民的生日.现 ...
- docker container can not connect internet
https://stackoverflow.com/questions/23810845/i-cant-get-docker-containers-to-access-the-internet htt ...
- ping命令返回的TTL值判断操作系统
通过简单的ping命令,查看返回的TTL值来判断对方的操作系统 生存时间(TTL)是IP分组中的一个值,网络中的路由器通过察看这个值就可以判断这个IP分组是不是已经在网络中停留了很久,进而决定是否要将 ...
- kali linux升级
自己使用的是2017.2 版本的kali linux 想着升级一下 里面的包 比如msf 等 但是执行 msfupdate时提示 root@kali201702:~# msfupdate msfupd ...