ubuntu12.04安装Opencv2.4.9
之前在Linux下装过几次opencv,但几乎每次都要查一下怎么安装,这次索性记录一下安装过程,不用每次都看其他人的教程了。
至于安装过程,可以直接参考官方文档。在解压后的文件夹下opencv\build\doc的opencv_tutorials.pdf文件开头就讲怎样在Linux下安装opencv.
以下就是官方文档的原文:
1.1 Installation in Linux
These steps have been tested for Ubuntu 10.04 but should work with other distros as well.
Required Packages
• GCC 4.4.x or later. This can be installed with:
sudo apt-get install build-essential
• CMake 2.6 or higher;
• Git;
• GTK+2.x or higher, including headers (libgtk2.0-dev);
• pkg-config;
• Python 2.6 or later and Numpy 1.5 or later with developer packages (python-dev, python-numpy);
• ffmpeg or libav development packages: libavcodec-dev, libavformat-dev, libswscale-dev;
• [optional] libdc1394 2.x;
• [optional] libjpeg-dev, libpng-dev, libtiff-dev, libjasper-dev.
All the libraries above can be installed via Terminal or by using Synaptic Manager
Building OpenCV from Source Using CMake, Using the Command Line
1. Create a temporary directory, which we denote as <cmake_binary_dir>, where you want to put the generated
Makefiles, project files as well the object files and output binaries.
2. Enter the <cmake_binary_dir> and type
cmake [<some optional parameters>] <path to the OpenCV source directory>
For example
cd ~/opencv
mkdir release
cd release
cmake -D CMAKE_BUILD_TYPE=RELEASE -D CMAKE_INSTALL_PREFIX=/usr/local ..
3. Enter the created temporary directory (<cmake_binary_dir>) and proceed with:
make
sudo make install
因为是在虚拟机上操作,虚拟机网速有限,所以我的opencv2.4.9是从本地下载好后通过共享文件夹拷贝到虚拟机上的。
操作一 拷贝OPENCV源文件到虚拟机
先从虚拟机Terminal进入的共享文件夹,假设opencv-2.4.9.zip在共性文件夹内,使用命令复制到Documents文件夹下(其中xxxxxxxxx就是你设置的linux虚拟机的用户名):
cp opencv-2.4.9.zip /home/xxxxxxxxx/Documents/
这样就将 opencv-2.4.9.zip拷贝至虚拟机Documents文件夹下。
下一步就是解压opencv-2.4.9.zip文件:
unzip opencv-2.4.9.zip
操作二 安装Cmake
由于要安装opencv,按照上面官网教程的说明:
在我安装的ubuntu12.04上面测试过。自带的gcc版本:

嗯,4.6.3,比官网上说的4.4大,没问题。
然后按照下一步教程sudo apt-get install build-essential:

接着安装cmake,直接使用sudo apt-get install cmake安装的cmake一般都是ubuntu自带的支持的版本,不是最新的,但是使用该方法安装方便,我就暂且一试,毕竟下载源码自己编译很费事。

所以为图简便,就直接这样安装了,然后查一下版本号:

喔,相对于前面教程里面说的CMake 2.6 or higher,这个版本已经够用了。
操作三 安装必要库
由于Git是用来下载opencv源码用的,因为开始我们已经从本地拷贝过源码了,所以此处可以跳过。
下面是安装一些库和依赖文件:
sudo apt-get install libgtk2.0-dev libavcodec-dev libavformat-dev libtiff4-dev libswscale-dev libjasper-dev

安装pkg-config,它是一个提供从源代码中编译软件时查询已安装的库时使用的统一接口的计算机软件。(下面这个在我这里是默认安装好的)
sudo apt-get install pkg-config
操作三 编译安装opencv
没有gui的cmake我用不惯,所以先安装cmake-gui:
sudo apt-get install cmake-qt-gui

安装完成后,就可以使用cmake-gui了,在终端输入cmake-gui就可以打开GUI界面:

然后就是配置了。
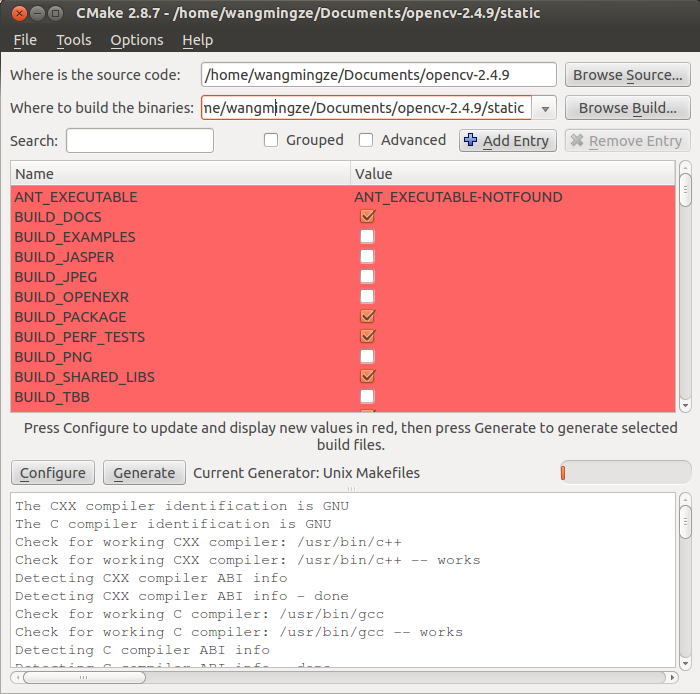
选完原文件路径和生成路径,然后点Configure就可以完成配置。注意在生成路径下的static文件夹是我新建的,因为我要生成一份静态库。
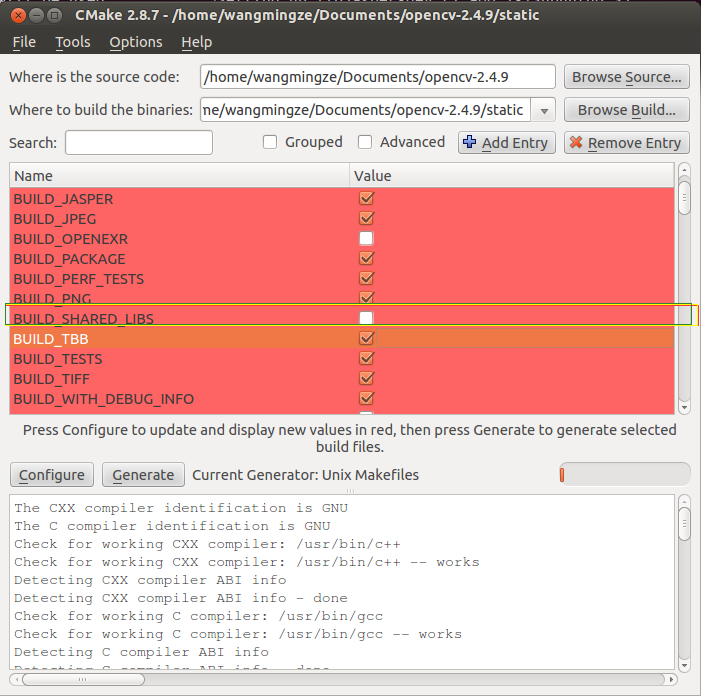
注意我用黄色框框起来的部分,因为要生成静态库,所以把右侧的复选框的“√”去掉,然后重新点Configure按钮。
下一步点Generate,Cmake会根据CmakeList.txt生成make文件,接着就需要编译了。
关掉cmake-gui。由终端进入自己新建的那个static文件夹
使用make编译,其中-j4表示4核编译:
make -j4

嗯,大概这次是被我要写笔记吓到了,一次顺利通过,内心喜悦!
使用make install 安装

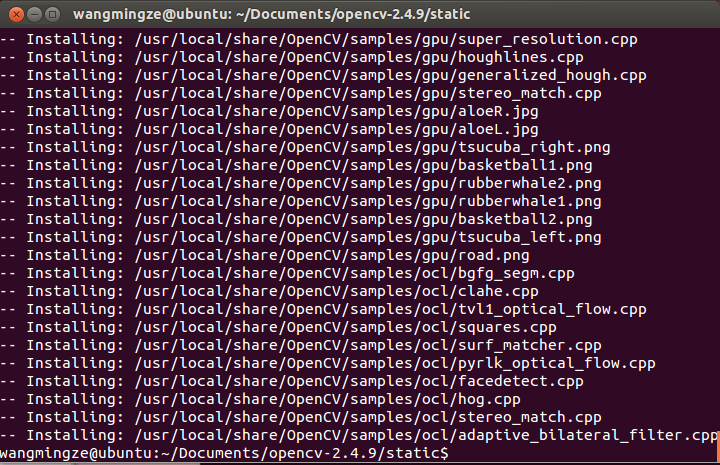
嗯,又顺利通过!
操作三 测试opencv
1.2 Using OpenCV with gcc and CMake
Note: We assume that you have successfully installed OpenCV in your workstation.
• The easiest way of using OpenCV in your code is to use CMake. A few advantages (taken from the Wiki):
1. No need to change anything when porting between Linux and Windows
2. Can easily be combined with other tools by CMake( i.e. Qt, ITK and VTK )
• If you are not familiar with CMake, checkout the tutorial on its website.
Steps
Create a program using OpenCV
Let’s use a simple program such as DisplayImage.cpp shown below.
 #include <stdio.h>

 #include <opencv2/opencv.hpp>

 using namespace cv;

 int main(int argc, char** argv )

 {

 if ( argc !=  )

 {

 printf("usage: DisplayImage.out <Image_Path>\n");

 return -;

 }

 Mat image;

 image = imread( argv[],  );

 if ( !image.data )

 {

 printf("No image data \n");

 return -;

 }

 namedWindow("Display Image", CV_WINDOW_AUTOSIZE );

 imshow("Display Image", image);

 waitKey();

 return ;

 }
Create a CMake file
Now you have to create your CMakeLists.txt file. It should look like this:
Generate the executable
This part is easy, just proceed as with any other project using CMake:
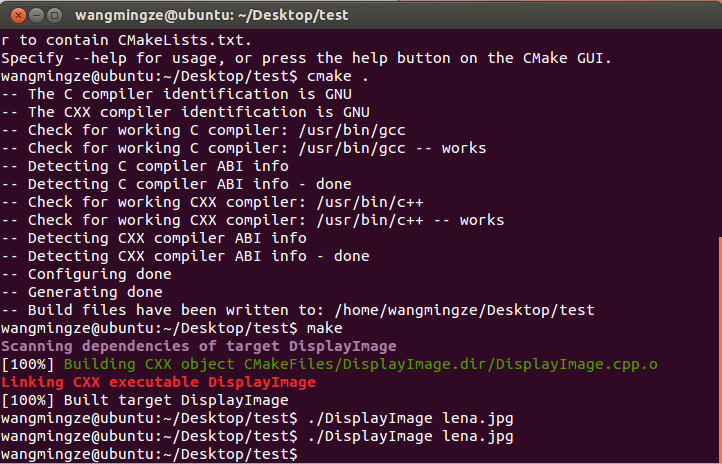
cd <DisplayImage_directory>
cmake .
make
Result
By now you should have an executable (called DisplayImage in this case). You just have to run it giving an image
location as an argument, i.e.:
./DisplayImage lena.jpg
You should get a nice window as the one shown below:

嗯,就这样吧。
ubuntu12.04安装Opencv2.4.9的更多相关文章
- Ubuntu12.04安装64位系统出现编译错误error while loading shared libraries: libz.so.1: cannot open shared object file: No such file or dir
问题: Ubuntu12.04安装64位系统出现编译错误error while loading shared libraries: libz.so.1: cannot open shared obje ...
- ubuntu12.04安装svn 1.7(转载)
ubuntu12.04安装svn 1.7 分类: ubuntu2013-10-22 16:03 239人阅读 评论(0) 收藏 举报 svnubuntu 目录(?)[+] 1.问题 在 ...
- ubuntu12.04 安装 php5.4/php5.5
1:修改源(我使用163的源)直接修改/etc/apt/sources.list deb http://mirrors.163.com/ubuntu/ precise main universe re ...
- Ubuntu12.04 安装Samba
Ubuntu12.04 安装Samba Ubuntu12.04 安装Samba 本教程介绍了在Ubuntu12.04安装Samba文件服务器,以及如何配置它通过SMB协议共享文件,以及如何将用户添加. ...
- Ubuntu12.04安装java6
按照android官方文档 http://source.android.com 下载编译android源代码,jdk安装失败,尝试一下方法成功(2013-11-20) 下面我就把在Ubuntu12.0 ...
- [分享]Ubuntu12.04安装基础教程(图文)
[分享]Ubuntu12.04安装基础教程(图文) 原文地址: http://teliute.org/linux/Ubsetup/lesson21/lesson21.html 1.进入 live cd ...
- ubuntu12.04 安装nginx+php+mysql (lnmp)的web服务器环境
1.Ubuntu12.04 安装nginx+php+mysql (lnmp)的web服务器环境 http://blog.db89.org/ubuntu12-04-install-nginx-php-m ...
- ubuntu12.04 安装CS:APP Y86模拟器
下的第一UBUNTU12.04下Y86模拟器的安装:(參考http://archive.cnblogs.com/a/1865627/ 作适当改动) 1.安装bison和flex词法分析工具 sudo ...
- Ubuntu12.04安装vscode i386
最近在Ubuntu12.04的32位版本上安装vscode,我下载的是32位deb包, vscode官网 安装命令 sudo dpkg -i vscode-i386.deb 安装完成没有报错,但是点 ...
随机推荐
- 洛谷 pP2708 硬币翻转
题目描述 从前有很多个硬币摆在一行,有正面朝上的,也有背面朝上的.正面朝上的用1表示,背面朝上的用0表示.现在要求从这行的第一个硬币开始,将前若干个硬币一起翻面,问如果要将所有硬币翻到正面朝上,最少要 ...
- Pytest学习9-常用插件
pytest-django:为django应用程序编写测试. pytest-twisted:为twisted应用程序编写测试,启动反应堆并处理测试函数的延迟. pytest-cov:覆盖率报告,与分布 ...
- BK: How to read a book 第一篇
第一章 阅读的活力与艺术 主动阅读 VS 被动阅读(新闻媒体) 作者与读者:投手与捕手的关系. 阅读的目标: 为获得资讯而读,以及为求得理解而读. 为获得咨讯而读,不会增加我们的理解力.比如阅读报纸, ...
- linux - mysql 异常:Ignoring query to other database
问题描述 Ignoring query to other database(忽略其他数据库查询) 问题原因 登录方式错误,登录命令用的是 “mysql -root -p”,应该用命令 “mysql - ...
- linux - mysql:启动 mysql
启动mysql 第一种: /etc/rc.d/init.d/mysqld start /etc/rc.d/init.d/mysqld stop 第二种:使用service 启动.关闭MySQL服务 s ...
- jsp中引用的jstl 和fmt标签-详解
JSTL 核心标签库标签共有13个,功能上分为4类: 1.表达式控制标签:out.set.remove.catch 2.流程控制标签:if.choose.when.otherwise 3.循环标签:f ...
- 浅析网页meta标签中X-UA-Compatible属性的使用
今天有一个做开发的朋友突然问你知道很多网站上面加入的X-UA-Compatible属性的意义么?其实这个在以前还专门花了一点时间来验证我自己的想法,结果也确实如自己所预想的那样,八九不离十,当然有一点 ...
- JavaScript DOM–节点操作
节点 节点至少拥有nodeType(节点类型).nodeName(节点名称)和nodeValue(节点值)这三个基本属性. 元素节点 nodeType 为1 属性节点 nodeType 为2 文本 ...
- cc.formatStr()用法
cc.formatStr() 第一个变量为含有 %s 或 %d 的字符串 后面依次为%s或%d对应的内容
- nginx的配置总结,有时间自己整理
推荐文章:https://www.cnblogs.com/digdeep/p/4217310.html