[WPF]原生TabControl控件实现拖拽排序功能
在UI交互中,拖拽操作是一种非常简单友好的交互。尤其是在ListBox,TabControl,ListView这类列表控件中更为常见。通常要实现拖拽排序功能的做法是自定义控件。本文将分享一种在原生控件上设置附加属性的方式实现拖拽排序功能。
该方法的使用非常简单,仅需增加一个附加属性就行。
<TabControl

    assist:SelectorDragDropAttach.IsItemsDragDropEnabled="True"

    AlternationCount="{Binding ClassInfos.Count}"

    ContentTemplate="{StaticResource contentTemplate}"

    ItemContainerStyle="{StaticResource TabItemStyle}"

    ItemsSource="{Binding ClassInfos}"

    SelectedIndex="0" />
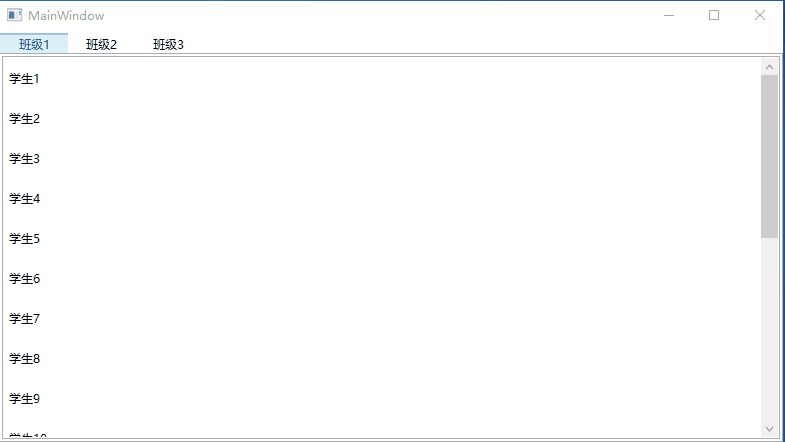
实现效果如下:
主要思路
WPF中核心基类UIElement包含了DragEnter,DragLeave,DragEnter,Drop等拖拽相关的事件,因此只需对这几个事件进行监听并做相应的处理就可以实现WPF中的UI元素拖拽操作。
另外,WPF的一大特点是支持数据驱动,即由数据模型来推动UI的呈现。因此,可以通过通过拖拽事件处理拖拽的源位置以及目标位置,并获取到对应位置渲染的数据,然后操作数据集中数据的位置,从而实现数据和UI界面上的顺序更新。
首先定义一个附加属性类SelectorDragDropAttach,通过附加属性IsItemsDragDropEnabled控制是否允许拖拽排序。
public static class SelectorDragDropAttach

{

    public static bool GetIsItemsDragDropEnabled(Selector scrollViewer)

    {

        return (bool)scrollViewer.GetValue(IsItemsDragDropEnabledProperty);

    }

    public static void SetIsItemsDragDropEnabled(Selector scrollViewer, bool value)

    {

        scrollViewer.SetValue(IsItemsDragDropEnabledProperty, value);

    }

    public static readonly DependencyProperty IsItemsDragDropEnabledProperty =

        DependencyProperty.RegisterAttached("IsItemsDragDropEnabled", typeof(bool), typeof(SelectorDragDropAttach), new PropertyMetadata(false, OnIsItemsDragDropEnabledChanged));

    private static readonly DependencyProperty SelectorDragDropProperty =

        DependencyProperty.RegisterAttached("SelectorDragDrop", typeof(SelectorDragDrop), typeof(SelectorDragDropAttach), new PropertyMetadata(null));

    private static void OnIsItemsDragDropEnabledChanged(DependencyObject d, DependencyPropertyChangedEventArgs e)

    {

        bool b = (bool)e.NewValue;

        Selector selector = d as Selector;

        var selectorDragDrop = selector?.GetValue(SelectorDragDropProperty) as SelectorDragDrop;

        if (selectorDragDrop != null)

            selectorDragDrop.Selector = null;

        if (b == false)

        {

            selector?.SetValue(SelectorDragDropProperty, null);

            return;

        }

        selector?.SetValue(SelectorDragDropProperty, new SelectorDragDrop(selector));

    }

}
其中SelectorDragDrop就是处理拖拽排序的对象,接下来看下几个主要事件的处理逻辑。
通过PreviewMouseLeftButtonDown确定选中的需要拖拽操作的元素的索引
void selector_PreviewMouseLeftButtonDown(object sender, MouseButtonEventArgs e)

{

    if (this.IsMouseOverScrollbar)

    {

        //Set the flag to false when cursor is over scrollbar.

        this.canInitiateDrag = false;

        return;

    }

    int index = this.IndexUnderDragCursor;

    this.canInitiateDrag = index > -1;

    if (this.canInitiateDrag)

    {

        // Remember the location and index of the SelectorItem the user clicked on for later.

        this.ptMouseDown = GetMousePosition(this.selector);

        this.indexToSelect = index;

    }

    else

    {

        this.ptMouseDown = new Point(-10000, -10000);

        this.indexToSelect = -1;

    }

}
在PreviewMouseMove事件中根据需要拖拽操作的元素创建一个AdornerLayer,实现鼠标拖着元素移动的效果。其实拖拽移动的只是这个AdornerLayer,真实的元素并未移动。
void selector_PreviewMouseMove(object sender, MouseEventArgs e)

{

    if (!this.CanStartDragOperation)

        return;

    // Select the item the user clicked on.

    if (this.selector.SelectedIndex != this.indexToSelect)

        this.selector.SelectedIndex = this.indexToSelect;

    // If the item at the selected index is null, there's nothing

    // we can do, so just return;

    if (this.selector.SelectedItem == null)

        return;

    UIElement itemToDrag = this.GetSelectorItem(this.selector.SelectedIndex);

    if (itemToDrag == null)

        return;

    AdornerLayer adornerLayer = this.ShowDragAdornerResolved ? this.InitializeAdornerLayer(itemToDrag) : null;

    this.InitializeDragOperation(itemToDrag);

    this.PerformDragOperation();

    this.FinishDragOperation(itemToDrag, adornerLayer);

}
DragEnter,DragLeave,DragEnter事件中处理AdornerLayer的位置以及是否显示。
Drop事件中确定了拖拽操作目标位置以及渲染的数据元素,然后移动元数据,通过数据顺序的变化更新界面的排序。从代码中可以看到列表控件的ItemsSource不能为空,否则拖拽无效。这也是后边将提到的一个缺点。
void selector_Drop(object sender, DragEventArgs e)

{

    if (this.ItemUnderDragCursor != null)

        this.ItemUnderDragCursor = null;

    e.Effects = DragDropEffects.None;

    var itemsSource = this.selector.ItemsSource;

    if (itemsSource == null) return;

    int itemsCount = 0;

    Type type = null;

    foreach (object obj in itemsSource)

    {

        type = obj.GetType();

        itemsCount++;

    }

    if (itemsCount < 1) return;

    if (!e.Data.GetDataPresent(type))

        return;

    object data = e.Data.GetData(type);

    if (data == null)

        return;

    int oldIndex = -1;

    int index = 0;

    foreach (object obj in itemsSource)

    {

        if (obj == data)

        {

            oldIndex = index;

            break;

        }

        index++;

    }

    int newIndex = this.IndexUnderDragCursor;

    if (newIndex < 0)

    {

        if (itemsCount == 0)

            newIndex = 0;

        else if (oldIndex < 0)

            newIndex = itemsCount;

        else

            return;

    }

    if (oldIndex == newIndex)

        return;

    if (this.ProcessDrop != null)

    {

        // Let the client code process the drop.

        ProcessDropEventArgs args = new ProcessDropEventArgs(itemsSource, data, oldIndex, newIndex, e.AllowedEffects);

        this.ProcessDrop(this, args);

        e.Effects = args.Effects;

    }

    else

    {

        dynamic dItemsSource = itemsSource;

        if (oldIndex > -1)

            dItemsSource.Move(oldIndex, newIndex);

        else

            dItemsSource.Insert(newIndex, data);

        e.Effects = DragDropEffects.Move;

    }

}
优点与缺点
优点:
- 用法简单,封装好拖拽操作的附加属性后,只需一行代码实现拖拽功能。
- 对现有项目友好,对于已有项目需要扩展拖拽操作排序功能,无需替换控件。
- 支持多种列表控件扩展。派生自
Selector的ListBox,TabControl,ListView,ComboBox都可使用该方法。
缺点:
- 仅支持通过数据绑定动态渲染的列表控件,XAML硬编码或者后台代码循环添加列表元素创建的列表控件不适用该方法。
- 仅支持列表控件内的元素拖拽,不支持穿梭框拖拽效果。
- 不支持同时拖拽多个元素。
小结
本文介绍列表拖拽操作的解决方案不算完美,功能简单但轻量,并且很好的体现了WPF的数据驱动的思想。个人非常喜欢这种方式,它能让我们轻松的实现列表数据的增删以及排序操作,而不是耗费时间和精力去自定义可增删数据的控件。
参考
https://www.codeproject.com/Articles/17266/Drag-and-Drop-Items-in-a-WPF-ListView#xx1911611xx
代码示例
[WPF]原生TabControl控件实现拖拽排序功能的更多相关文章
- 【C#/WPF】UI控件的拖拽/拉伸
需求①:控件拖拽——按住鼠标,可自由拖拽控件. 方法:目前看到的办法有两种. 使用ZoomableCanvas:http://www.cnblogs.com/gnielee/archive/2011/ ...
- ToolStrip控件左右拖拽移动效果实现
1.主窗体下部添加一个Panel乘放ToolStrip控件以实现ToolStrip在窗体下部定位.2.当ToolStrip控件中子控件超出屏幕时,拖动控件可以实现滑动效果.拖动到控件边缘距窗体边缘1/ ...
- PyQt5控件支持拖拽方法
让控件支持拖拽动作A.setDragEnable(True) 设置A可以拖动B.setAcceptDrops(True) 设置B可以接受拖动B需要满足两个事件1.dragEnterEvent 将A拖到 ...
- RecyclerViewItemTouchHelperDemo【使用ItemTouchHelper进行拖拽排序功能】
版权声明:本文为HaiyuKing原创文章,转载请注明出处! 前言 记录使用ItemTouchHelper对Recyclerview进行拖拽排序功能的实现. 效果图 代码分析 ItemTouchHel ...
- WPF 自定义TabControl控件样式
一.前言 程序中经常会用到TabControl控件,默认的控件样式很普通.而且样式或功能不一定符合我们的要求.比如:我们需要TabControl的标题能够居中.或平均分布:或者我们希望TabContr ...
- WPF之TabControl控件用法
先创建实体基类:NotificationObject(用来被实体类继承) 实现属性更改通知接口: using System; using System.Collections.Generic; usi ...
- php接口实现拖拽排序功能
列表拖拽排序是一个很常见的功能,但是后端接口如何处理却是一个令人纠结的问题 如何实现才能达到效率最高呢 先分析一个场景,假如有一个页面有十条数据,所谓的拖拽就是在这十条数据来来回回的拖,但是每次拖动都 ...
- vue列表拖拽排序功能实现
1.实现目标:目标是输入一个数组,生成一个列表:通过拖拽排序,拖拽结束后输出一个经过排序的数组. 2.实现思路: 2.1是使用HTML5的drag功能来实现,每次拖拽时直接操作Dom节点排序,拖拽结束 ...
- vue el-transfer新增拖拽排序功能---sortablejs插件
<template> <!-- target-order="unshift"必须设置,如果不设置的话后台穿的value值得顺序会被data重置 - --> ...
- WPF 实现控件间拖拽内容
想实现这样一个常用功能:在ListBox的一个Item上点住左键,然后拖拽到另外一个控件(如ListView中),松开左键,数据已经拖拽过来. 步骤如下: 1. 设置ListBox 的AllowDro ...
随机推荐
- EDP转LVDS屏转接板方案芯片CS5211替代CH7511B电路设计
CS5211替代CH7511B电路设计: CS5211用于设计DP转LVDS转换器,DP转LVDS控制板,DP转LVDS转接板等产品设计,其性能和参数可以替代与兼容PS8622,PS8625,CH75 ...
- 如何不加锁地将数据并发写入Apache Hudi?
最近一位 Hudi 用户询问他们是否可以在不需要任何锁的情况下同时从多个写入端写入单个 Hudi 表. 他们场景是一个不可变的工作负载. 一般来说对于任何多写入端功能,Hudi 建议启用锁定配置. 但 ...
- 图像分割_评价指标_PSNR峰值信噪比和SSIM结构相似度
PSNR psnr是"Peak Signal to Noise Ratio"的缩写,即峰值信噪比,是一种评价图像的客观标准. 为了衡量经过处理后的影像品质,我们通常会参考PSNR值 ...
- 使用react-test-renderer/shallow写测试
我的项目是采用react + ts来写的,项目中要写单元测试,于是采用了Jest库, 主要用的package有 react-test-renderer react-test-renderer/sha ...
- TOML是什么格式
TOML(Tom's Obvious, Minimal Language)是一种用于配置文件的轻量级.易读的数据序列化格式.它由Tom Preston-Werner创建,旨在成为一种简单直观的配置文件 ...
- Linux 软件包:man pages
有时候,man ls 发现没有帮助文档,可以快递打开浏览器检索 "man ls" . # yum list | grep man | grep pages gl-manpages. ...
- Mysql高级3-索引的结构和分类
一.索引概述 1.1 索引的介绍 索引index:是帮助 Mysql 高效获取数据 的 有序的数据结构,在数据之外,数据库系统维护着的满足特定查找算法的数据结构,这些数据结构以某种方式引用(指向)数据 ...
- <学习笔记> 关于二项式反演
1 容斥原理的式子: \[|A1∪A2∪...∪An|=\sum_{1≤i≤n}|Ai|−\sum_{1≤i<j≤n}|Ai∩Aj|+...+(−1)^{n−1}×|A1∩A2∩...∩An| ...
- React报错:You are running `create-react-app` 5.0.0, which is behind the latest release (5.0.1).
错误 解决方案 说白了就是版本过低,升级下就好.或者按照提示卸载掉原来的版本,之后输入临时创建命令即可,如下图所示 参考链接 https://stackoverflow.com/questions/7 ...
- excel 启用迭代计算
迭代,即计算程序中一组指令的重复.在Excel中有些公式需要启用迭代计算,才能正常运算. 注:公式直接或间接引用自身单元格,会导致计算结果不正确,可以尝试使用该方法解决.所愿单元格的初始值都为0. 参 ...