[转]Node.js tutorial in Visual Studio Code
本文转自:https://code.visualstudio.com/docs/nodejs/nodejs-tutorial
Node.js tutorial in Visual Studio Code
Node.js is a platform for building fast and scalable server applications using JavaScript. Node.js is the runtime and NPM is the Package Manager for Node.js modules.
Visual Studio Code has support for the JavaScript and TypeScript languages out-of-the-box as well as Node.js debugging. However, to run a Node.js application, you will need to install the Node.js runtime on your machine.
To get started in this walkthrough, install Node.js for your platform. The Node Package Manager is included in the Node.js distribution. You'll need to open a new terminal (command prompt) for the nodeand npm command line tools to be on your PATH.
Linux: There are specific Node.js packages available for the various flavors of Linux. See Installing Node.js via package manager to find the Node.js package and installation instructions tailored to your version of Linux.
Tip: To test that you've got Node.js correctly installed on your computer, open a new terminal and type
node --helpand you should see the usage documentation.
Hello World
Let's get started by creating the simplest Node.js application, "Hello World".
Create an empty folder called "hello", navigate into and open VS Code:
mkdir hello

cd hello

code .
Tip: You can open files or folders directly from the command line. The period '.' refers to the current folder, therefore VS Code will start and open the
Hellofolder.
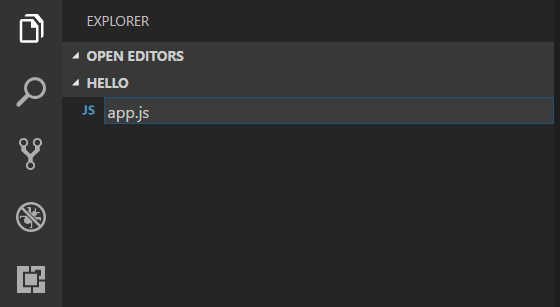
From the File Explorer tool bar, press the New File button:
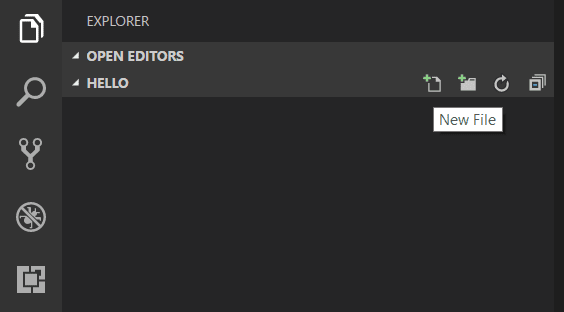
and name the file app.js:
By using the .js file extension, VS Code interprets this file as JavaScript and will evaluate the contents with the JavaScript language service. Refer to the VS Code JavaScript language topic to learn more about JavaScript support.
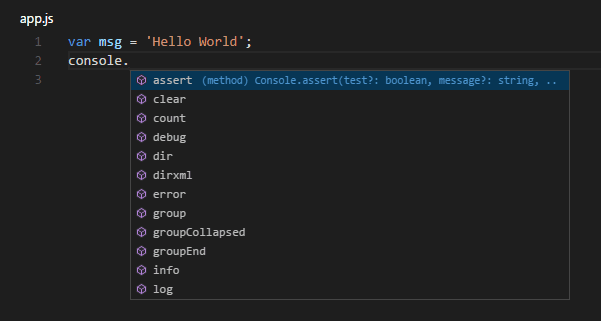
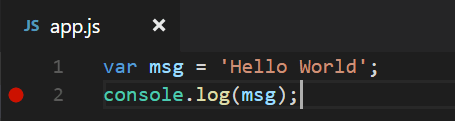
Create a simple string variable in app.js and send the contents of the string to the console:
var msg = 'Hello World';

console.log(msg);
Note that when you typed console. IntelliSense on the console object was automatically presented to you.
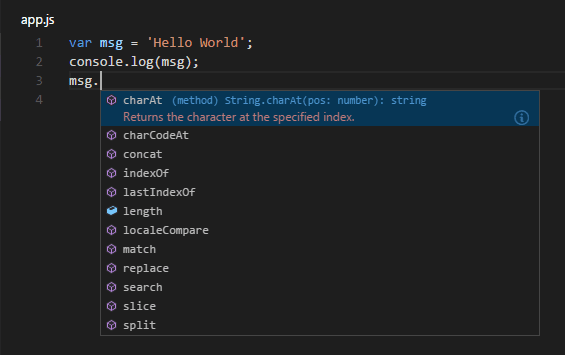
Also notice that VS Code knows that msg is a string based on the initialization to 'Hello World'. If you type msg. you'll see IntelliSense showing all of the string functions available on msg.
After experimenting with IntelliSense, revert any extra changes from the source code example above and save the file (Ctrl+S).
Running Hello World
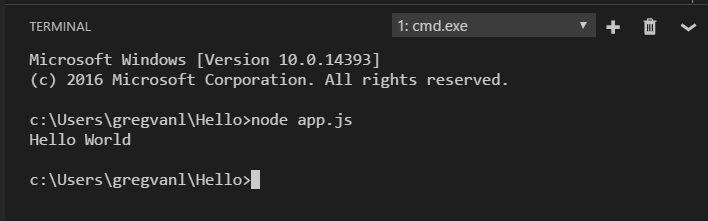
It's simple to run app.js with Node.js. From a terminal, just type:
node app.js
You should see "Hello World" output to the terminal and then Node.js returns.
Integrated Terminal
VS Code has an integrated terminal which you can use to run shell commands. You can run Node.js directly from there and avoid switching out of VS Code while running command line tools.
View > Integrated Terminal (Ctrl+` with the backtick character) will open the integrated terminal and you can run node app.js there:
For this walkthrough, you can use either an external terminal or the VS Code integrated terminal for running the command line tools.
Debugging Hello World
As mentioned in the introduction, VS Code ships with a debugger for Node.js applications. Let's try debugging our simple Hello World application.
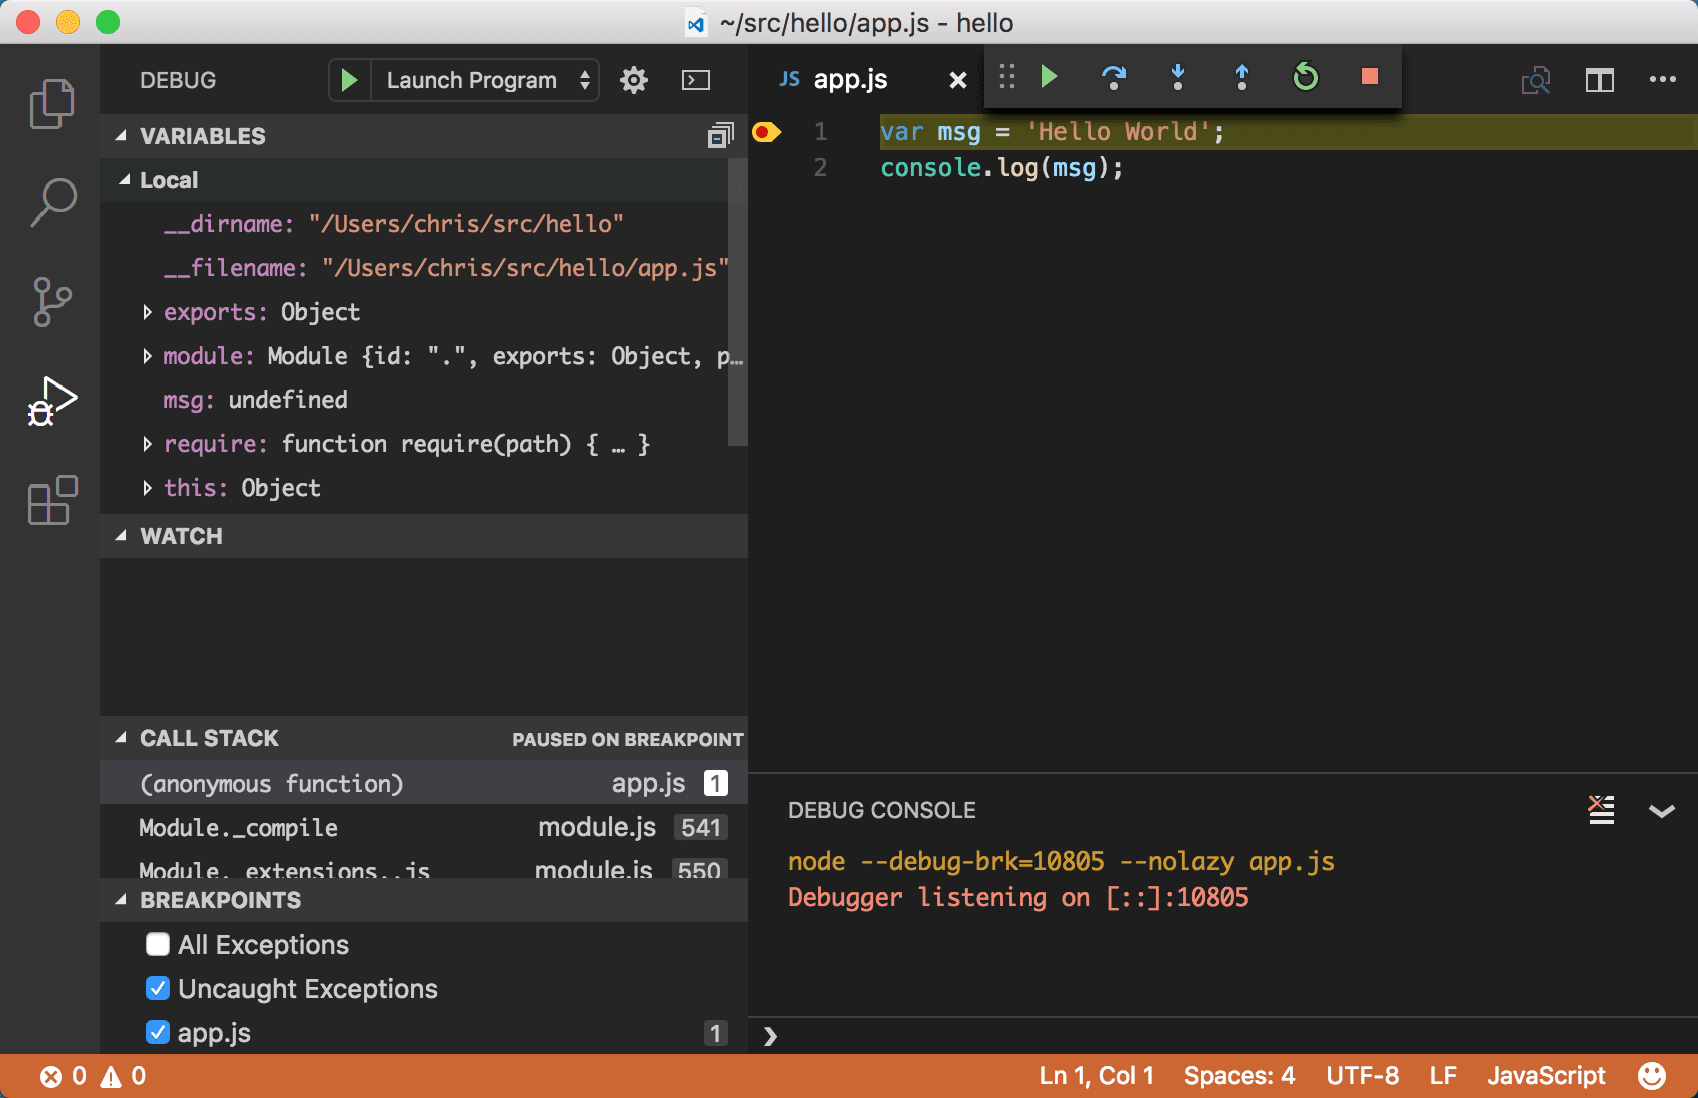
To set a breakpoint in app.js, put the editor cursor on the first line and press F9 or click in the editor left gutter next to the line numbers. A red circle will appear in the gutter.
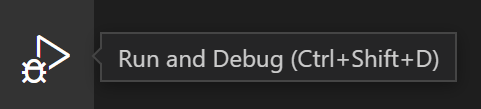
To start debugging, select the Debug View in the Activity Bar:
You can now click Debug tool bar green arrow or press F5 to launch and debug "Hello World". Your breakpoint will be hit and you can view and step through the simple application. Notice that VS Code displays a different colored Status Bar to indicate it is in Debug mode and the DEBUG CONSOLE is displayed.
Now that you've seen VS Code in action with "Hello World", the next section shows using VS Code with a full-stack Node.js web app.
Note: We're done with the "Hello World" example so navigate out of that folder before you create an Express app. You can delete the "Hello" folder if you wish as it is not required for the rest of the walkthrough.
An Express application
Express is a very popular application framework for building and running Node.js applications. You can scaffold (create) a new Express application using the Express Generator tool. The Express Generator is shipped as an NPM module and installed by using the NPM command line tool npm.
Tip: To test that you've got
npmcorrectly installed on your computer, typenpm --helpfrom a terminal and you should see the usage documentation.
Install the Express Generator by running the following from a terminal:
npm install -g express-generator
The -g switch installs the Express Generator globally on your machine so you can run it from anywhere.
We can now scaffold a new Express application called myExpressApp by running:
express myExpressApp
This creates a new folder called myExpressApp with the contents of your application. To install all of the application's dependencies (again shipped as NPM modules), go to the new folder and execute npm install:
cd myExpressApp

npm install
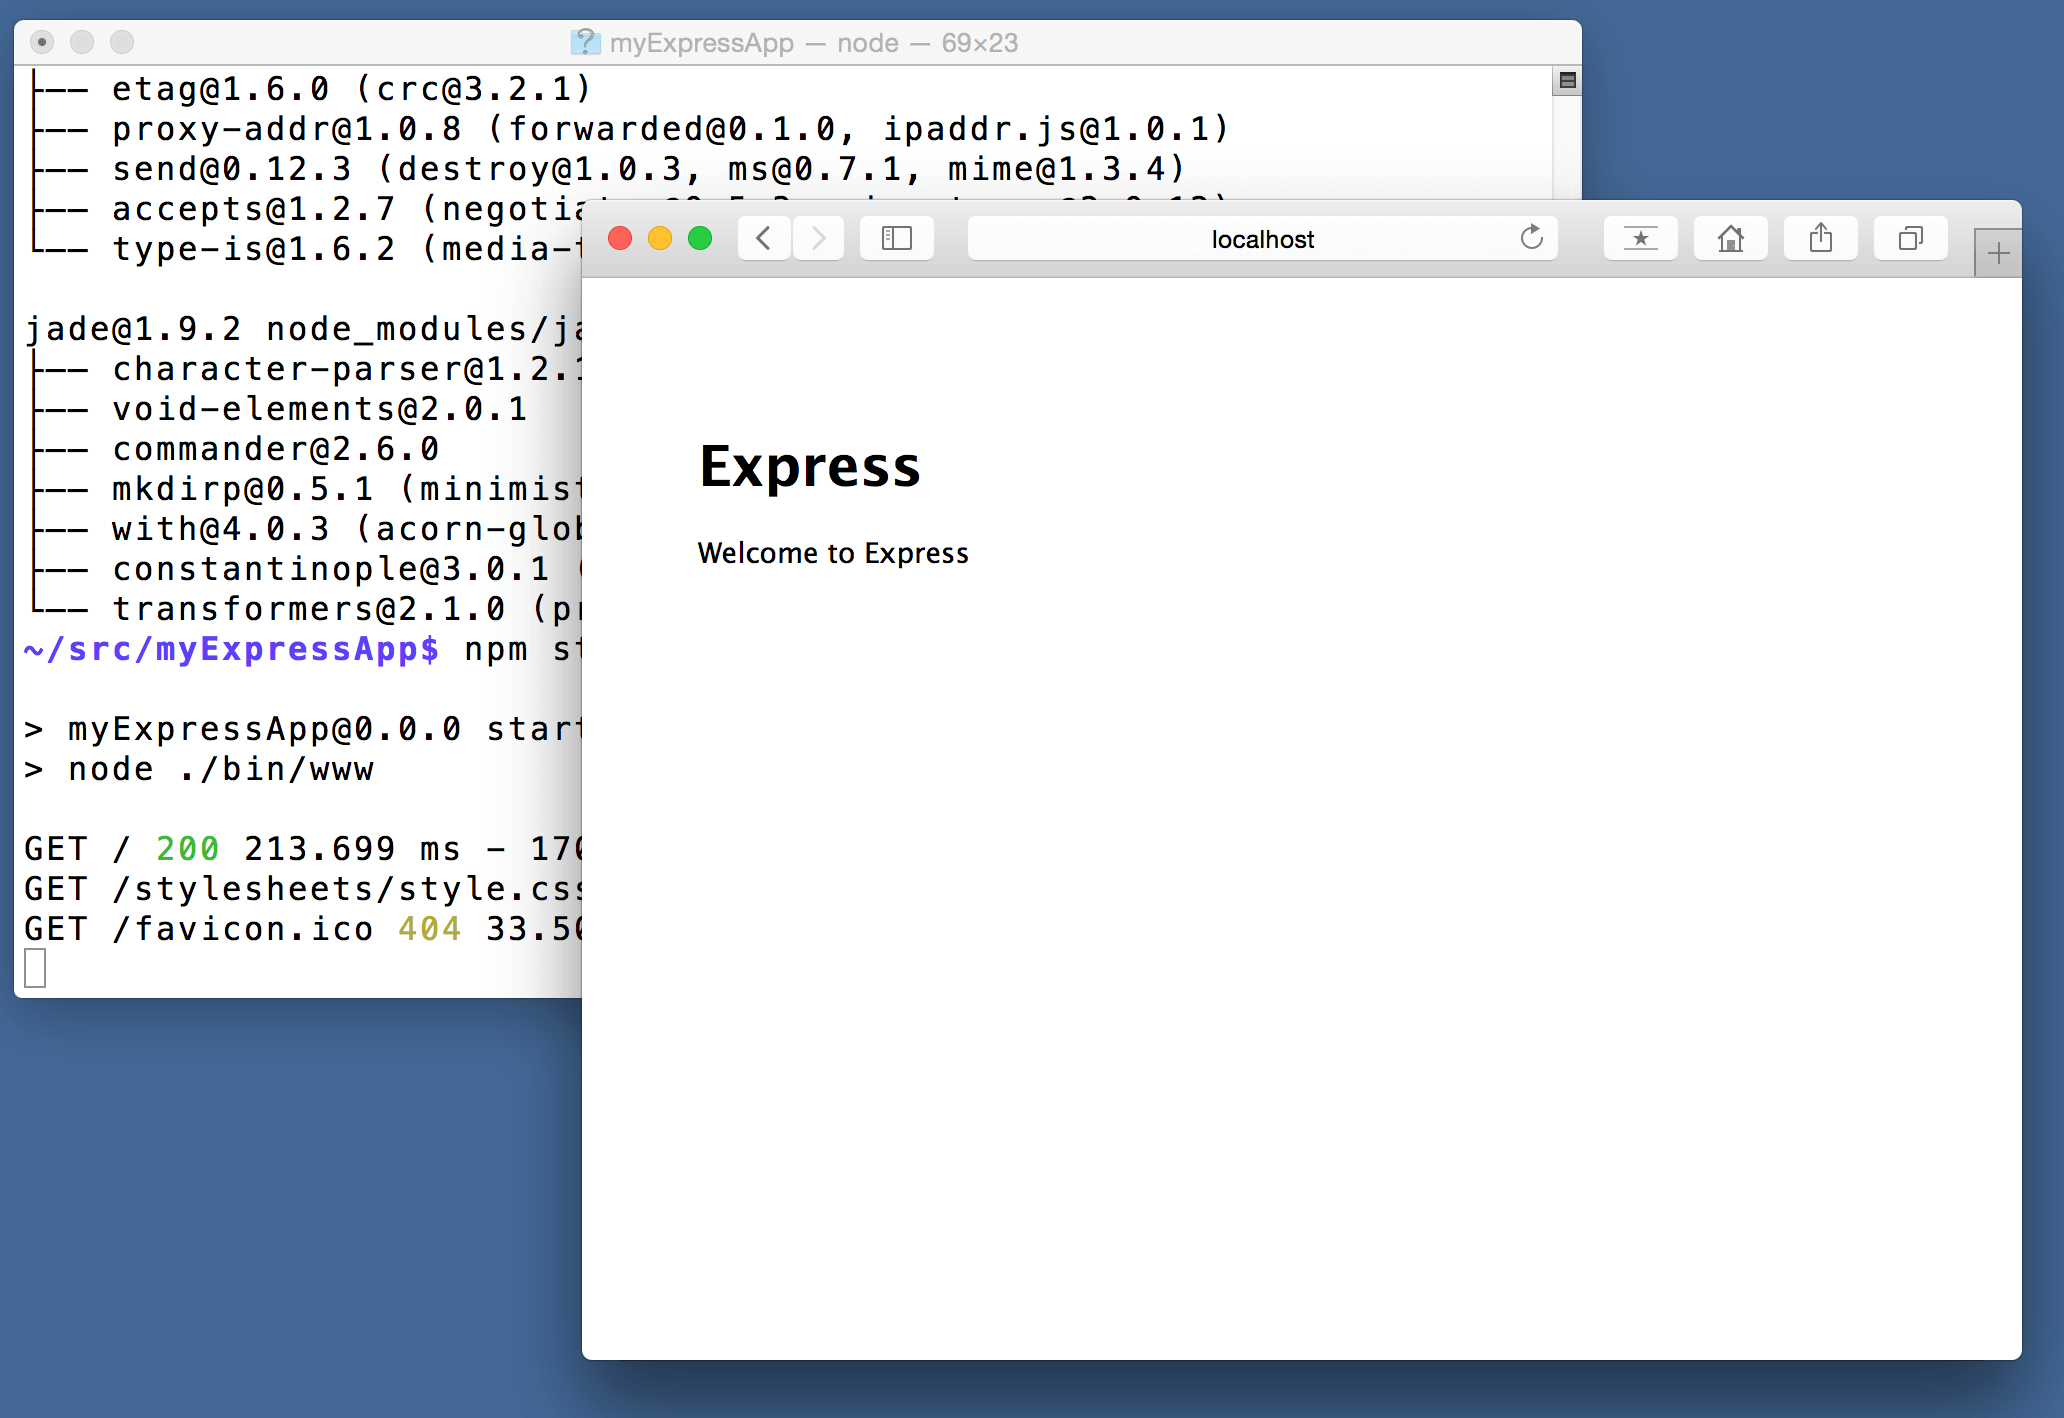
At this point, we should test that our application runs. The generated Express application has a package.json file which includes a start script to run node ./bin/www. This will start the Node.js application running.
From a terminal in the Express application folder, run:
npm start
Tip: You can enable an explorer for the npm scripts in your workspace using the
npm.enableScriptExplorersetting.
The Node.js web server will start and you can browse to http://localhost:3000 to see the running application.
Great code editing
Close the browser and from a terminal in the myExpressApp folder, stop the Node.js server by pressing CTRL+C.
Now launch VS Code:
code .
Note: If you've been using the VS Code integrated terminal to install the Express generator and scaffold the app, you can open the
myExpressAppfolder from your running VS Code instance with the File > Open Folder... command.
The Node.js and Express documentation does a great job explaining how to build rich applications using the platform and framework. Visual Studio Code will make you more productive developing these types of applications by providing great code editing and navigation experiences.
Open the file app.js and hover over the Node.js global object __dirname. Notice how VS Code understands that __dirname is a string. Even more interesting, you can get full IntelliSense against the Node.js framework. For example, you can require http and get full IntelliSense against the http class as you type in Visual Studio Code.
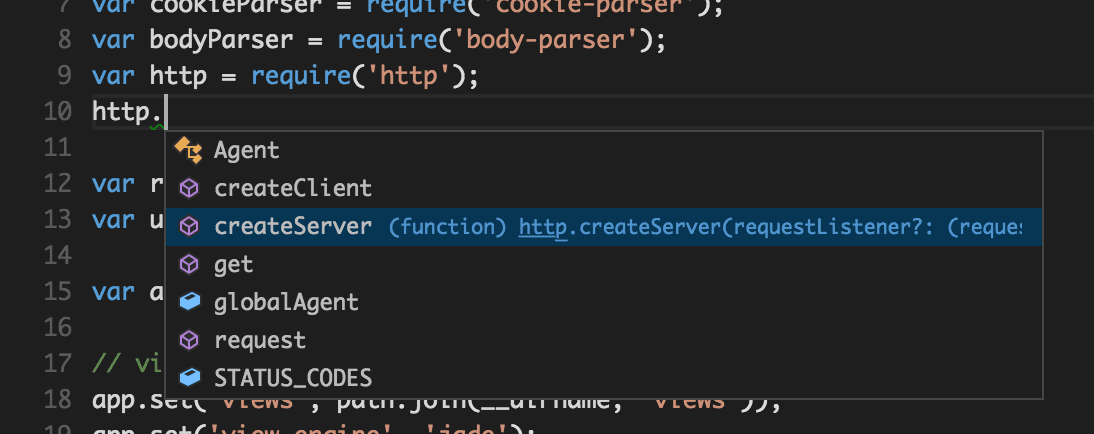
VS Code uses TypeScript type declaration (typings) files (for example node.d.ts) to provide metadata to VS Code about the JavaScript based frameworks you are consuming in your application. Type declaration files are written in TypeScript so they can express the data types of parameters and functions, allowing VS Code to provide a rich IntelliSense experience. Thanks to a feature called Automatic Type Acquisition, you do not have to worry about downloading these type declaration files, VS Code will install them automatically for you.
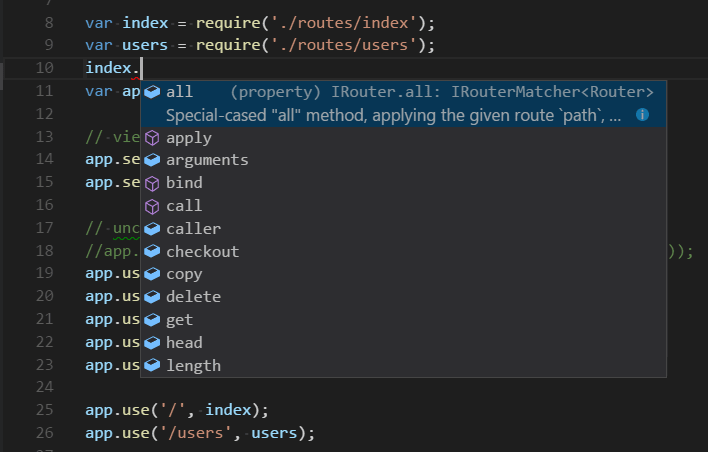
You can also write code that references modules in other files. For example, in app.js we require the ./routes/index module, which exports an Express.Router class. If you bring up IntelliSense on index, you can see the shape of the Router class.
Debug your Express app
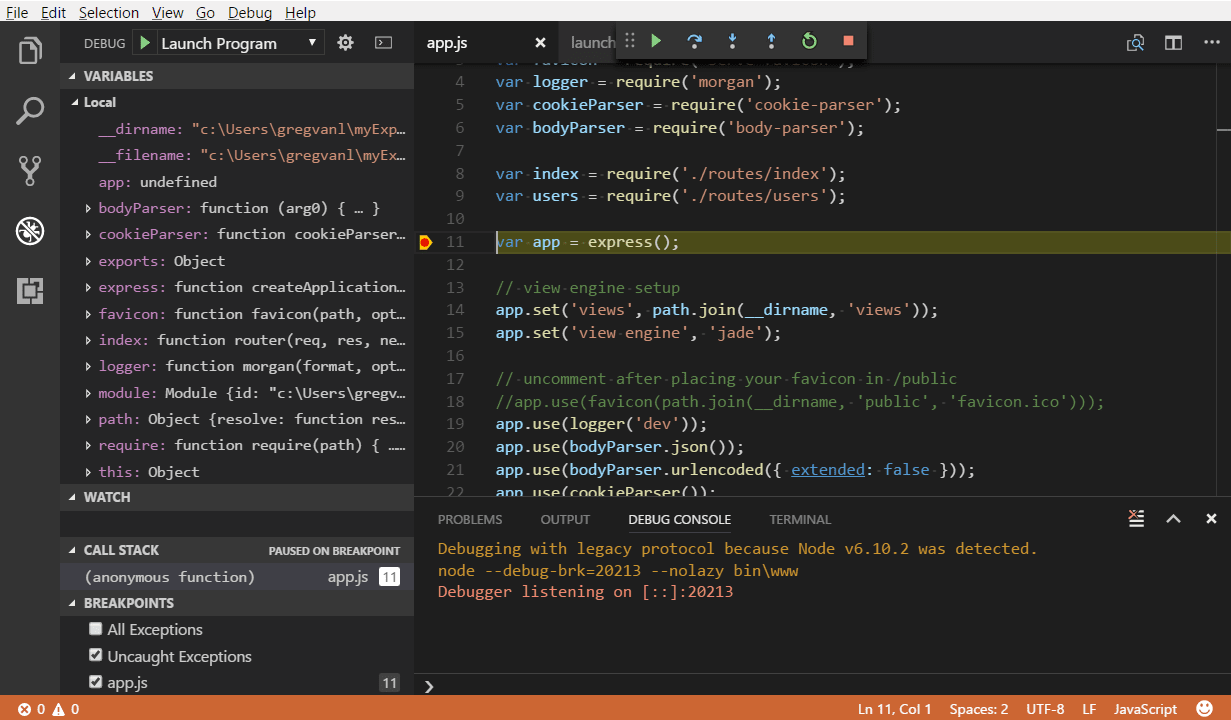
You will need to create a debugger configuration file launch.json for your Express application. Click on the Debug icon in the Activity Bar and then the Configure gear icon at the top of the Debug view to create a default launch.json file. Select the Node.js environment by ensuring that the type property in configurations is set to "node". When the file is first created, VS Code will look in package.json for a start script and will use that value as the program (which in this case is "${workspaceFolder}\\bin\\www) for the Launch Program configuration.
{

    "version": "0.2.0",

    "configurations": [

        {

            "type": "node",

            "request": "launch",

            "name": "Launch Program",

            "program": "${workspaceFolder}\\bin\\www"

        }

    ]

}
Save the new file and make sure Launch Program is selected in the configuration dropdown at the top of the Debug view. Open app.js and set a breakpoint near the top of the file where the Express app object is created by clicking in the gutter to the left of the line number. Press F5 to start debugging the application. VS Code will start the server in a new terminal and hit the breakpoint we set. From there you can inspect variables, create watches, and step through your code.
Deploy your application
If you'd like to learn how to deploy your web application, check out the Deploying Applications to Azuretutorials where we show how to run your website in Azure.
Next Steps
There is much more to explore with Visual Studio Code, please try the following topics:
- Settings - Learn how to customize VS Code for how you like to work.
- Debugging - This is where VS Code really shines.
- Video: Getting started with Node.js debugging - Learn how to attach to a running Node.js process.
- Node.js debugging - Learn more about VS Code's built-in Node.js debugging.
- Debugging recipes - Examples for scenarios like client-side and container debugging.
- Tasks - Running tasks with Gulp, Grunt and Jake. Showing Errors and Warnings.
[转]Node.js tutorial in Visual Studio Code的更多相关文章
- [转]Getting Start With Node.JS Tools For Visual Studio
本文转自:http://www.c-sharpcorner.com/UploadFile/g_arora/getting-started-with-node-js-tools-for-visual-s ...
- node.js Tools for Visual Studio 介绍
node.js Tools for Visual Studio简称NTVS 项目 安装包地址:https://nodejstools.codeplex.com 目前支持2012和2013
- Node.js tools for visual studio 在vs中使用Node.js
简单介绍 PTVS开发团队又开发出一款可以在VS里编写Node.js应用程序的插件——NTVS(Node.js Tools for Visual Studio),开发者可以在VS里轻松开发Node.j ...
- Node.js Tools for Visual Studio
https://www.visualstudio.com/en-us/features/node-js-vs.aspx
- 【Visual Studio Code 】使用Visual Studio Code + Node.js搭建TypeScript开发环境
1.准备工作 Node.js Node.js - Official Site Visual Studio Code Visual Studio Code - Official Site 安装Node. ...
- 使用Visual Studio Code + Node.js搭建TypeScript开发环境
Visual Studio Code搭建Typescript开发环境 —— 相关文章: http://www.cnblogs.com/sunjie9606/p/5945540.html [注意:这里仅 ...
- Visual Studio Code - 调试 Node.js 代码
官方的文档写的太好了!大家还是看参考资料吧. 参考资料: Debugging in Visual Studio Code Debug Node.js Apps using Visual Studio ...
- Nodejs in Visual Studio Code 01.简单介绍Nodejs
1.开始 作者自己:开发人员,Asp.Net , html / js , restful , memcached , oracle ,windows , iis 目标读者:供自己以后回顾 2.我看No ...
- crossplatform---Nodejs in Visual Studio Code 01.简单介绍Nodejs
1.开始 作者自己:开发人员,Asp.Net , html / js , restful , memcached , oracle ,windows , iis 目标读者:供自己以后回顾 2.我看No ...
随机推荐
- 51nod 1344
一个很简单的算法题,求最小的前缀和,就是要注意数据范围要开一个longlong #include<iostream> using namespace std; int main() { i ...
- Cmd控制台修改编码方法
Cmd控制台修改编码方法 一.前言 在Unbuntu中用sqlite3-command-line操作sqlite3还好好的,到了windows下查询表内容时发现中文全部乱码了!马上想到sqlite3内 ...
- Java变成思想总结
Java容器 collection一个独立的元素序列,这些元素都服从一条或多条规则.list必须按照插入的顺序保存元素,set不能有重复元素,queue按照排队的顺序确定对象产生的顺序.map一组成对 ...
- AI for VS ,美团创新之处分析
微软在2017中发布了VS Tools for AI,旨在提升用户对于深度学习的需求体验.AI组件可以让我们迅速构建和训练深度学习的Project,其功能主要有开发,调试和部署深度学习和人工智能的解决 ...
- php中 curl, fsockopen ,file_get_contents 三个函数
赵永斌:有些时候用file_get_contents()调用外部文件,容易超时报错.换成curl后就可以.具体原因不清楚curl 效率比file_get_contents()和fsockopen()高 ...
- 内置函数_range()
range() range()语法格式为 range([start,] stop [,step])# 有三种用法range(stop)range(start,stop)range(start,stop ...
- Python之旅Day2 元组 字符串 字典 集合
元组(tuple) 元组其实跟列表差不多,也是存一组数,与列表相比,元组一旦创建,便不能再修改,所以又叫只读列表. 语法: names = ("Wuchunwei","Y ...
- Linux 查看IP
UBuntu 系统下 按Ctrl+Alt+T 唤出终端 在终端输入: ifconfig 命令 点击回车 就可以看到自己电脑在局域网的IP地址了 图中第二行 inet 地址:192.168.1.101 ...
- MongoDB学习小结
启动对应server:cd:到mangodb安装根目录下 mongod --dbpath db路径 创建MangoDB服务: mongod.exe --logpath d:/mongodb/logs/ ...
- Java 实现 HDFS 文件基本操作
1. pom <hadoop.version>2.7.3</hadoop.version> <dependency> <groupId>org.apac ...