
LNMP分离部署
环境:
Nginx+PHP:192.168.2.144
Mysql:192.168.2.151
【Nginx】
yum install -y pcre-devel openssl-deve popt-devel
tar zxvf nginx-1.11.2.tar.gz -C /usr/src/
cd /usr/src/
d /usr/src/nginx-1.11.2/
./configure --prefix=/usr/local/nginx --with-http_stub_status_module --with-http_ssl_module
make
make install
ln -s /usr/local/nginx/sbin/nginx /usr/local/sbin/
nginx -t
[root@www ~]# cat /etc/init.d/nginx

#!/bin/bash

PRIF="/usr/local/nginx/sbin/nginx"

PROG="/usr/local/nginx/logs/nginx.pid"

case $ in

start)

    [[ `netstat -anput | grep nginx | wc -l` -eq  ]]

    $PRIF

    ([ `echo $?` -eq  ] && echo "This Start Secusses!") ||(echo "This Nginx Running,Please reload or restart")

;;

stop)

    [[ `netstat -anput | grep nginx | wc -l` >  ]]

     kill -s QUIT $(cat $PROG)

    ([ `echo $?` -eq  ] && echo "Nginx stop successfully!") || (echo "Failed stop nginx!")

;;

reload)

     if [[ `netstat -anput | grep nginx | wc -l` >  ]];then

     kill -s HUP $(cat $PROG)

  else

     $PRIF

     kill -s HUP $(cat $PROG)

     ([ `echo $?` -eq  ] && echo "This is Nginx reload Secussed!")|| (echo "This Nginx Reload failure!")

   fi

;;

restart)

    if [[ `netstat -anput | grep nginx | wc -l` ==  ]];then

     echo "This Nginx Running..."

     $PRIF

    ([ `echo $?` -eq  ] && echo "Nginx start successfully!")

 else

     echo Stopping Nginx...

    kill -s QUIT $(cat $PROG)

    $PRIF

    ([ `echo $?` -eq  ] && echo "This is Nginx Restart Secussed!") || (echo "This Nginx Restart Faulure!")

   fi

;;

*)

   echo -e "\033[41;36m Unages: $0 [start|stop|reload|restart]\033[0m"

   exit

;;

esac
【Mysql】
[root@DBserver ~]# yum install -y cmake ncurses-devel
[root@DBserver ~]# tar zxvf mysql-5.5.38.tar.gz -C /usr/src/
[root@DBserver ~]# cd /usr/src/mysql-5.5.38/
[root@DBserver mysql-5.5.38]# cmake -DCMAKE_INSTALL_PREFIX=/usr/local/mysql -DSYSCONFDIR=/etc -DDEFAULT_CHARSET=utf8 -DDEFAULT_COLLATION=utff8_general_ci -DWITH_EXTRA_CHARSETS=all
[root@DBserver mysql-5.5.38]# make
[root@DBserver mysql-5.5.38]# make install
[root@DBserver mysql-5.5.38]# useradd -M -s /sbin/nologin mysql
[root@DBserver mysql-5.5.38]# chown -R mysql.mysql /usr/local/mysql/
[root@DBserver mysql-5.5.38]# cp /usr/local/mysql/support-files/my-medium.cnf /etc/my.cf
[root@DBserver mysql-5.5.38]# /usr/local/mysql/scripts/mysql_install_db --user=mysql --basedir=/usr/local/mysql --datadir=/usr/local/mysql/data/
[root@DBserver mysql-5.5.38]# cp /usr/local/mysql/support-files/mysql.server /etc/init.d/mysqld
[root@DBserver mysql-5.5.38]# echo "PATH=$PATH:/usr/local/mysql/bin" >>/etc/profile
[root@DBserver mysql-5.5.38]# source /etc/profile
[root@DBserver mysql-5.5.38]# chkconfig --add mysqld
[root@DBserver mysql-5.5.38]# systemctl mysqld start
[php]
[root@www ~]# yum install -y libxml2-devel bzip2-devel libcurl-devel libmcrypt-devel
[root@www ~]# tar -jxvf php-5.6.8.tar.bz2 -C /usr/src/
[root@www php-5.6.8]# ./configure --prefix=/usr/local/php --with-mysql --with-pdo-mysql --with-mysqli --with-openssl --enable-fpm --enable-sockts --enable-mbstring --with-jpeg-dir --with-png-dir --with-libxml-dir=/usr/ --with-config-file-path=/etc/ --with-config-file-scan-dir=/etc/php.d --with-curl
[root@www php-5.6.8]# make
[root@www php-5.6.8]# make install
[root@www php-5.6.8]# cp php.ini-production /etc/php.ini
[root@www php-5.6.8]# cp sapi/fpm/init.d.php-fpm /etc/init.d/php-fpm
[root@www php-5.6.8]# chmod +x /etc/init.d/php-fpm
[root@www php-5.6.8]# chkconfig --add php-fpm
[root@www php-5.6.8]# chkconfig php-fpm on
[root@www php-5.6.8]# cp /usr/local/php/etc/php-fpm.conf.default /usr/local/php/etc/php-fpm.conf
[root@www etc]# sed -i '235s#pm.max_children = 5#pm.max_children = 150#;s#pm.start_servers = 2#pm.start_servers = 8#;s#pm.min_spare_servers = 1#pm.min_spare_servers = 8#;s#pm.max_spare_servers = 3#pm.max_spare_servers = 10#g' /usr/local/php/etc/php-fpm.conf
配置php-fpm的 Pid文件路径
[root@www etc]# sed -i 's#;pid = run/php-fpm.pid#pid = /usr/local/php/var/run/php-fpm.pid#g' /usr/local/php/etc/php-fpm.conf
在php-fpm配置文件配置用户名为nginx,用nginx用户来启用php-fpm程序,而监听地址为本地IP用来调用
[root@www etc]# sed -i 's#user = nobody#user = nginx#;s#group = nobody#group = nginx#;s#listen = 127.0.0.1:9000#listen = 192.168.2.144:9000#g' /usr/local/php/etc/php-fpm.conf
【整合Nginx与PHP】
worker_processes  ;

events {

    worker_connections  ;

}

http {

    include       mime.types;

    default_type  application/octet-stream;

    sendfile        on;

    keepalive_timeout  ;

    server {

        listen       ;

        server_name  localhost;

        location / {

            root   /www/webapp/;

            index index.php index.html index.htm;

        }

           location ~ \.php$ {

             root           /www/webapp;

               fastcgi_pass   192.168.2.144:;

               fastcgi_index  index.php;

               fastcgi_param  SCRIPT_FILENAME  $document_root$fastcgi_script_name;

               include        fastcgi_params;

           }

        error_page        /50x.html;

        location = /50x.html {

            root   html;

        }

    }

}
[root@www etc]# mkdir /www/webapp -p
[root@www etc]# useradd -M -s /sbin/nologin nginx
[root@www etc]# systemctl start php-fpm
netstat -anput | grep php-fpm
tcp 0 0 192.168.2.144:9000 0.0.0.0:* LISTEN 126357/php-fpm: mas
[root@www ~]# cat /www/webapp/index.php
<?php
phpinfo();
?>
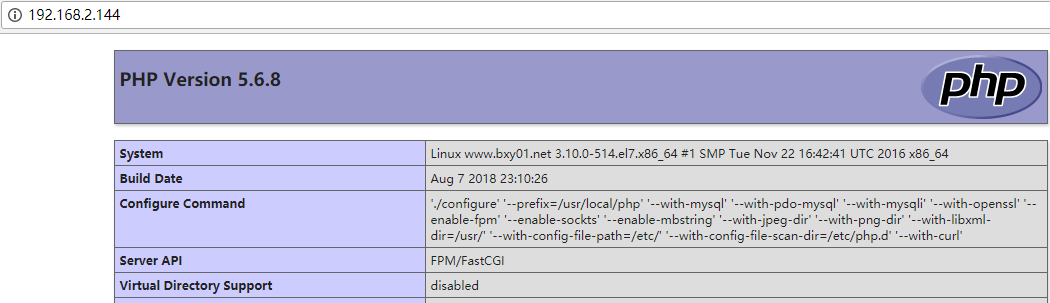
Ps:如果PHP单独在一个服务独立运行的话。可以用nfs共享,指定php-fpm的本地IP进行挂载
1 mkdir /www

2 chown -R nginx:nginx /www

3 vim /etc/exports

4 ---------------------------------------------

5 /www    192.168.2.0/24(rw,no_root_squash)

6 ---------------------------------------------

7 service nfs start

8 mount -t nfs 192.168.2.144:/www /www
【Discuz论坛】
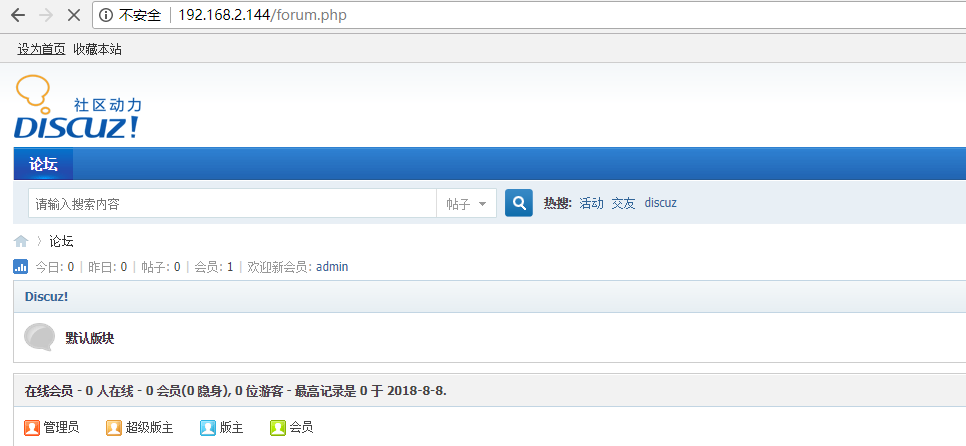
[root@www ~]# unzip Discuz_X3.1_SC_UTF8.zip -d /www/webapp
[root@www ~]# cd /www/webapp
[root@www webapp]# mv upload/* .
[root@www webapp]# chmod 777 -R data/ config/ uc_client/ uc_server/
【数据库授权】
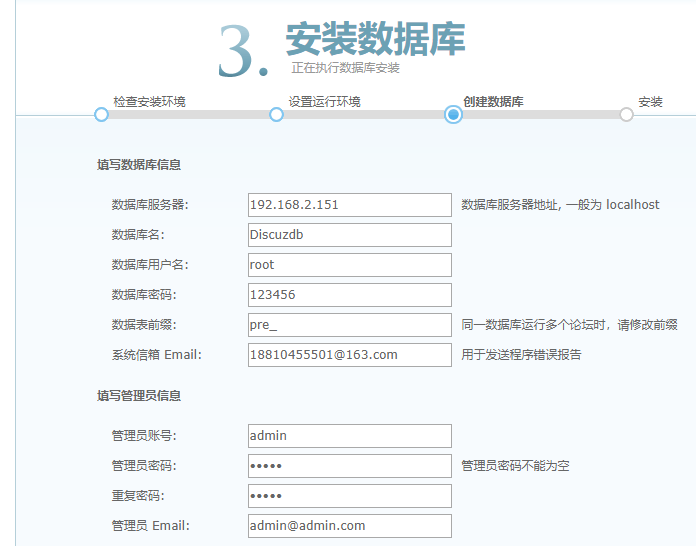
[root@DBserver mysql-5.5.38]# mysql -u root -p123.com
mysql> create database Discuzdb default charset=utf8;
mysql> grant all on Discuzdb.* to root@'mysql> grant all on Discuzdb.* to root@'192.168.2.144' identified by '123456';
mysql> flush privileges;
【Mysql数据库错误问题汇总】
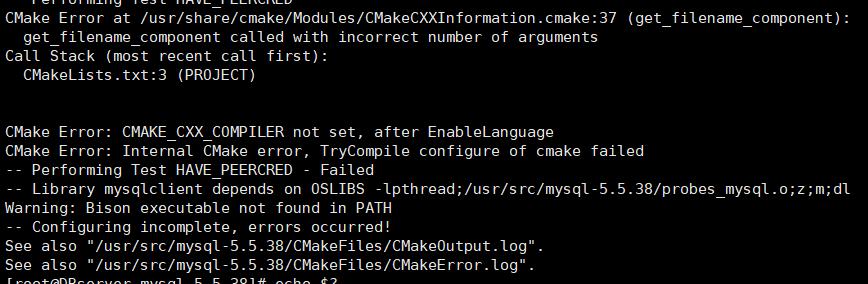
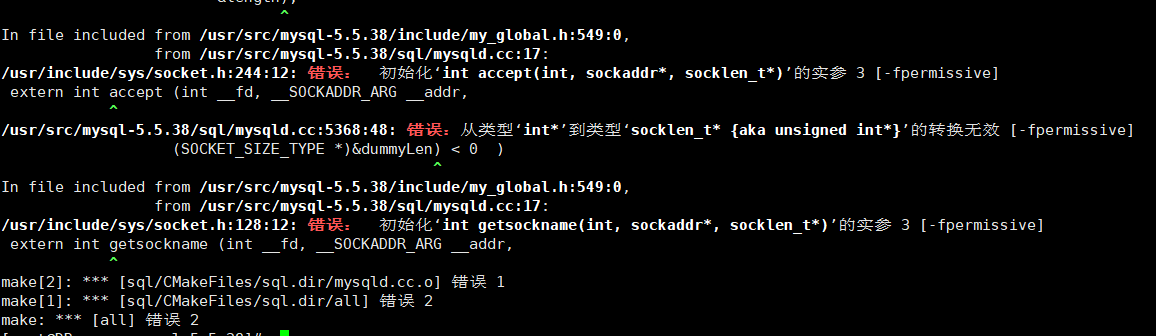
错误1:预编译报错:
CMake Error: CMAKE_CXX_COMPILER not set, after EnableLanguage
CMake Error: Internal CMake error, TryCompile configure of cmake failed
错误2:解决方法:
make clean #清楚上次编译生成的object文件以及二进制文件
rm -rf CMakeCache.txt
rm -rf /etc/my.cnf
make[2]: *** [sql/CMakeFiles/sql.dir/mysqld.cc.o] 错误 1
make[1]: *** [sql/CMakeFiles/sql.dir/all] 错误 2
LNMP分离部署的更多相关文章
- LNMP下动静分离部署phpmyadmin软件包
LNMP环境肯定是先要配置好的.可以参考我之前的博客.那我们直接进行配置,我这里使用了三台机器进行动静分离部署,第一台负责nginx反向代理,第二台负责php-fpm应用程序以及mariadb的服务器 ...
- 【转】Nginx+php-fpm+MySQL分离部署详解
转:http://www.linuxidc.com/Linux/2015-07/120580.htm Nginx+php-fpm+MySQL分离部署详解 [日期:2015-07-26] 来源:Linu ...
- LNMP分离式部署
#### LNMP组合工作流程 在LNMP组合工作时,首先是用户通过浏览器输入域名请求Nginx Web服务,如果请求是静态资源,则由Nginx解析返回给用户:如果是动态请求(.php结尾),那么Ng ...
- LNMP分离式部署实例[转]
很多人在练习部署LNMP环境的时候,大都数是部署在同一个虚拟机上面的.但是实际工作中,我们一般都是分离部署的. 今天我就用3台虚拟机,部署下LNMP环境.以供参考! 网络拓扑图: 首先准备3台虚拟机: ...
- linux运维、架构之路-Lnmp架构部署
一.Lnmp架构原理 二. Lnmp架构软件安装 1.Nginx安装脚本 #!/bin/bash useradd -s /sbin/nologin -M www mkdir -p /server/to ...
- LNMP架构部署
第1章 部署LNMP架构步骤 1.1 ①部署Linux系统(OK) 基本优化完成(ip地址设置 yum源更新 字符集设置) 安全优化完成(iptables关闭 selinux关闭 /tmp/ 1777 ...
- 001.Amoeba读写分离部署
一 Amoeba简介 Amoeba(变形虫)项目,该开源框架于2008年 开始发布一款 Amoeba forMysql软件.这个软件致力于MySQL的分布式数据库前端代理层,它主要在应用层访问MySQ ...
- Puppet基于Master/Agent模式实现LNMP平台部署
前言 随着IT行业的迅猛发展,传统的运维方式靠大量人力比较吃力,运维人员面对日益增长的服务器和运维工作,不得不把很多重复的.繁琐的工作利用自动化处理.前期我们介绍了运维自动化工具ansible的简单应 ...
- windows下Redis 主从读写分离部署
原文:windows下Redis 主从读写分离部署 1.可直接下载window下的运行文件(下面这个链接) 也可以浏览github 查看相应的版本说明文档 https://github.com/Ser ...
随机推荐
- node+vue报错合辑
vue 1.This is probably not a problem with npm. There is likely additional logging output above. npm ...
- (常用)os模块
os.getcwd() 获取当前工作目录,即当前python脚本工作的目录路径os.chdir("dirname") 改变当前脚本工作目录:相当于shell下cdos.curdi ...
- LabVIEW将字符串转化为十进制
(1)作用:将ASCII当做成十六进制来表示,并计算这个十六进制数对应的十进制大小 例如:008A本身对应的ASCII码用十六进制表示为为30 30 38 41,但有些协议中将008A当成0x008A ...
- 用于主题检测的临时日志(c5ac07a5-5dab-45d9-8dc2-a3b27be6e507 - 3bfe001a-32de-4114-a6b4-4005b770f6d7)
这是一个未删除的临时日志.请手动删除它.(5051e554-d10d-4e48-b2ca-37c38a30153a - 3bfe001a-32de-4114-a6b4-4005b770f6d7)
- Confluence 6 隐藏人员目录
人员目录提供了你 Confluence 中所有用户的列表. 如果你希望禁用人员目录,请在你应用程序命令行中的 Configuring System Properties 进行设置. 希望为匿名用户禁用 ...
- NHibernate入门
这里是官方的Demo,可以看看,因为我也是通过官方的demo学习的. https://github.com/nhibernate/nhibernate-core/tree/master/src/N ...
- day34 基于TCP和UDP的套接字方法 粘包问题 丢包问题
TCP 基于流的协议 又叫可靠性传输协议 通过三次握手 四次挥手 来保证数据传输完毕 缺点效率低 正因为是基于流的协议 所以会出现粘包问题粘包问题:原因一:是应为数据是先发送给操作系统,在操作系统中有 ...
- 1010:Tempter of the Bone
题目链接:http://acm.hdu.edu.cn/showproblem.php?pid=1010 Problem Description The doggie found a bone in a ...
- Python基础之面向对象进阶二
一.__getattribute__ 我们一看见getattribute,就想起来前面学的getattr,好了,我们先回顾一下getattr的用法吧! class foo: def __init__( ...
- echarts + timeline 显示多个options
var option = { //timeline基本配置都写在baseoption 中 baseOption: { timeline: { //loop: false, axisType: 'cat ...