openvswitch2.11.0修改源码后重新编译(2)
一:前提
已经正常安装了SDN环境(mininet和openswitch2.11.0和Ryu)
使用前面教程安装环境SDN实验---使用git安装Mininet
(一)测试ovs是否正常使用
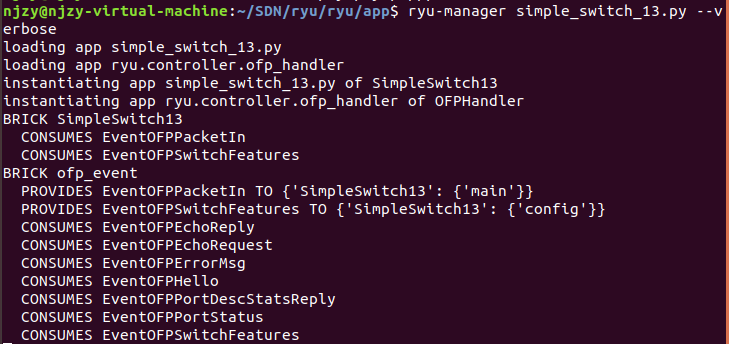
1.ryu启动
2.mn启动测试
二:原始信息


三:修改程序
(一)修改源码:在vport.c和.h中添加代码---文件写入信息《慎用》(未修改调试,出现问题)
1.vport.h文件
//custom function to log info

void send_msg(const char* filename,const char* info);

//file operation function

struct file *file_open(const char *path, int flags, int rights);

void file_close(struct file *file);

int file_read(struct file *file, unsigned long long offset, unsigned char *data, unsigned int size);

int file_write(struct file *file, unsigned long long offset, unsigned char *data, unsigned int size);
2.vport.c文件
//custom function to log info

void send_msg(const char* filename,const char* info)

{

    loff_t f_pos;

    struct file* fp = file_open(filename,O_RDWR|O_CREAT,);

    f_pos = fp->f_pos;

    file_write(fp,f_pos,info,strlen(info)+);

    file_close(fp);

}

//file operation function

struct file *file_open(const char *path, int flags, int rights)

{

    struct file *filp = NULL;

    mm_segment_t oldfs;

    int err = ;

    oldfs = get_fs();

    set_fs(get_ds());

    filp = filp_open(path, flags, rights);

    set_fs(oldfs);

    if (IS_ERR(filp)) {

        err = PTR_ERR(filp);

        return NULL;

    }

    return filp;

}

void file_close(struct file *file)

{

    filp_close(file, NULL);

}

int file_read(struct file *file, unsigned long long offset, unsigned char *data, unsigned int size)

{

    mm_segment_t oldfs;

    int ret;

    oldfs = get_fs();

    set_fs(get_ds());

    ret = vfs_read(file, data, size, &offset);

    set_fs(oldfs);

    return ret;

}

int file_write(struct file *file, unsigned long long offset, unsigned char *data, unsigned int size)

{

    mm_segment_t oldfs;

    int ret;

    oldfs = get_fs();

    set_fs(get_ds());

    ret = vfs_write(file, data, size, &offset);

    set_fs(oldfs);

    return ret;

}
3.检查日志

(二)使用日志打印(推荐)
1.使用sublime在datapath文件夹中搜索log,pr等信息,找到可用的内核输出函数pr_info("Open vSwitch switching datapath %s\n", VERSION);
2.使用pr_info在vport.c函数中输入调试信息

3.进行下面编译方法
4.结果显示:使用dmesg方法查看即可
四:实验开始
(一)重新编译前检查
1.查看内核模块openvswitch是否正在被占用(若是被占用,不能被安装)
lsmod | grep openvswitch
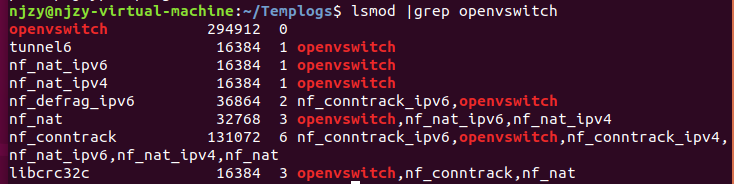
第一行,第三列为1则被占用,为0未被占用(此处未被占用)
2.若是被占用,此时使用sudo ovs-dpctl show查看内核,应该会有一个ovs-system的datapath
此时需要使用sudo ovs-dpctl del-dp ovs-system删除刚才看到的datapath。
3.使用sudo rmmod openvswitch来移除openvswitch内核模块,再使用lsmod|grep openvswitch应该就没有openvswitch字样。

(二)开始重新编译
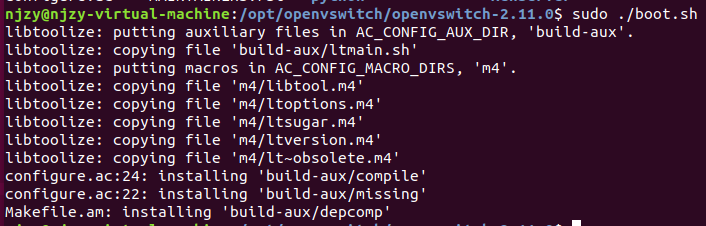
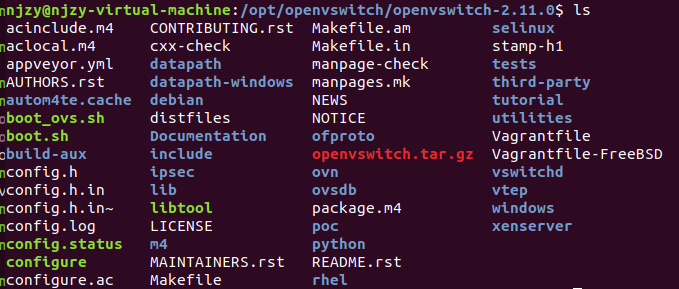
1.进入openswitch文件夹中

2.启动boot.sh脚本
3.make clean清除上次的make命令所产生的object文件(后缀为“.o”的文件)及可执行文件。
因为我们之前安装openswitch编译过一次,我们需要先清除上一次的文件。

没有错误的时候不用clean,这样编译会快很多,编译器会自动编译变动的部份。

当排除错误时就应当clean一下(当出现莫名其妙的错误时,就要想到可能是没有clean导致的)---出错可以参考上一篇文章openvswitch2.11.0修改源码后重新编译
4.使用sudo ./configure --with-linux=/lib/modules/`uname -r`/build配置
./configure是源代码安装的第一步,主要的作用是对即将安装的软件进行配置,检查当前的环境是否满足要安装软件的依赖关系,但并不是所有的tar包都是源代码的包,可以ls看看有没有configure这个文件,如果是二进制的包,解压后直接就能使用
5.进行编译sudo make

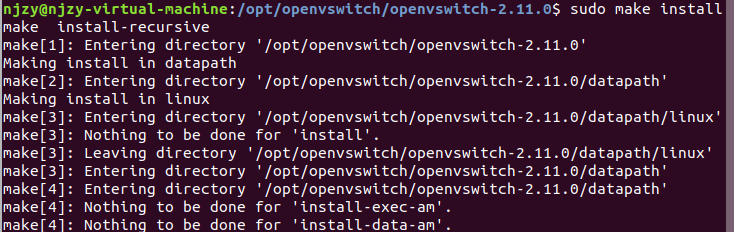
6.进行sudo make install
7.在编译内核模块之前,我们将之前的ko模块备份出去
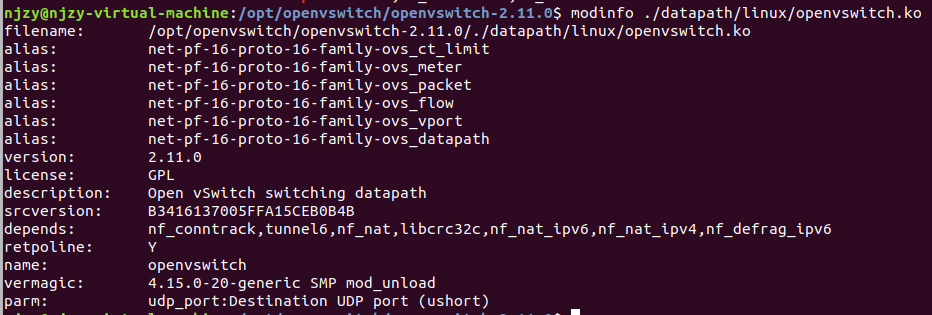
查看ko文件位置 modinfo openvswitch

备份原始ko文件,删除原始文件


8.开始编译内核文件sudo make modules_install

lsmod | grep bridge    查看原始程序是否在运行(我们前面以及关闭了,这里应该没有输出信息)

lsmod | grep openvswitch
9.加载内核模块sudo modprobe openvswitch

使用lsmod | grep open查看是否加载了内核
查看内核信息
10.后面还有操作 modprobe -D openvswitch 进行内核模块插入

modinfo /lib/modules/4.15.--generic/extra/openvswitch.ko


原本在二中,没有这个extra文件夹和这些内核模块。在make modules_install后出现

原始源文件中,被删除了openswitch.ko,编译后没有在这个文件中出现
11.初始化数据库配置文件---一定要做
sudo mkdir -p /usr/local/etc/openvswitch

sudo ovsdb-tool create /usr/local/etc/openvswitch/conf.db vswitchd/vswitch.ovsschema

ls /usr/local/etc/openvswitch

重点补充:若是在后面出现pr_info无法输出,说明我们编译的新的内核并没有插入到系统中,我们需要进行以下操作
首先移除原有内核
sudo rmmod openvswitch
进入ovs根目录下的datapath/linux:

然后执行insmod操作,进行插入操作:
insmod openvswitch.ko

五:后续问题
(一)使用mn进行测试,出现下面错误
*** Creating  network

*** Adding controller

*** Adding hosts:

h1 h2

*** Adding switches:

ovs-vsctl: unix:/usr/local/var/run/openvswitch/db.sock: database connection failed (No such file or directory)

ovs-vsctl exited with code

*** Error connecting to ovs-db with ovs-vsctl

Make sure that Open vSwitch is installed, that ovsdb-server is running, and that

"ovs-vsctl show" works correctly.

You may wish to try "service openvswitch-switch start"
(二)网上查找解决方案
ovsdb-server --remote=punix:/usr/local/var/run/openvswitch/db.sock --remote=db:Open_vSwitch,Open_vSwitch,manager_options --pidfile --detach

ovs-vsctl --no-wait init

ovs-vswitchd --pidfile --detach --log-file
(三)出现不能创建/usr/local/var/run/openvswitch/db.sock,没有这个文件或者目录

原本没有run目录,无法创建递归目录导致错误。我们使用sudo mkdir -p /usr/local/var/run/openvswitch/
解决问题
(四)将(三)上面的解决方案,设置为sh脚本
boot_ovs.sh就是,sudo chmod  ./boot_ovs.sh

启动即可
(五)启动过程中,因为在虚拟机中启动,可能出现客户端禁用cpu,导致Ubuntu系统卡死---修改内核出错导致
之前我给了2个cpu,一个2核。应该适当降低
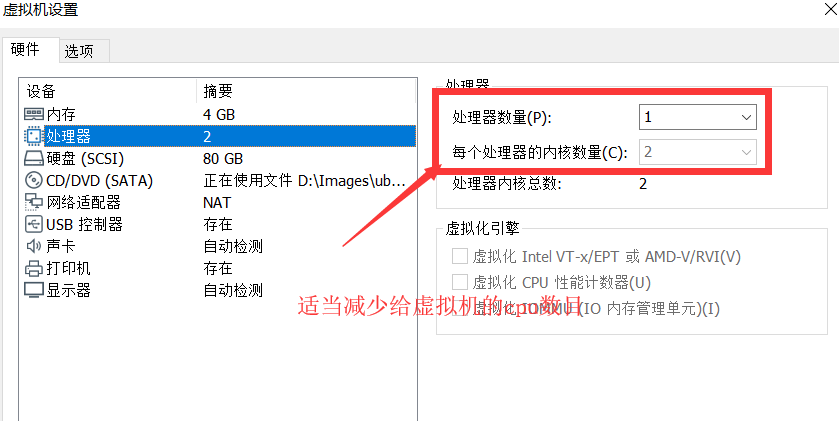
其实:这里应该是因为我们上面使用的内核文件操作函数有问题,导致的。因为后面发现一使用复杂拓扑就失效了,依旧出现CPU禁用现象
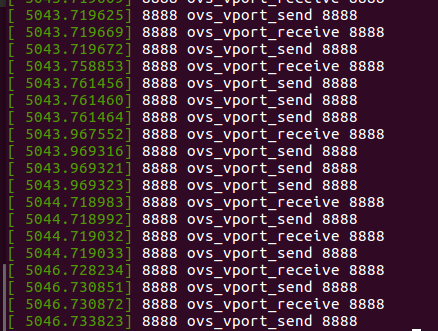
五:测试结果
(一)开启mn
sudo mn --test pingall
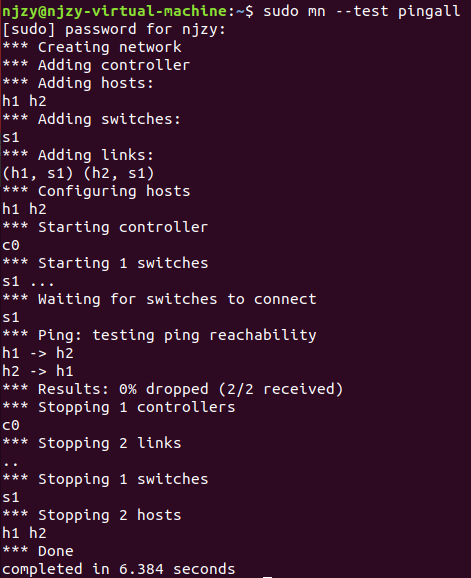
(二)结果显示如二中
openvswitch2.11.0修改源码后重新编译(2)的更多相关文章
- openvswitch2.11.0修改源码后重新编译
一:推文 https://www.jianshu.com/p/923f49c290f5(可以删除运行当中的DataPath内核) https://github.com/ebiken/doc-netwo ...
- Appium修改源码后重新编译
按照官方的说明下载源码,安装依赖库,具体可从这来: https://github.com/appium/appium/blob/master/docs/en/contributing-to-appiu ...
- 利用src.rpm包修改源码后重新制作rpm包
1. 下载 .src.rpm包.例:https://repos.fedorapeople.org/repos/openstack/EOL/openstack-grizzly/epel-6/openst ...
- kafka 0.11.0.3 源码编译
首先下载 kafka 0.11.0.3 版本 源码: http://mirrors.hust.edu.cn/apache/kafka/0.11.0.3/ 下载源码 首先安装 gradle,不再说明 1 ...
- [delphi]修改indy源码后重新编译
http://blog.csdn.net/nerdy/article/details/8702568 虽然indy有一身的毛病,但是一般情况下使用起来还是多方便的. 今天在做一个使用到indy的程序的 ...
- 下载Dubbo源码后的编译安装启动
1:安装jdk,maven 配制环境变量: 2:安装zookeeper 配制zookeeper环境变量 3:把dubbo源码编译成war包 启动cmd黑窗口 ,进入 源码文件 ...
- Tomcat修改源码,重新编译
源码和编译的区别:源码不能直接运行,是人读的,而编译后的程序是计算机可以读的.所以它们是不同的语言.
- win10+vs2008编译比特币1.0版源码总结
https://zhuanlan.zhihu.com/p/25074960 https://zhuanlan.zhihu.com/p/25095222 总体上是参考这两个链接,感谢大神的分享,但是中间 ...
- Hadoop 修改源码以及将修改后的源码应用到部署好的Hadoop中
我的Hadoop版本是hadoop-2.7.3, 我们可以去hadoop官网下载源码hadoop-2.7.3-src,以及编译好的工程文件hadoop-2.7.3, 后者可以直接部署. 前者hadoo ...
随机推荐
- 接口自动化--读取Excel操作(openpyxl)
上次我们已经将requests库封装成我们想要的样子了,我们的接口自动化已经完成了最开始的一步了,接下来我们需要完成我们相应的其他模块的封装,下面简单介绍下我们在接口自动化需要用到的模块吧在接口自动化 ...
- HDU5421 Victor and String 和 APIO2014 回文串
两道差不多的题,都是回文自动机right集合处理相关. Victor and String Victor loves to play with string. He thinks a string i ...
- Nginx——跨域造成的504问题
前言 前台域名和后台域名是两个不同不同的二级域名,访问的时候造成了跨域,出现了504错误 解决 修改Nginx配置,将超时的时间设置为1200秒 keepalive_timeout 1200; pro ...
- python预课03 三元表达式示例,函数定义示例,七段彩码管绘制示例
三元表达式 s = '不下雨' if s == '下雨': print('带伞') if s == '不下雨': print('不带伞') #等效与以下语句 print('带伞' if s == '下 ...
- 如何移除woocommerce的tabs【wordpress技巧】
我们在用woocommerce建站时有时不想让产品的review显示出来,以使单个产品页面简单而令人印象深刻,那么要如何移除tab呢?可以在主题的function.php文件定义移除tabs函数,代码 ...
- PHP数组操作类
class ArrayHelper{ /** * 从数组中删除空白的元素(包括只有空白字符的元素) * * 用法: * @code php ...
- EJS的个人总结
什么是模板引擎? 用于Web开发的模板引擎是为了使用用户界面与业务数据(内容)分离而产生的,使用模板语法编写的模板代码通常放在具有特的格式的文档中,经过模板引擎编译之后就会生成一个标准的HTML文档. ...
- [Git] --amend
Change a Commit Message that Hasn't Been Pushed Yet If you make a mistake in a commit message but HA ...
- vim命令(转)
1.Linux下创建文件 vi test.txt 或者 vim test.txt 或者 touch test.txt 2.vi/vim 使用 基本上 vi/vim 共分为三种模式,分别是命令模式(Co ...
- 大文件断点续传webupload插件
javaweb上传文件 上传文件的jsp中的部分 上传文件同样可以使用form表单向后端发请求,也可以使用 ajax向后端发请求 1. 通过form表单向后端发送请求 <form id=&quo ...