linux编译安装mysql5.7
一、下载源码包
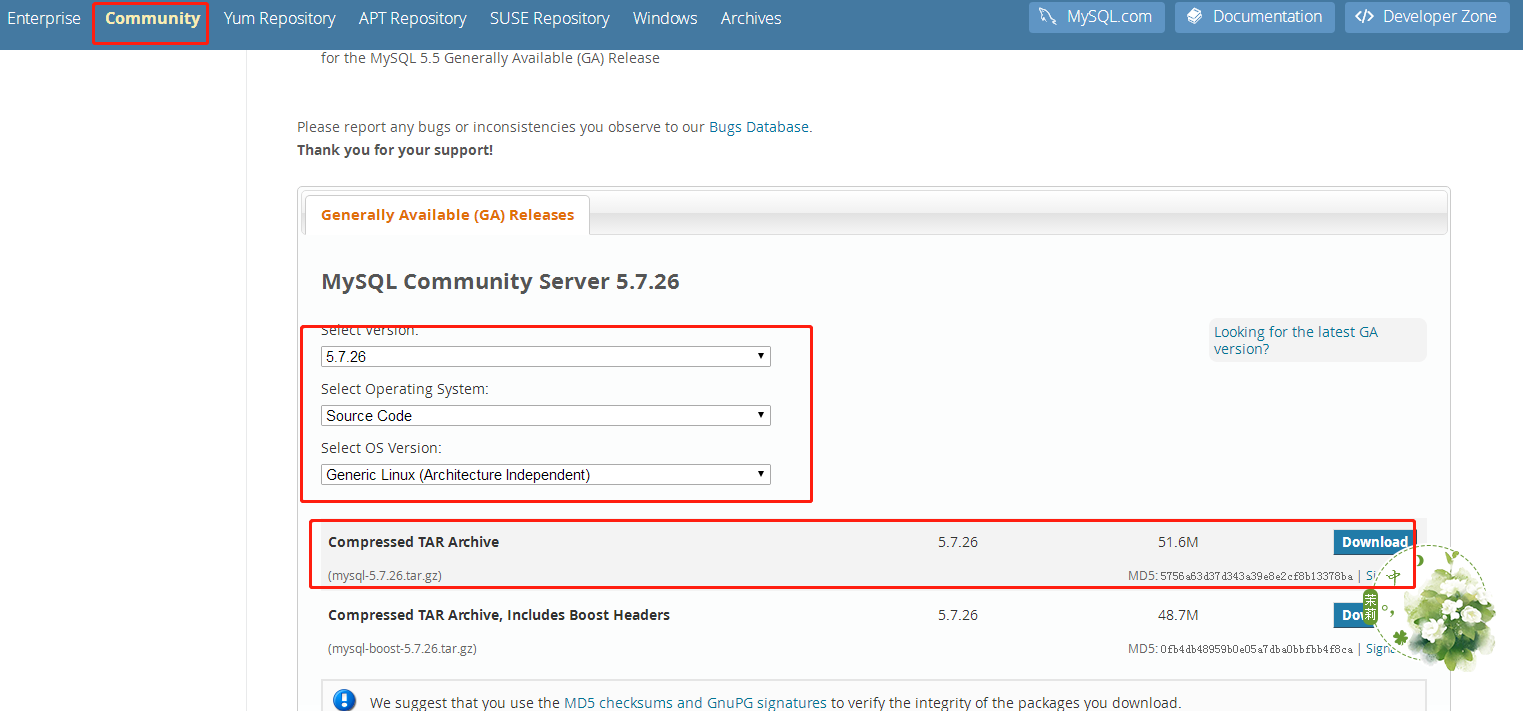
mkdir  /usr/local/src/mysql-5.7.-src

cd /usr/local/src/mysql-5.7.-src

wget https://dev.mysql.com/get/Downloads/MySQL-5.7/mysql-5.7.26.tar.gz
二、添加mysql用户和组
[root@node2 ~]# groupadd  mysql

[root@node2 ~]# id myql

id: myql: no such user

[root@node2 ~]# useradd -d /home/myql -g mysql -m mysql

[root@node2 ~]# id mysql

uid=(mysql) gid=(mysql) 组=(mysql)
[root@node2 ~]# passwd mysql

更改用户 mysql 的密码 。

新的 密码:

重新输入新的 密码:

passwd:所有的身份验证令牌已经成功更新。
三、新建相关目录,并赋权限给mysql用户
[root@node2 home]# mkdir /home/mysql-5.7.

[root@node2 home]# mkdir /home/mysql-5.7./data

[root@node2 home]# mkdir -p /home/mysql-5.7./log[root@node2 home]# mkdir -p /home/mysql-5.7./run

[root@node2 home]# mkdir -p /home/mysql-5.7./tmp
[root@node2 home]# chown -R mysql:mysql /home/mysql-5.7./

[root@node2 home]# ll

总用量

drwxr-xr-x  mysql mysql  5月    : mysql-5.7.

[root@node2 home]# cd mysql-5.7./

[root@node2 mysql-5.7.]# ll

总用量

drwxr-xr-x  mysql mysql   5月    : data

drwxr-xr-x  mysql mysql  5月    : log

drwxr-xr-x  mysql mysql   5月    : run

[root@node2 mysql-5.7.]# chmod -R  /home/mysql-5.7./

[root@node2 mysql-5.7.]# ll

总用量

drwxr-xr-x  mysql mysql   5月    : data

drwxr-xr-x  mysql mysql  5月    : log

drwxr-xr-x  mysql mysql   5月    : run
四、解压源码包
cd /usr/local/src/mysql-5.7.-src

tar -zxvf mysql-5.7..tar.gz
五、安装相关依赖包
yum install cmake gcc gcc-c++ ncurses-devel bison zlib libxml openssl automake autoconf make libtool bison-devel libaio-devel
六、安装boost
cd /usr/local

wget http://downloads.sourceforge.net/project/boost/boost/1.59.0/boost_1_59_0.tar.gz

tar -zxvf  boost_1_59_0.tar.gz
七、编译安装
cmake \

-DCMAKE_INSTALL_PREFIX=/home/mysql-5.7. \    #安装目录
-DINSTALL_DATADIR=/home/mysql-5.7./data \ #数据目录
-DDEFAULT_CHARSET=utf8 \   #默认编码

-DDEFAULT_COLLATION=utf8_general_ci \  #默认校验规则

-DEXTRA_CHARSETS=all \

-DWITH_SSL=yes \

-DWITH_EMBEDDED_SERVER= \

-DENABLED_LOCAL_INFILE= \

-DWITH_MYISAM_STORAGE_ENGINE= \    #激活myisam

-DWITH_INNOBASE_STORAGE_ENGINE= \  #激活innodb

-DWITH_ARCHIVE_STORAGE_ENGINE= \    #

-DWITH_BLACKHOLE_STORAGE_ENGINE= \

-DWITH_FEDERATED_STORAGE_ENGINE= \

-DWITH_PARTITION_STORAGE_ENGINE= \

-DMYSQL_UNIX_ADDR=/home/mysql-5.7./run/mysql.sock \  #sock目录

-DMYSQL_TCP_PORT= \    #端口

-DENABLED_LOCAL_INFILE= \  #允许导入数据

-DSYSCONFDIR=/etc \

-DWITH_READLINE=on \   #快捷键功能

-DWITH_BOOST=/usr/local/boost_1_59_0 \  #增强插件
make
最后出现:
[%] Building CXX object mysql-test/lib/My/SafeProcess/CMakeFiles/my_safe_process.dir/safe_process.cc.o

Linking CXX executable my_safe_process

[%] Built target my_safe_process
编译成功,再执行
make install
最后出现:
-- Installing: /home/mysql-5.7././COPYING-test

-- Installing: /home/mysql-5.7././README-test

-- Up-to-date: /home/mysql-5.7./mysql-test/mtr

-- Up-to-date: /home/mysql-5.7./mysql-test/mysql-test-run

-- Installing: /home/mysql-5.7./mysql-test/lib/My/SafeProcess/my_safe_process

-- Up-to-date: /home/mysql-5.7./mysql-test/lib/My/SafeProcess/my_safe_process

-- Installing: /home/mysql-5.7./mysql-test/lib/My/SafeProcess/Base.pm

-- Installing: /home/mysql-5.7./support-files/mysqld_multi.server

-- Installing: /home/mysql-5.7./support-files/mysql-log-rotate

-- Installing: /home/mysql-5.7./support-files/magic

-- Installing: /home/mysql-5.7./share/aclocal/mysql.m4

-- Installing: /home/mysql-5.7./support-files/mysql.server
进入/home/mysql-5.7.26/目录
[root@node2 mysql-5.7.]# ll

总用量

drwxr-xr-x   root  root    5月   : bin

-rw-r--r--   root  root   4月   : COPYING

-rw-r--r--   root  root   4月   : COPYING-test

drwxr-xr-x   mysql mysql      5月    : data

drwxr-xr-x   root  root      5月   : docs

drwxr-xr-x   root  root    5月   : include

drwxr-xr-x   root  root     5月   : lib

drwxr-xr-x   mysql mysql     5月    : log

drwxr-xr-x   root  root      5月   : man

drwxr-xr-x  root  root    5月   : mysql-test

-rw-r--r--   root  root    4月   : README

-rw-r--r--   root  root    4月   : README-test

drwxr-xr-x   mysql mysql      5月    : run

drwxr-xr-x  root  root    5月   : share

drwxr-xr-x   root  root      5月   : support-files

drwxr-xr-x   mysql mysql      5月    : tmp
安装成功
八、编写配置文件my.cnf
mkdir /etc/mysql

cd /etc/mysql

vim my.cnf

[mysqld]

basedir=/home/mysql-5.7.

datadir=/home/mysql-5.7./data

socket=/home/mysql-5.7./mysql.sock

user=mysql

symbolic-links=

[mysqld_safe]

log-error=/home/mysql-5.7./log/mysqld.log

pid-file=/home/mysql-5.7./run/mysqld.pid
九、初始化系统数据库
[root@node2 bin]# ./mysqld –defaults-file=/etc/mysql/my.cnf --initialize --user=mysql --basedir=/home/mysql-5.7./ --datadir=/home/mysql-5.7./data/

--15T06::.880090Z  [Warning] TIMESTAMP with implicit DEFAULT value is deprecated. Please use --explicit_defaults_for_timestamp server option (see documentation for more details). --15T06::.176430Z  [Warning] InnoDB: New log files created, LSN= --15T06::.525258Z  [Warning] InnoDB: Creating foreign key constraint system tables. --15T06::.673537Z  [Warning] No existing UUID has been found, so we assume that this is the first time that this server has been started. Generating a new UUID: ddbee8c3-76da-11e9--90b11c15be09. --15T06::.693221Z  [Warning] Gtid table is not ready to be used. Table 'mysql.gtid_executed' cannot be opened. --15T06::.209547Z  [Warning] CA certificate ca.pem is self signed. --15T06::.257442Z  [Note] A temporary password is generated for root@localhost: O3CaqsqoDy+V
这里显示了第一次登陆时的临时密码,需要记下来
十、启动
[root@node2 bin]# touch /home/mysql-5.7./log/mysqld.log

[root@node2 bin]# chown -R mysql:mysql /home/mysql-5.7./log/mysqld.log

[root@node2 bin]# ./mysqld_safe --defaults-file=/etc/mysql/my.cnf --user=mysql

--15T06::.794898Z mysqld_safe Logging to '/home/mysql-5.7.26/log/mysqld.log'.

--15T06::.826283Z mysqld_safe Starting mysqld daemon with databases from /home/mysql-5.7./data
十一、添加MySQL服务
cp /home/mysql-5.7.26/support-files/mysql.server /etc/init.d/mysqld

chmod  /etc/init.d/mysqld
十二、启动服务
[root@node2 bin]# service mysqld start

Starting MySQL. SUCCESS!
十三、添加mysql的环境变量
vim /etc/profile

最后一行添加

export PATH=/home/mysql-5.7./bin:$PATH
source /etc/profile
十四、连接mysql
先查看mysqld.log日志,查找初始密码,初始密码是在第一次运行初始化数据库时由系统生成的
[root@node2 data]# cat /home/mysql-5.7./log/mysqld.log |grep password

--15T03::.137254Z  [Note] A temporary password is generated for root@localhost: 1ws;,dEy?kM#
登录
[root@node2 bin]# mysql -uroot -p

Enter password:

Welcome to the MySQL monitor.  Commands end with ; or \g.

Your MySQL connection id is

Server version: 5.7.

Copyright (c) , , Oracle and/or its affiliates. All rights reserved.

Oracle is a registered trademark of Oracle Corporation and/or its

affiliates. Other names may be trademarks of their respective

owners.

Type 'help;' or '\h' for help. Type '\c' to clear the current input statement.

mysql>
登录成功,此时执行任何命令,提示
mysql> show databases;

ERROR  (HY000): You must reset your password using ALTER USER statement before executing this statement.
需要首先修改密码
mysql> set PASSWORD=PASSWORD('xxxxxxxx');

Query OK,  rows affected,  warning (0.01 sec)

mysql> alter user 'root'@'localhost' PASSWORD EXPIRE NEVER;

Query OK,  rows affected (0.00 sec)

mysql> flush privileges;

Query OK,  rows affected (0.00 sec)
退出,重新登录
[root@node2 log]# /home/mysql-5.7./bin/mysql -uroot -p

Enter password:

Welcome to the MySQL monitor.  Commands end with ; or \g.

Your MySQL connection id is

Server version: 5.7. Source distribution

Copyright (c) , , Oracle and/or its affiliates. All rights reserved.

Oracle is a registered trademark of Oracle Corporation and/or its

affiliates. Other names may be trademarks of their respective

owners.

Type 'help;' or '\h' for help. Type '\c' to clear the current input statement.

mysql> show database;

+--------------------+

| Database           |

+--------------------+

| information_schema |

| mysql              |

| performance_schema |

| sys                |

+--------------------+

 rows in set (0.00 sec
可以执行命令了
linux编译安装mysql5.7的更多相关文章
- 转:Linux 编译安装 Mysql5.7
http://broqiang.com/2017/04/18/Mysql-Install-5.7.18-Linux-Compile/ 原文 Linux 编译安装 Mysql5.7 Ubuntu 下快速 ...
- Linux编译安装MySQL5.6
为了防止无良网站的爬虫抓取文章,特此标识,转载请注明文章出处.LaplaceDemon/SJQ. http://www.cnblogs.com/shijiaqi1066/p/4311061.html ...
- linux编译安装mysql5.1.x
安装mysql,安装前准备 如果mysql用户不存在,那么添加mysql用户 groupadd mysql useradd -g mysql mysql mysql编译安装 make时间特别长 wge ...
- linux上源码编译安装mysql-5.6.28
在 linux 上编译安装 mysql-.tar.gz http://www.mysql.com/ mysql下载地址: http://www.mysql.com/downloads/mysql/#d ...
- Linux源码编译安装MySQL5.7
目录[-] 一.环境准备: 二.升级系统: 三.做一些准备工作(以下Linux命令均在su到root用户操作): 四.开始编译安装mysql-5.7.9: 一.环境准备: 我尝试过以下环境都是能成功的 ...
- 【转】linux 编译安装nginx,配置自启动脚本
linux 编译安装nginx,配置自启动脚本 本文章来给各位同学介绍一篇关于linux 编译安装nginx,配置自启动脚本教程,希望有需要了解的朋友可一起来学习学习哦. 在公司的suse服务器装ng ...
- centos6.5环境源码编译安装mysql5.6.34
centos6.5环境源码编译安装mysql5.6.34 源码下载地址http://dev.mysql.com/downloads/mysql/5.6.html#downloads 选择Generic ...
- Ubuntu14.04编译安装mysql5.6.26
Ubuntu14.04编译安装mysql5.6.26 (1)安装编译源码需要的包 sudo apt-get install make cmake gcc g++ bison libncurses5-d ...
- linux 编译安装nginx,配置自启动脚本
本文章来给各位同学介绍一篇关于linux 编译安装nginx,配置自启动脚本教程,希望有需要了解的朋友可一起来学习学习哦. 在公司的suse服务器装nginx,记录下安装过程: 参照这篇文章:Linu ...
随机推荐
- Oracle9i的详细安装与卸载步骤(有图解)
Oracle9i的安装和卸载详解 本章将以Windows操作系统为例讲述Oracle9i数据库的安装 ...
- vue的周期函数
beforeCreate(创建前) created(创建后) beforeMount(载入前) mounted(载入后) beforeUpdate(更新前) updated(更新后) beforeDe ...
- template要加s,重启服务,不然报错
- Python学习笔记:(十二)输入输出
一.格式化输出 1.str.format()函数,格式化输出值 2.将输出值转变为字符串,可以使用repr()和str() str()函数将返回一个易读的表达式形式: repr()返回一个解释器易读的 ...
- mysql——前面内容——前期整理笔记00
), sname ), sage ), ssex ) ); ','zhaolei','1990-01-01','nan'); ','qiandian','1990-12-21','nan'); ',' ...
- python 并发编程 多线程与多进程的区别
1.开进程的开销远大于开线程 2 同一进程内的线程共享该进程的数据,进程之间地址空间是隔离的 1 开进程的开销远大于开线程 from multiprocessing import Process de ...
- [转帖]教你如何修改运行中的docker容器的端口映射
教你如何修改运行中的docker容器的端口映射 在docker run创建并运行容器的时候,可以通过-p指定端口映射规则.但是,我们经常会遇到刚开始忘记设置端口映射或者设置错了需要修改.当dock ...
- 【五一qbxt】test2
又犯了一些迷之错误??要不然yy鼠标就是我的了 1.Superman: 小姐姐的题解:直接用set模拟即可emmmm 里面有很多指针啊,乱七八糟的,不会qwq,先看看我的大模拟吧: #include& ...
- wpf学习笔记(1)
wpf常用控件 0x01. 常用布局控件 1.Canvas 不会对子控件施加任何帮助,也不会施加任何限制 2.DockPanel 可以让子控件贴靠在自己四条边的任意一边 ,最后一个子控件充满剩余区域 ...
- Nginx与PHP如何协同工作
要说Nginx与PHP如何协同工作,首先得说CGI和FastCGI两个协议. CGI是Web Server与后台语言交互的协议,有了这个协议,开发者可以使用任何语言处理Web Server发来的请求, ...