
ASP.NET Core的身份认证框架IdentityServer4--(2)API跟WEB端配置
API配置
可以使用ASP.NET Core Web API模板。同样,我们建议您控制端口并使用与之前一样的方法来配置Kestrel和启动配置文件。端口配置为http://localhost:5001。
在项目Api中添加一个IdentityController控制器代码如下:
[Route("identity")]

[Authorize]

public class IdentityController : ControllerBase

{

    [HttpGet]

    public IActionResult Get()

    {

        return new JsonResult(from c in User.Claims select new { c.Type, c.Value });

    }

}
稍后将使用此控制器来测试授权要求,并通过API返回的数据显示身份声明。
配置AccessTokenValidation
添加NuGet包IdentityServer4.AccessTokenValidation到项目中
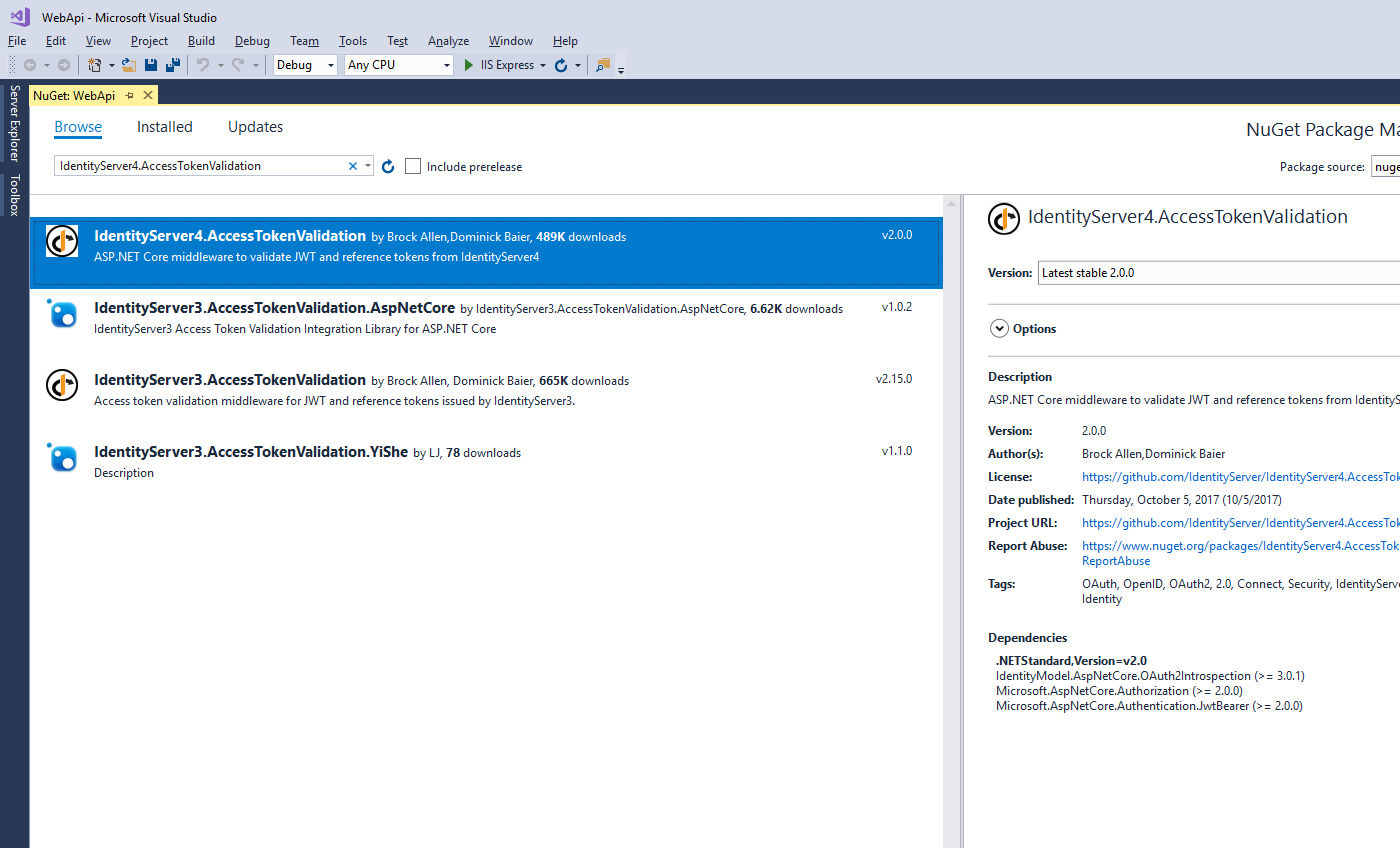
更新Startup.cs代码如下:
namespace API

{

    public class Startup

    {

        public Startup(IConfiguration configuration)

        {

            Configuration = configuration;

        }

        public IConfiguration Configuration { get; }

        // This method gets called by the runtime. Use this method to add services to the container.

        public void ConfigureServices(IServiceCollection services)

        {

            services.AddMvcCore()

               .AddAuthorization()//添加身份验证服务

               .AddJsonFormatters();

            //AddAuthentication将身份验证服务添加到DI并配置"Bearer"为默认方案

            services.AddAuthentication("Bearer")

                    .AddIdentityServerAuthentication(options =>

                    {

                        options.Authority = "http://localhost:5000";//identifyServer服务地址

                        options.RequireHttpsMetadata = false;//是否使用https

                        options.ApiName = "api1";//进行身份验证的API资源的名称

                    });

        }

        // This method gets called by the runtime. Use this method to configure the HTTP request pipeline.

        public void Configure(IApplicationBuilder app, IHostingEnvironment env)

        {

            if (env.IsDevelopment())

            {

                app.UseDeveloperExceptionPage();

            }

            //将身份验证中间件添加到管道中

            app.UseAuthentication();

            app.UseMvc();

        }

    }

}
AddAuthentication将认证服务添加到DI并配置"Bearer"为默认方案。AddIdentityServerAuthentication将IdentityServer访问令牌验证处理程序添加到DI以供验证服务使用。 UseAuthentication将认证中间件添加到请求管道中,以便每次调用主机时自动执行认证。
如果您使用浏览器导航到控制器(http://localhost:5001/identity),则应该获得401状态码。这意味着您的API需要一个凭证。
就是这样,API现在由IdentityServer保护。
WEB配置
最后一步是编写一个客户端请求访问令牌,然后使用此令牌访问该API。
IdentityServer中的令牌端点实现了OAuth 2.0协议,您可以使用原始HTTP访问它。然而,我们有一个名为IdentityModel的客户端库,它将协议交互封装在易于使用的API中。
官方源码参考地址:点击这里将 NuGet包IdentityModel添加到您的应用程序。
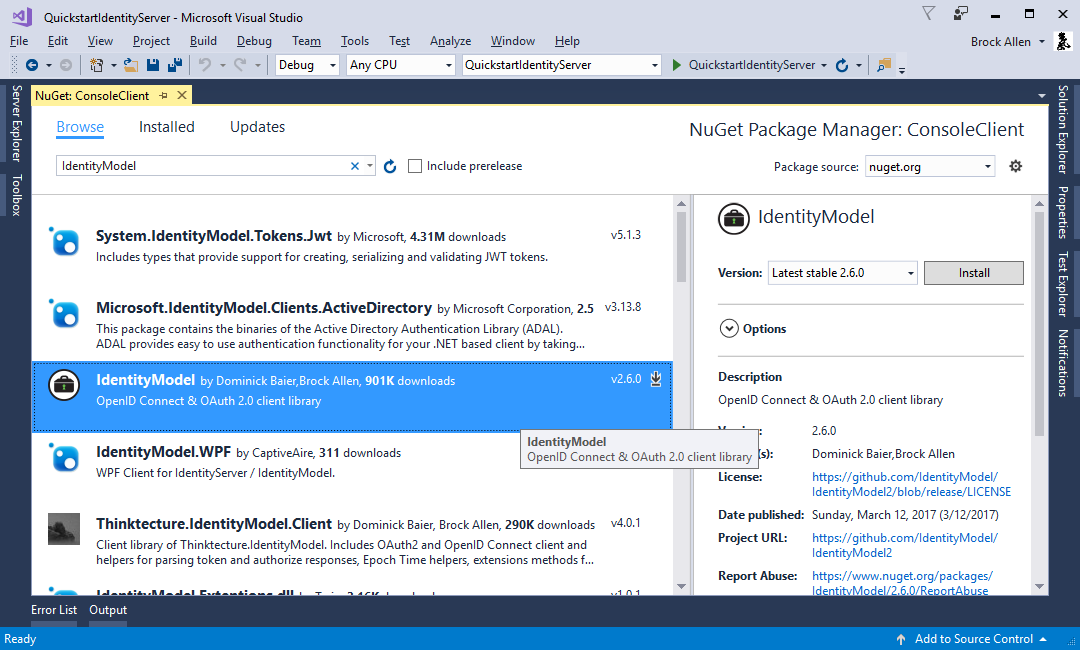
IdentityModel包含一个用于发现端点的客户端库。这样你只需要知道IdentityServer的访问地址 - 实际的端点地址可以从元数据中读取
// 从元数据中发现端口

var disco = await DiscoveryClient.GetAsync("http://localhost:5000");

if (disco.IsError)

{

    Console.WriteLine(disco.Error);

    return;

}
接着你可以使用 TokenClient 来请求令牌。为了创建一个该类型的实例,你需要传入令牌端点地址、客户端id和密码。
然后你可以使用 RequestClientCredentialsAsync 方法来为你的目标 API 请求一个令牌:
// 请求令牌

var tokenClient = new TokenClient(disco.TokenEndpoint, "client", "secret");

var tokenResponse = await tokenClient.RequestClientCredentialsAsync("api1");

if (tokenResponse.IsError)

{

    Console.WriteLine(tokenResponse.Error);

    return;

}

Console.WriteLine(tokenResponse.Json);
最后调用API。
为了发送访问令牌到 API,你一般要使用 HTTP 授权 header。这可以通过 SetBearerToken 扩展方法来实现:
// 调用api

var client = new HttpClient();

client.SetBearerToken(tokenResponse.AccessToken);

var response = await client.GetAsync("http://localhost:5001/identity");

if (!response.IsSuccessStatusCode)

{

    Console.WriteLine(response.StatusCode);

}

else

{

    var content = await response.Content.ReadAsStringAsync();

    Console.WriteLine(JArray.Parse(content));

}
依次启动项目QuickstartIdentityServer、API、WEB
最后查看输出结果

注意:默认情况下,访问令牌将包含关于作用域,生命周期(nbf和exp),客户端ID(client_id)和发行者名称(iss)的声明。
ASP.NET Core的身份认证框架IdentityServer4--(2)API跟WEB端配置的更多相关文章
- ASP.NET Core的身份认证框架IdentityServer4(6)- 开始
安装和概述 启动一个新的IdentityServer项目有两种基本方法: 从头开始 从Visual Studio中的ASP.NET身份模板开始 如果从头开始,我们提供了一些文档.项目帮助和内存存储支持 ...
- ASP.NET Core的身份认证框架IdentityServer4(7)- 使用客户端证书控制API访问
前言 今天(2017-9-8,写于9.8,今天才发布)一口气连续把最后几篇IdentityServer4相关理论全部翻译完了,终于可以进入写代码的过程了,比较累.目前官方的文档和Demo以及一些相关组 ...
- ASP.NET Core的身份认证框架IdentityServer4(1)-特性一览
IdentityServer4是ASP.NET Core的一个包含OpenID和OAuth 2.0协议的框架.OpenID和OAuth 的区别请看 https://www.zhihu.com/ques ...
- ASP.NET Core的身份认证框架IdentityServer4(5)- 包和构建
包和构建 IdentityServer有许多nuget包 IdentityServer4 nuget | github 包含IdentityServer核心对象模型,服务和中间件. 仅支持内存配置和用 ...
- ASP.NET Core的身份认证框架IdentityServer4(9)-使用OpenID Connect添加用户认证
OpenID Connect OpenID Connect 1.0是OAuth 2.0协议之上的一个简单的身份层. 它允许客户端基于授权服务器执行的身份验证来验证最终用户的身份,以及以可互操作和类似R ...
- ASP.NET Core的身份认证框架IdentityServer4(3)-术语的解释
IdentityServer4 术语 IdentityServer4的规范.文档和对象模型使用了一些你应该了解的术语. 身份认证服务器(IdentityServer) IdentityServer是一 ...
- ASP.NET Core的身份认证框架IdentityServer4(8)- 使用密码认证方式控制API访问
前言 本文及IdentityServer这个系列使用的都是基于.net core 2.0的.上一篇博文在API项目中我使用了icrosoft.AspNetCore.Authentication.Jwt ...
- ASP.NET Core的身份认证框架IdentityServer4(4)- 支持的规范
IdentityServer实现以下规范: OpenID Connect OpenID Connect Core 1.0 (spec) OpenID Connect Discovery 1.0 (sp ...
- ASP.NET Core的身份认证框架IdentityServer4--入门
ASP.NET Core的身份认证框架IdentityServer4--入门 2018年08月11日 10:09:00 qq_42606051 阅读数 4002 https://blog.csdn ...
- ASP.NET Core的身份认证框架IdentityServer4--(3)令牌服务配置访问控制跟UI添加
使用密码保护API OAuth 2.0 资源所有者密码授权允许一个客户端发送用户名和密码到IdentityServer并获得一个表示该用户的可以用于访问api的Token. 该规范建议仅对" ...
随机推荐
- winform webbrowser如何强制使用ie11内核?
webkit.net ,cefsharp,openwebkit.net等这些基于谷歌或者基于firfox内核的浏览器有个共同点,就是必须指定winform为x86的才能使用, 而且使用过程中也是各种坑 ...
- win7 mysql 数据库轻松实现数据库定时备份
本地备份: 第一步: 安装一个mysql. 第二步: 在命令行中配置mysql 打开环境变量将mysql 安装路径配置到path中 第三部: cmd 中输入:mysqldump -uroot -p12 ...
- 如何去掉ul标签的多余空白或多余大距离?
在css中写入 ul{ margin:; padding:; list-style: none; } 让其内边距和外边距为0,列表样式为空
- junit忽略测试方法
JUnit 提供注解 org.junit.Ignore 用于暂时忽略某个测试方法或者说整个类.因为有时候由于测试环境受限,并不能保证每一个测试方法都能正确运行. 1,方法级别上使用@ignore来注释 ...
- Newtonsoft.Json 版本冲突时解决方案
如果同一项目中不同第三方类库分别使用了不同版本的Newtonsoft.Json的情况下,可以在主项目配置文件中添加以下节点,将0.0.0.0-11.0.0.0此区间的Newtonsoft.Json使用 ...
- 号外号外!解决github+hexo+yilia评论插件的问题!!!
先走一波效果图! 本人网站--http://www.wenzheng.club/ ps:效果还是不错的,支持QQ微信登录,支持表情,甚至gif动图评论! 插件采用韩国服务器的来必力评论插件--h ...
- Hyperledger Fabric Chaincode for Operators——实操智能合约
什么是Chaincode(智能合约)? chaincode是一个程序,它是使用Go语言编写的,最终在Java等其他编程语言中实现了指定的接口.chaincode运行在一个被背书peer进程独立出来的安 ...
- HTTP请求和MIME介绍
HTTP请求和MIME介绍 HTTP请求由三部分组成,分别是: 请求行,消息报头,请求正文. 请求行(格式): Method Request-URI HTTP-Version CRLF Method: ...
- ADB Shell之手机性能测试
Connect 夜神模拟器for Android 4.4.2 打开模拟器-在CMD输入如下连接测试设备 adb connect 127.0.0.1:62001 你也可以连接自己的手机设备 开发者选项- ...
- spring之AspectJ基于xml AOP编程
一.引言: AspectJ框架不仅实现了面向切面编程,而且还支持注解,spring将它引入自己的规范之中. 二.需要了解: AspectJ是基于java语言的AOP框架 spring2.0之后支持As ...