【spring源码分析】IOC容器初始化——查漏补缺(三)
前言:本文分析InitializingBean和init-method方法,其实该知识点在AbstractAutowireCapableBeanFactory#initializeBean方法中有所提及,这里对其进行详细分析。
InitializingBean
InitializingBean是一个接口,它只包含一个afterPropertiesSet方法:
 public interface InitializingBean {

     /**

      * 该方法在BeanFactory设置完了所有的属性之后被调用<br/>

      * 该方法允许bean实例设置了所有bean属性时执行初始化工作,如果该过程出现了错误,则需要抛出异常<br/>

      * Invoked by the containing {@code BeanFactory} after it has set all bean properties

      * and satisfied {@link BeanFactoryAware}, {@code ApplicationContextAware} etc.

      * <p>This method allows the bean instance to perform validation of its overall

      * configuration and final initialization when all bean properties have been set.

      *

      * @throws Exception in the event of misconfiguration (such as failure to set an

      *                   essential property) or if initialization fails for any other reason

      */

     void afterPropertiesSet() throws Exception;

 }
分析:
Spring在完成实例化后,设置完所有属性,进行"Aware"接口和"BeanPostProcessor"前置处理后,会接着检测当前bean对象是否实现了InitializingBean接口,如果是,则会调用其afterPropertiesSet方法进一步调整bean实例对象的状态。
InitializingBean示例
 public class UserDefinedInitializingBean implements InitializingBean {

     private String msg;

     public String getMsg() {

         return msg;

     }

     public void setMsg(String msg) {

         this.msg = msg;

     }

     @Override

     public void afterPropertiesSet() throws Exception {

         System.out.println("InitializingBean afterPropertiesSet......");

         this.msg = "修改了msg,msg=hello initializingBean!!!!!!";

     }

 }
进行如下配置:
 <bean id="userDefinedInitializingBean" class="com.dev.basebean.initializingbean.UserDefinedInitializingBean"

           p:msg="i am msg!!!"/>
测试:
 @Test

     public void initializingBeanTest() {

         ApplicationContext context = new ClassPathXmlApplicationContext("classpath*:com/dev/config/initializingbean/initializingbean.xml");

         UserDefinedInitializingBean initializingBean = context.getBean(UserDefinedInitializingBean.class);

         System.out.println(initializingBean.getMsg());

     }
运行结果如下:

从运行结果来看,msg属性被我们修改了,在afterPropertiesSet方法中,这相当于Spring又提供给我们一种可以改变bean实例对象的方法。
invokeInitMethods
InitializingBean的afterPropertiesSet方法就是在invokeInitMethods方法中被执行的。
AbstractAutowireCapableBeanFactory#invokeInitMethods:
 protected void invokeInitMethods(String beanName, final Object bean, @Nullable RootBeanDefinition mbd)

             throws Throwable {

         // 首先先检查是否是InitializingBean,如果是,则需要调用afterPropertiesSet()

         boolean isInitializingBean = (bean instanceof InitializingBean);

         if (isInitializingBean && (mbd == null || !mbd.isExternallyManagedInitMethod("afterPropertiesSet"))) {

             if (logger.isDebugEnabled()) {

                 logger.debug("Invoking afterPropertiesSet() on bean with name '" + beanName + "'");

             }

             // 安全模式

             if (System.getSecurityManager() != null) {

                 try {

                     AccessController.doPrivileged((PrivilegedExceptionAction<Object>) () -> {

                         ((InitializingBean) bean).afterPropertiesSet();

                         return null;

                     }, getAccessControlContext());

                 } catch (PrivilegedActionException pae) {

                     throw pae.getException();

                 }

             } else {

                 // 属性初始化处理

                 ((InitializingBean) bean).afterPropertiesSet();

             }

         }

         if (mbd != null && bean.getClass() != NullBean.class) {

             String initMethodName = mbd.getInitMethodName();

             if (StringUtils.hasLength(initMethodName) &&

                     !(isInitializingBean && "afterPropertiesSet".equals(initMethodName)) &&

                     !mbd.isExternallyManagedInitMethod(initMethodName)) {

                 // 激活用户自定义的初始化方法

                 invokeCustomInitMethod(beanName, bean, mbd);

             }

         }

     }
分析:
- 首先检查当前bean是否实现了InitializingBean接口,如果实现了,则调用其afterPropertiesSet方法。
- 然后再检查是否指定了init-method,如果指定了init-method方法,则通过反射进行调用。
init-method
对init-method进行示例,只需根据上面示例进行一点调整即可。
 <bean id="userDefinedInitializingBean" class="com.dev.basebean.initializingbean.UserDefinedInitializingBean"

           p:msg="i am msg!!!" init-method="initMethod"/>
在UserDefinedInitializingBean中增加如下代码:
 public void initMethod() {

         System.out.println("通过init-method方法对msg属性进行修改");

         this.msg = "修改了msg,msg=hello init-method!!!!!!";

     }
运行结果如下:
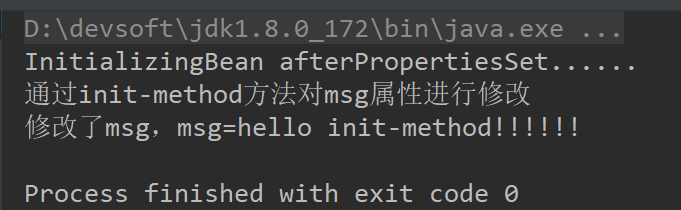
从结果上可以看到init-method方法是在afterPropertiesSet方法之后,并且达到了同样的效果,对代码无侵入性。
分析到这里其实已经把bean的生命周期都总结出来,下篇文章进行具体总结,这里想来看本篇小结。
总结
从invokeInitMethods方法中,我们知道init-method指定的方法会在afterPropertiesSet方法后执行,如果afterPropertiesSet方法执行过程中出现异常,init-method方法是不会执行的。使用init-method使其对业务代码的侵入降低,虽然init-method是基于xml配置文件的,但我们也可以通过@PostConstruct注解的形式来进行替换。
至此InitializingBean和init-method已分析完毕,对于DisposableBean和destroy-method与init相似,这里不再进行赘述。
by Shawn Chen,2019.05.05,下午。
【spring源码分析】IOC容器初始化——查漏补缺(三)的更多相关文章
- 【spring源码分析】IOC容器初始化——查漏补缺(一)
前言:在[spring源码分析]IOC容器初始化(十一)中提到了初始化bean的三个步骤: 激活Aware方法. 后置处理器应用(before/after). 激活自定义的init方法. 这里我们就来 ...
- 【spring源码分析】IOC容器初始化——查漏补缺(五)
前言:我们知道在Spring中经常使用配置文件的形式对进行属性的赋值,那配置文件的值是怎么赋值到属性上的呢,本文将对其进行分析. 首先了解一个类:PropertySourcesPlaceholderC ...
- 【spring源码分析】IOC容器初始化——查漏补缺(二)
前言:在[spring源码分析]IOC容器初始化(八)中多次提到了前置处理与后置处理,本篇文章针对此问题进行分析.Spring对前置处理或后置处理主要通过BeanPostProcessor进行实现. ...
- 【spring源码分析】IOC容器初始化——查漏补缺(四)
前言:在前几篇查漏补缺中,其实我们已经涉及到bean生命周期了,本篇内容进行详细分析. 首先看bean实例化过程: 分析: bean实例化开始后 注入对象属性后(前面IOC初始化十几篇文章). 检查激 ...
- SPRING源码分析:IOC容器
在Spring中,最基本的IOC容器接口是BeanFactory - 这个接口为具体的IOC容器的实现作了最基本的功能规定 - 不管怎么着,作为IOC容器,这些接口你必须要满足应用程序的最基本要求: ...
- Spring源码解析-ioc容器的设计
Spring源码解析-ioc容器的设计 1 IoC容器系列的设计:BeanFactory和ApplicatioContext 在Spring容器中,主要分为两个主要的容器系列,一个是实现BeanFac ...
- spring源码分析---IOC(1)
我们都知道spring有2个最重要的概念,IOC(控制反转)和AOP(依赖注入).今天我就分享一下spring源码的IOC. IOC的定义:直观的来说,就是由spring来负责控制对象的生命周期和对象 ...
- spring 源码之 ioc 容器的初始化和注入简图
IoC最核心就是两个过程:IoC容器初始化和IoC依赖注入,下面通过简单的图示来表述其中的关键过程:
- Spring源码阅读-IoC容器解析
目录 Spring IoC容器 ApplicationContext设计解析 BeanFactory ListableBeanFactory HierarchicalBeanFactory Messa ...
随机推荐
- Redis 测试 数据类型
- 基于【 Docker】二 || Docker的入门安装
一.前提条件 本文介绍 Docker CE 的安装使用. 目前,CentOS 仅发行版本中的内核支持 Docker. Docker 运行在 CentOS 7 上,要求系统为64位.系统内核版本为 3. ...
- c#模拟鼠标左键单击
[System.Runtime.InteropServices.DllImport("user32.dll")] private static extern int mouse_e ...
- http服务详解(2)——httpd的配置文件常见设置
HTTP服务器应用 http服务器程序 httpd apache nginx lighttpd 应用程序服务器 IIS .asp tomcat .jsp jetty 开源的servlet容器,基于Ja ...
- [Python][pythonchallenge][TBC]古老的python在线挑战赛,很有意思 (C0-C4)
预计阅读时间:15分钟 背景:搜索资料时候偶然发现的,很有意思,每一关都覆盖了很多知识点 Python版本:3.0 Talking is cheap,show me the code 主页: http ...
- Vue 日期下拉框
<!-- html --> <template> <!-- 控件样式 --> <div class="select"> <di ...
- Windows安全应急响应(一)
入侵排查思路 检查账号安全 1.查看服务器是否有弱口令,远程管理端口是否对公网开放 2.查看服务器是否存在可以账号.新增账号 3.查看服务器是否存在隐藏账号.克隆账号检查方法:i.打开注册表,查看管理 ...
- 从c到c++<一>
逻辑型也称布尔型,其取值为true(逻辑真)和false(逻辑假),存储字节数在不同编译系统中可能有所不同,VC++中为1个字节. 声明方式: bool result; result=true; 可以 ...
- 简单的JAVAWeb选课系统
该系统管理员可以添加和删除学生.教师,教师可以修改自己信息.添加课程.浏览自己课程,学生可以修改自己的信息.选课.浏览全部课程. 首先展示文件: 然后就是一次展示代码: Guanli包中代码: pac ...
- 【转】解决 canvas 在高清屏中绘制模糊的问题
来源: http://www.css88.com/archives/9297 使用 canvas 绘制图片或者是文字在 Retina 屏中会非常模糊.如图: 因为 canvas 不是矢量图,而是像图片 ...