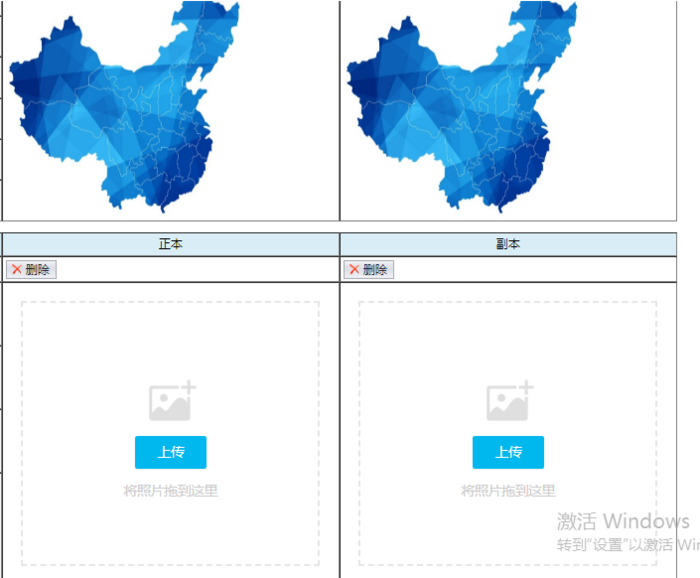
webuploader的一个页面多个上传按钮实例

借鉴一位大佬的demo 附上他的github地址https://github.com/lishuqi
我把他的cxuploader.js改了不需要预览 直接上传图片后拿到回传地址给img标签显示图片
    jQuery(function() {

        uploader = new Array();//创建 uploader数组

        // 优化retina, 在retina下这个值是2

        var ratio = window.devicePixelRatio || 1,

        // 缩略图大小

        thumbnailWidth = 100 * ratio,

        thumbnailHeight = 100 * ratio,

        supportTransition = (function(){

            var s = document.createElement('p').style,

            r = 'transition' in s ||

                  'WebkitTransition' in s ||

                  'MozTransition' in s ||

                  'msTransition' in s ||

                  'OTransition' in s;

            s = null;

            return r;

        })();

         // 所有文件的进度信息,key为file id

        var percentages = {};

        var state = 'pedding';

        //可行性判断

        if ( !WebUploader.Uploader.support() ) {

            alert( 'Web Uploader 不支持您的浏览器!如果你使用的是IE浏览器,请尝试升级 flash 播放器');

            throw new Error( 'WebUploader does not support the browser you are using.' );

        }

        //循环页面中每个上传域

        $('.uploder-container').each(function(index){

            // 添加的文件数量

            var fileCount = 0;

            // 添加的文件总大小

            var fileSize = 0;

            var filePicker=$(this).find('.filePicker');//上传按钮实例

            var queueList=$(this).find('.queueList');//拖拽容器实例

            var placeholder=$(this).find('.placeholder');//按钮与虚线框实例

            var statusBar=$(this).find('.statusBar');//再次添加按钮容器实例

            var info =statusBar.find('.info');//提示信息容器实例

            // 图片容器

            var queue = $('<ul class="filelist"></ul>').appendTo( queueList);

            var filePickerid = $(this).find('.filePicker').id;

            //初始化上传实例

            uploader[index] = WebUploader.create({

                pick: {

                    id:filePicker,

                    class:filePicker,

                    label: '上传'

                },

                dnd: queueList,

                //这里可以根据 index 或者其他,使用变量形式

                accept: {

                    title: 'Images',

                    extensions: 'gif,jpg,jpeg,bmp,png,doc',

                    mimeTypes: 'image/*'

                },

                // swf文件路径

                swf: 'js/Uploader.swf',

                disableGlobalDnd: true,//禁用浏览器的拖拽功能,否则图片会被浏览器打开

                chunked: false,//是否分片处理大文件的上传

                server: 'fileUpload.do',//上传地址

                fileNumLimit: 1,//一次最多上传文件个数

                fileSizeLimit: 10 * 1024 * 1024,    // 总共的最大限制10M

                fileSingleSizeLimit: 3 * 1024 * 1024 ,   // 单文件的最大限制3M

                auto :true,

                formData: {

                    token:index//可以在这里附加控件编号,从而区分是哪个控件上传的

                }

            });

            uploader[index].on('uploadSuccess',function(file,response){

                 alert(JSON.stringify(response));

                 console.log("file:",file);

                 console.log("response:",response);

                 console.log("fileAdress:",response.fileAdress);

                 var imageid = "#"+response.imageAddr+"_1";

                    mini.get(response.imageAddr).setValue(response.fileAdress);

                    placeholder.hide();

                    queueList.hide();

                 //document.getElementById(response.imageAddr).value=response.fileAdress;

                 $(imageid).attr("src",response.fileAdress);

                alert("上传成功");

            });

            //可以在这里附加额外上传数据

            uploader[index].on('uploadBeforeSend',function(object,data,header) {

                //alert("id:"+filePicker.attr("id"));

                //获得当前id的长度

                var divlen = filePicker.attr("id").length;

                //alert("divlen"+divlen);

                //截取id的值后两位不要

                var imageAddr = filePicker.attr("id").substring(0, divlen-2);

            var genre=$(":input[name='genre']").val();

              data=$.extend(data,{

               genre:genre,

               imageAddr:imageAddr

               });

           data.formData= {genre:genre,imageAddr:imageAddr};

            });

        });

    });
<script type="text/javascript">

/*删除图片  */

function deleteImage(path) {

    //图片名称

    var imageAddrs = mini.get(path).getValue();

    alert(path);

    alert(imageAddrs);

    mini.get(path).setValue("");

    $("#"+path+"_1").attr("src"," ");

    $("#"+path+"_5").hide();

    document.getElementById(path + "_4").style.display = '';

    document.getElementById(path + "_3").style.display = '';

    /*

    硬删除

    if (imageAddrs == ""|| imageAddrs== null|| imageAddrs == undefined) {

        alert("照片为空,请重新操作");

    }else{

        $.ajax({

            type : "POST",

            url : "ajax/removeImage",

            data : {

                imageAddr : imageAddrs

            },

            dataType : "json",

            // 下面三个参数要指定,如果不指定,会报一个JQuery的错误

            success : function(data) {

                console.log(data);

                console.log(data.mess);

                alert(data.mess);

                alert(imageAddrs);

                // 删除成功后刷新页面

                $(".cxuploder").html(page);

                 window.location.reload();

            }

        });

    } */

}

</script>
上传控制层
    // 允许上传图片的格式

    private static final String[] IMAGE_TYPE = { ".jpg", ".jpge", ".bmp", ".png", "gif" };

    /**

     *图片上传

     *

     * @param id

     * @param name

     * @param flog

     * @param autoId

     * @param size

     * @param type

     * @param file

     * @param request

     */

    @RequestMapping(value = "fileUpload.do",method = RequestMethod.POST)

    @ResponseBody

    public String fileUpload(String genre,String imageAddr,@RequestParam("file")MultipartFile file,HttpServletRequest request,HttpServletResponse response){

        Map<String,Object> resultMap=new HashMap <String, Object>();

        Boolean flag = false;

         System.out.println(file.getOriginalFilename());

        //校验图片格式

        for (String type : IMAGE_TYPE) {

            if (StringUtils.endsWithIgnoreCase(file.getOriginalFilename(), type)) {

                flag = true;

                break;

            }

        }

        //如果图片校验错误,直接返回。

        if (!flag) {

            return "";

        }

         //获取当前时间 File.separator等同于/或者\\

        String fileFolder = File.separator + DateUtil.getYear(new Date())

        + File.separator +  DateUtil.getMonth(new Date()) + File.separator

        + DateUtil.getDay(new Date());

        try {

            //设置根目录

            //设置根目录

            /*String filePathGen = request.getSession().getServletContext()

                    .getRealPath("/") + "upload/photoPhoto/images/";

            String uploadPath ="";*/

             String uploadPath="";//图片上传的目录

             InputStream in = this.getClass().getResourceAsStream("/conf.properties");

              Properties props = new Properties();

              InputStreamReader inputStreamReader = new InputStreamReader(in, "UTF-8");

              props.load(inputStreamReader);

              if("renyuan".equals(genre)) {

                  uploadPath = props.getProperty("Upload_path")+genre+fileFolder;

              }else if ("cheliang".equals(genre)) {

                  uploadPath =props.getProperty("Upload_path")+genre+fileFolder;

            }

                 System.out.println(file.getOriginalFilename());

              //生成图片的绝对路径

              //重新命名

                String  newFileName= "";

                String fileName = file.getOriginalFilename();

                  if(null!=fileName){

                      newFileName=UUID.randomUUID ()+fileName.substring (fileName.lastIndexOf ("."));

                  }

                //创建File对象

                File newfile = new File(uploadPath+File.separator+newFileName);

                //如果文件目录不存在,则进行创建

                if (!newfile.isDirectory()) {

                    newfile.mkdirs();

                }

                //把图片写入到磁盘中

                try {

                    file.transferTo(newfile);

                } catch (Exception e1) {

                    // TODO Auto-generated catch block

                    e1.printStackTrace();

                }

             resultMap.put("fileAdress","/upload"+File.separator+genre+fileFolder+File.separator+newFileName);

              resultMap.put("imageAddr",imageAddr);

              resultMap.put("uploadFlag",true);

             //获取照片类型  人员/车辆

            System.out.println(genre);

            System.out.println(imageAddr);

        } catch (Exception e) {

            e.printStackTrace();

            resultMap.put("uploadFlag",false);

        }

          String json=JSONObject.toJSONString(resultMap).toString();

          writeJson(json,response);

        return null;

    }

    /*

     * 写入数据

     */

    private void writeJson(String json, HttpServletResponse response) {

        response.setContentType("application/json;charset=UTF-8");

        PrintWriter out = null;

        try {

            out = response.getWriter();

            out.print(json);

            out.flush();

        } catch (Exception e) {

            e.printStackTrace();

        } finally {

            if (null != out) {

                out.close();

            }

        }

  }
上面的是上传图片的控制层,点击上传图片立马上传
webuploader的一个页面多个上传按钮实例的更多相关文章
- form表单的一个页面多个上传按钮实例
/* * 图片上传 */ @RequestMapping("/uploadFile") @ResponseBody public String uploadFile(@Reques ...
- webuploader 百度上传,一个页面多个上传按钮
需求:列表里每条数据需加文件上传 html: <div> <ul class="SR_wrap_pic"></ul> <button ty ...
- 用jQuery File Upload做的上传控件demo,支持同页面多个上传按钮
需求 有这么一个需求,一个form有多个文件要上传,但又不是传统的图片批量上传那种,是类似下图这种需求,一开始是用的swfupload做的上传,但是问题是如果有多个按钮的话,就要写很多重复的代码,于为 ...
- angular封装七牛云图片上传,解决同一页面多个上传按钮分别上传
step1:引入文件 引入Plupload *该SDK上传功能集于Plupload插件封装,所以需要下载Plupload; plupload.dev.js 引入qiniu.js为了简便,当时直接从官网 ...
- dropzonejs中文翻译手册 DropzoneJS是一个提供文件拖拽上传并且提供图片预览的开源类库.
http://wxb.github.io/dropzonejs.com.zh-CN/dropzonezh-CN/ 由于项目需要,完成一个web的图片拖拽上传,也就顺便学习和了解了一下前端的比较新的技术 ...
- 基于jQuery的ajax系列之用FormData实现页面无刷新上传
接着上一篇ajax系列之用jQuery的ajax方法向服务器发出get和post请求写,这篇主要写如何利用ajax和FormData实现页面无刷新的文件上传效果,主要用到了jQuery的ajax()方 ...
- 一个很不错的支持Ext JS 4的上传按钮
以前经常使用的swfUpload,自从2010年开始到现在,很久没更新了.而这几年,flash版本已经换了好多个,所以决定抛弃swfupload,使用新找到的上传按钮. 新的上传按钮由harrydel ...
- Django实现注册页面_头像上传
Django实现注册页面_头像上传 Django实现注册页面_头像上传 1.urls.py 配置路由 from django.conf.urls import url from django.cont ...
- DropzoneJS是一个提供文件拖拽上传并且提供图片预览的开源类库.
DropzoneJS是一个提供文件拖拽上传并且提供图片预览的开源类库. 它是轻量级的,不依赖任何其他类库(如JQuery)并且高度可定制. 试试看! 将文件拖至此处或点击上传.(这仅仅是 dropzo ...
随机推荐
- 使用SDL2出现 “error LNK2019: 无法解析的外部符号 _SDL_main,该符号在函数 _main 中被引用” 时的可能错误记录
这几天在使用SDL2,之前一直都没有错,直到上午把项目搬了个地方.结果一直出现 “error LNK2019: 无法解析的外部符号 _SDL_main,该符号在函数 _main 中被引用” . 看了网 ...
- C++异常安全
转自:http://www.cnblogs.com/zgfLawliet/p/3417308.html 异常安全的代码是指,满足两个条件 1异常中立性 : 是指当你的代码(包括你调用的代码)引发异 ...
- Python log 模块介绍
刚用Python log模块写了一个例子,记录一下. import logging import logging.handlers import os from datetime import dat ...
- 密码存储中MD5的安全问题与替代方案
md5安全吗?有多么地不安全?如何才能安全地存储密码?... md5安全吗? 经过各种安全事件后,很多系统在存放密码的时候不会直接存放明文密码了,大都改成了存放了 md5 加密(hash)后的密码,可 ...
- 【NLP_Stanford课堂】文本分类2
一.实验评估参数 实验数据本身可以分为是否属于某一个类(即correct和not correct),表示本身是否属于某一类别上,这是客观事实:又可以按照我们系统的输出是否属于某一个类(即selecte ...
- double转换long的疑问
在lua(5.1.4)下面测试的时候使用0x100000000的时候出现了问题,打印结果很明显,如下所示: Lua Copyright (C) - Lua.org, PUC-Rio > prin ...
- nginx转发配置
nginx upstream backend19050 { server 10.10.10.10:19050 max_fails=3 fail_timeout=30s; } server { list ...
- 生成证书,用于签名Android应用
1. keytool 命令 1)使用JDK中的一个命令keytool,都有哪些命令呢,使用 keytool -help 进行查看 2)本次使用 keytool -genkeypair 命令生成签名,查 ...
- springMVC+mybatis事务管理总结
1.spring,mybatis事务管理配置与@Transactional注解使用: 概述事务管理对于企业应用来说是至关重要的,即使出现异常情况,它也可以保证数据的一致性.Spring Framewo ...
- Zabbix监控mysql主从状态并实现报警
一.环境需求 主机A: zabbix-server 主机B: zabbix-agent/mysql从 二.主机B操作 1.添加监控脚本 vim /data/zabbix/mysql_slave_che ...
