android中shape的属性
<shape>

            <!– 实心 –>

            <solid android:color=”#ff9d77″/>

            <!– 渐变 –>

            <gradient

                android:startColor=”#ff8c00″

                android:endColor=”#FFFFFF”

                android:angle=”270″ />

            <!– 描边 –>

            <stroke

                android:width=”2dp”

                android:color=”#dcdcdc” />

            <!– 圆角 –>

            <corners

                android:radius=”2dp” />

            <padding

                android:left=”10dp”

                android:top=”10dp”

                android:right=”10dp”

                android:bottom=”10dp” />

        </shape>
solid:实心,就是填充的意思
android:color指定填充的颜色
gradient:渐变
android:startColor和android:endColor分别为起始和结束颜色,ndroid:angle是渐变角度,必须为45的整数倍。
另外渐变默认的模式为android:type=”linear”,即线性渐变,可以指定渐变为径向渐变,android:type=”radial”,径向渐变需要指定半径android:gradientRadius=”50″。
stroke:描边
android:width=”2dp”
描边的宽度,android:color
描边的颜色。
我们还可以把描边弄成虚线的形式,设置方式为:
android:dashWidth=”5dp”
android:dashGap=”3dp”
其中android:dashWidth表示’-‘这样一个横线的宽度,android:dashGap表示之间隔开的距离。
corners:圆角
android:radius为角的弧度,值越大角越圆。
我们还可以把四个角设定成不同的角度,方法为:
<corners

        android:topRightRadius=”20dp”    右上角

        android:bottomLeftRadius=”20dp”    右下角

        android:topLeftRadius=”1dp”    左上角

        android:bottomRightRadius=”0dp”    左下角

 />
这里有个地方需要注意,bottomLeftRadius是右下角,而不是左下角,这个有点郁闷,不过不影响使用,记得别搞错了就行。
还有网上看到有人说设置成0dp无效,不过我在测试中发现是可以的,我用的是2.2,可能修复了这个问题吧,如果无效的话那就只能设成1dp了。
padding:间隔
这个就不用多说了,XML布局文件中经常用到。
大体的就是这样,以下是一个使用的具体示例:用在Selector中作为Button的背景,分别定义了按钮的一般状态、获得焦点状态和按下时的状态,具体代码如下:
main.xml:
<Button

    android:layout_width=”wrap_content”

    android:layout_height=”wrap_content”

    android:text=”TestShapeButton”

    android:background=”@drawable/button_selector”

    />
button_selector.xml:
<?xml version=”1.0″ encoding=”utf-8″?>

<selector

    xmlns:android=”http://schemas.android.com/apk/res/android”>

    <item android:state_pressed=”true” >

        <shape>

            <!– 渐变 –>

            <gradient

                android:startColor=”#ff8c00″

                android:endColor=”#FFFFFF”

                android:type=”radial”

                android:gradientRadius=”50″ />

            <!– 描边 –>

            <stroke

                android:width=”2dp”

                android:color=”#dcdcdc”

                android:dashWidth=”5dp”

                android:dashGap=”3dp” />

            <!– 圆角 –>

            <corners

                android:radius=”2dp” />

            <padding

                android:left=”10dp”

                android:top=”10dp”

                android:right=”10dp”

                android:bottom=”10dp” />

        </shape>

    </item>

    <item android:state_focused=”true” >

        <shape>

            <gradient

                android:startColor=”#ffc2b7″

                android:endColor=”#ffc2b7″

                android:angle=”270″ />

            <stroke

                android:width=”2dp”

                android:color=”#dcdcdc” />

            <corners

                android:radius=”2dp” />

            <padding

                android:left=”10dp”

                android:top=”10dp”

                android:right=”10dp”

                android:bottom=”10dp” />

        </shape>

    </item>

    <item>

        <shape>

            <solid android:color=”#ff9d77″/>

            <stroke

                android:width=”2dp”

                android:color=”#fad3cf” />

            <corners

                android:topRightRadius=”5dp”

                android:bottomLeftRadius=”5dp”

                android:topLeftRadius=”0dp”

                android:bottomRightRadius=”0dp”

            />

            <padding

                android:left=”10dp”

                android:top=”10dp”

                android:right=”10dp”

                android:bottom=”10dp” />

        </shape>

    </item>

</selector>
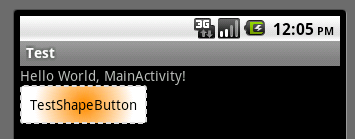
运行效果如下图:
一般状态:

获得焦点状态:
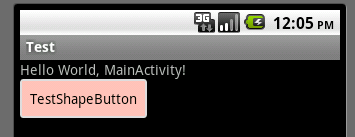
按下状态:
本文章转接于:http://kofi1122.blog.51cto.com/2815761/521605
android中shape的属性的更多相关文章
- Android中shape属性详解
一.简单使用 刚开始,就先不讲一堆标签的意义及用法,先简单看看shape标签怎么用. 1.新建shape文件 首先在res/drawable文件夹下,新建一个文件,命名为:shape_radius.x ...
- Android中的windowSoftInputMode属性详解
这篇文章主要介绍了Android中的windowSoftInputMode属性详解,本文对windowSoftInputMode的9个属性做了详细总结,需要的朋友可以参考下 在前面的一篇文章中 ...
- 【Android 界面效果19】Android中shape的使用
Android中常常使用shape来定义控件的一些显示属性,今天看了一些shape的使用,对shape有了大体的了解,稍作总结: 先看下面的代码: <shape> ...
- Android 中 shape 图形的使用
转载于:http://kofi1122.blog.51cto.com/2815761/521605 Android中常常使用shape来定义控件的一些显示属性,今天看了一些shape的使用,对shap ...
- android中xml tools属性详解
第一部分 安卓开发中,在写布局代码的时候,ide可以看到布局的预览效果. 但是有些效果则必须在运行之后才能看见,比如这种情况:TextView在xml中没有设置任何字符,而是在activity中设置了 ...
- android中xmlns:tools属性详解
今天读到一篇总结的非常棒的文章,写的逻辑很清晰也很实用,很少见到如此棒的文章了.就原文转发过来,我把格式给整理了一下,分享给园子里的各位朋友!好久没写博客了,就为2015年的11月留份纪念吧.希望对你 ...
- Android中的sharedUserId属性详解
在Android里面每个app都有一个唯一的linux user ID,则这样权限就被设置成该应用程序的文件只对该用户可见,只对该应用程序自身可见,而我们可以使他们对其他的应用程序可见,这会使我们用到 ...
- Android中Edittext的属性
//此为转载别人的,挺不错的 1.EditText输入的文字为密码形式的设置 (1)通过.xml里设置: 把该EditText设为:android:password="true" ...
- android中xml tools属性详解(转)
第一部分 安卓开发中,在写布局代码的时候,ide可以看到布局的预览效果. 但是有些效果则必须在运行之后才能看见,比如这种情况:TextView在xml中没有设置任何字符,而是在activity中设置了 ...
随机推荐
- assign,copy,retain的区别以及weak和strong的区别
@property (nonatomic, assign) NSString *title; 什么是assign,copy,retain之间的区别? assign: 简单赋值,不更改索 ...
- mysql之视图,触发器,事务等
一.视图 视图是一个虚拟表(非真实存在),其本质是[根据SQL语句获取动态的数据集,并为其命名],用户使用时只需使用[名称]即可获取结果集,可以将该结果集当做表来使用. 使用视图我们可以把查询过程中的 ...
- jQuery EasyUI - 数据表格(DataGrid)
由于工作需要,项目使用前端 jQuery EasyUI - DataGrid 来控制数据表格. 1.加载相关js和css,因为easyui依赖jquery,所有加载easyui前要先加载jquery, ...
- iOS Xcode 8 快捷键 (注释 失效 处理)
在升级后,好用的VVDocumment 插件不能用了.(但是苹果这次内置了好多好用的插件,也有自己的注释功能了 AddDocumentation) 上网上有查到 传播很广泛的一条信息 "这个 ...
- iOS imageNamed VS imageWithContentsOfFile
今天 又学习了 一个 提高应用交互效率 降低内存的 小知识 结论: (1)mageNamed加载图片,并且把image缓存到内存里面, (2)imageWithContentsOfFile是只显示图片 ...
- DNS 介绍
DNS 介绍 DNS 为 Domain Name System (域名系统的缩写),它是一种将ip地址转换为对应的主机名或将主机名转换成与之对应的ip地址的一种服务机制.DNS使用TCP和UDP,端口 ...
- Zabbix3.0安装与部署(centos7)
注:整理至http://blog.51cto.com/afterdawn/1923359 1 需要先搭建LAMP环境 http://www.cnblogs.com/cation/p/8882910.h ...
- Go Concurrency or Parallel
关于并发和并行,先看两个示例 示例1: package main import "fmt" var quit = make(chan int) func foo6(){ for i ...
- Python 数值类型
1.数值类型分为整形(二进制(0b),八进制(0o),十进制,十六进制(0x) ),浮点型,long,complex(复合行) 当我们说十进制数的时候,是逢10进1,就是说到达10的时候就要向前一位进 ...
- setup in xunit
https://xunit.github.io/docs/shared-context Shared Context between Tests It is common for unit test ...