const path = require('path')
module.exports = {
publicPath: '/',
outputDir: 'dist',
devServer: {
port: 9981,
open: true,
overlay: {
warnings: false,
errors: true
},
// lintOnSave: false
},
productionSourceMap: false,
configureWebpack: {
performance: {
hints: false
}
},
// 修改 pages 入口
pages: {
index: {
entry: 'examples/main.js', // 入口
template: 'public/index.html', // 模板
filename: 'index.html' // 输出文件
}
},
// 扩展 webpack 配置
chainWebpack: config => {
// @ 默认指向 src 目录,这里要改成 examples
// 另外也可以新增一个 ~ 指向 packages
config.resolve.alias
.set('@', path.resolve('examples'))
.set('~', path.resolve('packages'))
// 把 packages 和 examples 加入编译,因为新增的文件默认是不被 webpack 处理的
config.module
.rule('js')
.include.add(/packages/).end()
.include.add(/examples/).end()
.use('babel')
.loader('babel-loader')
.tap(options => {
// 修改它的选项...
return options
})
}
}
2.package.json:
{
"name": "shr-ui",
"version": "0.1.2",
"private": false,
"main": "lib/shr-ui.umd.js",
"style": "lib/shr-ui.css",
"files": [
"packages",
"lib",
"src"
],
"scripts": {
"dev": "vue-cli-service serve",
"build": "vue-cli-service build",
"lint": "vue-cli-service lint",
"docs:dev": "vuepress dev docs",
"docs:build": "vuepress build docs",
"lib": "vue-cli-service build --target lib --name shr-ui --dest lib packages/index.js"
},
"dependencies": {
"core-js": "^2.6.5",
"vue": "^2.6.10"
},
"devDependencies": {
"@vue/cli-plugin-babel": "^3.7.0",
"@vue/cli-plugin-eslint": "^3.7.0",
"@vue/cli-service": "^3.7.0",
"babel-eslint": "^10.0.1",
"babel-plugin-component": "^1.1.1",
"eslint": "^5.16.0",
"eslint-plugin-vue": "^5.0.0",
"less": "^3.9.0",
"less-loader": "^5.0.0",
"node-sass": "^5.0.0",
"sass-loader": "^10.1.0",
"vue-template-compiler": "^2.5.21",
"vuepress": "^0.14.11"
},
"eslintConfig": {
"root": true,
"env": {
"node": true
},
"extends": [
"plugin:vue/essential",
"eslint:recommended"
],
"rules": {},
"parserOptions": {
"parser": "babel-eslint"
}
},
"postcss": {
"plugins": {
"autoprefixer": {}
}
},
"browserslist": [
"> 1%",
"last 2 versions"
]
}
3.新建两个文件夹,一个叫packages和src文件,用于后期存储组件和公用方法

4.packages下这样写:index.js==>>
import ShrButton from "./button";
import { resolvingDate } from "../src/utils"
// 所有组件列表
const components = [ShrButton];
// 定义 install 方法,接收 Vue 作为参数
const install = function (Vue) {
// 判断是否安装,安装过就不继续往下执行
if (install.installed) return;
install.installed = true;
// 遍历注册所有组件
components.map(component => Vue.component(component.name, component));
// 下面这个写法也可以
// components.map(component => Vue.use(component))
Vue.prototype.$resolvingDate = resolvingDate;
};
// 检测到 Vue 才执行,毕竟我们是基于 Vue 的
if (typeof window !== "undefined" && window.Vue) {
install(window.Vue);
}
export {
install,
ShrButton,
// function
resolvingDate
}
export default {
install,
ShrButton,
};
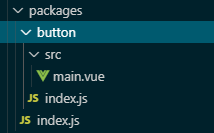
结构如图:
5.button/index.js==>
// 为组件提供 install 方法,供组件对外按需引入
import ShrButton from "./src/main";
ShrButton.install = Vue => {
Vue.component(ShrButton.name, ShrButton);
};
export default ShrButton;
6.src/main.vue == >
<template>
<div class="button_div">
<el-button type="primary" :loading="loadingbutton" @click="handleClick"
><slot></slot
></el-button>
</div>
</template>
<script>
export default {
name: "ShrButton",
props: {
time: {
type: Number,
default: 2000,
},
},
data() {
return {
loadingbutton: false,
};
},
methods: {
handleClick() {
if (this.loadingbutton) return;
this.loadingbutton = true;
setTimeout(() => {
this.loadingbutton = false;
}, this.time);
this.$emit("click");
},
},
};
</script>
<style lang="scss" scoped>
.button_div {
display: inline;
}
</style>
优点:这样就分装好了一个延时按钮,每次点击都会有一个防抖事件,达到不会连续点击连续出发后台接口等
分装好久执行 npm run lib命令就会自动打包好lib文件,最后要发到npm的。
打包好之后再执行,npm login ,然后再执行npm publish。就成功上传到了npm上啦。我们再看看在项目中怎么使用吧。
首先npm install shr-ui就可以下载我们的组件,然后引入

这是通过Vue.use全局注册的方法,也可以和element-ui一样的按需引入的方法

好了,分装组件并上传到npm上,并下载应用到项目,就此结束。欢迎有问题的小伙伴提出提问!
- 从零开始写一个npm包及上传
最近刚好自己需要写公有npm包及上传,虽然百度上资料都能找到,但是都是比较零零碎碎的,个人就来整理下,如何从零开始写一个npm包及上传. 该篇文件只记录一个大概的流程,一些细节没有记录. tips: ...
- SpringBoot项目打成jar包后上传文件到服务器 目录与jar包同级问题
看标题好像很简单的样子,但是针对使用jar包发布SpringBoot项目就不一样了.当你使用tomcat发布项目的时候,上传文件存放会变得非常简单,因为你可以随意操作项目路径下的资源.但是当你使用Sp ...
- GitHub上传项目到远程库
写文章 GitHub上传项目到远程库 GitHub上传项目到远程库 今天把想把文件托管到GitHub仓库,但是执行一系列的命令以后,刷新GitHub网站还是没有任何更新.后来终于找到原因,原来 ...
- Git 使用,本地项目上传到GitHub远程库
Git 使用,本地项目上传到GitHub远程库 环境 GitHub账号 点此进入github官网 git客户端工具 点此进入git下载页 本地项目上传到 GitHub 在GitHub中创建一个仓库(远 ...
- ASP.NET MVC 网站开发总结(二)——一个或多个文件的异步或同步上传
简而言之,直接用代码展示如何实现文件的上传,这里需要使用到一个bootstrap的文件上传插件File Input(请自行下载). 前台页面: <!----> <!DOCTYPE h ...
- 自己动手写一个iOS 网络请求库的三部曲[转]
代码示例:https://github.com/johnlui/Swift-On-iOS/blob/master/BuildYourHTTPRequestLibrary 开源项目:Pitaya,适合大 ...
- 使用TypeScript给Vue 3.0写一个指令实现组件拖拽
最近在用vue3重构后台的一个功能.一个弹窗组件,弹出一个表单.然后点击提交. 早上运维突然跑过来问我,为啥弹窗挡住了下边的表格的数据,我添加的时候,都没法对照表格来看了.你必须给我解决一下. 我参考 ...
- 多个module实体类集合打一个jar包并上传至远程库
本章内容主要分享多个module中的实体类集合生成到一个jar包中,并且发布到远程库:这里采用maven-assembly-plugin插件的功能来操作打包,内容不长却贴近实战切值得拥有,主要节点内容 ...
- CentOS安装Nexus(Maven私有库)详细配置及上传本地jar到私服
Nexus原理 Maven的原理就是将jar从远程中央仓库下载到PC磁盘的本地仓库,当本地仓库没有发现需要的jar就会去Maven默认的远程中央仓库Maven Central(由Apache维护)中寻 ...
- mvvm和mvc区别?
mvc和mvvm其实区别并不大.都是一种设计思想.主要就是mvc中Controller演变成mvvm中的viewModel. mvvm主要解决了mvc中大量的DOM 操作使页面渲染性能降低,加载速度变 ...
- 【Azure Developer】VS Code运行Java 版Azure Storage SDK操作Blob (新建Container, 上传Blob文件,下载及清理)
问题描述 是否可以用Java代码来管理Azure blob? 可以.在代码中加入azure-storage-blob依赖.即可使用以下类操作Azure Storage Blob. BlobServic ...
- MySQL事务(一)认识事务
简单来说,事务就是要保证一组数据库操作,要么全部完成,要么全部失败. 为什么要有事务 数据库中的数据是共享资源,因此数据库系统通常要支持多个用户的或不同应用程序的访问,会出现并发存取数据的现象. 数据 ...
- PhotoSwipe用法
1.自动识别data-size问题,添加以下代码 gallery = new PhotoSwipe(pswpElement, PhotoSwipeUI_Default, items, options) ...
- tensorflow学习笔记——DenseNet
完整代码及其数据,请移步小编的GitHub地址 传送门:请点击我 如果点击有误:https://github.com/LeBron-Jian/DeepLearningNote 这里结合网络的资料和De ...
- react第十六单元(redux的认识,redux相关api的掌握)
第十六单元(redux的认识,redux相关api的掌握) #课程目标 掌握组件化框架实现组件之间传参的几种方式,并了解两个没有任何关系组件之间通信的通点 了解为了解决上述通点诞生的flux架构 了解 ...
- 旁站和C段的简要解释
旁注与C段嗅探的意义,旁注的意思就是从同台服务器上的其他网站入手,提权,然后把服务器端了,就自然把那个网站端了.C段嗅探,每个IP有ABCD四个段,举个例子,192.168.0.1,A段就是192,B ...
- python 无损压缩照片,支持批量压缩,支持保留照片信息
由于云盘空间有限,照片尺寸也是很大,所以写个Python程序压缩一下照片,腾出一些云盘空间 1.批量压缩照片 新建 photo_compress.py 代码如下 1 # -*- coding: utf ...
- luabind 使用
LuaBind --最强大的Lua C++ Bind 转载:http://www.cppblog.com/deane/articles/49208.html1 介绍LuaBind 是一个帮助你绑定C+ ...
- robotframework中的参数展开
robot调用关键字传参的方式是用分隔符分开不同参数,如 keyword arg1 arg2 arg3 arg4 当参数中传入了使用@符号的列表变量时,@符号会将列表展开: @{list1}= Cre ...