IDEA一步步创建Maven管理的Spring入门程序
目前,做Java开发的很多人都在使用IDEA了,而有些人也选择用Eclipse,我这里介绍一下IDEA一步步创建Maven项目的步骤,并创建一个Spring的入门程序(Java项目,非Web项目),讲解比较少。。。
博客内容:
- 使用创建Maven项目
- 添加Spring核心包
- 编写Spring入门程序并运行(Bean装配和Bean注入)
1. 创建Maven项目
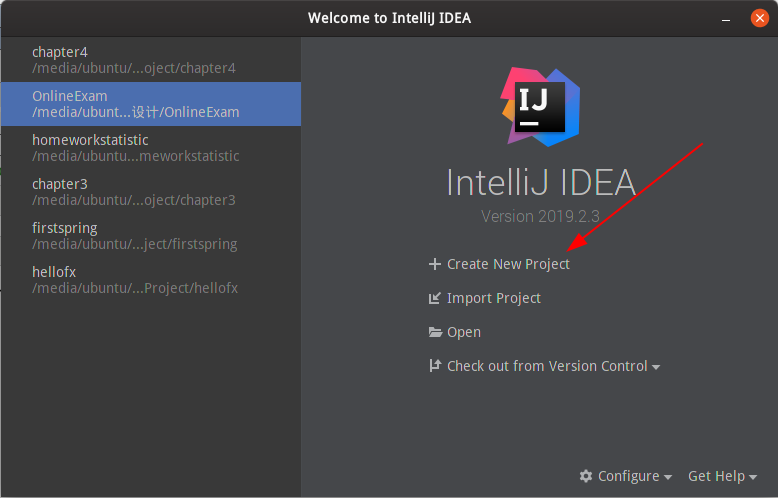
打开IDEA软件,如下图所示:
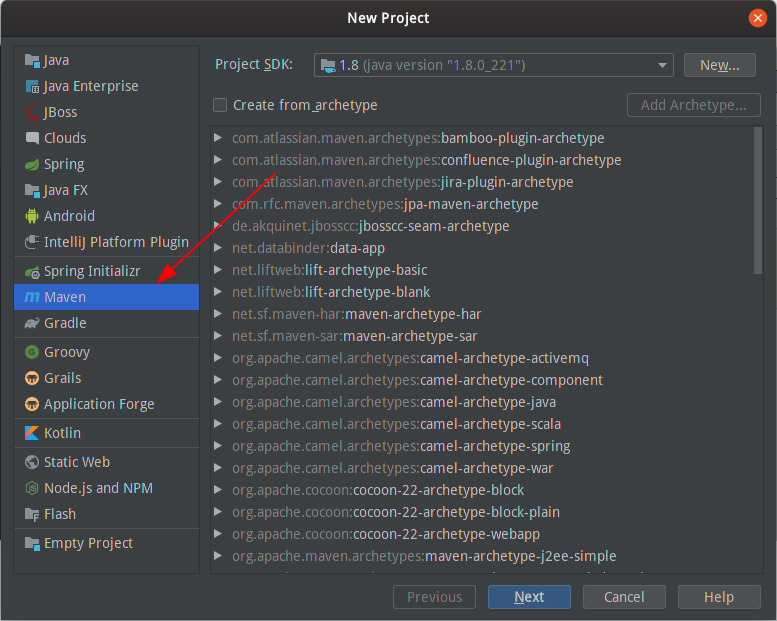
单击Create New Priject(创建新项目),然后选中Maven,如下图所示:
单击“下一步”按钮,进入填写项目GroupId和ArtifactId,如下图所示:

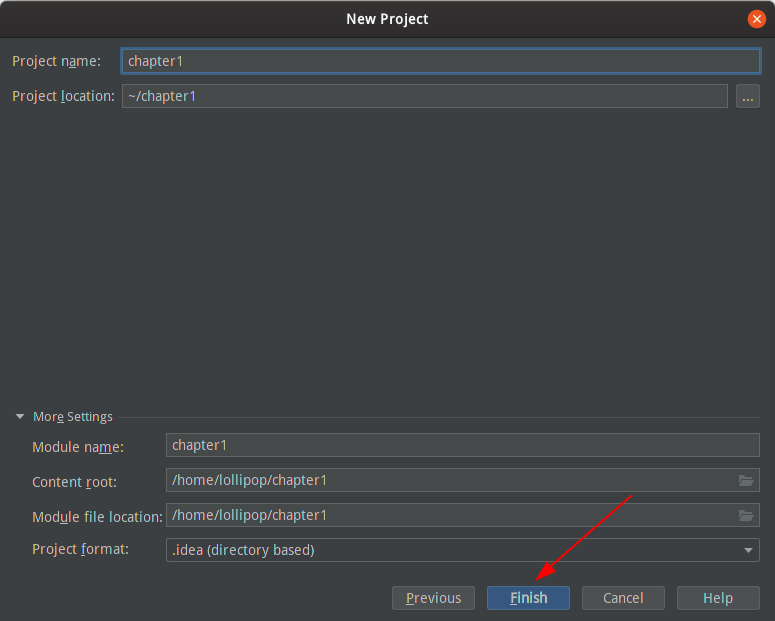
填写完项目GroupId和ArtifactId后,单击“Next”,出现确认项目信息的页面,如下图所示:
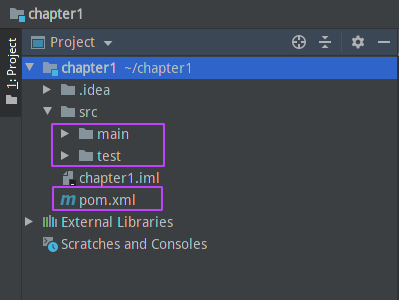
最后单击“Finish”按钮,完成Maven项目的创建。如下图的所示项目文件结构:
2. 添加Spring核心包
要使用Spring框架,需要添加Spring的spring-core-x.x.x.RELASE.jar、spring-beans-x.x.x.RELASE.jar、spring-context-x.x.x.RELASE.jar、spring-expression-x.x.x.RELASE.jar和Spring的第三方依赖包commons-logging-x.x.jar。其中x.x.x代表版本号。
- spring-core-x.x.x.RELASE.jar:包含Spring框架基本的核心工具类,Spring其他组件都要用到这个包里面的类,是其他核心类的基本核心。
- spring-beans-x.x.x.RELASE.jar:包含访问配置文件、创建和管理Bean以及进行控制反转(IoC)或者依赖注入(DI)操作相关的所有类。
- spring-context-x.x.x.RELASE.jar:Spring提供了在基础IoC功能上的扩展服务,包括邮件服务、任务调度等。
- spring-expression-x.x.x.RELASE.jar:定义了Spring表达书语言。
- commons-logging-x.x.jar:Spring用到的第三方依赖包。
Maven管理的Java项目导入第三方jar包只需要在Maven仓库里面搜索就可以了。Maven仓库地址:https://mvnrepository.com。在maven仓库上面搜索上面用到的五个jar包,然后添加<denpendency></denpendency>标签到上面创建Maven项目生成的pom.xml下的"<dependencies></dependencies>",没有"<dependencies></dependencies>"的新建。如下的pom.xml文件,我选择了spring-5.1.9版本。
>>pom.xml文件
<?xml version="1.0" encoding="UTF-8"?>

<project xmlns="http://maven.apache.org/POM/4.0.0"

         xmlns:xsi="http://www.w3.org/2001/XMLSchema-instance"

         xsi:schemaLocation="http://maven.apache.org/POM/4.0.0 http://maven.apache.org/xsd/maven-4.0.0.xsd">

    <modelVersion>4.0.0</modelVersion>

    <groupId>edu.gzmtu</groupId>

    <artifactId>chapter1</artifactId>

    <version>1.0-SNAPSHOT</version>

    <dependencies>

        <!-- https://mvnrepository.com/artifact/org.springframework/spring-context -->

        <dependency>

            <groupId>org.springframework</groupId>

            <artifactId>spring-context</artifactId>

            <version>5.1.9.RELEASE</version>

        </dependency>

        <!-- https://mvnrepository.com/artifact/org.springframework/spring-core -->

        <dependency>

            <groupId>org.springframework</groupId>

            <artifactId>spring-core</artifactId>

            <version>5.1.9.RELEASE</version>

        </dependency>

        <!-- https://mvnrepository.com/artifact/org.springframework/spring-beans -->

        <dependency>

            <groupId>org.springframework</groupId>

            <artifactId>spring-beans</artifactId>

            <version>5.1.9.RELEASE</version>

        </dependency>

        <!-- https://mvnrepository.com/artifact/org.springframework/spring-expression -->

        <dependency>

            <groupId>org.springframework</groupId>

            <artifactId>spring-expression</artifactId>

            <version>5.1.9.RELEASE</version>

        </dependency>

        <!-- https://mvnrepository.com/artifact/commons-logging/commons-logging -->

        <dependency>

            <groupId>commons-logging</groupId>

            <artifactId>commons-logging</artifactId>

            <version>1.2</version>

        </dependency>

    </dependencies>

</project>
至此,添加Spring核心包步骤完成。
3. 编写Spring入门程序并运行
3.1 Bean装配
在项目结构目录下的src/main/java下编写UserDao接口和UserDaoImpl实现类。
>>UserDao.java
/**

 * @author super lollipop

 * @date 2019/10/19

 */

public interface UserDao {

    public void saySomething();

}
>>UserDaoImpl.java
/**

 * @author super lollipop

 * @date 2019/10/19

 */

public class UserDapImpl implements UserDao {

    public void saySomething() {

        System.out.println("UserDapImpl.saySomething");

    }

}
然后编写Spring的xml配置文件,进行UserDaoImpl这个Bean装配,文件命名随意,这里为applicationContext.xml,存放在src/main/resources下。
>>applicationContext.xml
<?xml version="1.0" encoding="UTF-8"?>

<beans xmlns="http://www.springframework.org/schema/beans"

       xmlns:xsi="http://www.w3.org/2001/XMLSchema-instance"

       xsi:schemaLocation="http://www.springframework.org/schema/beans http://www.springframework.org/schema/beans/spring-beans.xsd">

    <bean id="userDao" class="UserDapImpl"></bean>

</beans>
然后可以编写一个单元测试,测试spring的转配文件是否可以成功装配。在src/test/java下新建JUnitTest.java类,编写测试代码。需要添加JUnitTest的jar包到pom.xml文件,添加后的文件为
>>pom.xml文件
 <dependencies>

      ......

     <dependency>

            <groupId>junit</groupId>

            <artifactId>junit</artifactId>

            <version>4.10</version>

            <scope>test</scope>

     </dependency>

      ......

 </dependencies>
>>JUnitTest.java文件
import org.junit.Test;

import org.springframework.context.ApplicationContext;

import org.springframework.context.support.ClassPathXmlApplicationContext;

/**

 * @author super lollipop

 * @date 2019/10/19

 */

public class JUnitTest {

    @Test

    public void saySomethingTest(){

        ApplicationContext applicationContext = new ClassPathXmlApplicationContext("applicationContext.xml");

        UserDao userDao = applicationContext.getBean("userDao",UserDao.class);

        userDao.saySomething();

    }

}
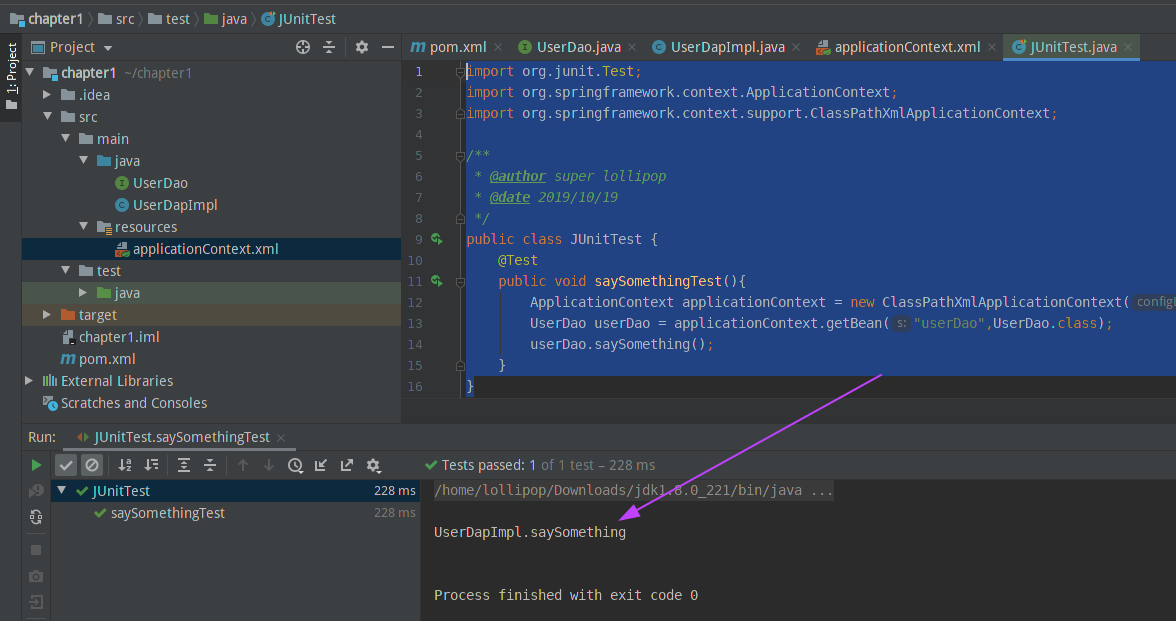
最后在IDEA内运行单元测试。运行成功,bean装配成功,如下图所示:
3.2 Bean注入
Bean注入Spring特性的Dependency Injection功能,可以在一个bean中注入另一个装配好的bean。在项目结构目录下的src/main/java下编写UserService类,注入上面创建好的UserDao bean。
>>UserService.java文件
/**

 * @author super lollipop

 * @date 2019/10/19

 * 用来测试依赖注入的UserService类

 */

public class UserService {

    /*声明userDao属性*/

    private UserDao userDao;

    /*添加userDao属性的setter方法,用于实现依赖注入*/

    public void setUserDao(UserDao userDao) {

        this.userDao = userDao;

    }

    public void saySomething(){

        this.userDao.saySomething(); //测试userDao是否注入

        System.out.println("UserService saySomething");

    }

}
然后配置Spring的配置文件applicationContext.xml,装配UserService并配置userDao这个属性bean
>>applicationContext.xml文件
<?xml version="1.0" encoding="UTF-8"?>

<beans xmlns="http://www.springframework.org/schema/beans"

       xmlns:xsi="http://www.w3.org/2001/XMLSchema-instance"

       xsi:schemaLocation="http://www.springframework.org/schema/beans http://www.springframework.org/schema/beans/spring-beans.xsd">

    <!--装配userDao Bean-->

    <bean id="userDao" class="UserDapImpl"></bean>

    <!--装配userService Bean,带有userDao属性-->

    <bean id="userService" class="UserService">

        <property name="userDao" ref="userDao"></property>

    </bean>

</beans>
然后编写测试单元,测试UserService的saySomething方法就可以知道userDao是否成功注入了。
>>测试单元代码
@Test

    public void dependencyInjectionTest(){

        ApplicationContext applicationContext = new ClassPathXmlApplicationContext("applicationContext.xml");

        UserService userService = applicationContext.getBean("userService",UserService.class);

        userService.saySomething();

    }
最后编译运行测试单元,运行结果显示bean注入成功,如下图所示:

至此,IDEA创建的Spring入门程序完成,所有的代码都放到github上面:https://github.com/quanbisen/chapter1。
IDEA一步步创建Maven管理的Spring入门程序的更多相关文章
- Spring-在IDEA2016中创建maven管理的SpringMVC项目
这是一套我自己摸索出来的创建项目方法,基本是用在创建用maven管理的 Spring+SpringMVC+Mybatis的J2EE项目时. 创建一个maven管理的webapp项目 在创建项目时,选择 ...
- spring 学习(一):使用 intellijIDEA 创建 maven 工程进行 Spring ioc 测试
spring学习(一):使用 intellijIDEA 创建 maven 工程进行 Spring ioc 测试 ioc 概念 控制反转(Inversion of Control,缩写为IOC),是面向 ...
- IntelliJ IDEA 12创建Maven管理的Java Web项目(图解)
转:http://blog.csdn.net/zht666/article/details/8673609/ 本文主要使用图解介绍了使用IntelliJIDEA 12创建Maven管理的JavaWeb ...
- Spring(一):Spring入门程序和IoC初步理解
本文是按照狂神说的教学视频学习的笔记,强力推荐,教学深入浅出一遍就懂!b站搜索狂神说或点击下面链接 https://space.bilibili.com/95256449?spm_id_from=33 ...
- IDEA下——Spring入门程序
创建一个Maven的项目,我的项目结构如下: 在pom文件里写下需要导入的依赖: <?xml version="1.0" encoding="UTF-8" ...
- 使用IDEA开发Spring入门程序
使用IDEA开发Spring入门程序 前言 本文通过一个简单的入门程序向读者演示Spring框架的使用过程,具体如下: 一.使用IDEA创建Maven应用项目并导入相应模块 使用IDEA创建一个名为n ...
- 如何创建Maven项目和Spring IOC例子
把如何创建Maven项目和创建Spring IOC的例子分享给大家,希望能对大家有帮助! 我的博客地址:https://www.cnblogs.com/themysteryofhackers/p/12 ...
- eclipse创建maven管理Spark的scala
说明,由于spark是用scala写的.因此,不管是在看源码还是在写spark有关的代码的时候,都最好是用scala.那么作为一个程序员首先是必须要把手中的宝剑给磨砺了.那就是创建好编写scala的代 ...
- IntelliJ IDEA 创建maven管理的webapp项目
因为使用框架时基本需要使用maven管理项目,所以单独写一个搭建maven项目的流程 第一步: File-->New--Project 第二步: 选择maven框架 第三步: 输入工程id ...
随机推荐
- deepstrem编译缺少gst/gst.h解决方案
Deepstream在编译程序的程序的显示缺少gst/gst.h 具体情况是Deepstream运行已编译好的deepstream-app可以正常运行,但对源码编译的时候出现以述情况,初步分析是我们安 ...
- 通过游戏学javascript系列第一节Canvas游戏开发基础
本节教程通过一个简单的游戏小例子,讲解Canvas的基础知识. 最终效果: 点击移动的方块,方块上的分数会增加,方块的行进方向会改变,并且方块的速度会增加. 在线演示 源码 HTML5引入了canva ...
- JS复习之深浅拷贝
一.复习导论(数据类型相关) 想掌握JS的深浅拷贝,首先来回顾一下JS的数据类型,JS中数据类型分为基本数据类型和引用数据类型. 基本数据类型是指存放在栈中的简单数据段,数据大小确定,内存空间大小可以 ...
- 冬季里有温度的 3D 可视化智慧供热系统
前言 随着供暖季来临,我国北方大部分省市开始陆续供热.一年一度的供暖问题被提上了日程.在我们的印象里,供热的设施不论是锅炉.管道还是暖气片,都是坚硬的钢铁.铸铁.HT 通过自主研发的强大的基于 HTM ...
- undo表空间丢失、损坏
1.模拟误删undo表空间 rm -rf undotbs01.dbf 2.解决步骤 SQL> shutdown immediateORA-01116: error in opening data ...
- Mysql8.0新特性【详细版本】
1. 账户与安全 用户创建与授权 之前:创建用户并授权 1 grant all privileges on *.* to 'myuser'@'%' identified by '3edc#EDC'; ...
- Git 工作原理以及常用命令操作
GIT工作原理 要了解GIT工作原理,先了解GIT的这几块区域: 工作区域划分 工作区:指的是本地工作空间,如果刚拉取下来的代码,没有修改的内容,这块区域是空白的 (modified-已修改状态) 暂 ...
- IDEA 2020.3 更新了,机器学习都整上了
Hello,大家好,我是楼下小黑哥~ 上周 Java 开发申请神器 IDEA 2020.3 新版正式发布: 小黑哥第一时间就在开发机上更新了新版本,并且完整体验了两周了. 下面介绍一下这个版本的主要功 ...
- Web服务器-正则表达式-整理+复习(3.1.1)
@ 目录 1.常用api 2.例子 3.正则表达式模式 关于作者 参考文章 1.常用api re.match(pattern, string, flags=0) pattern 匹配的正则表达式 st ...
- 基于Python实现环形队列高效定时器
定时器Python实现代码 import time import redis import multiprocessing class Base: """ redis配置 ...