Visual Studio Code——Angular2 Hello World 之 2.0
最近看到一篇用Visual Studio Code开发Angular2的文章,也是一篇入门教程,地址为:使用Visual Studio Code開發Angular 2專案。这里按部就班的做了一遍,感觉很方便,并且没有遇到楼主的一些问题,应该是安装环境有些不同。这里只为记录一下。再次感谢!
一、随便新建一个目录,这里为:F:\Visual Studio Code\angular2_1,并用Visual Studio Code
二、依次新建如下四个文件,参考https://angular.cn/docs/ts/latest/quickstart.html
package.json 用来标记出本项目所需的 npm 依赖包。
tsconfig.json 定义了 TypeScript 编译器如何从项目源文件生成 JavaScript 代码。
typings.json 为那些 TypeScript 编译器无法识别的库提供了别的定义文件。
systemjs.config.js 为模块加载器提供了该到哪里查找应用模块的信息,并注册了所有必备的依赖包。 它还包括文档中后面的例子需要用到的包。
 {

   "name": "angular-quickstart",

   "version": "1.0.0",

   "scripts": {

     "start": "tsc && concurrently \"tsc -w\" \"lite-server\" ",

     "lite": "lite-server",

     "postinstall": "typings install",

     "tsc": "tsc",

     "tsc:w": "tsc -w",

     "typings": "typings"

   },

   "license": "ISC",

   "dependencies": {

     "@angular/common": "~2.0.1",

     "@angular/compiler": "~2.0.1",

     "@angular/core": "~2.0.1",

     "@angular/forms": "~2.0.1",

     "@angular/http": "~2.0.1",

     "@angular/platform-browser": "~2.0.1",

     "@angular/platform-browser-dynamic": "~2.0.1",

     "@angular/router": "~3.0.1",

     "@angular/upgrade": "~2.0.1",

     "angular-in-memory-web-api": "~0.1.1",

     "bootstrap": "^3.3.7",

     "core-js": "^2.4.1",

     "reflect-metadata": "^0.1.8",

     "rxjs": "5.0.0-beta.12",

     "systemjs": "0.19.39",

     "zone.js": "^0.6.25"

   },

   "devDependencies": {

     "concurrently": "^3.0.0",

     "lite-server": "^2.2.2",

     "typescript": "^2.0.3",

     "typings":"^1.4.0"

   }

 }
package.json
 {

   "compilerOptions": {

     "target": "es5",

     "module": "commonjs",

     "moduleResolution": "node",

     "sourceMap": true,

     "emitDecoratorMetadata": true,

     "experimentalDecorators": true,

     "removeComments": false,

     "noImplicitAny": false

   }

 }
tsconfig.json
 {

   "globalDependencies": {

     "core-js": "registry:dt/core-js#0.0.0+20160725163759",

     "jasmine": "registry:dt/jasmine#2.2.0+20160621224255",

     "node": "registry:dt/node#6.0.0+20160909174046"

   }

 }
typings.json
 /**

  * System configuration for Angular samples

  * Adjust as necessary for your application needs.

  */

 (function (global) {

   System.config({

     paths: {

       // paths serve as alias

       'npm:': 'node_modules/'

     },

     // map tells the System loader where to look for things

     map: {

       // our app is within the app folder

       app: 'app',

       // angular bundles

       '@angular/core': 'npm:@angular/core/bundles/core.umd.js',

       '@angular/common': 'npm:@angular/common/bundles/common.umd.js',

       '@angular/compiler': 'npm:@angular/compiler/bundles/compiler.umd.js',

       '@angular/platform-browser': 'npm:@angular/platform-browser/bundles/platform-browser.umd.js',

       '@angular/platform-browser-dynamic': 'npm:@angular/platform-browser-dynamic/bundles/platform-browser-dynamic.umd.js',

       '@angular/http': 'npm:@angular/http/bundles/http.umd.js',

       '@angular/router': 'npm:@angular/router/bundles/router.umd.js',

       '@angular/forms': 'npm:@angular/forms/bundles/forms.umd.js',

       // other libraries

       'rxjs':                      'npm:rxjs',

       'angular-in-memory-web-api': 'npm:angular-in-memory-web-api',

     },

     // packages tells the System loader how to load when no filename and/or no extension

     packages: {

       app: {

         main: './main.js',

         defaultExtension: 'js'

       },

       rxjs: {

         defaultExtension: 'js'

       },

       'angular-in-memory-web-api': {

         main: './index.js',

         defaultExtension: 'js'

       }

     }

   });

 })(this);
systemjs.config.js
三、按着“shift”键,右键项目文件夹,选择“在此处打开命令窗口(W)”,键入DOS命令窗口,键入”npm install“,截图如下:

下载了好多文件,依赖的类库可真多,之后的文件夹目录如下:

四、在根目录下新建app文件夹,并依次创建下面三个文件app.module.ts、app.component.ts、main.ts;并在根目录下新建html页面——index.html
 import { NgModule }      from '@angular/core';

 import { BrowserModule } from '@angular/platform-browser';

 import { AppComponent }   from './app.component';

 @NgModule({

   imports:      [ BrowserModule ],

   declarations: [ AppComponent ],

   bootstrap:    [ AppComponent ]

 })

 export class AppModule { }
app.module.ts
 import { Component } from '@angular/core';

 @Component({

   selector: 'my-app',

   template: '<h1>My First Angular App</h1>'

 })

 export class AppComponent { }
app.component.ts
 import { platformBrowserDynamic } from '@angular/platform-browser-dynamic';

 import { AppModule } from './app.module';

 const platform = platformBrowserDynamic();

 platform.bootstrapModule(AppModule);
main.ts
 <html>

   <head>

     <title>Angular QuickStart</title>

     <meta charset="UTF-8">

     <meta name="viewport" content="width=device-width, initial-scale=1">

     <link rel="stylesheet" href="styles.css">

     <!-- 1. Load libraries -->

      <!-- Polyfill(s) for older browsers -->

     <script src="node_modules/core-js/client/shim.min.js"></script>

     <script src="node_modules/zone.js/dist/zone.js"></script>

     <script src="node_modules/reflect-metadata/Reflect.js"></script>

     <script src="node_modules/systemjs/dist/system.src.js"></script>

     <!-- 2. Configure SystemJS -->

     <script src="systemjs.config.js"></script>

     <script>

       System.import('app').catch(function(err){ console.error(err); });

     </script>

   </head>

   <!-- 3. Display the application -->

   <body>

     <my-app>Loading...</my-app>

   </body>

 </html>
index.html
五、按照如下截图,设定启动作业:


设置成功之后,在启动文件launch.json中做如上图修改:${workspaceRoot}/node_modules/lite-server/bin/lite-server
六、在菜单栏中,点击”查看“/”命令面板“或者快捷键”cltr+shift+p“,键入”configure“,选择”任务:配置任务运行程序“,之后选择”TypeScript-tsconfig.json 创建TypeScript项目“,如下图:


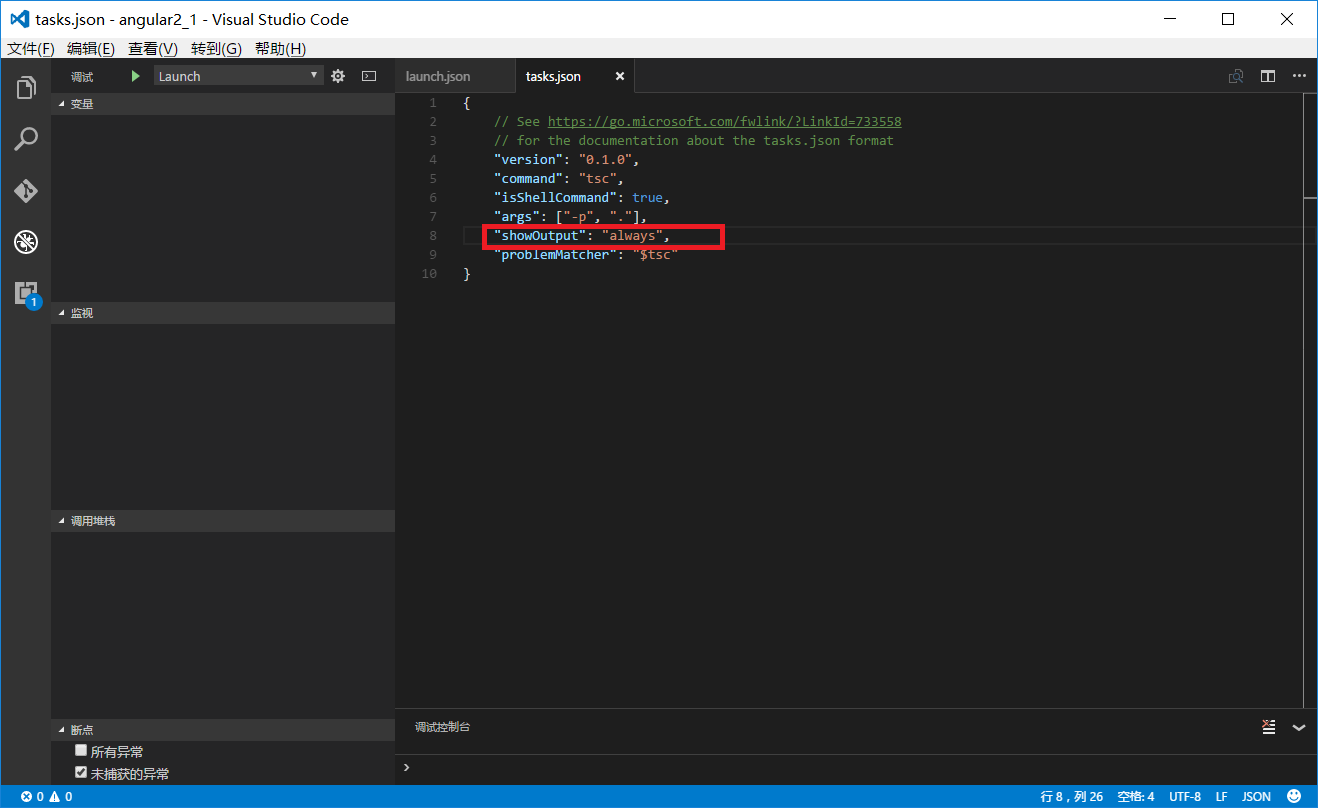
按照教程博客所说,要task.json做如上图修改,否则下面调试时如果出现错误没有任何提示。
七、以上已经完成了所有的工作,开始调试。按下”ctrl+shift+b“,执行编译,会将ts文件编译为js文件,如下图:

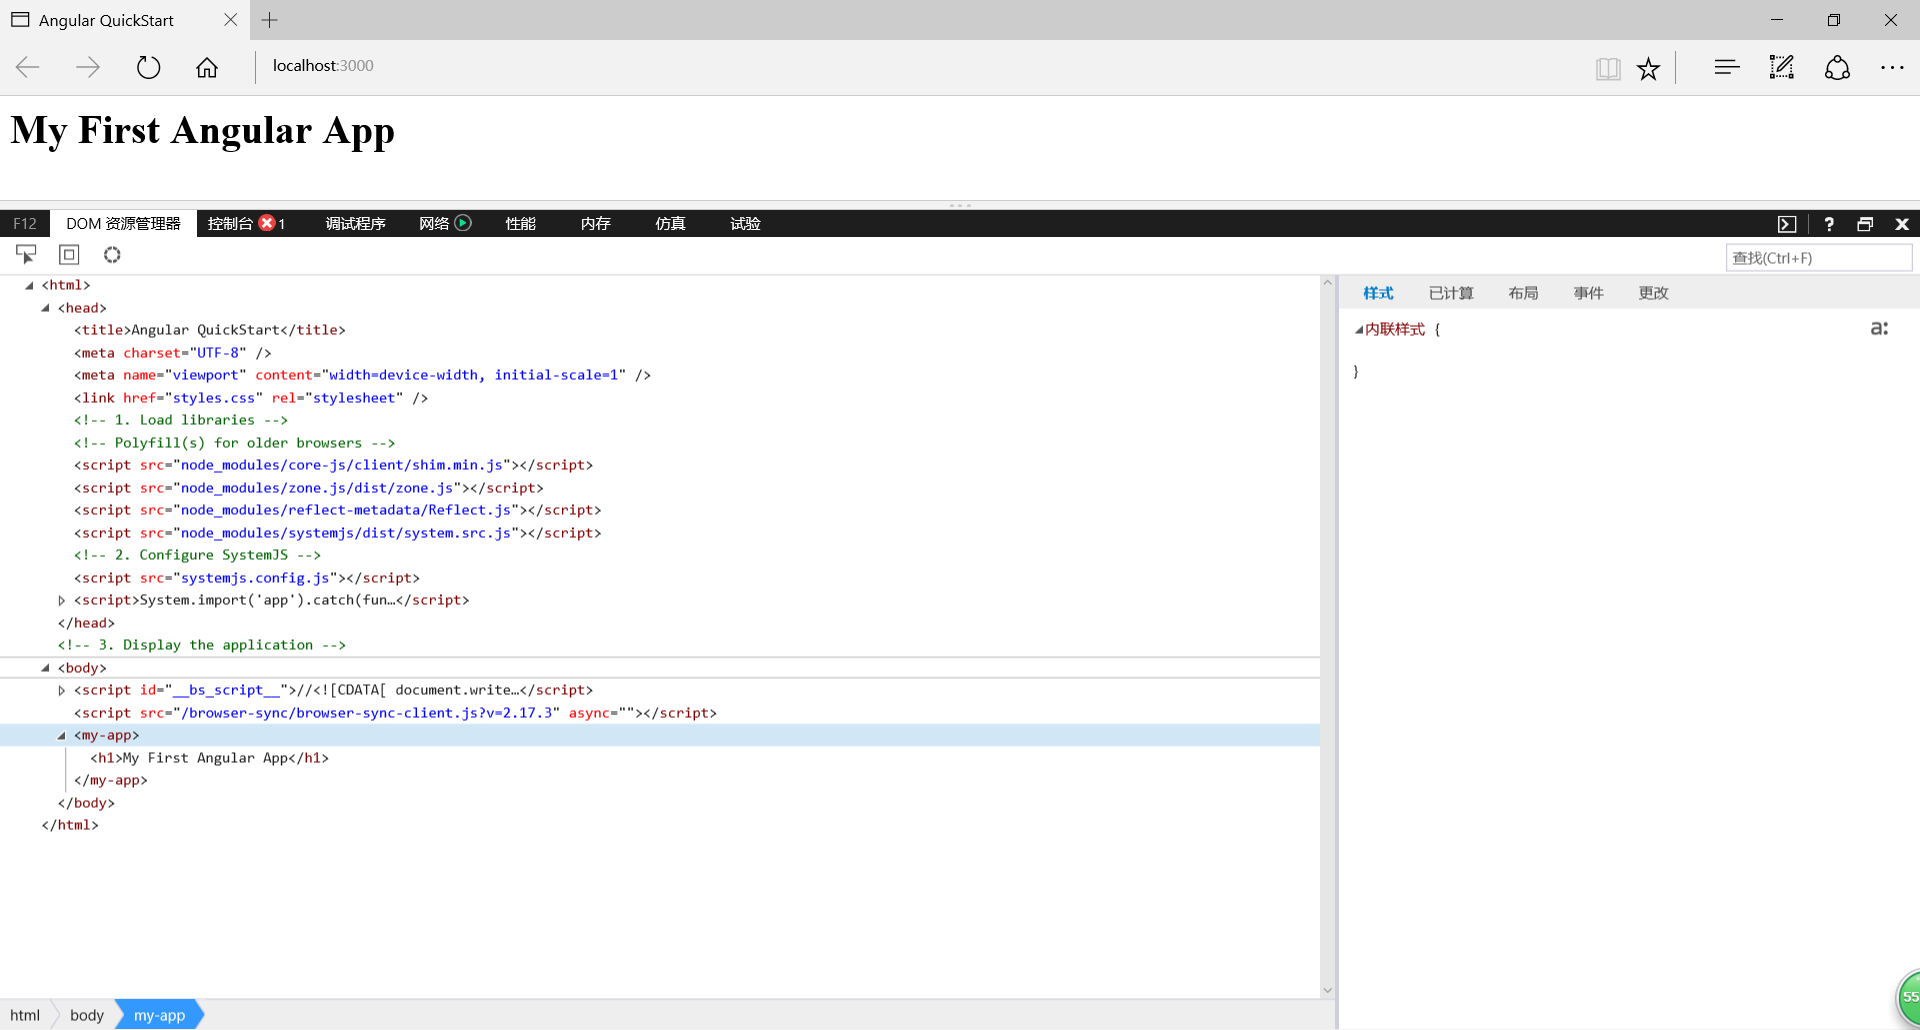
如果编译成功(如上图),就可以按”F5“了,如下图:
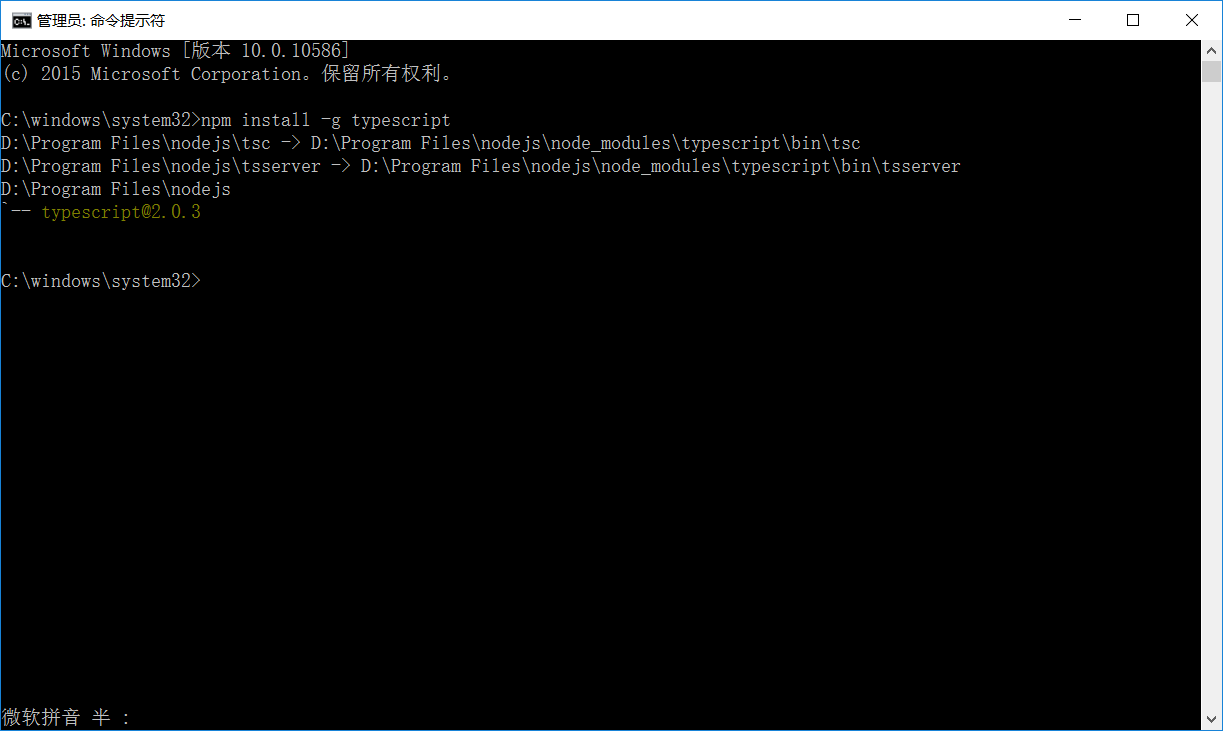
但是如果编译不成功,应该是没有安装tsc,使用命令”npm install -g typescript“安装一下,之后再编译就没问题了,如下图:
这里完全是按着上面的教程来的,有点不好意思,只作为练习记录,再次感谢!
Visual Studio Code——Angular2 Hello World 之 2.0的更多相关文章
- Visual Studio Code升级到0.5,提供对ES6的更好支持
(此文章同时发表在本人微信公众号"dotNET每日精华文章",欢迎右边二维码来关注.) 题记:题目即题记. 自从Visual Studio Code发布之后(最初是0.1),微软就 ...
- Visual Studio Code 配置指南
Visual Studio Code (简称 VS Code)是由微软研发的一款免费.开源的跨平台文本(代码)编辑器.在我看来它是「一款完美的编辑器」. 本文是有关 VS Code 的特性介绍与配置指 ...
- Visual Studio Code 代理设置
Visual Studio Code (简称 VS Code)是由微软研发的一款免费.开源的跨平台文本(代码)编辑器,在十多年的编程经历中,我使用过非常多的的代码编辑器(包括 IDE),例如 Fron ...
- 在Visual Studio Code中配置GO开发环境
一.GO语言安装 详情查看:GO语言下载.安装.配置 二.GoLang插件介绍 对于Visual Studio Code开发工具,有一款优秀的GoLang插件,它的主页为:https://github ...
- docker4dotnet #3 在macOS上使用Visual Studio Code和Docker开发asp.net core和mysql应用
.net猿遇到了小鲸鱼,觉得越来越兴奋.本来.net猿只是在透过家里那田子窗看外面的世界,但是看着海峡对岸的苹果园越来越茂盛,实在不想再去做一只宅猿了.于是,.net猿决定搭上小鲸鱼的渡轮到苹果园去看 ...
- Visual Studio Code v0.9.1 发布
微软的跨平台编辑器 Visual Studio Code v0.9.1 已经发布,官方博客上发布文章Visual Studio Code – October Update (0.9.1):http:/ ...
- 微软Visual Studio Code 0.8.0发布,新增多种主题
月30日,Build 开发者大会上,正式宣布了 Visual Studio Code 项目;并将其定义为:一个运行于 Mac OS X.Windows和 Linux 之上的,针对于编写现代 Web 和 ...
- Visual Studio Code,完美的编辑器
今日凌晨,微软的文本(代码)编辑器 Visual Studio Code(简称 VS Code),发布了首个正式版,距离首个 beta 版上线时间刚好一年. 在十多年的编程经历中,我使用过非常多的的代 ...
- 打造TypeScript的Visual Studio Code开发环境
打造TypeScript的Visual Studio Code开发环境 本文转自:https://zhuanlan.zhihu.com/p/21611724 作者: 2gua TypeScript是由 ...
随机推荐
- 一次修改闭源 Entity Provider 程序集以兼容新 EntityFramework 的过程
读完本文你会知道,如何在没有源码的情况下,直接修改一个 DLL 以去除 DLL 上的强命名限制,并在该程序集上直接添加你的“友元程序集(一种特殊的 Attribute,将它应用在程序集上,使得程序集内 ...
- Python高手之路【四】python函数装饰器
def outer(func): def inner(): print('hello') print('hello') print('hello') r = func() print('end') p ...
- EventBus实现activity跟fragment交互数据
最近老是听到技术群里面有人提出需求,activity跟fragment交互数据,或者从一个activity跳转到另外一个activity的fragment,所以我给大家介绍一个开源项目,EventBu ...
- the Zen of Python---转载版
摘自译文学习区 http://article.yeeyan.org/view/legendsland/154430 The Zen of Python Python 之禅 Beautiful is b ...
- 浅谈Java的throw与throws
转载:http://blog.csdn.net/luoweifu/article/details/10721543 我进行了一些加工,不是本人原创但比原博主要更完善~ 浅谈Java异常 以前虽然知道一 ...
- jQuery禁用或启用
禁用:.attr("disabled","disabled"); 启用:.removeAttr("disabled");
- js 基础篇(点击事件轮播图的实现)
轮播图在以后的应用中还是比较常见的,不需要多少行代码就能实现.但是在只掌握了js基础知识的情况下,怎么来用较少的而且逻辑又简单的方法来实现呢?下面来分析下几种不同的做法: 1.利用位移的方法来实现 首 ...
- POJ1149 PIGS [最大流 建图]
PIGS Time Limit: 1000MS Memory Limit: 10000K Total Submissions: 20662 Accepted: 9435 Description ...
- 转: 如何高效利用GitHub
注:写了很多使用哲学,有意思 from: http://www.yangzhiping.com/tech/github.html
- 瞬间记住Javascript中apply与call的区别
关于Javascript函数的apply与call方法的用法,网上的文章很多,我就不多话了.apply和call的作用很相似,但使用方式有区别 apply与call的第一个参数都是一个对象,这个对象就 ...