GraphQL快速入门教程
摘要: 体验神奇的GraphQL!
- 原文:GraphQL 入门详解
- 作者:MudOnTire
Fundebug经授权转载,版权归原作者所有。
GraphQL简介
定义
一种用于API调用的数据查询语言
核心思想
传统的api调用一般获取到的是后端组装好的一个完整对象,而前端可能只需要用其中的某些字段,大部分数据的查询和传输工作都浪费了。graphQL提供一种全新数据查询方式,可以只获取需要的数据,使api调用更灵活、高效和低成本。
特点
- 需要什么就获取什么数据
- 支持关系数据的查询
- API无需定义各种路由,完全数据驱动
- 无需管理API版本,一个版本持续演进
- 支持大部分主流开发语言和平台
- 强大的配套开发工具
使用方法
下面我们通过搭建一个SpaceX的新闻网站来直观学习graphQL的基本使用方法,所有数据由 官方API 获得。
GraphQL服务端
服务端采用node + express。新建一个node项目,安装如下依赖:
$ npm i graphql express-graphql express axios
创建入口文件 server.js,里面创建express服务。使用graphQL我们只需要设置一个路由,所有的请求都由这个graphQL的request handler处理:
const express = require("express");

const graphqlHTTP = require("express-graphql");

const schema = require("./schema");

const app = express();

app.use(

    "/graphql",

    graphqlHTTP({

        schema,

        graphiql: true

    })

);

const PORT = process.env.PORT || 5000;

app.listen(PORT, () => console.log(`Server started on port ${PORT}`));
graphqlHTTP是grapql的http服务,用于处理graphql的查询请求,它接收一个options参数,其中schema是一个 GraphQLSchema实例,我们接下来定义,graphiql设置为true可以在浏览器中直接对graphQL进行调试。更多express-graphql的用法请参考 Github express-graphql。
schema
接下来我们定义schema,schema意为‘模式’,其中定义了数据模型的结构、字段的类型、模型间的关系,是graphQL的核心。
新建schema.js文件,首先定义两个数据模型:LaunchType(发射)和 RocketType(火箭)。注意字段的数据类型需要使用GraphQL定义的,不能使用js中的基本数据类型。
const {

    GraphQLObjectType,

    GraphQLInt,

    GraphQLString,

    GraphQLBoolean,

    GraphQLList,

    GraphQLSchema

} = require("graphql");

const LaunchType = new GraphQLObjectType({

    name: "Launch",

    fields: () => ({

        flight_number: { type: GraphQLInt },

        mission_name: { type: GraphQLString },

        launch_date_local: { type: GraphQLString },

        launch_success: { type: GraphQLBoolean },

        rocket: { type: RocketType }

    })

});

const LaunchType = new GraphQLObjectType({

    name: "Rocket",

    fields: () => ({

        rocket_id: { type: GraphQLString },

        rocket_name: { type: GraphQLString },

        rocket_type: { type: GraphQLString }

    })

});
有了数据模型之后,我们需要从数据库或者第三方API获取数据,在此我们从spacex的官方API获取。我们需要定义一个root query,root query做为所有查询的入口,处理并返回数据,更多请参考 GraphQL Root fields & resolvers。
在 schema.js中增加代码:
const axios = require("axios");

const RootQuery = new GraphQLObjectType({

    name: "RootQueryType",

    fields: {

        launches: {

            type: new GraphQLList(LaunchType),

            resolve(parent, args) {

                return axios

                    .get("https://api.spacexdata.com/v3/launches")

                    .then(res => res.data);

            }

        }

    }

});

module.exports = new GraphQLSchema({

    query: RootQuery

});
查询列表
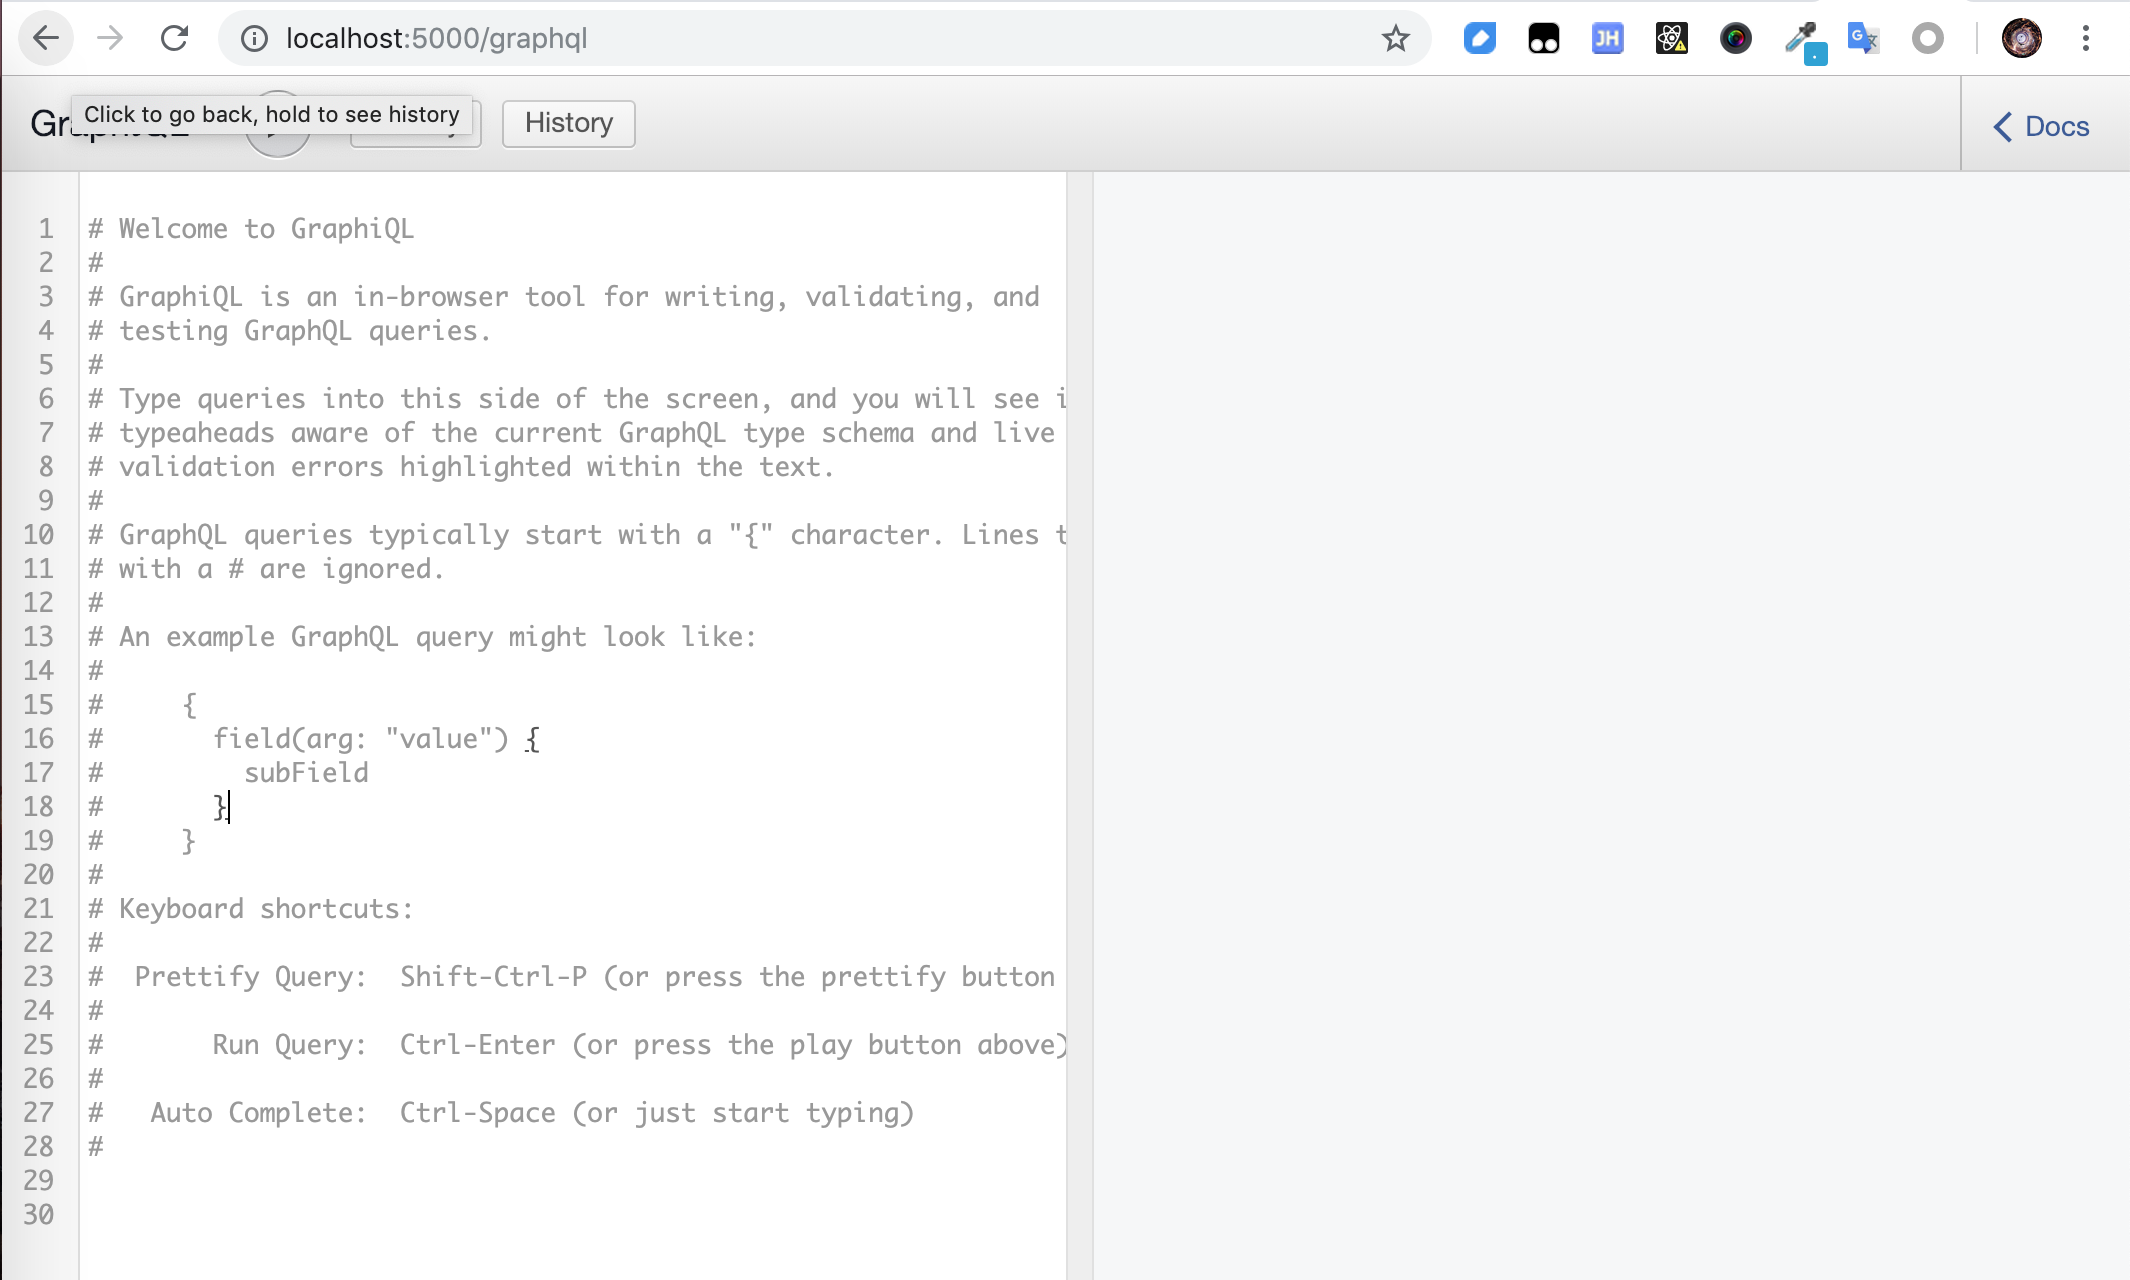
完成这一步,服务端api基本搭建完成!我们看一下效果,在浏览器中输入 http://localhost:5000/graphql 将打开 Graphiql(生产环境建议禁用):
我们可以只查询所有的 flight_number:
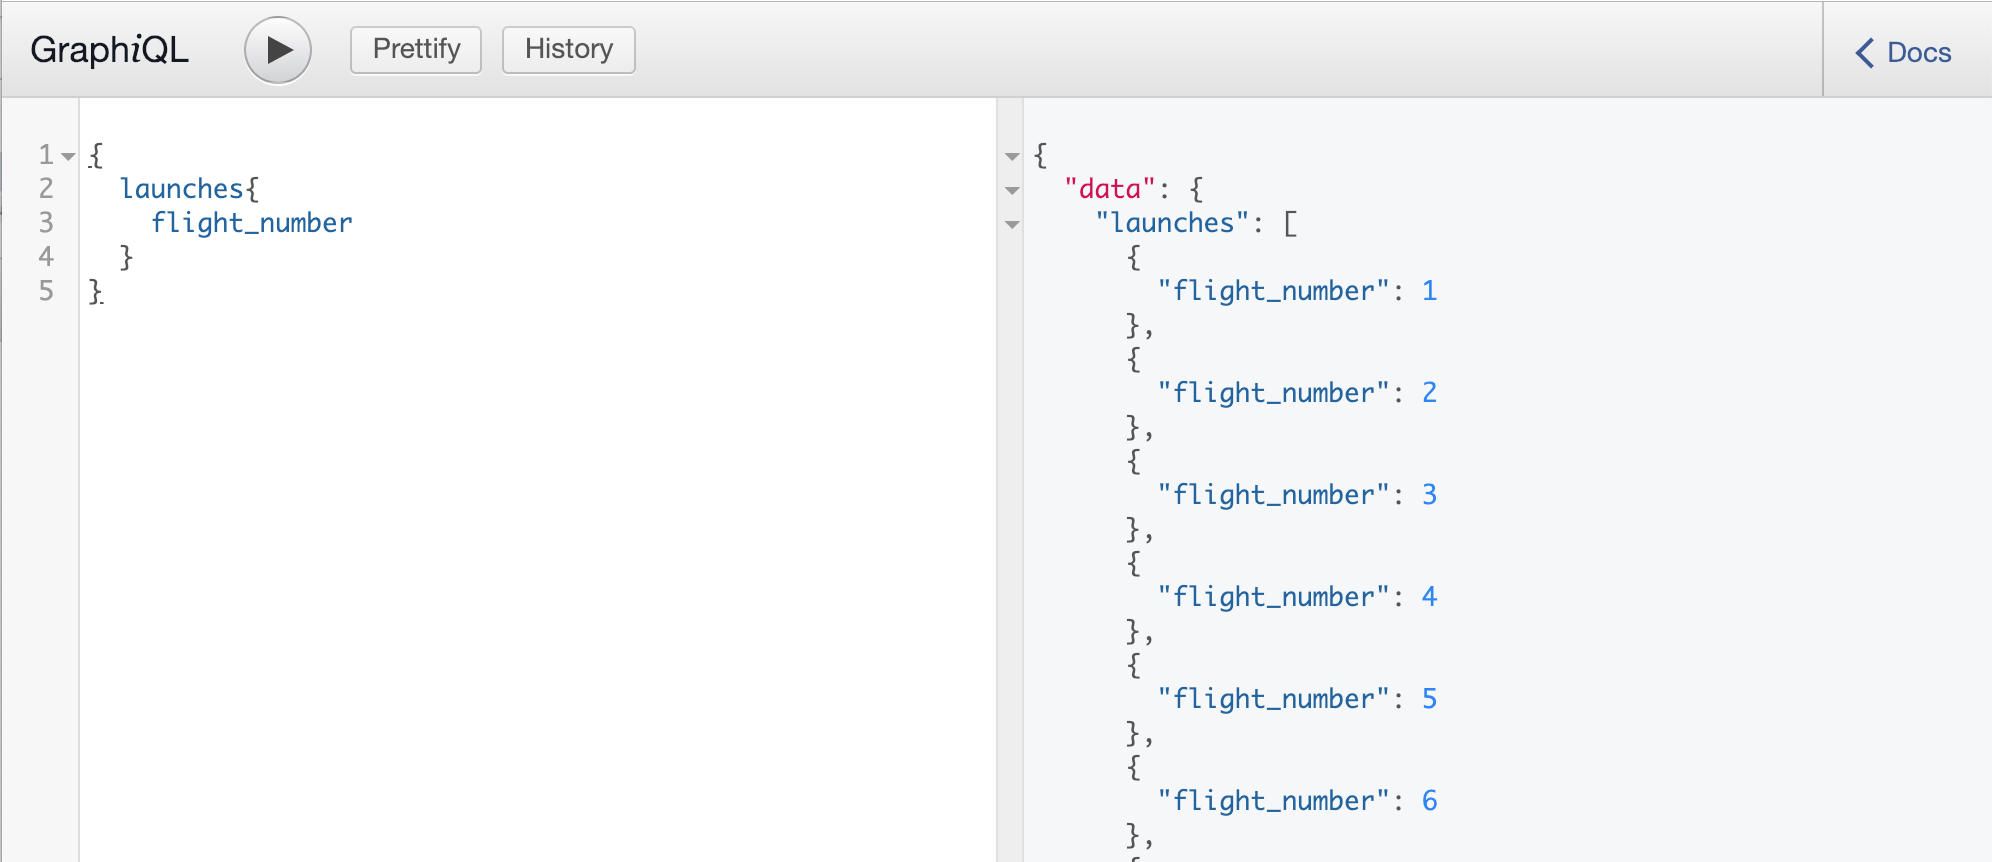
或者更多的属性:

是不是很简单很神奇!
单个查询
我们也可以通过传入参数查询单条信息:
const RootQuery = new GraphQLObjectType({

    name: "RootQueryType",

    fields: {

        launch: {

            type: LaunchType,

            args: {

                flight_number: { type: GraphQLInt }

            },

            resolve(parent, args) {

                return axios

                    .get(

                        `https://api.spacexdata.com/v3/launches/${

                            args.flight_number

                        }`

                    )

                    .then(res => res.data);

            }

        }

    }

});
结果:

推荐大家使用Fundebug,一款很好用的BUG监控工具~
GraphQL前端
刚刚我们都是用GraphiQL在浏览器调用接口,接下来我们看一下在前端页面中怎么调用graphql服务。前端我们使用react。
在项目根目录初始化react项目:
$ npx create-react-app client
为了便于调试,在package.json中增加scripts:
"start": "node server.js",

"server": "nodemon server.js",

"client": "npm start --prefix client",

"dev":"concurrently \"npm run server\" \"npm run client\" "
样式我们使用bootswatch中的一款主题:

GraphQL的客户端有多种实现,本次项目使用 Apollo,最流行的GraphQL Client。更多client请参考 GraphQL Clients。
安装依赖
安装如下依赖:
$ cd client

$ npm i apollo-boost react-apollo graphql
其中 apollo-boost 是apollo client本身,react-apollo 是react视图层的集成,graphql 用于解析graphql的查询语句。
设置client
修改App.js内容如下:
import React, { Component } from "react";

import ApolloClient from "apollo-boost";

import { ApolloProvider } from "react-apollo";

import "./theme.css";

import "./App.css";

import logo from "./spacex-logo-light.png";

const client = new ApolloClient({

    uri: "http://localhost:5000/graphql"

});

class App extends Component {

    render() {

        return (

            <ApolloProvider client={client}>

                <div className="container">

                    <img src={logo} id="logo" />

                </div>

            </ApolloProvider>

        );

    }

}

export default App;
和redux使用<Provider>传递store类似,react-apollo 通过 <ApolloProvider>将apollo client向下传递。
实现query
接着我们来实现显示launches的component,新增文件 components/Launches.js:
import React, { Component, Fragment } from "react";

import gql from "graphql-tag";

import { Query } from "react-apollo";

import LaunchItem from "./LaunchItem";

const LAUNCHES_QUERY = gql`

    query LaunchesQuery {

        launches {

            flight_number

            mission_name

            launch_date_local

            launch_success

        }

    }

`;

export class Launches extends Component {

    render() {

        return (

            <Fragment>

                <h1 className="display-4 my-3">Launches</h1>

                <Query query={LAUNCHES_QUERY}>

                    {({ loading, error, data }) => {

                        if (loading) return <h4>Loading...</h4>;

                        if (error) console.log(error);

                        return (

                            <Fragment>

                                {data.launches.map(launch => (

                                    <LaunchItem

                                        key={launch.flight_number}

                                        launch={launch}

                                    />

                                ))}

                            </Fragment>

                        );

                    }}

                </Query>

            </Fragment>

        );

    }

}

export default Launches;
query语句通过 graphql-tag 定义,传入 <Query> 执行获取数据并传入 LaunchItem 显示。
components/LaunchItem.js:
import React from "react";

export default function LaunchItem({

    launch: { flight_number, mission_name, launch_date_local, launch_success }

}) {

    return (

        <div className="card card-body mb-3">

            <div className="col-md-9">

                <h4>Mission: {mission_name}</h4>

                <p>Date: {launch_date_local}</p>

            </div>

            <div className="col-md-3">

                <button className="btn btn-secondary">Launch Details</button>

            </div>

        </div>

    );

}
查询语句通过graphql-tag定义,然后传入<Query>执行。
运行
由于本地调试,client和server分别运行在不同的端口,所以需要先进行跨域处理,使用 cors。
// server.js

const cors = require('cors');

app.use(cors());
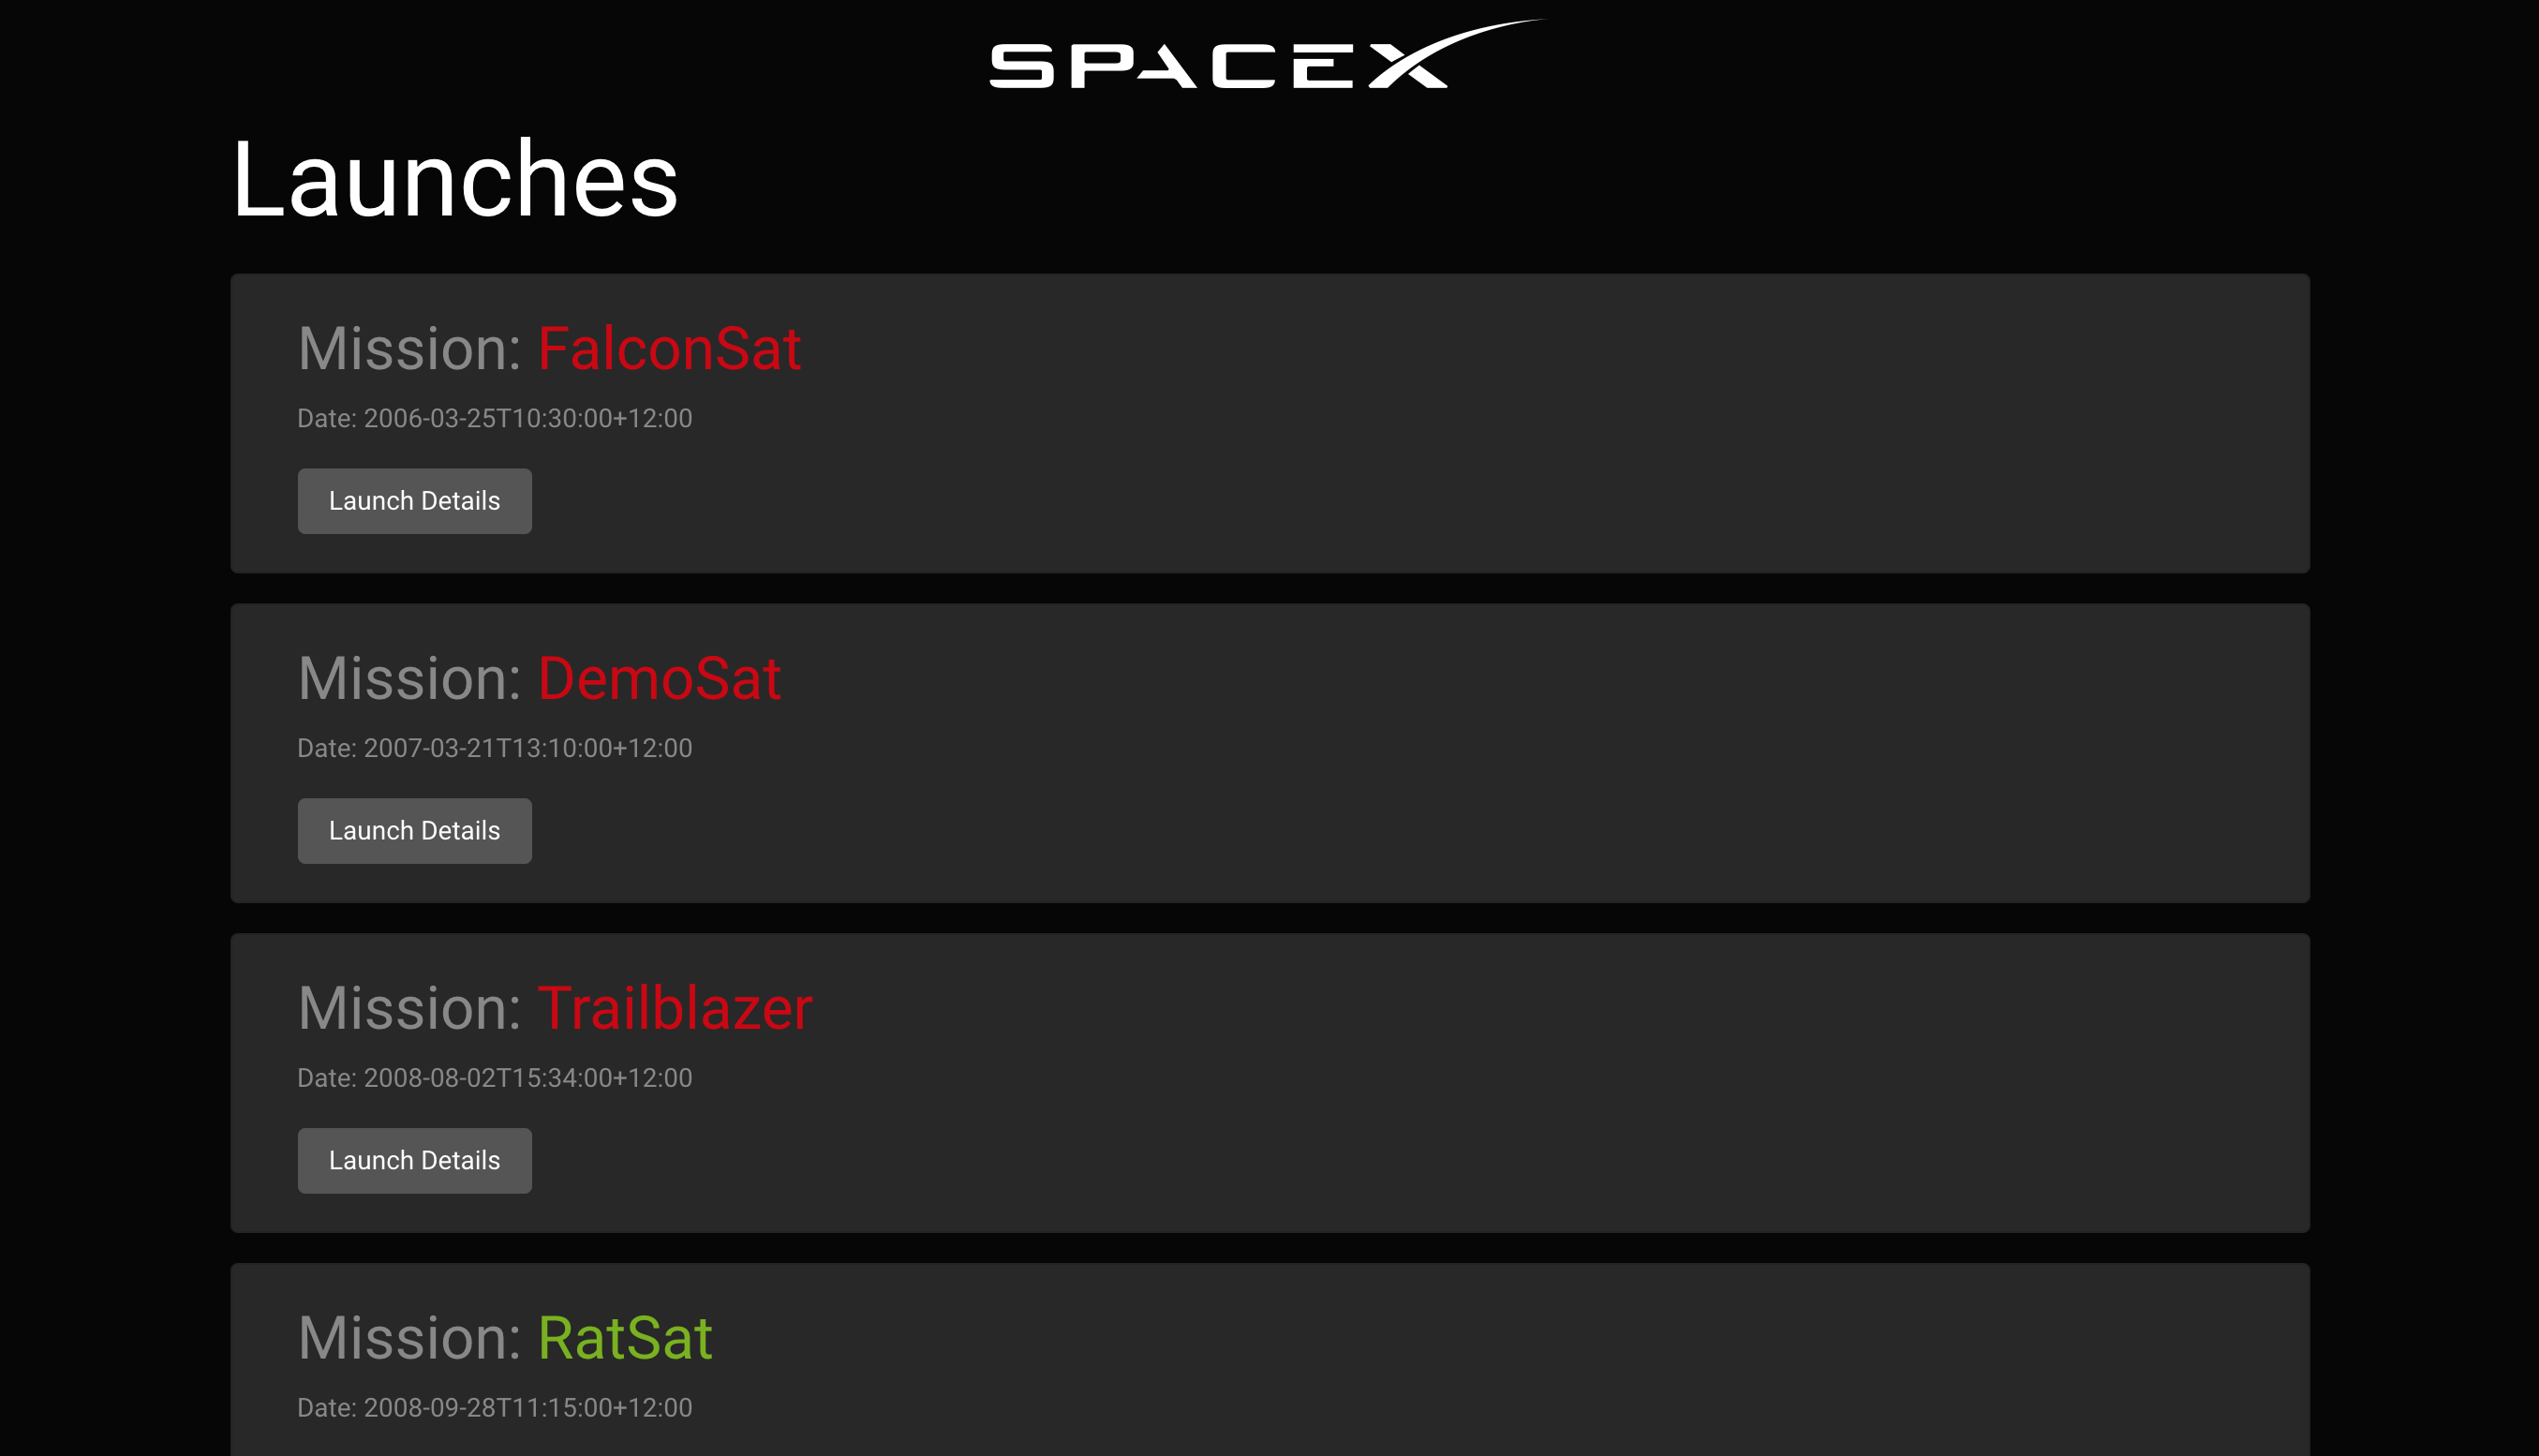
效果
好了,大功告成,我们来看一下效果:
结语
今天就主要介绍GraphQL工程的搭建和GraphQL Query的使用,更多关于GraphQL的内容比如 Mutation下次有空会跟大家逐步讲解。
本文灵感来源:Youtube@Traversy Media,感谢
本文Demo Github地址:Github@MudOnTire
本文Demo线上展示:Heroku@graphql-spacex-launches
最后,推荐大家使用Fundebug,一款很好用的BUG监控工具~
关于Fundebug
Fundebug专注于JavaScript、微信小程序、微信小游戏、支付宝小程序、React Native、Node.js和Java线上应用实时BUG监控。 自从2016年双十一正式上线,Fundebug累计处理了10亿+错误事件,付费客户有阳光保险、核桃编程、荔枝FM、掌门1对1、微脉、青团社等众多品牌企业。欢迎大家免费试用!
GraphQL快速入门教程的更多相关文章
- 专为设计师而写的GitHub快速入门教程
专为设计师而写的GitHub快速入门教程 来源: 伯乐在线 作者:Kevin Li 原文出处: Kevin Li 在互联网行业工作的想必都多多少少听说过GitHub的大名,除了是最大的开源项目 ...
- EntityFramework6 快速入门教程
EntityFramework6 快速入门教程 不得不说EF在国内实在是太小众,相关的技术文章真实屈指可数,而且很多文章都很旧了,里面使用的版本跟如今的EF6差别还是比较大.我刚开始弄这个的时候真是绕 ...
- Apple Watch开发快速入门教程
Apple Watch开发快速入门教程 试读下载地址:http://pan.baidu.com/s/1eQ8JdR0 介绍:苹果为Watch提供全新的开发框架WatchKit.本教程是国内第一本A ...
- 指示灯组与3个复位按钮的介绍Arduino Yun快速入门教程
指示灯组与3个复位按钮的介绍Arduino Yun快速入门教程 1.4.2 指示灯组 指示灯组的放大图如图1.5所示. 图1.5 指示灯组 各个指示灯对应的功能如下: q RX:对应于0号端口, ...
- 游戏控制杆OUYA游戏开发快速入门教程
游戏控制杆OUYA游戏开发快速入门教程 1.2.2 游戏控制杆 游戏控制杆各个角度的视图,如图1-4所示,它的硬件规格是本文选自OUYA游戏开发快速入门教程大学霸: 图1-4 游戏控制杆各个角度的 ...
- Query 快速入门教程
Query 快速入门教程 http://www.365mini.com/page/jquery-quickstart.htm#what_is_jquery jquery常用方法及使用示例汇总 http ...
- Realm for Android快速入门教程
介绍 如果你关注安卓开发的最新趋势,你可能已经听说过Realm.Realm是一个可以替代SQLite以及ORMlibraries的轻量级数据库. 相比SQLite,Realm更快并且具有很多现代数据库 ...
- CMake快速入门教程-实战
http://www.ibm.com/developerworks/cn/linux/l-cn-cmake/ http://blog.csdn.net/dbzhang800/article/detai ...
- .NET Core 快速入门教程
.NET Core 快速学习.入门系列教程.这个入门系列教程主要跟大家聊聊.NET Core的前世今生,以及Windows.Linux(CentOS.Ubuntu)基础开发环境的搭建.第一个.NET ...
随机推荐
- Hive性能调优(二)----数据倾斜
Hive在分布式运行的时候最害怕的是数据倾斜,这是由于分布式系统的特性决定的,因为分布式系统之所以很快是由于作业平均分配给了不同的节点,不同节点同心协力,从而达到更快处理完作业的目的. Hive中数据 ...
- Python—端口检测(socket)
基于python检测端口是否在使用 原理:创建一个socket服务,连接对应的 ip:port ,如果能够连接,说明端口被占用:若端口可用,则不可连接. #!/usr/bin/evn python # ...
- client-go集群外认证k8s
除了认证外,还判断了操作系统. 且根据不同的系统,生成不同的文件. 在集群外认证时,使用的是k8s官方的方式, 而不是第三方库. package main import ( "flag&qu ...
- Vue中怎样使用swiper组件?
我用的VS Code编译器,首先打开终端,进入项目(我是在13-vue文件夹下面的elem中使用) D:\study\web\13-vue\elem> cnpm install vue-awes ...
- 6. Vue - 声明周期
一.官方vue生命周期流程图 二.vue声明周期介绍 beforeCreate执行时:data和el均未初始化,值为undefined created执行时:Vue 实例观察的数据对象data已经配置 ...
- jmeter BeanShell的几种使用方式
jmeter的BeanShell Sampler,可以直接引用java代码,有下面3种方式: 1.直接输入java代码:2.导入java文件:3.导入class文件 BeanShell脚本访问变量主要 ...
- 《深度学习》圣经"花书"经验法则中文版!
作者:Jeff Macaluso https://jeffmacaluso.github.io/post/DeepLearningRulesOfThumb/ 转自CVer,仅用作个人学习 当我在研究生 ...
- 【CodeChef】August Challenge 2019 Div2 解题报告
点此进入比赛 \(T1\):Football(点此看题面) 大致题意: 求\(max(20a_i-10b_i,0)\). 送分题不解释. #include<bits/stdc++.h> # ...
- 【2019.7.24 NOIP模拟赛 T1】道路建设(road)(水题)
原题与此题 原题是一道神仙不可做题,两者区别在于,原题不能有重边和自环. 然而,这题可以有重边... 于是这题就变成了一道大水题. 此题的解法 考虑如何构造. 对于\(n\le10^4\)的情况: 对 ...
- gradle是什么
Gradle是JVM生态下又一款开源的自动化构建工具,以基于Groovy的DSL描述构建过程,在结合了ant和maven的优点的基础上,提供了更为简洁,灵活和高效的build体验. Task代表了构建 ...