Android中通过Fragment进行简单的页面切换
首先是activity中的布局
<?xml version="1.0" encoding="utf-8"?>

<androidx.constraintlayout.widget.ConstraintLayout xmlns:android="http://schemas.android.com/apk/res/android"

    xmlns:app="http://schemas.android.com/apk/res-auto"

    xmlns:tools="http://schemas.android.com/tools"

    android:layout_width="match_parent"

    android:layout_height="match_parent"

    tools:context=".MainActivity">

    <FrameLayout

        android:id="@+id/fragment"

        android:layout_width="395dp"

        android:layout_height="509dp"

        app:layout_constraintEnd_toEndOf="parent"

        app:layout_constraintHorizontal_bias="0.333"

        app:layout_constraintStart_toStartOf="parent"

        app:layout_constraintTop_toTopOf="parent">

    </FrameLayout>

    <Button

        android:id="@+id/b1"

        android:layout_width="wrap_content"

        android:layout_height="wrap_content"

        android:layout_marginStart="50dp"

        android:layout_marginBottom="12dp"

        android:text="1"

        app:layout_constraintBottom_toBottomOf="parent"

        app:layout_constraintStart_toStartOf="parent" />

    <Button

        android:id="@+id/b2"

        android:layout_width="wrap_content"

        android:layout_height="wrap_content"

        android:layout_marginEnd="64dp"

        android:layout_marginBottom="17dp"

        android:text="2"

        app:layout_constraintBottom_toBottomOf="parent"

        app:layout_constraintEnd_toEndOf="parent" />

</androidx.constraintlayout.widget.ConstraintLayout>
创建两个Fragment子类
这里以一个为例
package com.example.fragment;

import android.os.Bundle;

import androidx.annotation.NonNull;
import androidx.annotation.Nullable;
import androidx.fragment.app.Fragment;

import android.view.LayoutInflater;
import android.view.View;
import android.view.ViewGroup;

public class f1 extends Fragment {

    @Override
    public View onCreateView(@NonNull LayoutInflater inflater, @Nullable ViewGroup container,
                             @Nullable Bundle savedInstanceState) {
        return inflater.inflate(R.layout.f1_fragment2, container, false);
    }

}
其布局:
<?xml version="1.0" encoding="utf-8"?>

<androidx.constraintlayout.widget.ConstraintLayout xmlns:android="http://schemas.android.com/apk/res/android"

    xmlns:app="http://schemas.android.com/apk/res-auto"

    xmlns:tools="http://schemas.android.com/tools"

    android:id="@+id/f1"

    android:layout_width="match_parent"

    android:layout_height="match_parent"

    tools:context="f1">

    <TextView

        android:id="@+id/textView4"

        android:layout_width="182dp"

        android:layout_height="85dp"

        android:layout_marginTop="165dp"

        android:text="我是1"

        app:layout_constraintEnd_toEndOf="parent"

        app:layout_constraintStart_toStartOf="parent"

        app:layout_constraintTop_toTopOf="parent" />

</androidx.constraintlayout.widget.ConstraintLayout>
最后也是最重要的,Mainactivity内容:
package com.example.fragment;

import androidx.appcompat.app.AppCompatActivity;

import androidx.fragment.app.FragmentManager;

import androidx.fragment.app.FragmentTransaction;

import android.os.Bundle;

import android.view.View;

import android.widget.Button;

public class MainActivity extends AppCompatActivity {

    private Button b1=null;

    private Button b2=null;

   private  FragmentManager fm=null ;

    private  FragmentTransaction transaction =null ;

    private f1 f1;

    private f2 f2;

    @Override

    protected void onCreate(Bundle savedInstanceState) {

        super.onCreate(savedInstanceState);

        setContentView(R.layout.activity_main);

        b1=(Button)findViewById(R.id.b1);

        b2=(Button)findViewById(R.id.b2);

       fm = getSupportFragmentManager();

    setDefaultFragment();

    b1.setOnClickListener(new View.OnClickListener() {

        @Override

        public void onClick(View v) {

            transaction = fm.beginTransaction();

            f1=new f1();

            transaction.replace(R.id.fragment,f1);

            transaction.commit();

        }

    });

    b2.setOnClickListener(new View.OnClickListener() {

        @Override

        public void onClick(View v) {

            transaction = fm.beginTransaction();

            f2=new f2();

            transaction.replace(R.id.fragment,f2);

            transaction.commit();

        }

    });

    }

    private void setDefaultFragment()

    {

        transaction = fm.beginTransaction();

        f1=new f1();

        transaction.replace(R.id.fragment,f1);

        transaction.commit();

    }

}
注意:每个FragmentTransaction只能提交一次,因此在每次提交前都要重新为transaction赋予一个新对象;
还有关于“fm = getSupportFragmentManager();”处使用“getSupportFragmentManager();”,而不使用“fm = getFragmentManager();”的原因请参照这篇帖子https://blog.csdn.net/qq_28484355/article/details/67824228
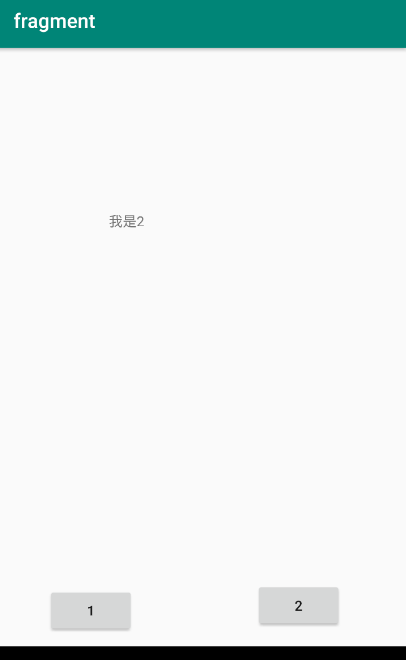
效果:

点击“2”后:
Android中通过Fragment进行简单的页面切换的更多相关文章
- android中viewPager+fragment实现的屏幕左右切换(进阶篇)
Fragment支持在不同的Activity中使用并且可以处理自己的输入事件以及生命周期方法等.可以看做是一个子Activity. 先看一下布局: 1 <LinearLayout xmlns:a ...
- Android中ViewPager+Fragment取消(禁止)预加载延迟加载(懒加载)问题解决方案
转载请注明出处:http://blog.csdn.net/linglongxin24/article/details/53205878本文出自[DylanAndroid的博客] Android中Vie ...
- Android笔记(十九) Android中的Fragment
通常我们使用Activity来展示界面,但是在手机上界面可能显示的很好看,但在平板上,因为平板的屏幕非常大,手机的界面放在平板上可能会出现控件被拉长.控件之间间距变大等问题.为了更好的体验效果,在Ac ...
- Android 中关于Fragment嵌套Fragment的问题
转载请注明出处:http://www.cnblogs.com/Joanna-Yan/p/5802146.html 问题描述: 在项目中Activity A中嵌套Fragment B,Fragment ...
- Android中GPS定位的简单应用
在Android中通过GPS获得当前位置,首先要获得一个LocationManager实例,通过该实例的getLastKnownLocation()方法获得第一个的位置,该方法的说明如下: void ...
- ViewPager (下)-- 利用 Fragment 实现美丽的 页面切换
之前用的ViewPager适用于简单的广告切换,但实现页面间的切换最好是用官方推荐的Fragment来处理. 本人力争做到最简单.最有用,是想以后用到的时候能够方便的拿过来复制就能够了. 效果图: w ...
- Android中的Fragment页面切换和selector选择器
效果如图: 提示:下面是用的整个的图片 下面看代码: //--------------------这是主页面布局文件----------------------- <?xml version=& ...
- Android中ViewPgae中的Fragment如何确认当前页面可见的问题
由于在ViewPage中PageAdapter来管理所有的Fragment.在加载一个Fragment的时候,会自动缓存左右几个(默认是一个)页面,此时也会调用到正常的生命周期函数,onCreate, ...
- 【IOS】ios中NSUserDefault与android中的SharedPreference用法简单对比
以下内容为原创,欢迎转载,转载请注明 来自天天博客:http://www.cnblogs.com/tiantianbyconan/p/3405308.html 有Android开发经验的朋友对Shar ...
随机推荐
- CF572_Div2_F
题意 http://codeforces.com/contest/1189/problem/F 思考 由于是子序列,答案只跟选法有关,与顺序无关,先排序. 直接计算答案比较困难.联想到期望的无穷级数计 ...
- sas9.2 windows7系统 10年11月后 建立永久数据集时,提示:“用户没有与逻辑库相应的授权级别
先把你这个逻辑库删掉,在桌面创立空的新文件夹,然后用这个新文件夹在sas里新建逻辑库,名字照旧,再把你要的数据放进空文件夹就好了
- Linux 常用工具sysstat之sar
sysstat包 iostat.sar.sa1和sa2命令都是sysstat包的一部分.它是Linux包含的性能监视工具集合: sar:收集.报告或存储信息(CPU.内存.磁盘.中断.网卡.TTY.内 ...
- 在华为云上开启FTP服务并建立FTP站点来从本地向服务器发送和下载文件
时间:2019/12/8 最近学习计算机网络的时候老师布置了一个实践作业,具体要求是两个人一组,一个在电脑上建立FTP站点,另一个开启FTP服务器来进行文件的上传和下载. 看到这个的时候我灵机一动,正 ...
- 【WPF学习】第三十三章 高级命令
前面两章介绍了命令的基本内容,可考虑一些更复杂的实现了.接下来介绍如何使用自己的命令,根据目标以不同方式处理相同的命令以及使用命令参数,还将讨论如何支持基本的撤销特性. 一.自定义命令 在5个命令类( ...
- C++基类和派生类的构造函数
派生类不能继承基类的构造函数,若想通过派生类来对基类的private的变量成员进行初始化则需要: 通过派生类的构造函数来调用基类的构造函数完成基类成员变量的初始化. 看下面的例子: #include ...
- LeetCode 664. Strange Printer 奇怪的打印机(C++/Java)
题目: There is a strange printer with the following two special requirements: The printer can only pri ...
- LeetCode.509——斐波那契数
问题描述: 斐波那契数,通常用 F(n) 表示,形成的序列称为斐波那契数列.该数列由 0 和 1 开始,后面的每一项数字都是前面两项数字的和.也就是: F(0) = 0, F(1) = 1 F(N) ...
- Codeforces_799
A.求两个时间比较一下. #include<bits/stdc++.h> using namespace std; int n,t,k,d; int main() { ios::sync_ ...
- (三)Mybatis类型转换器,接口传参类型,一对一,一对多查询resultMap配置
Mybatis类型转换器 首先明白什么时候用到它,当数据库的字段类型和java字段类型无法默认匹配时候进行转换,比如现在数据库类型是INTEGER,而java当中类型是Boolean,true表示1, ...