【springboot】之整合ActiveMQ
1、引入依赖的jar
<parent>

        <groupId>org.springframework.boot</groupId>

        <artifactId>spring-boot-starter-parent</artifactId>

        <version>1.5.9.RELEASE</version>

    </parent>
<dependencies>

        <dependency>

            <groupId>org.springframework.boot</groupId>

            <artifactId>spring-boot-starter</artifactId>

        </dependency>

        <dependency>

            <groupId>org.springframework.boot</groupId>

            <artifactId>spring-boot-starter-activemq</artifactId>

        </dependency>

        <dependency>

            <groupId>org.springframework.boot</groupId>

            <artifactId>spring-boot-starter-web</artifactId>

        </dependency>

        <dependency>

            <groupId>org.springframework.boot</groupId>

            <artifactId>spring-boot-starter-logging</artifactId>

        </dependency>

        <dependency>

            <groupId>org.springframework.boot</groupId>

            <artifactId>spring-boot-starter-test</artifactId>

        </dependency>

        <dependency>

            <groupId>org.apache.activemq</groupId>

            <artifactId>activemq-pool</artifactId>

        </dependency>

    </dependencies>
2、application配置
spring.activemq.broker-url=tcp://localhost:61616

spring.activemq.in-memory=true

spring.activemq.pool.enabled=true
3、单向发送消息
@RunWith(SpringJUnit4ClassRunner.class)

@SpringBootTest(classes = MqApplication.class)

public class MqTest {

    @Autowired

    JmsMessagingTemplate jmsMessagingTemplate;

    //发送String消息

    @Test

    public void testStr() {

        //往luna队列发送消息

        jmsMessagingTemplate.convertAndSend("luna","to luna queue");

    }

}
接收消息
@Component

@Slf4j

public class Consumer {

    @JmsListener(destination = "luna")

    public void receiveQueue(String text){

        log.info("receive:{}",text);

    }

}
查看ActiveMQ控制台
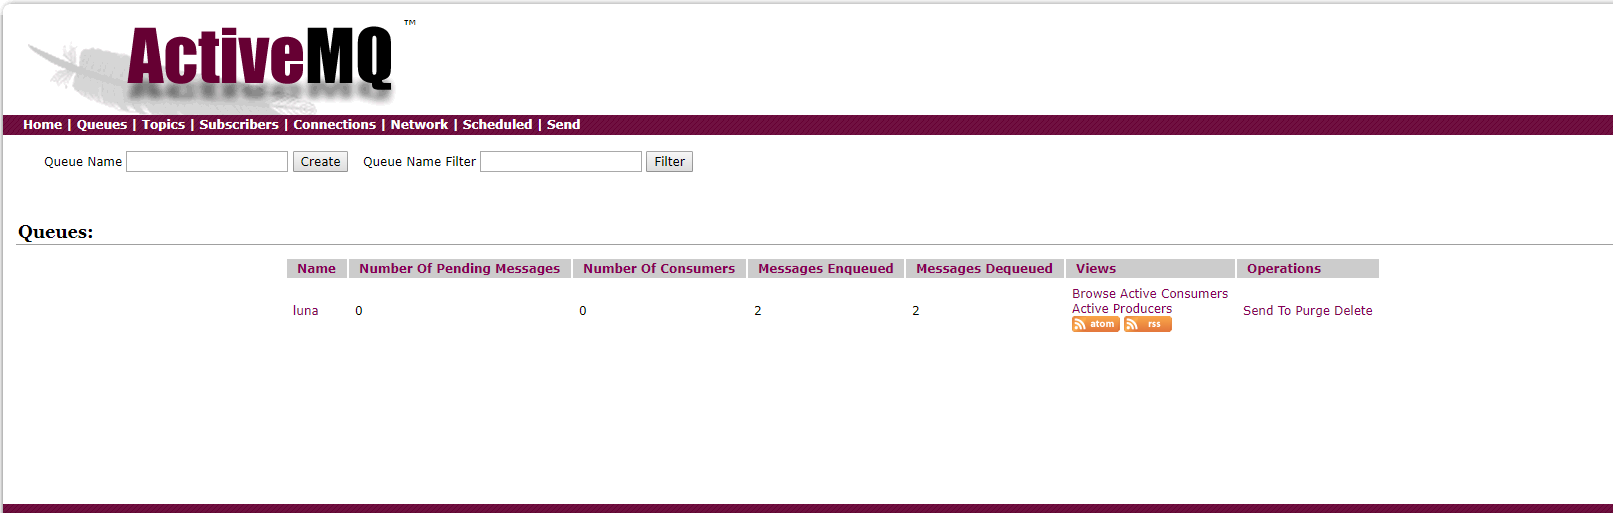
控制台打印

4、双向发送消息
例如 A发送B消费 B消费完毕将结果放在某一个队列中,A再去消费
我们将上面代码继续改造一下
@Component

@Slf4j

public class Consumer {

    @JmsListener(destination = "luna")

    @SendTo("luna_ret")//将消费结果返回

    public String receiveQueue(String text){

        log.info("receive:{}",text);

        return "SUCCESS--"+text;

    }

}
写一个消费luna_ret的queue
@Component

@Slf4j

public class ConsumerRet {

    @JmsListener(destination = "luna_ret")

    public void receiveQueue(String text){

        log.info("receive:{}",text);

    }

}
ok,我们再执行上面的发送queues代码
ActiveMQ控制台显示
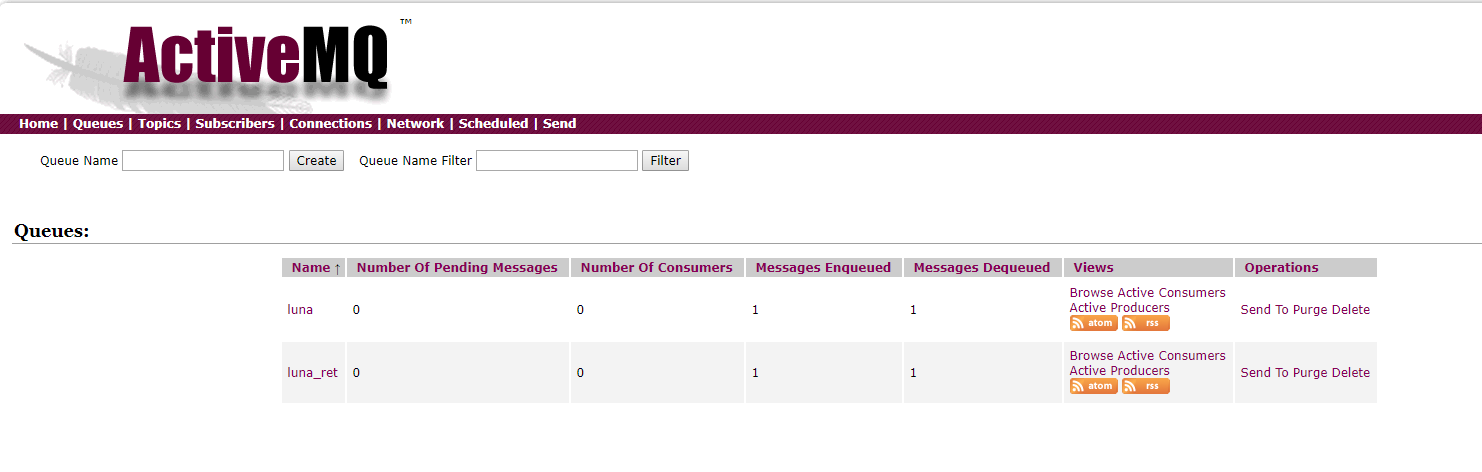
控制台日志显示

由上可知,
@SendTo 注解
可以将返回值发送到指定的queue
-----------------------------------------------
springboot整合ActiveMQ安全配置
【springboot】之整合ActiveMQ的更多相关文章
- springboot整合ActiveMQ,配置问题
1.ActiveMQ的安装和相关配置修改 去官网下载安装包解压至文件夹 双击打开 打开浏览器输入 http://127.0.0.1:8161 到此activeMQ就安装好了 2.springboot工 ...
- SpringBoot2.0源码分析(二):整合ActiveMQ分析
SpringBoot具体整合ActiveMQ可参考:SpringBoot2.0应用(二):SpringBoot2.0整合ActiveMQ ActiveMQ自动注入 当项目中存在javax.jms.Me ...
- Web项目容器集成ActiveMQ & SpringBoot整合ActiveMQ
集成tomcat就是随项目启动而启动tomcat,最简单的方法就是监听器监听容器创建之后以Broker的方式启动ActiveMQ. 1.web项目中Broker启动的方式进行集成 在这里采用Liste ...
- SpringBoot系列八:SpringBoot整合消息服务(SpringBoot 整合 ActiveMQ、SpringBoot 整合 RabbitMQ、SpringBoot 整合 Kafka)
声明:本文来源于MLDN培训视频的课堂笔记,写在这里只是为了方便查阅. 1.概念:SpringBoot 整合消息服务 2.具体内容 对于异步消息组件在实际的应用之中会有两类: · JMS:代表作就是 ...
- SpringBoot整合ActiveMQ快速入门
Spring Boot 具有如下特性: 为基于 Spring 的开发提供更快的入门体验 开箱即用,没有代码生成,也无需 XML 配置.同时也可以修改默认值来满足特定的需求. 提供了一些大型项目中常见的 ...
- SpringBoot 2.x (13):整合ActiveMQ
ActiveMQ5.x不多做介绍了,主要是SpringBoot的整合 特点: 1)支持来自Java,C,C ++,C#,Ruby,Perl,Python,PHP的各种跨语言客户端和协议 2)支持许多高 ...
- SpringBoot第二十一篇:整合ActiveMQ
作者:追梦1819 原文:https://www.cnblogs.com/yanfei1819/p/11190048.html 版权声明:本文为博主原创文章,转载请附上博文链接! 引言 前一章节中 ...
- 解决Springboot整合ActiveMQ发送和接收topic消息的问题
环境搭建 1.创建maven项目(jar) 2.pom.xml添加依赖 <parent> <groupId>org.springframework.boot</group ...
- SpringBoot整合ActiveMQ和开启持久化
一.点对点 1.提供者目录展示 2.导入依赖 <dependency> <groupId>org.springframework.boot</groupId> &l ...
随机推荐
- MySQL篇,第三章:数据库知识3
MySQL 数据库 3 索引 1.普通索引(MUL) 2.唯一索引(UNI) 3.主键索引(PRI) 1.使用规则 1.一个表中只能有一个主键(primary)字段 2.对应字段的值不允许重复 ...
- Python之路,第十四篇:Python入门与基础14
python3 模块2 标准模块 随机模块random 假设导入 import random as R 函数: R.random() 返回一个[0 ,1) 之间的随机数 R.getr ...
- IDEA 导出项目war包
部署 Maven 项目,使用 “mvn package” 命令出现错误,不能正确打包时的解决方法 一.最简单.最快的方式: 思路,本地能运行,直接把本地编译后能正确运行的项目文件打包,传到服务器部署即 ...
- XXS level3
(1)用level1和2的方法都行不通,查看PHP源代码,发现url与输入框内容都进行了过滤 <?php ini_set("display_errors", 0); $str ...
- 51Nod 1007:正整数分组(01背包)
1007 正整数分组 基准时间限制:1 秒 空间限制:131072 KB 分值: 10 难度:2级算法题 收藏 关注 将一堆正整数分为2组,要求2组的和相差最小. 例如:1 2 3 4 5,将1 ...
- ATM-java
通过学习JAVA,我的进步不是很多,了解了不多的编程知识,但是我一直在进步,我发现我有很大的进步空间,每天都有一点点的进步使我每天都很充实.还记得我编写的第一个 经典程序“hello Word”.从那 ...
- web网页【2】
前端代码: <%@ Page Language="C#" AutoEventWireup="true" CodeFile="Default.as ...
- mongodb备份与还原
mongodb单机: 备份所有的库: mongodump --host 10.10.7.33:27019 --gzip --out /home/mongodb/0415_bf 备份指定的库: mong ...
- c++简单的ATL COM开发和调用实例
1.打开VS2010.新建ATL COM 项目.步骤:"文件" -->"新建" -->"项目",选择"Visual C ...
- centos7离线安装rpm包自动解决依赖
离线安装rpm包自动解决依赖参照https://blog.csdn.net/u011396718/article/details/80153515当生产环境由于安全原因处于断网状态的时候.通过本地源的 ...