
spring学习笔记之---bean属性注入
bean属性注入

(一)构造方法的属性注入
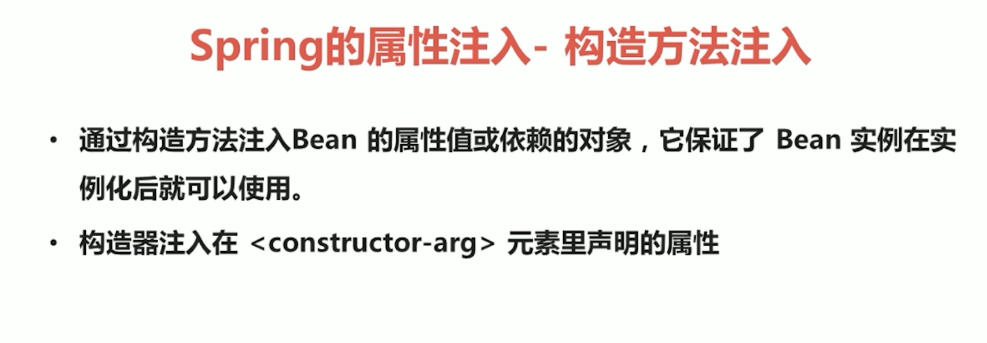
1.Student.java
package entity;

public class Student {

    private String name;

    private String age;

    public Student(String name, String age) {

        this.name = name;

        this.age = age;

    }

    @Override

    public String toString() {

        return "Student{" +

                "name='" + name + '\'' +

                ", age='" + age + '\'' +

                '}';

    }

}
2.applicationContext.xml
<?xml version="1.0" encoding="UTF-8"?>

<beans xmlns="http://www.springframework.org/schema/beans"

       xmlns:xsi="http://www.w3.org/2001/XMLSchema-instance"

       xsi:schemaLocation="http://www.springframework.org/schema/beans http://www.springframework.org/schema/beans/spring-beans.xsd">

    <bean id="student" class="entity.Student">

        <constructor-arg name="name" value="李四"/>

        <constructor-arg name="age" value="21"/>

    </bean>

</beans>
3.StudentTest.java
package Test;

import entity.Student;

import entity.User;

import org.junit.Test;

import org.springframework.context.ApplicationContext;

import org.springframework.context.support.ClassPathXmlApplicationContext;

public class StudentTest {

    @Test

    public void stu(){

        ApplicationContext applicationContext=new ClassPathXmlApplicationContext("applicationContext.xml");

        Student student=(Student)applicationContext.getBean("student");

        System.out.println(student);

    }

}
(二)set方法的属性注入
1.Student.java
package entity;

public class Student {

    private String name;

    private String age;

    public String getName() {

        return name;

    }

    public void setName(String name) {

        this.name = name;

    }

    public String getAge() {

        return age;

    }

    public void setAge(String age) {

        this.age = age;

    }

    @Override

    public String toString() {

        return "Student{" +

                "name='" + name + '\'' +

                ", age='" + age + '\'' +

                '}';

    }

}
2.applicationContext.xml
<?xml version="1.0" encoding="UTF-8"?>

<beans xmlns="http://www.springframework.org/schema/beans"

       xmlns:xsi="http://www.w3.org/2001/XMLSchema-instance"

       xsi:schemaLocation="http://www.springframework.org/schema/beans http://www.springframework.org/schema/beans/spring-beans.xsd">

    <bean id="student2" class="entity.Student">

        <property name="name" value="张三"/>

        <property name="age" value="22"/>

    </bean>

</beans>
3.StudentTest.java
package Test;

import entity.Student;

import entity.User;

import org.junit.Test;

import org.springframework.context.ApplicationContext;

import org.springframework.context.support.ClassPathXmlApplicationContext;

public class StudentTest {

      @Test

    public void stu2(){

        ApplicationContext applicationContext=new ClassPathXmlApplicationContext("applicationContext.xml");

        Student student2=(Student)applicationContext.getBean("student2");

        System.out.println(student2);

    }

}
(三)p名称空间的属性注入

1.Student.java
package entity;

public class Student {

    private String name;

    private String age;

    private Cat cat;

    public String getName() {

        return name;

    }

    public void setName(String name) {

        this.name = name;

    }

    public String getAge() {

        return age;

    }

    public void setAge(String age) {

        this.age = age;

    }

    public Cat getCat() {

        return cat;

    }

    public void setCat(Cat cat) {

        this.cat = cat;

    }

    @Override

    public String toString() {

        return "Student{" +

                "name='" + name + '\'' +

                ", age='" + age + '\'' +

                ", cat=" + cat +

                '}';

    }

}
2.Cat.java
package entity;

public class Cat {

    private String name;

    public String getName() {

        return name;

    }

    public void setName(String name) {

        this.name = name;

    }

    @Override

    public String toString() {

        return "Cat{" +

                "name='" + name + '\'' +

                '}';

    }

}
3.applicationContext.xml
<?xml version="1.0" encoding="UTF-8"?>

<beans xmlns="http://www.springframework.org/schema/beans"

       xmlns:p="http://www.springframework.org/schema/p"

       xmlns:xsi="http://www.w3.org/2001/XMLSchema-instance"

       xsi:schemaLocation="http://www.springframework.org/schema/beans http://www.springframework.org/schema/beans/spring-beans.xsd">

    <bean id="student3" class="entity.Student" p:name="小明" p:age="15" p:cat-ref="cat"/>

    <bean id="cat" class="entity.Cat" p:name="小黄"/>

</beans>
4.StudentTest.java
package Test;

        import entity.Student;

        import entity.User;

        import org.junit.Test;

        import org.springframework.context.ApplicationContext;

        import org.springframework.context.support.ClassPathXmlApplicationContext;

public class StudentTest {

    @Test

    public void stu3(){

        ApplicationContext applicationContext=new ClassPathXmlApplicationContext("applicationContext.xml");

        Student student3=(Student)applicationContext.getBean("student3");

        System.out.println(student3);

    }

}
(四)spel的属性注入
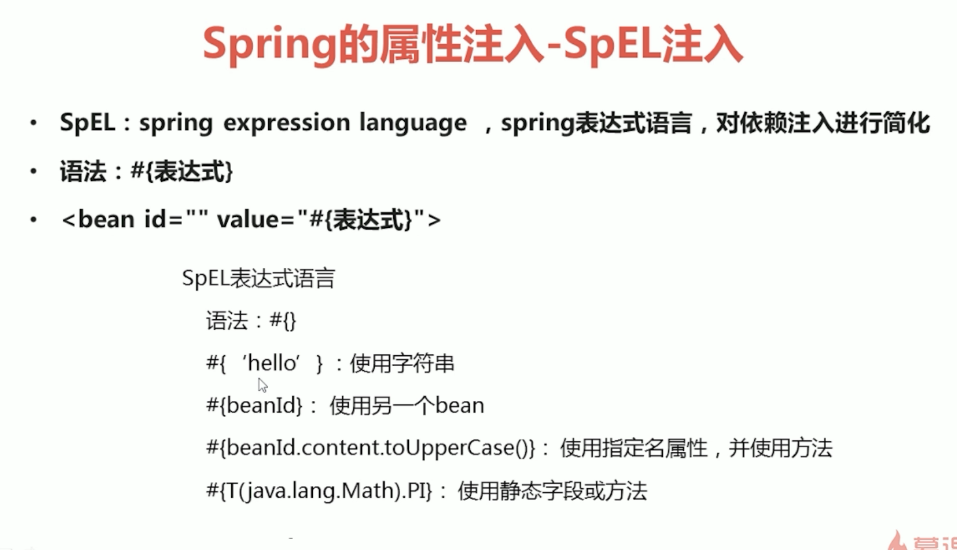
1.Student.java
package entity;

public class Student {

    private String name;

    private String age;

    private Cat cat;

    public String getName() {

        return name;

    }

    public void setName(String name) {

        this.name = name;

    }

    public String getAge() {

        return age;

    }

    public void setAge(String age) {

        this.age = age;

    }

    public Cat getCat() {

        return cat;

    }

    public void setCat(Cat cat) {

        this.cat = cat;

    }

    @Override

    public String toString() {

        return "Student{" +

                "name='" + name + '\'' +

                ", age='" + age + '\'' +

                ", cat=" + cat +

                '}';

    }

}
2.Cat.java
package entity;

public class Cat {

    private String name;

    public String getName() {

        return name;

    }

    public void setName(String name) {

        this.name = name;

    }

    @Override

    public String toString() {

        return "Cat{" +

                "name='" + name + '\'' +

                '}';

    }

}
3.applicationContext.xml
<?xml version="1.0" encoding="UTF-8"?>

<beans xmlns="http://www.springframework.org/schema/beans"

       xmlns:p="http://www.springframework.org/schema/p"

       xmlns:xsi="http://www.w3.org/2001/XMLSchema-instance"

       xsi:schemaLocation="http://www.springframework.org/schema/beans http://www.springframework.org/schema/beans/spring-beans.xsd">

    <bean id="student4" class="entity.Student">

        <property name="name" value="#{'大名'}"/>

        <property name="age" value="#{16}"/>

        <property name="cat" value="#{cat}"/>

    </bean>

    <bean id="cat" class="entity.Cat">

        <property name="name" value="#{'大黄'}"/>

    </bean>

</beans>
4.StudentTest.java
package Test;

        import entity.Student;

        import entity.User;

        import org.junit.Test;

        import org.springframework.context.ApplicationContext;

        import org.springframework.context.support.ClassPathXmlApplicationContext;

public class StudentTest {

    @Test

    public void stu4(){

        ApplicationContext applicationContext=new ClassPathXmlApplicationContext("applicationContext.xml");

        Student student4=(Student)applicationContext.getBean("student4");

        System.out.println(student4);

    }

}
(五)复杂类型的属性注入

1.Bean.java
package entity;

import java.util.*;

public class Bean {

    private String arr[];//数组类型

    private List<String > list;//List集合类型

    private Set<String> set;//Set集合类型

    private Map<String,Integer> map;//Map集合类型

    private Properties properties;//属性类型

    public String[] getArr() {

        return arr;

    }

    public void setArr(String[] arr) {

        this.arr = arr;

    }

    public List<String> getList() {

        return list;

    }

    public void setList(List<String> list) {

        this.list = list;

    }

    public Set<String> getSet() {

        return set;

    }

    public void setSet(Set<String> set) {

        this.set = set;

    }

    public Map<String, Integer> getMap() {

        return map;

    }

    public void setMap(Map<String, Integer> map) {

        this.map = map;

    }

    public Properties getProperties() {

        return properties;

    }

    public void setProperties(Properties properties) {

        this.properties = properties;

    }

    @Override

    public String toString() {

        return "Bean{" +

                "arr=" + Arrays.toString(arr) +

                ", list=" + list +

                ", set=" + set +

                ", map=" + map +

                ", properties=" + properties +

                '}';

    }

}
2.applicationContext.xml
<?xml version="1.0" encoding="UTF-8"?>

<beans xmlns="http://www.springframework.org/schema/beans"

       xmlns:p="http://www.springframework.org/schema/p"

       xmlns:xsi="http://www.w3.org/2001/XMLSchema-instance"

       xsi:schemaLocation="http://www.springframework.org/schema/beans http://www.springframework.org/schema/beans/spring-beans.xsd">

   <bean id="bean" class="entity.Bean">

        <!--数组类型-->

        <property name="arr">

            <list >

                <value>aaa</value>

                <value>bbb</value>

                <value>ccc</value>

            </list>

        </property>

        <!--List集合类型-->

        <property name="list">

            <list>

                <value>111</value>

                <value>222</value>

                <value>333</value>

            </list>

        </property>

        <!--Set集合类型-->

        <property name="set">

            <set>

                <value>aaa</value>

                <value>bbb</value>

                <value>ccc</value>

            </set>

        </property>

        <!--Map集合类型-->

        <property name="map">

            <map>

                <entry key="aaa" value="111"/>

                <entry key="bbb" value="222"/>

                <entry key="ccc" value="333"/>

            </map>

        </property>

        <!--属性类型-->

        <property name="properties">

            <props>

                <prop key="username">111</prop>

                <prop key="password">222</prop>

            </props>

        </property>

    </bean>

</beans>
3.BeanTest.java
package Test;

import entity.Bean;

import org.junit.Test;

import org.springframework.context.ApplicationContext;

import org.springframework.context.support.ClassPathXmlApplicationContext;

public class BeanTest {

    @Test

    public void bean(){

        ApplicationContext applicationContext=new ClassPathXmlApplicationContext("applicationContext.xml");

        Bean bean=(Bean)applicationContext.getBean("bean");

        System.out.println(bean);

    }

}
spring学习笔记之---bean属性注入的更多相关文章
- Spring学习笔记(3)——Bean的注入方式
依赖注入 依赖注入支持属性注入.构造函数注入.工厂注入. 属性注入: 属性注入即通过setXxx()方法注入Bean的属性值或依赖对象 属性注入要求Bean提供一个默认的构造函数(无参构造函数),并为 ...
- Spring学习笔记—装配Bean
在Spring中,对象无需自己负责查找或创建与其关联的其他对象.相反,容器负责把需要相互协作的对象引用赋予各个对象.创建应用对象之间协作关系的行为通常称为装配(wiring),这也是依赖注入的本质. ...
- spring学习(三)属性注入
用的是IDEA的maven工程,pom.xml文件导包依赖省略 本文主要写set方式注入 (一).一般类型注入 一.写两个实体类Car.User public class Car { private ...
- spring学习笔记之---bean管理的注解方式
bean管理的注解方式 (一)使用注解定义bean (1)常用注解 (2)实例 1.在pom.xml中进行配置 <dependencies> <dependency> < ...
- Spring学习笔记之Bean的一些属性设置
1.beans 里边配置default-init-method="shunge",有这个方法的会执行,没有也不会报错 2.beans 里边配置default-destroy-met ...
- Spring学习笔记(2)——Bean的配置
要使应用程序中的Spring容器成功启动,需要以下三个方面的条件都具备: 1.Spring框架的类包都已经放到应用程序的类路径下 2.应用程序为Spring提供完备的Bean配置信息 3.Bean的类 ...
- Spring学习笔记之bean配置
1.命名bean 每个bean都有一个或者多个的的标识符.这些标识符必须在加载他们的容器里边唯一.一个bean经常有且只有一个标识符,但是如果需要超过一个的名字,可以考虑额外的别名. 基于xml的配置 ...
- Spring学习笔记之Bean的实例化
一.bean的实例化方法有3种, 1.构造器实例化 2.静态工厂方法实例化 3.实例工厂方法实例化 二.用构造器来实例化 <bean id="ShunDao" class=& ...
- Spring学习笔记——02 Bean的命名及实例化
一.Bean的命名 前一篇讲到IoC是一个管理Bean的容器,Bean多数情况下都是通过XML文件进行配置的,其中Bean的命名有以下几种方式,现在梳理一下. 1. 不指定id,只配置类名 <b ...
随机推荐
- Docker启动一个Centos镜像,在docker中安装ifconfig和ssh
执行docker search centos 现在最流行的Linux嘛.查了下,排名第一的(STARS最多1882)官方版,就是你了 果断拿下, docker pull centos,看网速了静等拿下 ...
- Redis复制流程:图解
一.新版复制PSYNC命令实现:复制实现总流程 (1)通过客户端向从服务器发送 slaveof <master_ip> <master_port>:此为异步执行,从服务器设置好 ...
- QRowTable表格控件-支持hover整行、checked整行、指定列排序等
目录 一.开心一刻 二.嘴一嘴 三.效果展示 四.浅谈实现 五.自定义数据源 1.data函数 2.flags函数 六.自定义视图 1.目的 2.问题分析 七.测试 八.相关文章 原文链接:QRowT ...
- 5.秋招复习简单整理之请介绍一下List和ArrayList的区别,arrayList和HashSet区别?
第一问:List是接口,ArrayList是List的实现类. 第二问:ArrayList是List的实现类,HashSet是Set的实现类,List和Set都实现了Collection接口. Arr ...
- C++学习书籍推荐《Inside the C++ Object Model》下载
百度云及其他网盘下载地址:点我 作者简介 Stanley B. Lippman is Architect with the Visual C++ development team at Microso ...
- SpringBoot 2.0.3 源码解析
前言 用SpringBoot也有很长一段时间了,一直是底层使用者,没有研究过其到底是怎么运行的,借此机会今天试着将源码读一下,在此记录...我这里使用的SpringBoot 版本是 2.0.3.RE ...
- 《Graph Attention Network》阅读笔记
基本信息 论文题目:GRAPH ATTENTION NETWORKS 时间:2018 期刊:ICLR 主要动机 探讨图谱(Graph)作为输入的情况下如何用深度学习完成分类.预测等问题:通过堆叠这种层 ...
- 「玩转Python」突破封锁继续爬取百万妹子图
前言 从零学 Python 案例,自从提交第一个妹子图版本引来了不少小伙伴的兴趣.最近,很多小伙伴发来私信说,妹子图不能爬了!? 趁着周末试了一把,果然爬不动了,爬下来的都是些 0kb 的假图片,然后 ...
- ServiceFabric极简文档-5.0 Service Fabric有状态与无状态
Service Fabric 应用程序方案 2017/08/14 作者 Edward Chen Jack Zeng Azure Service Fabric提供了一个可靠而灵活的平台,可用于编写和运行 ...
- redis集群(单机6节点实现)
Redis集群搭建与简单使用 1.介绍安装环境与版本: 1)Redis使用的是Redis-3.2.8版本. 2)用一台虚拟机模拟6个节点,三个master节点,三个slave节点.虚拟机使用CentO ...