Zend Framework 1 - Quick Start
创建 Zend 项目
要创建 Zend 项目,首先要下载并解压 Zend Framework。
安装 Zend Framework
下载最新的 Zend Framework 1.12.20 源码包,(我们使用的是 Zend Framework 1,所以下面的内容都是基于 Zend 1)
解压到合适的地方(比如:/home/xxx/bin/).
注: /home/xxx/bin 是我偏爱的目录,如果你设定了自己的目录,就应该替换下面命令中相应的地方
$ tar -xzvf ZendFramework-1.12.20.tar.gz -C /home/xxx/bin
这样 Zend Framework 就安装在了 /home/xxx/bin/ZendFramework-1.12.20
注1:Zend Framework 各个版本下载
注2:$ 符号表示当前环境是 Linux 命令行终端,在等待输入一个人命令。
创建项目
在 Zend 安装目录下的 bin/ 目录下有 zf.sh 脚本文件,你需要在系统path目录下创建该文件的链接,然后就可以在命令行中任何地方使用zf命令创建项目了。
$ sudo ln -s /home/xxx/bin/ZendFramework-1.12.20/bin/zf.sh /usr/local/bin/zf
打开命令行(Ctrl + Alt + T),切换到你想创建项目的位置,假如你想在 ~/demo/ 目录下创建 Zend 项目:cd ~/demo/。
执行下面的命令创建 quickstart 项目:
$ zf create project quickstart
这样就创建了 /home/xxx/demo/quickstart,并且在 quickstart 目录下自动创建了 Zend 项目的一些目录结构。其项目结构如下:
quickstart

|-- application

|   |-- Bootstrap.php

|   |-- configs

|   |   `-- application.ini

|   |-- controllers

|   |   |-- ErrorController.php

|   |   `-- IndexController.php

|   |-- models

|   `-- views

|       |-- helpers

|       `-- scripts

|           |-- error

|           |   `-- error.phtml

|           `-- index

|               `-- index.phtml

|-- library

|-- public

|   |-- .htaccess

|   `-- index.php

`-- tests

    |-- application

    |   `-- bootstrap.php

    |-- library

    |   `-- bootstrap.php

    `-- phpunit.xml
此时,只是创建了 Zend 项目结构,你还需要把 Zend Framework 添加到 quickstart 项目中,有两种方式,一中是创建一个链接,把 zend 框架下的 library 目录链接到 quickstart/library ,另一种方式是直接复制 zend 框架下的 library 目录替换掉 quickstart/library。
# Symlink

$ cd library

$ ln -s /home/xxx/bin/ZendFramework-1.12.20/library/Zend .

# or copy

$ cd library

$ cp -r /home/xxx/bin/ZendFramework-1.12.20/library/Zend .
这样就可以看到 quickstart/library/Zend 目录了。
项目启动文件
Bootstrap 类定义了 Zend 项目启动时要初始化的资源和组件。默认地,Zend Framework 初始化了 Front Controller,然后它使用 application/controllers/ 作为寻找 action controller 的默认路径。这个类如下:
// application/Bootstrap.php

class Bootstrap extends Zend_Application_Bootstrap_Bootstrap

{

}
如你所见,这里面没有什么内容。
项目配置文件
默认配置文件放在:application/configs/application.ini,包含一些基本的指令,比如设置php环境,设置启动类,设置 action controller 等。文件内容如下:
; application/configs/application.ini

[production]

phpSettings.display_startup_errors = 0

phpSettings.display_errors = 0

includePaths.library = APPLICATION_PATH "/../library"

bootstrap.path = APPLICATION_PATH "/Bootstrap.php"

bootstrap.class = "Bootstrap"

appnamespace = "Application"

resources.frontController.controllerDirectory = APPLICATION_PATH "/controllers"

resources.frontController.params.displayExceptions = 0

[staging : production]

[testing : production]

phpSettings.display_startup_errors = 1

phpSettings.display_errors = 1

[development : production]

phpSettings.display_startup_errors = 1

phpSettings.display_errors = 1
关于这个文件有几个要点:
(1) 使用 ini 配置文件时,你可以直接引用常量,APPLICATION_PATH 就是一个常量。
(2) 这个文件被分成几个部分:production,staging,testing 和 development。后面三个包括了 production 的设置。不同的环境其配置分开,这样便于开发和调试。
Action Controller 控制器
应用程序的 action controller 定义了程序流程,把用户请求映射到合适的 model 和 view。
一个 action controller 应包含一个或多个以Action结尾的方法,这些方法可以通过 web 请求访问到。默认地,Zend Framework URLs 遵循 /controller/action 的模式,其中 controller 就映射 action controller 名字(以Controller作为后缀),而 action 就映射到 action 方法(以Action作为后缀)。
通常,需要一个 IndexController,它表示网站首页,和一个 ErrorController,它表示诸如 HTTP404、HTTP500 等错误页面.
初始 IndexController 代码如下:
// application/controllers/IndexController.php

class IndexController extends Zend_Controller_Action

{

    public function init()

    {

        /* Initialize action controller here */

    }

    public function indexAction()

    {

        // action body

    }

}
初始 ErrorController 代码如下:
// application/controllers/ErrorController.php

class ErrorController extends Zend_Controller_Action

{

    public function errorAction()

    {

        $errors = $this->_getParam('error_handler');

        switch ($errors->type) {

            case Zend_Controller_Plugin_ErrorHandler::EXCEPTION_NO_ROUTE:

            case Zend_Controller_Plugin_ErrorHandler::EXCEPTION_NO_CONTROLLER:

            case Zend_Controller_Plugin_ErrorHandler::EXCEPTION_NO_ACTION:

                // 404 error -- controller or action not found

                $this->getResponse()->setHttpResponseCode(404);

                $this->view->message = 'Page not found';

                break;

            default:

                // application error

                $this->getResponse()->setHttpResponseCode(500);

                $this->view->message = 'Application error';

                break;

        }

        $this->view->exception = $errors->exception;

        $this->view->request   = $errors->request;

    }

}
Views 视图
Zend Framework 中的 Views 是用普通 PHP 代码写的。View scripts 在 application/views/scripts/ 下面,它以控制器名字分文件夹组织起来。本例中,我们有一个 IndexController 和 ErrorController,因此相应地,也应在 View scripts 目录下有 index/ 和 error/ 子目录。在这个子目录中,又有每个 view scripts 文件,对应 Controller 中的 Action。本例中,使用 index/index.phtml 和 error/error.phtml。
下面是默认的 index/index.phtml view script:
<!-- application/views/scripts/index/index.phtml -->

<style>

    a:link,

    a:visited

    {

        color: #0398CA;

    }

    span#zf-name

    {

        color: #91BE3F;

    }

    div#welcome

    {

        color: #FFFFFF;

        background-image: url(http://framework.zend.com/images/bkg_header.jpg);

        width:  600px;

        height: 400px;

        border: 2px solid #444444;

        overflow: hidden;

        text-align: center;

    }

    div#more-information

    {

        background-image: url(http://framework.zend.com/images/bkg_body-bottom.gif);

        height: 100%;

    }

</style>

<div id="welcome">

    <h1>Welcome to the <span id="zf-name">Zend Framework!</span><h1 />

    <h3>This is your project's main page<h3 />

    <div id="more-information">

        <p>

            <img src="http://framework.zend.com/images/PoweredBy_ZF_4LightBG.png" />

        </p>

        <p>

            Helpful Links: <br />

            <a href="http://framework.zend.com/">Zend Framework Website</a> |

            <a href="http://framework.zend.com/manual/en/">Zend Framework

                Manual</a>

        </p>

    </div>

</div>
error/error.phtml 稍微复杂一点,其中使用了php条件语句:
<!-- application/views/scripts/error/error.phtml -->

<!DOCTYPE html PUBLIC "-//W3C//DTD XHTML 1.0 Strict//EN";

    "http://www.w3.org/TR/xhtml1/DTD/xhtml1-strict.dtd>

<html xmlns="http://www.w3.org/1999/xhtml">

<head>

  <meta http-equiv="Content-Type" content="text/html; charset=utf-8" />

  <title>Zend Framework Default Application</title>

</head>

<body>

  <h1>An error occurred</h1>

  <h2><?php echo $this->message ?></h2>

  <?php if ('development' == $this->env): ?>

  <h3>Exception information:</h3>

  <p>

      <b>Message:</b> <?php echo $this->exception->getMessage() ?>

  </p>

  <h3>Stack trace:</h3>

  <pre><?php echo $this->exception->getTraceAsString() ?>

  </pre>

  <h3>Request Parameters:</h3>

  <pre><?php echo var_export($this->request->getParams(), 1) ?>

  </pre>

  <?php endif ?>

</body>

</html>
创建虚拟主机
对于 quickstart 项目,我们把它放在 apache 服务器上运行。
我们需要设置一个虚拟主机,这样就可以在浏览器中输入域名来访问我们的网站了。假设你已经配置好了 php+apache+mysql 运行环境,如果没有,请参考教程
假设我们的项目所映射的域名是:quickstart.local。
进入 apache 配置目录,创建配置文件:
cd /etc/apache2/sites-available/

sudo gedit quickstart.local.conf
然后复制下面的内容到该配置文件,注意:项目路径需要替换成你自己的项目路径:
<VirtualHost *:80>

	ServerName quickstart.local

	ServerAdmin webmaster@localhost

	DocumentRoot /home/xxx/demo/quickstart/public

	<Directory /home/xxx/demo/quickstart/public>

	AllowOverride all

	require all granted

	</Directory>

	ErrorLog ${APACHE_LOG_DIR}/error.log

	CustomLog ${APACHE_LOG_DIR}/access.log combined

</VirtualHost>
保存该文件,并且启用该配置:sudo a2ensite quickstart.local
然后打开hosts文件:sudo gedit /etc/hosts 添加一行:
127.0.0.1 quickstart.local
最后重启一下 apache 服务器:
sudo service apache2 restart
到此为止,这个项目就创建成功并且可运行了。
检验成果
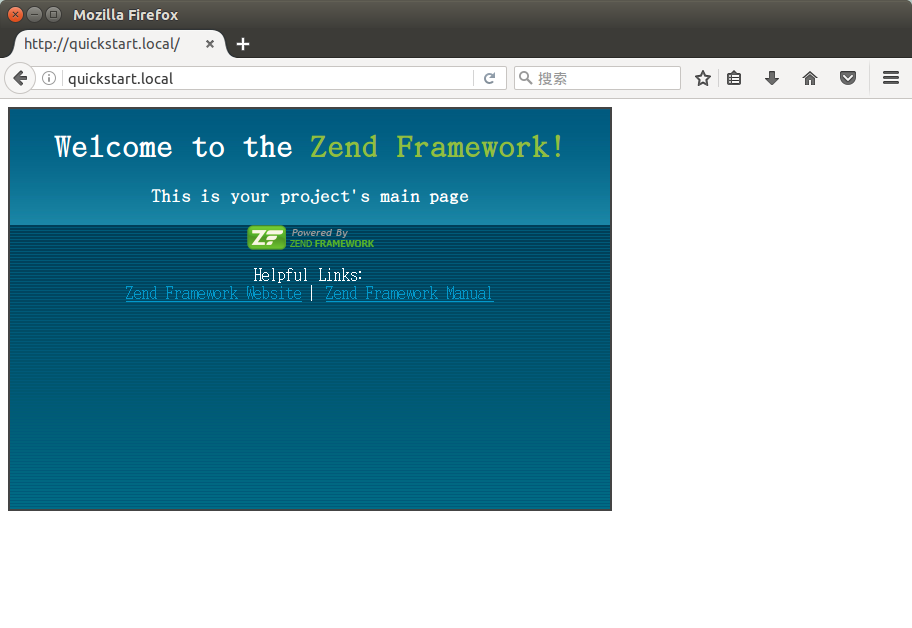
现在就可以访问你的项目网站了,打开浏览器输入http://quickstart.local,就能看到欢迎页了。
可能遇到的问题:
- 页面不显示:很有可能时项目目录的权限问题,使用
chmod -R 777 /home/xxx/demo/quickstart试试看。
创建一个 Layout
你可能注意到,上面的 view scripts 不是完整的 html 页面,这是故意设计的。我们只想让 action 只返回 action 本身要输出的内容,而不是整个应用程序页面。
现在来组成一个完整的 HTML 页面。我们使用一个全局的 layout 来作为网站统一的样式。
注: 下面的命令若无说明,默认是在当前项目根目录下执行的。
开始使用 Zend_Layout,首先让 bootstrap 来加载 Layout 资源。通过下面的命令可实现:
$zf enable layout

# Layouts have been enabled, and a default layout created at

# application/layouts/scripts/layout.phtml

# A layout entry has been added to the application config file.
此时,application/configs/application.ini 内容自动更新了:
; application/configs/application.ini

; Add to [production] section:

resources.layout.layoutPath = APPLICATION_PATH "/layouts/scripts"
这个指令告诉应用程序去 application/layouts/scripts 去寻找 layout。
我们还要启用 XHTML DocType 声明,为此,在 bootstrap 中加载该资源。在 bootstrap中添加资源的最简单的方法就是创建一个以init开头的方法。此时,我们使用 _initDoctype() 方法来初始化 doctype:
// application/Bootstrap.php

class Bootstrap extends Zend_Application_Bootstrap_Bootstrap

{

    protected function _initDoctype()

    {

    }

}
有了这个方法,还需要让 view 使用正确的 doctype,但是 view 从哪里来?最简单的方式就是初始化 View 资源;有了它,就可以把 view 对象放入 bootstrap 并使用它。
添加下行到 aplication/configs/application.ini 来创建 view 资源:
; application/configs/application.ini

; Add to [production] section:

resources.view[] =
然后再来充实一下 _initDoctype() 方法。
// application/Bootstrap.php

class Bootstrap extends Zend_Application_Bootstrap_Bootstrap

{

    protected function _initDoctype()

    {

        $this->bootstrap('view');

        $view = $this->getResource('view');

        $view->doctype('XHTML1_STRICT');

    }

}
然后,创建全局的 layout:
<!-- application/layouts/scripts/layout.phtml -->

<?php echo $this->doctype() ?>

<html xmlns="http://www.w3.org/1999/xhtml">

<head>

  <meta http-equiv="Content-Type" content="text/html; charset=utf-8" />

  <title>Zend Framework Quickstart Application</title>

  <?php echo $this->headLink()->appendStylesheet('/css/global.css') ?>

</head>

<body>

<div id="header" style="background-color: #EEEEEE; height: 30px;">

    <div id="header-logo" style="float: left">

        <b>ZF Quickstart Application</b>

    </div>

    <div id="header-navigation" style="float: right">

        <a href="<?php echo $this->url(

            array('controller'=>'guestbook'),

            'default',

            true) ?>">Guestbook</a>

    </div>

</div>

<?php echo $this->layout()->content ?>

</body>

</html>
使用headLink()来生成<link>元素。
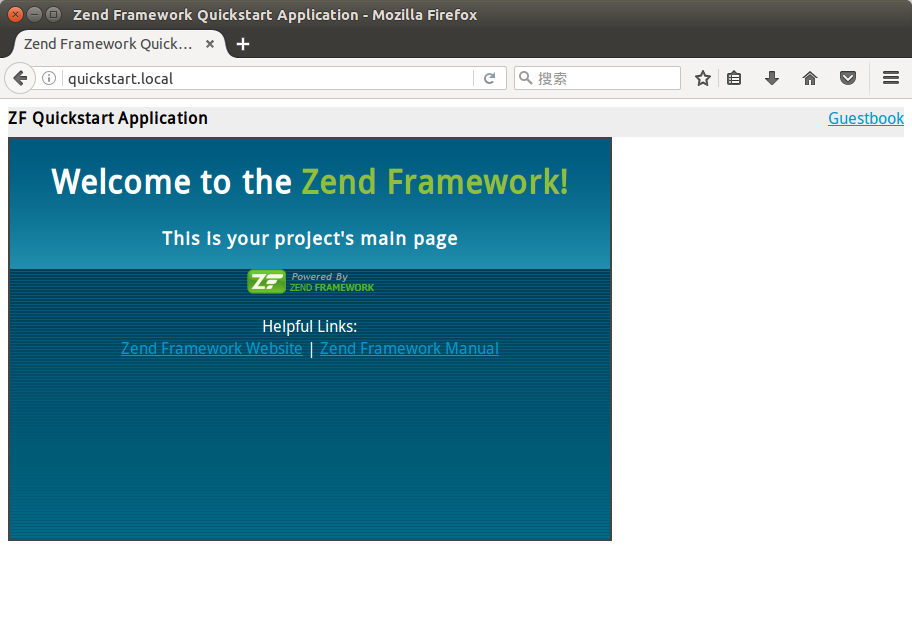
现在再打开浏览器并查看源代码,应该能看到 XHTML头部,<head> <title> <body>等部分。
创建一个 Model 和 Database Table
现在考虑一下guestbook的组成,它包含一些记录,每个记录由注释,时间戳,email地址等组成。我们把它存在数据库里,并有一个唯一id。我们希望能保存、获取所有记录。
因此,一个简单的 guestbook 模型 API 就像下面这样:
// application/models/Guestbook.php

class Application_Model_Guestbook

{

    protected $_comment;

    protected $_created;

    protected $_email;

    protected $_id;

    public function __set($name, $value);

    public function __get($name);

    public function setComment($text);

    public function getComment();

    public function setEmail($email);

    public function getEmail();

    public function setCreated($ts);

    public function getCreated();

    public function setId($id);

    public function getId();

}

class Application_Model_GuestbookMapper

{

    public function save(Application_Model_Guestbook $guestbook);

    public function find($id);

    public function fetchAll();

}

}
下面,我们可以开始思考如何设置数据库了。
首先要初始化 Db 资源。使用 zf configure db-adapter 命令:
zf configure db-adapter "adapter=Pdo_MySql&host=localhost&username=root&password=&dbname=guestbook" production

zf configure db-adapter "adapter=Pdo_MySql&host=localhost&username=root&password=&dbname=guestbook-test" testing

zf configure db-adapter "adapter=Pdo_MySql&host=localhost&username=root&password=&dbname=guestbook-dev" development
如果成功执行,那么在 application/configs/application.ini 中就能看到新增的几行配置:
//application/configs/application.ini

resources.db.adapter = "Pdo_MySql"

resources.db.params.host = "localhost"

resources.db.params.username = "root"

resources.db.params.password = ""

resources.db.params.dbname ="guestbook"
注:要把数据库密码设置成你自己的。
然后创建数据库,打开 phpMyadmin,创建数据库 guestbook,输入下面SQL语句并执行:
CREATE TABLE IF NOT EXISTS `guestbook` (

    `id` int(11) NOT NULL AUTO_INCREMENT,

    `email` varchar(32) NOT NULL DEFAULT 'noemail@test.com',

    `comment` varchar(200) NOT NULL,

    `created` timestamp NOT NULL DEFAULT CURRENT_TIMESTAMP,

    PRIMARY KEY (`id`)

) ENGINE=MyISAM  DEFAULT CHARSET=latin1 AUTO_INCREMENT=1 ;
接下来我们使用 Table Data Gateway 机制来连接数据源。Zend_Db_Table 提供了这个功能。
首先创建一个 Zend_Db_Table 类:
$ zf create db-table Guestbook guestbook
查看项目结构,发现多了一个 application/models/DbTable/ 目录,里面有一个 Guestbook.php 文件。其内容如下:
// application/models/DbTable/Guestbook.php

/**

* This is the DbTable class for the guestbook table.

*/

class Application_Model_DbTable_Guestbook extends Zend_Db_Table_Abstract

{

    /** Table name */

    protected $_name    = 'guestbook';

}
注意 Application_Model_DbTable 类前缀,它对应 application/models/DbTable 目录。
然后创建一个 Data Mapper。Data Mapper 映射对象到数据库。本例中,它将映射 model 到数据源。
$ zf create model GuestbookMapper
然后打开 application/models/GuestbookMapper.php 并输入以下内容:
// application/models/GuestbookMapper.php

class Application_Model_GuestbookMapper

{

    protected $_dbTable;

    public function setDbTable($dbTable)

    {

        if (is_string($dbTable)) {

            $dbTable = new $dbTable();

        }

        if (!$dbTable instanceof Zend_Db_Table_Abstract) {

            throw new Exception('Invalid table data gateway provided');

        }

        $this->_dbTable = $dbTable;

        return $this;

    }

    public function getDbTable()

    {

        if (null === $this->_dbTable) {

            $this->setDbTable('Application_Model_DbTable_Guestbook');

        }

        return $this->_dbTable;

    }

    public function save(Application_Model_Guestbook $guestbook)

    {

        $data = array(

            'email'   => $guestbook->getEmail(),

            'comment' => $guestbook->getComment(),

            'created' => date('Y-m-d H:i:s'),

        );

        if (null === ($id = $guestbook->getId())) {

            unset($data['id']);

            $this->getDbTable()->insert($data);

        } else {

            $this->getDbTable()->update($data, array('id = ?' => $id));

        }

    }

    public function find($id, Application_Model_Guestbook $guestbook)

    {

        $result = $this->getDbTable()->find($id);

        if (0 == count($result)) {

            return;

        }

        $row = $result->current();

        $guestbook->setId($row->id)

                  ->setEmail($row->email)

                  ->setComment($row->comment)

                  ->setCreated($row->created);

    }

    public function fetchAll()

    {

        $resultSet = $this->getDbTable()->fetchAll();

        $entries   = array();

        foreach ($resultSet as $row) {

            $entry = new Application_Model_Guestbook();

            $entry->setId($row->id)

                  ->setEmail($row->email)

                  ->setComment($row->comment)

                  ->setCreated($row->created);

            $entries[] = $entry;

        }

        return $entries;

    }

}
现在,创建 model 类,仍然使用 zf 命令:
$ zf create model Guestbook
打开刚刚创建的模型类: application/models/Guestbook.php 并添加以下代码:
// application/models/Guestbook.php

class Application_Model_Guestbook

{

    protected $_comment;

    protected $_created;

    protected $_email;

    protected $_id;

    public function __construct(array $options = null)

    {

        if (is_array($options)) {

            $this->setOptions($options);

        }

    }

    public function __set($name, $value)

    {

        $method = 'set' . $name;

        if (('mapper' == $name) || !method_exists($this, $method)) {

            throw new Exception('Invalid guestbook property');

        }

        $this->$method($value);

    }

    public function __get($name)

    {

        $method = 'get' . $name;

        if (('mapper' == $name) || !method_exists($this, $method)) {

            throw new Exception('Invalid guestbook property');

        }

        return $this->$method();

    }

    public function setOptions(array $options)

    {

        $methods = get_class_methods($this);

        foreach ($options as $key => $value) {

            $method = 'set' . ucfirst($key);

            if (in_array($method, $methods)) {

                $this->$method($value);

            }

        }

        return $this;

    }

    public function setComment($text)

    {

        $this->_comment = (string) $text;

        return $this;

    }

    public function getComment()

    {

        return $this->_comment;

    }

    public function setEmail($email)

    {

        $this->_email = (string) $email;

        return $this;

    }

    public function getEmail()

    {

        return $this->_email;

    }

    public function setCreated($ts)

    {

        $this->_created = $ts;

        return $this;

    }

    public function getCreated()

    {

        return $this->_created;

    }

    public function setId($id)

    {

        $this->_id = (int) $id;

        return $this;

    }

    public function getId()

    {

        return $this->_id;

    }

}
最后,我们创建一个 guestbook controller 查询并显示数据库中的结果:
$ zf create controller Guestbook
这将创建 application/controllers/GuestbookController.php,它有一个 IndexAction 方法,同时,在 application/views/scripts/guestbook 目录中创建了一个 index.phtml 文件。
打开 GuestbookController,在 IndexAction 中添加代码,显示所有的 guestbook 记录:
// application/controllers/GuestbookController.php

class GuestbookController extends Zend_Controller_Action

{

    public function indexAction()

    {

        $guestbook = new Application_Model_GuestbookMapper();

        $this->view->entries = $guestbook->fetchAll();

    }

}
打开 application/views/scripts/guestbook/index.phtml 添加以下内容:
<!-- application/views/scripts/guestbook/index.phtml -->

<p><a href="<?php echo $this->url(

    array(

        'controller' => 'guestbook',

        'action'     => 'sign'

    ),

    'default',

    true) ?>">Sign Our Guestbook</a></p>

Guestbook Entries: <br />

<dl>

    <?php foreach ($this->entries as $entry): ?>

    <dt><?php echo $this->escape($entry->email) ?></dt>

    <dd><?php echo $this->escape($entry->comment) ?></dd>

    <?php endforeach ?>

</dl>
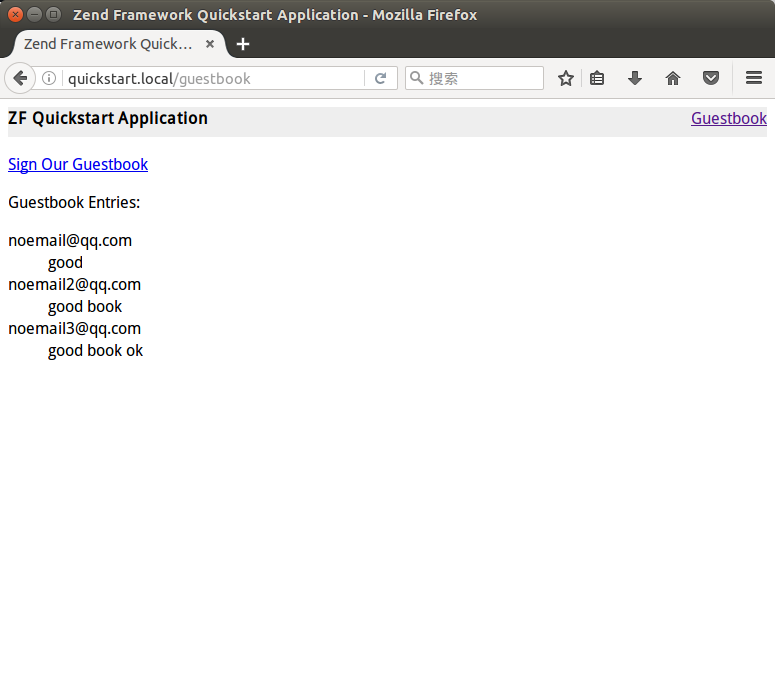
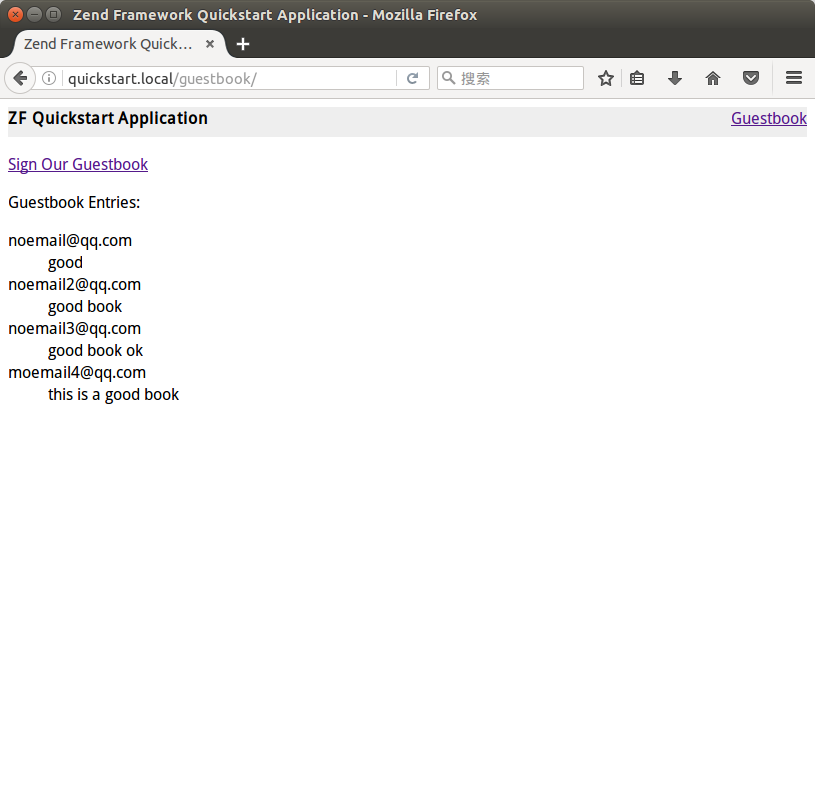
切换到浏览器,打开:http://guestbook.local/guestbook ,你应该看到这些内容:

发现没有数据,那就打开 phpMyadmin,插入一些数据再看看,复制下面的sql语句到phpmyadmin并执行:
INSERT INTO `guestbook`.`guestbook` (`id`, `email`, `comment`, `created`) VALUES (NULL, 'noemail@qq.com', 'good', CURRENT_TIMESTAMP),

(NULL, 'noemail2@qq.com', 'good book', CURRENT_TIMESTAMP),

(NULL, 'noemail3@qq.com', 'good book ok', CURRENT_TIMESTAMP);
刷新浏览器,结果如图所示,成功地从数据库读取数据并显示在页面上:
创建 Form
为了让 guestbook 更有用一些,我们需要一个表单来提交新的评论项。
首先,创建一个 form 类:
$ zf create form Guestbook
打开刚创建的 form 类 *application/forms/Guestbook.php *,添加下列代码:
// application/forms/Guestbook.php

class Application_Form_Guestbook extends Zend_Form

{

    public function init()

    {

        // Set the method for the display form to POST

        $this->setMethod('post');

        // Add an email element

        $this->addElement('text', 'email', array(

            'label'      => 'Your email address:',

            'required'   => true,

            'filters'    => array('StringTrim'),

            'validators' => array(

                'EmailAddress',

            )

        ));

        // Add the comment element

        $this->addElement('textarea', 'comment', array(

            'label'      => 'Please Comment:',

            'required'   => true,

            'validators' => array(

                array('validator' => 'StringLength', 'options' => array(0, 20))

                )

        ));

        // Add a captcha

        $this->addElement('captcha', 'captcha', array(

            'label'      => 'Please enter the 5 letters displayed below:',

            'required'   => true,

            'captcha'    => array(

                'captcha' => 'Figlet',

                'wordLen' => 5,

                'timeout' => 300

            )

        ));

        // Add the submit button

        $this->addElement('submit', 'submit', array(

            'ignore'   => true,

            'label'    => 'Sign Guestbook',

        ));

        // And finally add some CSRF protection

        $this->addElement('hash', 'csrf', array(

            'ignore' => true,

        ));

    }

}
上面代码定义了五个元素:email地址,评论输入框,验证码,提交按钮和CSRF保护字段。
下一步,添加 signAction 到 GuestbookController,它用于处理表单提交页面。使用 zf 命令创建:
$ zf create action sign Guestbook
创建了 signAction 和相应的 view script.
然后添加一些代码到 signAction,首先检查是否有POST或GET请求,然后若没有就简单地显示表单,若有,则验证提交的数据,并保存到数据库中
// application/controllers/GuestbookController.php

class GuestbookController extends Zend_Controller_Action

{

    // snipping indexAction()...

    public function signAction()

    {

        $request = $this->getRequest();

        $form    = new Application_Form_Guestbook();

        if ($this->getRequest()->isPost()) {

            if ($form->isValid($request->getPost())) {

                $comment = new Application_Model_Guestbook($form->getValues());

                $mapper  = new Application_Model_GuestbookMapper();

                $mapper->save($comment);

                return $this->_helper->redirector('index');

            }

        }

        $this->view->form = $form;

    }

}
当然,还需要编辑一下 view application/views/scripts/guestbook/sign.phtml
<!-- application/views/scripts/guestbook/sign.phtml -->
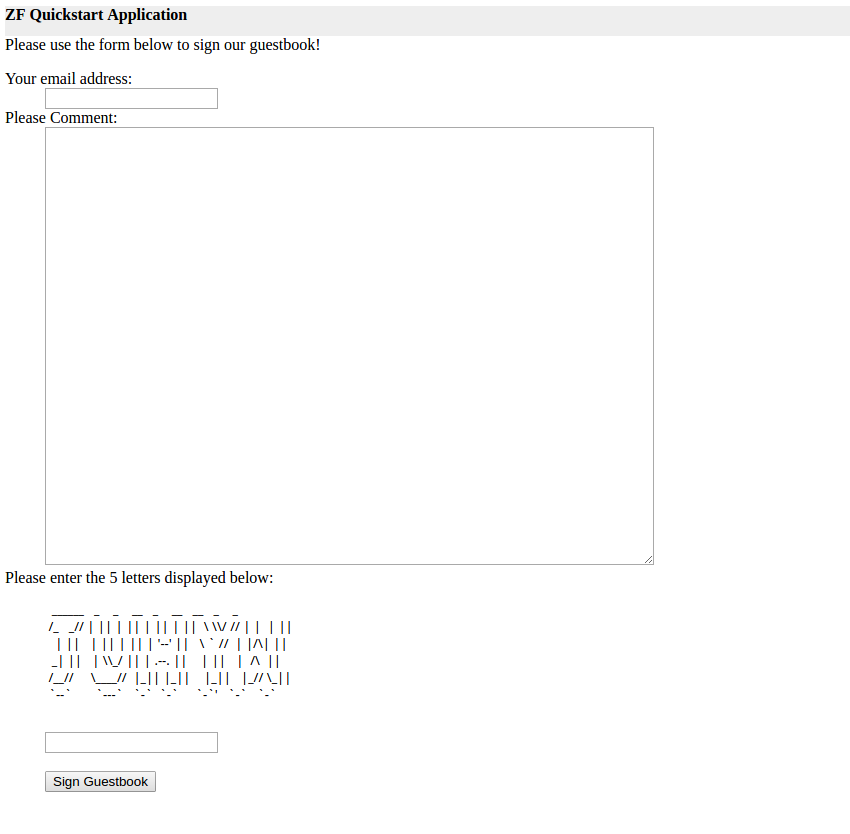
Please use the form below to sign our guestbook!
<?php
$this->form->setAction($this->url());
echo $this->form;
检查效果
现在再打开浏览器:http://quickstart.local/guestbook/sign 看看,效果如下:
填写好表单点击提交,就能看到列表已经更新了:
注: 上面的验证码部分辨认很困难,其实只要复制一下粘贴到txt文档中就能看清楚了。
恭喜你!
你已经成功地使用 Zend Framework 的常用功能建立了一个简单的应用程序。Zend Framework 内置了很多组件,你可以直接用在你的项目中,这些组件包括 web services,搜索,PDF读取和创建,身份认证等等。可以在 文档参考 中找到更多相关的技术细节。
转载请注明来源:http://www.cnblogs.com/feifeifanye/p/6252633.html
英文原文链接:https://framework.zend.com/manual/1.12/en/learning.html
Zend Framework 1 - Quick Start的更多相关文章
- Ubuntu14.0下安装Zend Framework 2
Ubuntu14.0下安装Zend Framework 2为了安装这个东西,忙活了快一天了,参考中文博客一直没有安装成功,有些博客的时间也是已经很早了,后来google看英文版的才安装成功,这里记录一 ...
- 搭建PHP官方框架zend framework 2(LINUX)
在五花八门的语言里,PHP作为我第一个觉得欣赏的理由,就是它的简单和快捷,因为它封装了许多的常用函数.PHP作为网站中一种算作比较流行的语言,也产生各种优秀的框架.我所接触过的有zend framew ...
- 高性能Web框架Zend Framework
Zend Framework (ZF)是用 PHP 5.3及更高版本来开发 Web 程序和服务的开源框架.ZF用100% 面向对象编码实现. ZF的组件结构独一无二,每个组件几乎不依靠其他组件.这样的 ...
- Zend Framework 入门(4)—页面布局
Zend Framework 的页面布局模块——Zend_Layout——既可以跟 MVC 一起使用,也可以单独使用.本文只讨论与 MVC 一起使用的情况. 1. 布局脚本 在 application ...
- Zend Framework 入门(1)—快速上手
1. 安装 从 Zend Framework 的网页上下载最新版本.解压后,把整个目录拷贝到一个理想的地方,比如:/php/library/Zend. 打开 php.ini 文件,确认包含 Zend ...
- Getting Started with Zend Framework MVC Applications
Getting Started with Zend Framework MVC Applications This tutorial is intended to give an introducti ...
- Zend Framework XML外部实体和安全绕过漏洞
漏洞版本: Zend Framework 1.x 漏洞描述: Bugtraq ID:66358 Zend Framework是一款开放源代码的PHP5开发框架实现. Zend Framework存在多 ...
- WAMP下 搭建Zend Framework(Hello World)实例
一.环境搭建 1.下载安装Zend Framework,此步骤不再详细叙述 2.配置php.ini文件 打开php.ini文件,可以找到如下的代码: ; Windows: "\path1;\ ...
- Migration from Zend Framework v2 to v3
Migration from Zend Framework v2 to v3 Zend Framework v2 to v3 has been intended as an incremental u ...
随机推荐
- 精彩 JavaScript 代码片段
1. 根据给定的条件在原有的数组上,得到所需要的新数组. ——<JavaScript 王者归来> var a = [-1,-1,1,2,-2,-2,-3,-3,3,-3]; functio ...
- 基于STM32Cube的IIC主从通信
1.建立STM32Cube工程,我使用的芯片是STM32F429,为了更简单的建立单独的IIC通信任务,我使用了FREERTOS,另外选择了RCC(系统时钟初始化),I2C1,I2C2(为了验证代码的 ...
- IdentityServer4 ASP.NET Core的OpenID Connect OAuth 2.0框架学习保护API
IdentityServer4 ASP.NET Core的OpenID Connect OAuth 2.0框架学习之保护API. 使用IdentityServer4 来实现使用客户端凭据保护ASP.N ...
- [dedecms]后台不显示验证码
原因:某个加载文件的开始处有一个标点,去掉就可显示 // 文件地址 /include/vdimgck.php @session_start(); $_SESSION['securimage_code_ ...
- Web测试介绍2一 安全测试
安全测试是在IT软件产品的生命周期中,特别是产品开发基本完成到发布阶段,对产品进行检验以验证产品符合安全需求定义和产品质量标准的过程. 主要安全需求包括: (i) 认证 Authent ...
- (转)SqlServer 数据库同步的两种方式 (发布、订阅),主从数据库之间的同步
最近在琢磨主从数据库之间的同步,公司正好也需要,在园子里找了一下,看到这篇博文比较详细,比较简单,本人亲自按步骤来过,现在分享给大家. 在这里要提醒大家的是(为了更好的理解,以下是本人自己理解,如有错 ...
- Maven+Spring+Spring MVC+MyBatis+MySQL,搭建SSM框架环境【转】
项目建设完成之后的结构: 数据库的表结构如下: 环境建设:搭建Maven环境.Tomcat环境.需要MySql 数据库支持,使用的编程工具Eclipse (这些是前期准备): 开始创建工程: 1.创建 ...
- 大数据下BI产品如何发挥最大价值
看到这个题目,你是否总感觉云里雾里?你是否真正懂什么叫“大数据”?商业智能BI和大数据又有着什么千丝万缕的联系?为什么说商业智能BI能在大数据中发挥价值? 大数据,指的是所涉及的数据资料量规模巨大到无 ...
- View and Data API Tips: Constrain Viewer Within a div Container
By Daniel Du When working with View and Data API, you probably want to contain viewer into a <div ...
- NSDateFormatter 时间格式转换
NSString *strDate = @“Wed Apr ::”; NSDateFormatter *dateFomatter =[[NSDateFormatter alloc] init]; [d ...