Ubuntu 安装LAMP
简要记录一下。
环境准备
虚拟机环境
lz@starnight:~$ sudo -i

[sudo] password for lz:

root@starnight:~# cat /etc/issue

Ubuntu 16.04. LTS \n \l
更新系统
root@starnight:~# sudo apt-get update
安装Apache
root@starnight:~# sudo apt-get install apache2
root@starnight:~# apache2 -v

Server version: Apache/2.4. (Ubuntu)

Server built:   --18T14::
默认的Web路径:/var/www/html
root@starnight:/var/www/html# pwd

/var/www/html

root@starnight:/var/www/html# ls

index.html
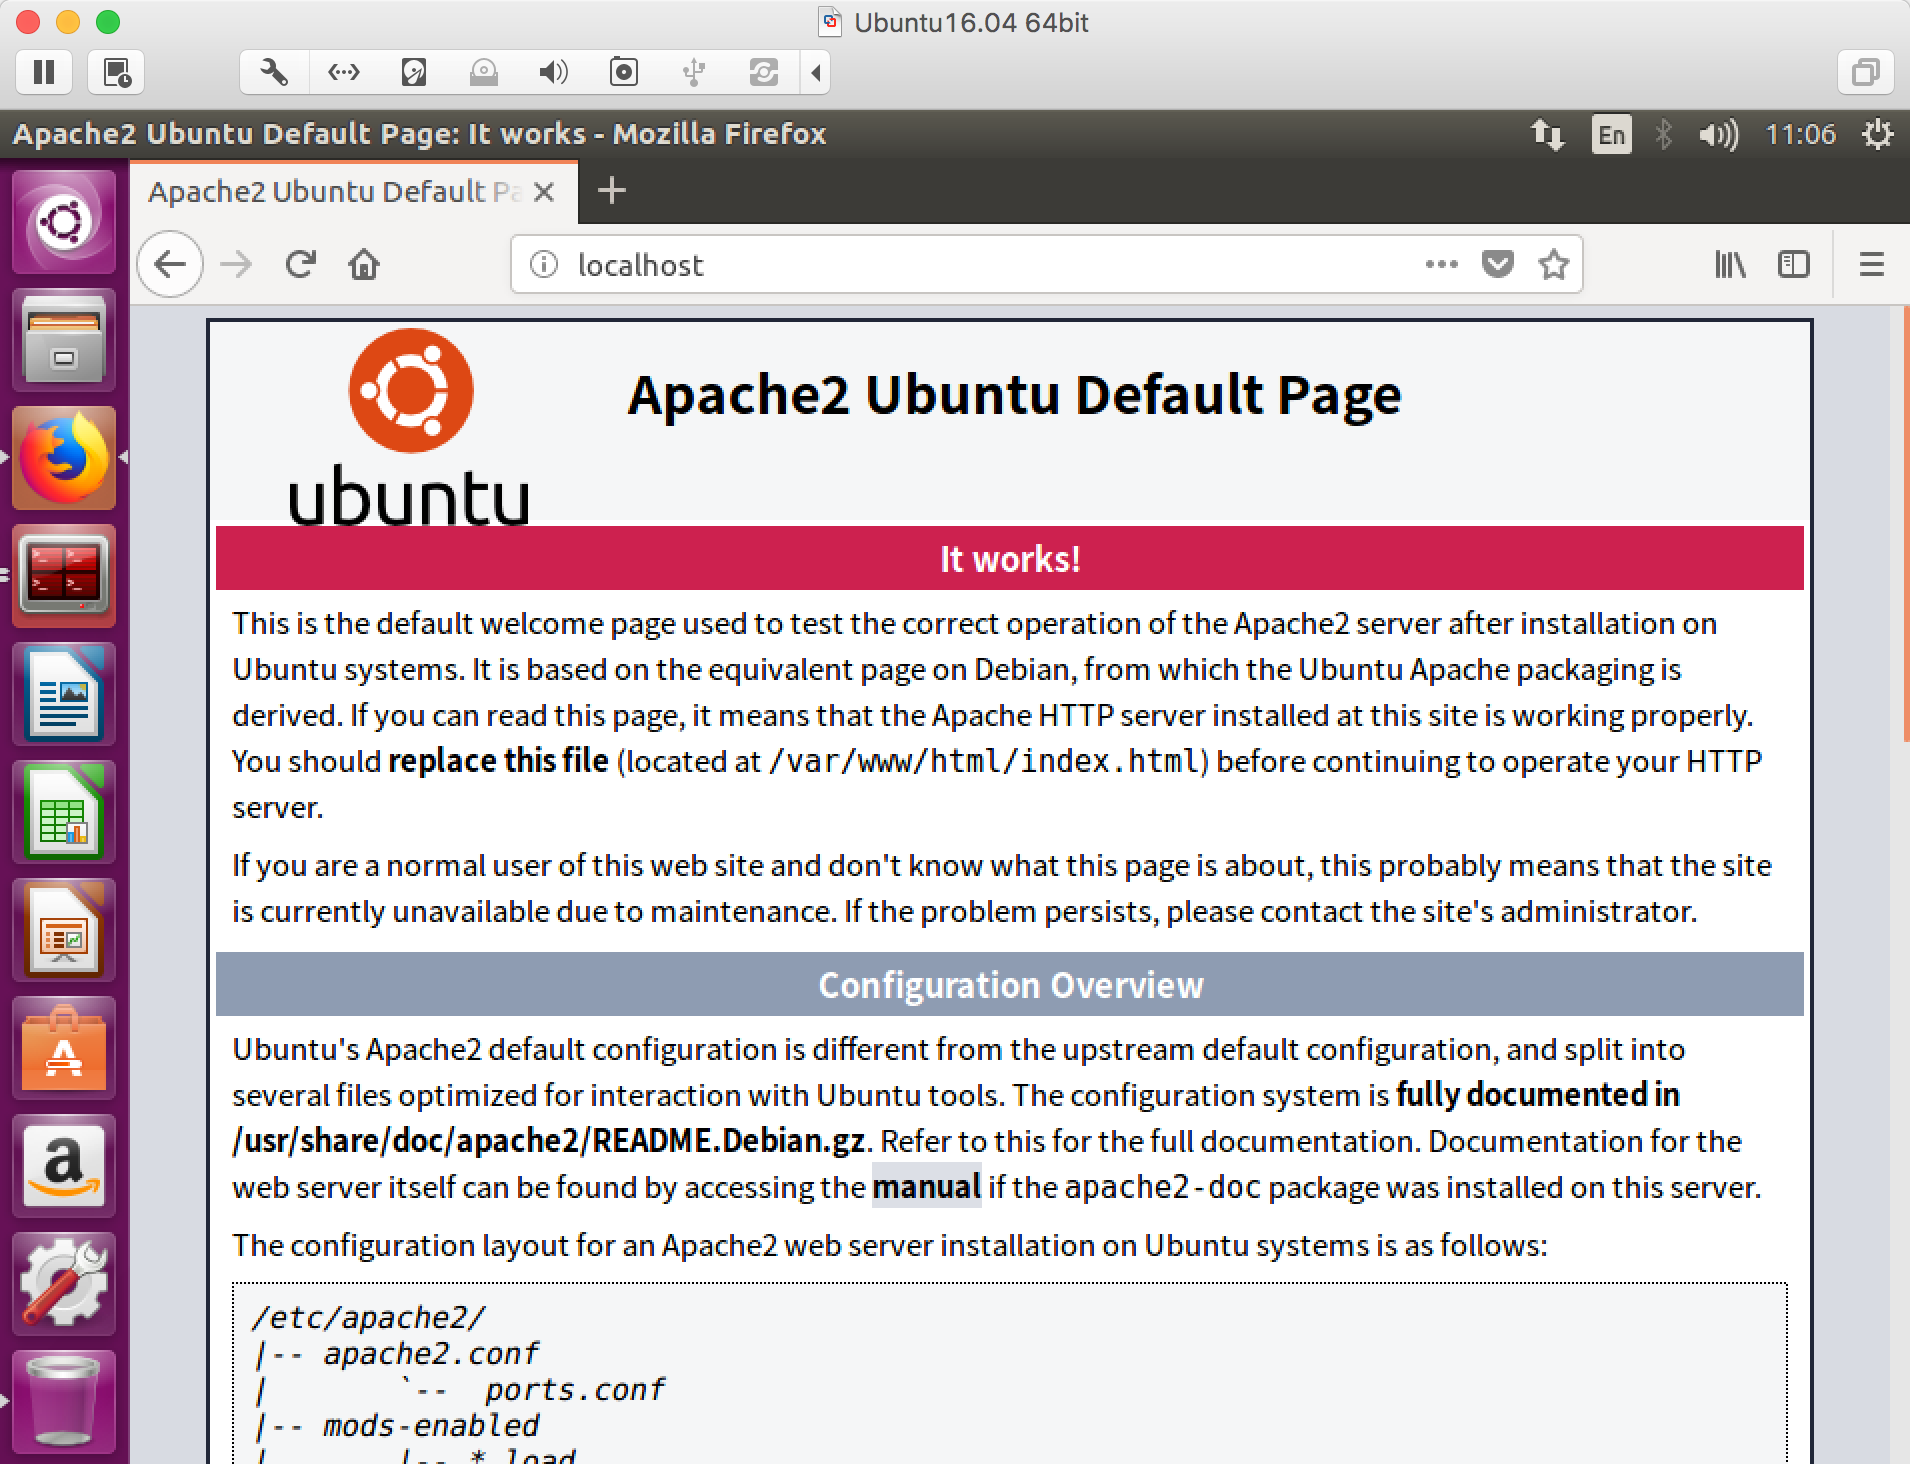
访问本地地址:localhost或127.0.0.1
安装PHP
root@starnight:~# sudo apt-get install php7.
root@starnight:~# php7. -v

PHP 7.0.-0ubuntu0.16.04. (cli) ( NTS )

Copyright (c) - The PHP Group

Zend Engine v3.0.0, Copyright (c) - Zend Technologies

    with Zend OPcache v7.0.28-0ubuntu0.16.04., Copyright (c) -, by Zend Technologies
root@starnight:~# sudo apt-get install libapache2-mod-php7.
安装MySQL
root@starnight:~# sudo apt-get install mysql-server
在安装过程中会提示输入/重复密码。
root@starnight:~# sudo apt-get install php7.-mysql
到这里LAMP环境就算是安装成功了。
虚拟目录
如果机器上要部署多个Web项目,可以通过不同端口进行指定。
例如:在Web Root下有个项目helo,我想直接通过ip:port的形式进行访问。
root@starnight:/var/www/html/helo# pwd

/var/www/html/helo

root@starnight:/var/www/html/helo# ls

index.php
这里可以通过配置虚拟目录来实现。
root@starnight:/var/www/html/helo# cat /etc/apache2/ports.conf
在Listen 80添加你想设置的端口,如8080
root@starnight:/var/www/html/helo# cat /etc/apache2/ports.conf

# If you just change the port or add more ports here, you will likely also

# have to change the VirtualHost statement in

# /etc/apache2/sites-enabled/-default.conf

Listen

Listen

<IfModule ssl_module>

    Listen

</IfModule>

<IfModule mod_gnutls.c>

    Listen

</IfModule>

# vim: syntax=apache ts= sw= sts= sr noet
设置虚拟目录:
root@starnight:/var/www/html/helo# cat /etc/apache2/sites-available/-default.conf
copy 一份里面原有的内容,只需要更改port和DocumentRoot两项即可(本地环境,不涉及域名的问题,也可以进行相应的修改)
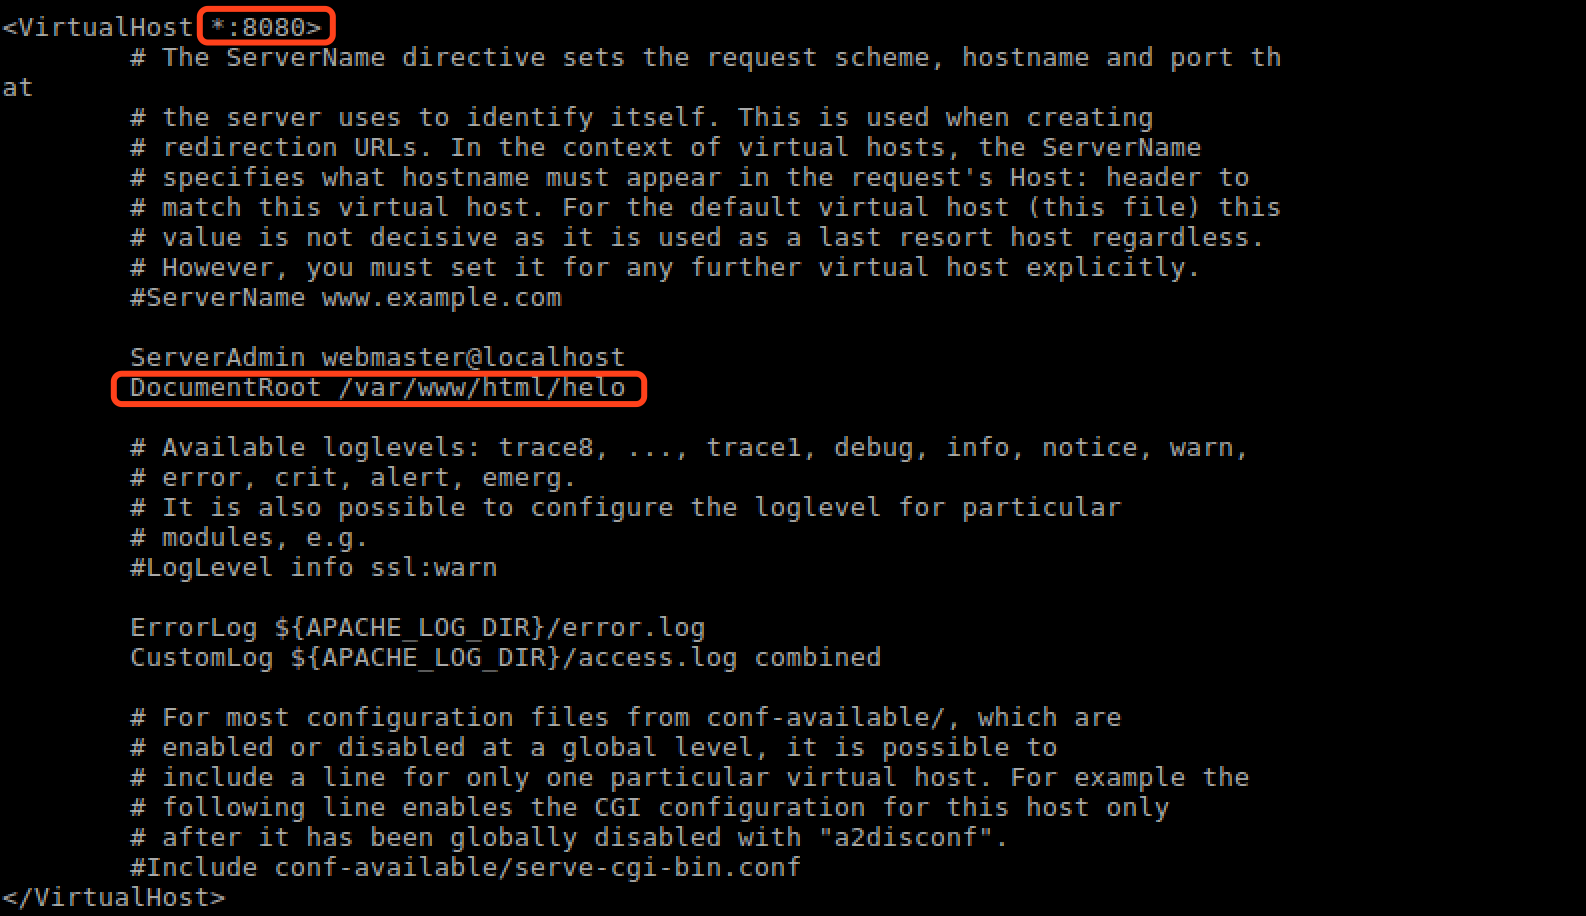
端口设置:8080,路径:/var/www/html/helo
重启apache2服务:
root@starnight:/var/www/html/helo# sudo /etc/init.d/apache2 restart
访问本地ip:port
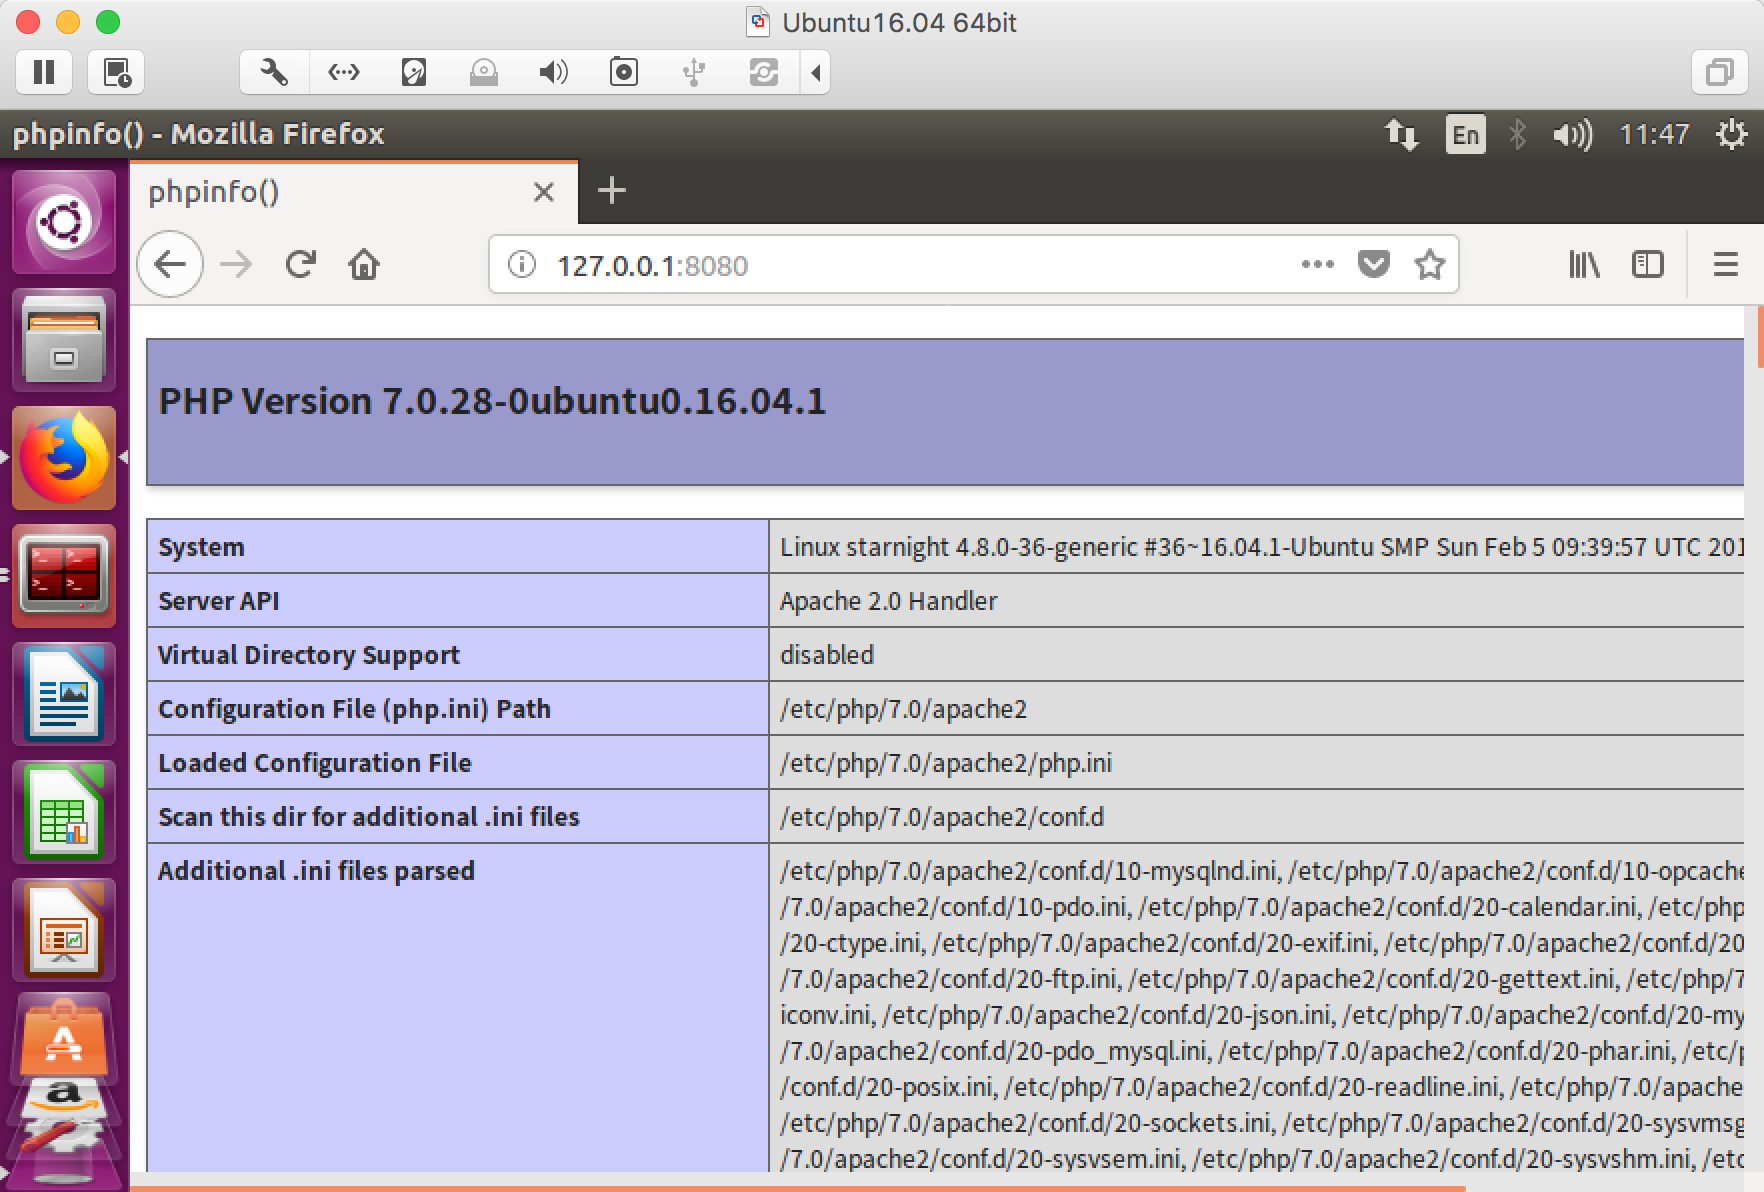
对,index.php的内容就是那个经典的phpinfo()。
Ubuntu 安装LAMP的更多相关文章
- 2019.9.17更换ubuntu的镜像源 ubuntu安装lamp iis安装网站和ftp站
更换ubuntu的镜像源 /etc/apt/sources.list cp /etc/apt/sources.list /etc/apt/sources.list.bak 备份这个文件 vim / ...
- ubuntu 安装 lamp 和配置虚拟机
1:sudo passwd root #设定root密码 su 切换 exit 退出 ,或者 普通用户下 加sudo 2:sudo apt-get update #更新软件列表 3:sudo ...
- Ubuntu安装LAMP环境(PHP5.6) 以及下载安装phpmyadmin
参考路径: http://blog.nciaer.com/?p=133 修改apache(2.4.18)的web路径时, 需要将 /etc/apache2/sites-available/000def ...
- ubuntu 安装LAMP web 服务器, phpmyadmin 安装后无法打开解决
安装方法: http://blog.chinaunix.net/uid-26495963-id-3173291.html 在上述文档中需要增加apache 支持mysql 功能. apt-get in ...
- ubuntu安装LAMP环境
1. LAMP 的安装 sudo apt-get install apache2 mysql-server mysql-client php5 php5-gd php5-mysql 由于LAMP大部分 ...
- 笔记:Ubuntu安装LAMP环境
一.更换Ubuntu的镜像源 镜像源路径:/etc/apt/sources.list 备份:cp /etc/apt/sources.list /etc/apt/souces.list.bak 使用阿里 ...
- Ubuntu安装LAMP
1.安装apache2 sudo apt-get install apache2 sudo apt-get install apache2 Apache安装成功后,/var/www/默认作为web的根 ...
- ubuntu 安装 lamp
链接: http://www.cnblogs.com/CheeseZH/p/4694135.html
- ubuntu 安装 LAMP环境
http://jingyan.baidu.com/article/a681b0de36ad683b18434691.html
随机推荐
- B2B、B2C、B2D的简单理解
B2D现在非常流行,顾名思义,B2D 就是指那些以开发者为对象的服务,它们通过 API 等形式"售卖"自己某一方面的特长.B2D(Business to Developer)市场很 ...
- c# 单元测试工程如何取得当前项目路径
前言: C#工程项目中有些配置文件,数据文件等不是C#工程文件,但是程序中需要访问,如果写成绝对路径不利于程序的迁移,所以必须写成相对路径.取得相对路径的方法很多,网上的例子也很多,基本上是七种吧,这 ...
- Leetcode_169_Majority Element
本文是在学习中的总结,欢迎转载但请注明出处:http://blog.csdn.net/pistolove/article/details/42247887 Given an array of size ...
- Leetcode_100_Same Tree
本文是在学习中的总结,欢迎转载但请注明出处:http://blog.csdn.net/pistolove/article/details/42061529 Given two binary trees ...
- Google地球查看香港地形
12月1号要去香港.为此需要先了解一下香港的情况.以前只知道用Google地球看别人照的照片(或者是全景照),这次无意间发现了它一个很强大的功能:立体的呈现一个地区的地形.对于像香港这样的多山地区来说 ...
- gcc学习(一)[第二版]
gcc简介 1. gcc是GNU Compiler Collection的缩写.最初是作为C语言的编译器(GNU C Compiler),作者为Richard Stallman,是GNU项目的奠基者 ...
- LeetCode之“链表”:Remove Nth Node From End of List
题目链接 题目要求: Given a linked list, remove the nth node from the end of list and return its head. For ex ...
- 2DSprite添加Light照射(Unity3D开发之十六)
猴子原创,欢迎转载.转载请注明: 转载自Cocos2Der-CSDN,谢谢! 原文地址: http://blog.csdn.net/cocos2der/article/details/45534245 ...
- android 之ViewStub
在开发应用程序的时候,经常会遇到这样的情况,会在运行时动态根据条件来决定显示哪个View或某个布局.那么最通常的想法就是把可能用到的View都写在上面,先把它们的可见性都设为View.GONE,然后在 ...
- akamai:与看视频广告等待相比,用户更不能忍受缓冲等待
根据akamai的研究,网络视频广告的位置对于完成率的影响最大,间插广告的完成率比前贴片广告要高18.1%,而前贴片广告比后贴片广告的完成率要高14.3%. 网站的重复访客的视频广告观看完成率比一时兴 ...