SpringBoot IntelliJ创建简单的Restful接口
使用SpringBoot快速建服务,和NodeJS使用express几乎一模一样,主要分为以下:
1.添加和安装依赖 2.添加路由(即接口) 3.对路由事件进行处理
同样坑的地方就是,祖国的防火墙太过强大,必须要把maven换成国内镜像源,阿里云的速度就非常快。
1.通过spring initializr创建项目
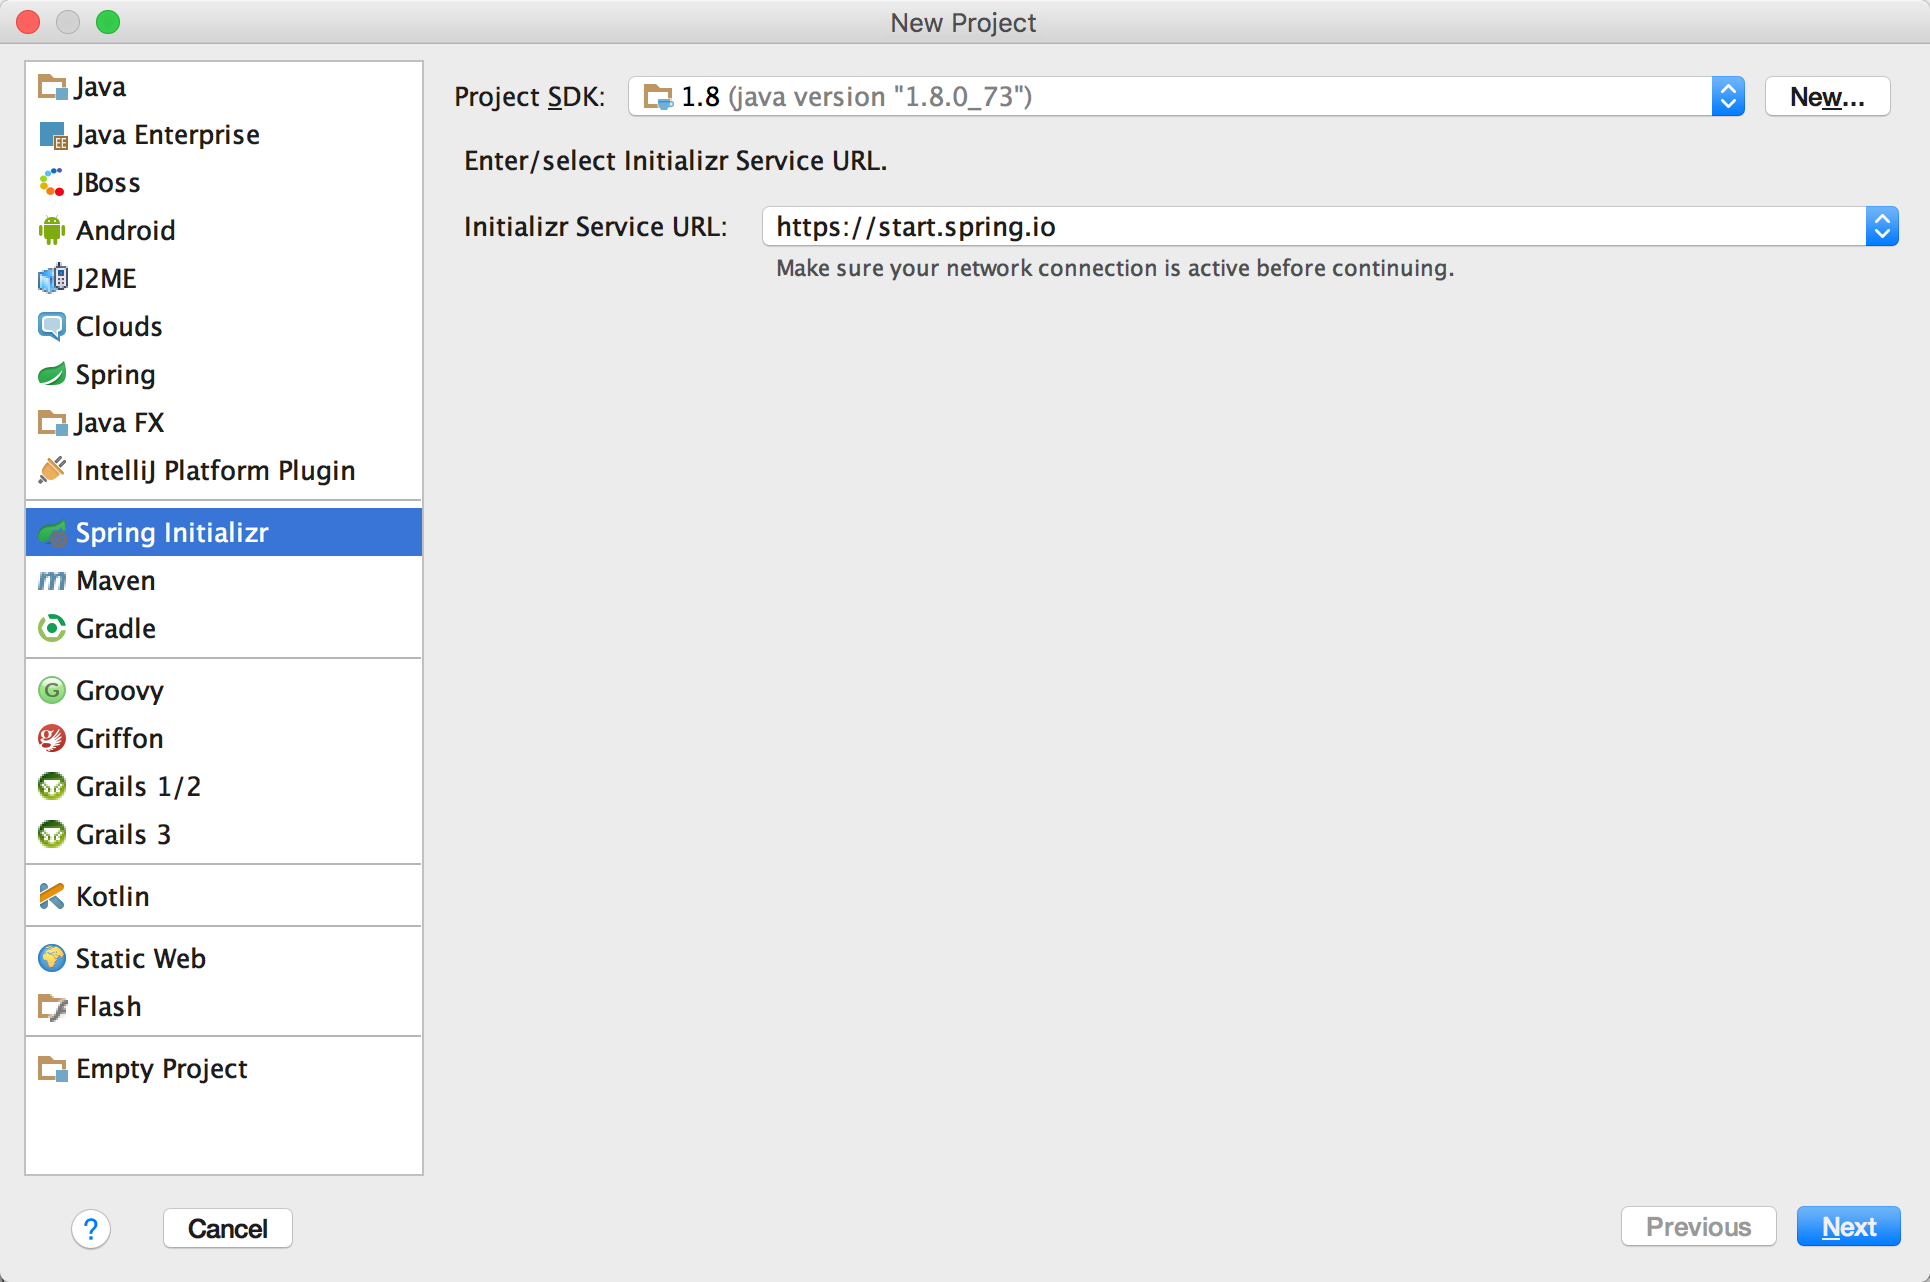
2.填好工程名,一路next到底
3.新建controller的package,新建class "DemoServer",填入以下内容:
import java.util.Date;

import java.util.HashMap;

import java.util.Map;

import org.springframework.web.bind.annotation.PathVariable;

import org.springframework.web.bind.annotation.RequestMapping;

import org.springframework.web.bind.annotation.RequestParam;

import org.springframework.web.bind.annotation.RestController;

import org.springframework.web.bind.annotation.ResponseBody;

@RestController

@RequestMapping(value = "/index")

public class NewServer {

    @RequestMapping

    public String index() {

        return "spring boot server";

    }

    // @RequestParam 简单类型的绑定,可以出来get和post

    @RequestMapping(value = "/get")

    public HashMap<String, Object> get(@RequestParam String name) {

        HashMap<String, Object> map = new HashMap<String, Object>();

        map.put("title", "hello world");

        map.put("name", name);

        return map;

    }
    @RequestMapping("/json")

    @ResponseBody

    public Map<String,Object> json(){

        Map<String,Object> map = new HashMap<String,Object>();

        map.put("name","Ryan");

        map.put("age","18");

        map.put("sex","man");

        return map;

    }

}
4.会提示缺少 org.springframework.web的依赖,在pom.xml中添加该依赖:
	<dependencies>

		<dependency>

			<groupId>org.springframework.boot</groupId>

			<artifactId>spring-boot-starter-web</artifactId>

		</dependency>

		<dependency>

			<groupId>org.springframework.boot</groupId>

			<artifactId>spring-boot-starter-test</artifactId>

			<scope>test</scope>

		</dependency>

		<dependency>

			<groupId>org.springframework.boot</groupId>

			<artifactId>spring-boot-devtools</artifactId>

		</dependency>

	</dependencies>
这里有个IntelliJ非常傻bi的bug,你不去修改pom.xml,他默认竟然不会安装里面的依赖。
所以你需要,先剪切<dependencies>标签里的内容,保存。然后重新复制进去,再保存,然后就会自动添加依赖了。。。真他妈简直了。。
如果IntelliJ安装依赖有问题,可以通过cd到工程目录,使用mvn install进行安装。
5.新建model的pakcage,写一个model类User
package com.example.model;

/**

 * Created by shenzw on 31/10/2016.

 */

import java.util.Date;

public class User {

    private int id;

    private String name;

    private Date date;

    public int getId() {

        return id;

    }

    public void setId(int id) {

        this.id = id;

    }

    public String getName() {

        return name;

    }

    public void setName(String name) {

        this.name = name;

    }

    public Date getDate() {

        return date;

    }

    public void setDate(Date date) {

        this.date = date;

    }

}
通过在DemoServer中添加路由,可以在路径中获取参数,然后拼装一个User对象,快速序列化成JSON返回
// @PathVariable 获得请求url中的动态参数

    @RequestMapping(value = "/get/{id}/{name}")

    public User getUser(@PathVariable int id, @PathVariable String name) {

        User user = new User();

        user.setId(id);

        user.setName(name);

        user.setDate(new Date());

        return user;

    }
6.点击运行,或选择DemoServer这个Class右键RUN
http://localhost:8080/index 可以访问到这个服务
http://localhost:8080/index/json 会返回json
http://localhost:8080/index/get?name=123 可以进行GET请求获取
http://localhost:8080/index/get/123/xiaoming 可以在路径中传递参数
demo:
https://github.com/rayshen/spring-boot-demo/tree/master/spring-boot-demo-2-1
SpringBoot IntelliJ创建简单的Restful接口的更多相关文章
- Intellij创建简单Springboot项目
Intellij创建简单Springboot项目 第一步:选择创建新项目——file-new-project 第二步:选择项目类型——Spring Initializr-next 第三步:输入项目信息 ...
- [转]简单识别 RESTful 接口
本文描述了识别一个接口是否真的是 RESTful 接口的基本方法.符合 REST 架构风格的接口,称为 RESTful 接口.本文不打算从架构风格的推导方面描述,而是从 HTTP 标准的方面 ...
- springboot结合jwt实现基于restful接口的身份认证
基于restful接口的身份认证,可以采用jwt的方式实现,想了解jwt,可以查询相关资料,这里不做介绍~ 下面直接看如何实现 1.首先添加jwt的jar包,pom.xml中添加依赖包: <de ...
- 使用springboot实现一个简单的restful crud——01、项目简介以及创建项目
前言 之前一段时间学习了一些springboot的一些基础使用方法和敲了一些例子,是时候写一个简单的crud来将之前学的东西做一个整合了 -- 一个员工列表的增删改查. 使用 restful api ...
- 利用WCF创建简单的RESTFul Service
1):用VS2013创建一个WCF的工程,如下图所示: 2):我们来看一下默认状态下的config文件内容,这里的内容我们会再后续的步骤中进行修改 <?xml version="1.0 ...
- cxf的使用及安全校验-02创建简单的客户端接口
上一篇文章中,我们已经讲了如果简单的创建一个webservice接口 http://www.cnblogs.com/snowstar123/p/3395568.html 现在我们创建一个简单客户端接口 ...
- 使用springboot实现一个简单的restful crud——03、前端页面、管理员登陆(注销)功能
前言 这一篇我们就先引入前端页面和相关的静态资源,再做一下管理员的登陆和注销的功能,为后续在页面上操作数据做一个基础. 前端页面 前端的页面是我从网上找的一个基于Bootstrap 的dashboar ...
- 使用springboot实现一个简单的restful crud——02、dao层单元测试,测试从数据库取数据
接着上一篇,上一篇我们创建了项目.创建了实体类,以及创建了数据库数据.这一篇就写一下Dao层,以及对Dao层进行单元测试,看下能否成功操作数据库数据. Dao EmpDao package com.j ...
- 使用webpy创建一个简单的restful风格的webservice应用
下载:wget http://webpy.org/static/web.py-0.38.tar.gz解压并进入web.py-0.38文件夹安装:easy_install web.py 这是一个如何使用 ...
随机推荐
- HashSet,TreeSet和LinkedHashSet的区别
Set接口Set不允许包含相同的元素,如果试图把两个相同元素加入同一个集合中,add方法返回false.Set判断两个对象相同不是使用==运算符,而是根据equals方法.也就是说,只要两个对象用eq ...
- 【干货分享】前端面试知识点锦集03(JavaScript篇)——附答案
三.JavaScript部分 1.谈谈你对Ajax的理解?(概念.特点.作用) AJAX全称为“Asynchronous JavaScript And XML”(异步JavaScript和XML) 是 ...
- ThinkPHP 整合Bootstrap Ajax分页
ThinkPHP Ajax分页代码 publicfunction index() { $where=array(); $name = I('name'); if(!empty($name)){ $wh ...
- iOS 3D 之 SceneKit框架Demo分析
Scene Kit 是Apple 向 OS X 开发者们提供的 Cocoa 下的 3D 渲染框架. Scene Kit 建立在 OpenGL 的基础上,包含了如光照.模型.材质.摄像机等高级引擎特性, ...
- iOS中的各种id
 网卡Mac地址会随机化 
- 长按TextField或TextView显示中文的粘贴复制
首先要确保手机当前系统为中文,只需要在 plist 文件中添加 Localized resources can be mixed = YES 就行了
- 易企秀微场景2016最新完整版V10.5,小编亲测修复众多错误
易企秀V10.5更新说明1.修复拨号英文错误2.修复转送场景问题3.修复设置场景密码乱码问题4.修复前台批量删除客户图片5.修复数据收集分页问题6.修复图片分类错乱问题7.修复音乐和特效冲突问题8.修 ...
- UILabel 自适应宽高
#import <UIKit/UIKit.h> @interface UILabel (UILabel_LabelHeighAndWidth) + (CGFloat)getHeightBy ...
- 多站点配置apache服务器
以阿里云服务器为例,使用的是阿里云web一键安装包 目录: /alidata/server/httpd-2.4.10/conf/extra 代码内容: <VirtualHost *:80> ...
- seL4之hello-3征途
seL4之hello-3征途 回顾上周 了解seL4的启动流程和初始化线程 了解seL4的几种内核对象和权能机制 完成hell0-2的运行. 补充上周 1.找到根任务(初始化线程)的创建具体的位置(那 ...