SpringBoot(四)thymeleaf+MyBatis+MySql
接着上一节
1.第一步:在pom文件中添加
 <!--   MyBatis  -->

        <dependency>

            <groupId>org.mybatis.spring.boot</groupId>

            <artifactId>mybatis-spring-boot-starter</artifactId>

            <version>1.3.1</version>

        </dependency>

        <dependency>

            <groupId>org.springframework.boot</groupId>

            <artifactId>spring-boot-starter</artifactId>

        </dependency>

        <dependency>

            <groupId>org.springframework.boot</groupId>

            <artifactId>spring-boot-devtools</artifactId>

            <optional>true</optional>

        </dependency>
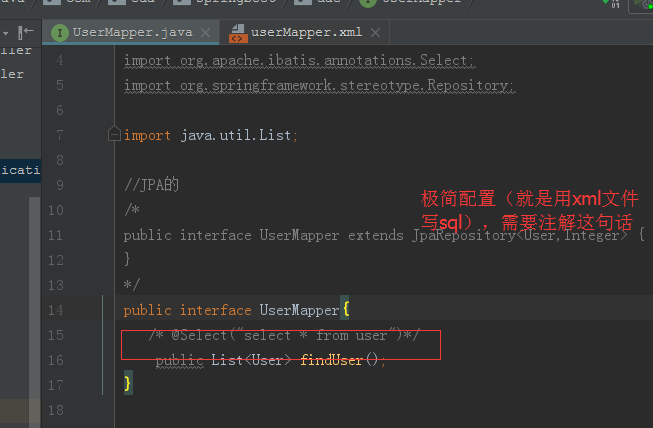
2.第二步:将userMapper类,改成下面这样
package com.oda.springboot.dao;

import com.oda.springboot.bean.User;

import org.apache.ibatis.annotations.Select;

import org.springframework.stereotype.Repository;

import java.util.List;

//JPA的

/*

public interface UserMapper extends JpaRepository<User,Integer> {

}

*/

public interface UserMapper{

   @Select("select * from user")

    public List<User> findUser();

}
3.第三步:将UserService类改成下面这样
package com.oda.springboot.service;

import com.oda.springboot.bean.User;

import com.oda.springboot.dao.UserMapper;

import org.springframework.beans.factory.annotation.Autowired;

import org.springframework.stereotype.Service;

import javax.annotation.Resource;

import java.util.List;

@Service

public class UserService {

    @Resource

    private UserMapper userMapper;

    //JPA的

    /*public List<User> users() {

        return userMapper.findAll();

    }*/

    public List<User> users(){

        return userMapper.findUser();

    }

}
4.第四步:将SpringbootApplication类改成下面这样
package com.oda.springboot;

import org.mybatis.spring.annotation.MapperScan;

import org.springframework.boot.SpringApplication;

import org.springframework.boot.autoconfigure.SpringBootApplication;

import org.springframework.boot.builder.SpringApplicationBuilder;

@SpringBootApplication

@MapperScan("com.oda.springboot.dao")

public class SpringbootApplication {

    protected SpringApplicationBuilder configure(SpringApplicationBuilder application) {

         return application.sources(SpringbootApplication.class);

    }

    public static void main(String[] args) {

        SpringApplication.run(SpringbootApplication.class, args);

    }

}
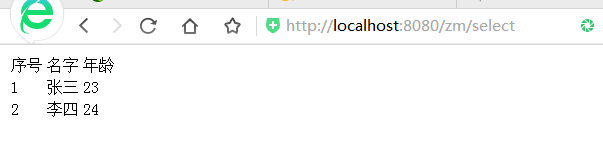
启动,访问http://localhost:8080/zm/users
极简配置(就是sql用xml文件写)
5.第五步:在resources包下新建mapper包,在其下新建userMapper.xml
<?xml version="1.0" encoding="UTF-8" ?>

        <!DOCTYPE mapper PUBLIC "-//ibatis.apache.org//DTD Mapper 3.0//EN" "http://mybatis.org/dtd/mybatis-3-mapper.dtd">

<mapper namespace="com.oda.springboot.dao.UserMapper">

    <select id="findUser" resultType="com.oda.springboot.bean.User">

        select *

        from user

    </select>

</mapper>
6.第六步:在application.yml中添加
mybatis:

  mapper-locations: classpath:mapper/*.xml
启动,访问http://localhost:8080/zm/users

SpringBoot(四)thymeleaf+MyBatis+MySql的更多相关文章
- SpringBoot (四) - 整合Mybatis,逆向工程,JPA
1.SpringBoot整合MyBatis 1.1 application.yml # 数据源配置 spring: datasource: driver-class-name: com.mysql.c ...
- 【SpringBoot】SpringBoot/MyBatis/MySql/thymeleaf/Log4j整合工程
工程下载地址:https://files.cnblogs.com/files/xiandedanteng/MMSpringWeb20191027-1.rar 工程目录结构如图: 1.创建工程 有些网文 ...
- Quartz学习——SSMM(Spring+SpringMVC+Mybatis+Mysql)和Quartz集成详解(四)
当任何时候觉你得难受了,其实你的大脑是在进化,当任何时候你觉得轻松,其实都在使用以前的坏习惯. 通过前面的学习,你可能大致了解了Quartz,本篇博文为你打开学习SSMM+Quartz的旅程!欢迎上车 ...
- Springboot+Mybatis+MySQL实例练习时踩坑记录
最近刚开始学习后端,直接让上手学习Springboot+Mybatis+MySQL对CRUD的实例,虽然实例不难,但是上面的三个知识我都不懂,就有点为难我了 所以经常遇到一个点卡自己很久的情况,这里列 ...
- Springboot集成mybatis(mysql),mail,mongodb,cassandra,scheduler,redis,kafka,shiro,websocket
https://blog.csdn.net/a123demi/article/details/78234023 : Springboot集成mybatis(mysql),mail,mongodb,c ...
- springboot成神之——springboot+mybatis+mysql搭建项目简明demo
springboot+mybatis+mysql搭建项目简明demo 项目所需目录结构 pom.xml文件配置 application.properties文件配置 MyApplication.jav ...
- (转) Quartz学习——SSMM(Spring+SpringMVC+Mybatis+Mysql)和Quartz集成详解(四)
http://blog.csdn.net/u010648555/article/details/60767633 当任何时候觉你得难受了,其实你的大脑是在进化,当任何时候你觉得轻松,其实都在使用以前的 ...
- SpringBoot+MyBatis+Mysql 6.X 版本日期型数据获,时间错乱,jason序列化时间相差8小时问题
新项目是用的springboot+mybatis+mysql 6.0.6版本的驱动包来搭建的,在使用的过程中遇到以下2个问题 从mysql取的的数据日期时间,与真实的时间往后错乱了14个小时. spr ...
- 从 0 使用 SpringBoot MyBatis MySQL Redis Elasticsearch打造企业级 RESTful API 项目实战
大家好!这是一门付费视频课程.新课优惠价 699 元,折合每小时 9 元左右,需要朋友的联系爱学啊客服 QQ:3469271680:我们每课程是明码标价的,因为如果售价为现在的 2 倍,然后打 5 折 ...
随机推荐
- h5 实现定位
直接上代码,代码使用了vue相关的语法 并且引入了dialog插件 ,使用时直接调用getLocation()方法就可以了! // 定位 function getLocation(){ console ...
- Hopfield神经网络
神经网络分类 多层神经网络:模式识别 相互连接型网络:通过联想记忆去除数据中的噪声 1982年提出的Hopfield神经网络是最典型的相互连结型网络. 联想记忆 当输入模式为某种状态时,输出端要给出与 ...
- Docker Compose 一键部署Nginx代理Tomcat集群
Docker Compose 一键部署Nginx代理Tomcat集群 目录结构 [root@localhost ~]# tree compose_nginx_tomcat/ compose_nginx ...
- 时间序列数据库调研之InfluxDB
基于 Go 语言开发,社区非常活跃,项目更新速度很快,日新月异,关注度高 测试版本 1.0.0_beta2-1 安装部署 wget https://dl.influxdata.com/influxdb ...
- Query the tables and index which will caus rebuild index fail
On MSSQL server database, while rebuild index failed, we can use the follow sql statement to see if ...
- Pandas 基础(11) - 用 melt 做格式转换
melt 也可以用来做数据格式转换, 请看下图, 我们可以用 melt 把左表转成右表的格式: 首先引入文件(已上传): df = pd.read_csv('/Users/rachel/Sites/p ...
- ABP权限认证
通过AOP+特性实现 ABP默认的权限验证过滤器 AbpAuthorizationFilter 可以通过继承AsyncAuthorizationFilter 自定义自己的权限过滤器 权限数据存放表 ...
- hdu-1043 bfs+康拓展开hash
因为是计算还原成一种局面的最短步骤,应该想到从最终局面开始做bfs,把所有能到达的情况遍历一遍,把值存下来. bfs过程中,访问过的局面的记录是此题的关键,9*9的方格在计算过程中直接存储非常占内存. ...
- 5、SAMBA服务一:参数详解
①:SAMBA服务一:参数详解 ②:SAMBA服务二:配置实例 一.SAMBA简介 samba指SMB(Server Message Block,服务器信息块)协议在网络上的计算机之间远程共享Linu ...
- 『TensorFlow』读书笔记_Word2Vec
由于暂时不会深入接触NLP相关领域,所以本章的内容就不过多涉及了,以后会进行学习,应该. Word2Vec又称Word Embeddings,中文称为"词向量"."词嵌入 ...