nginx配置https服务器
方法一
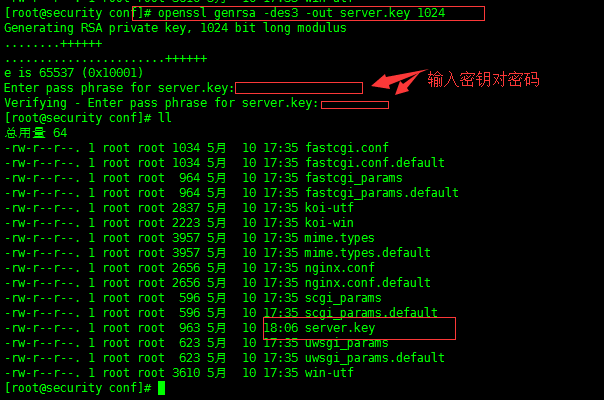
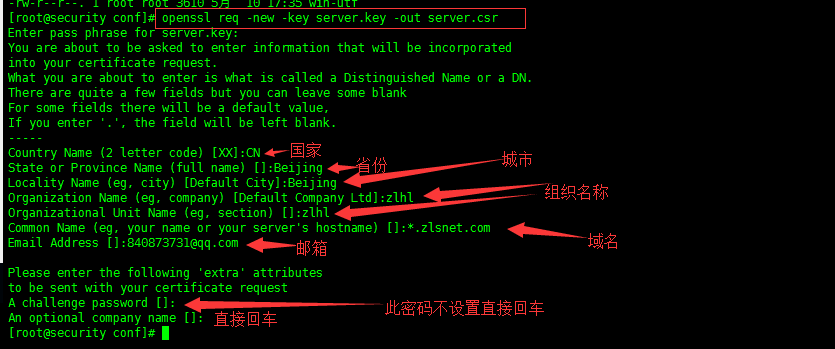
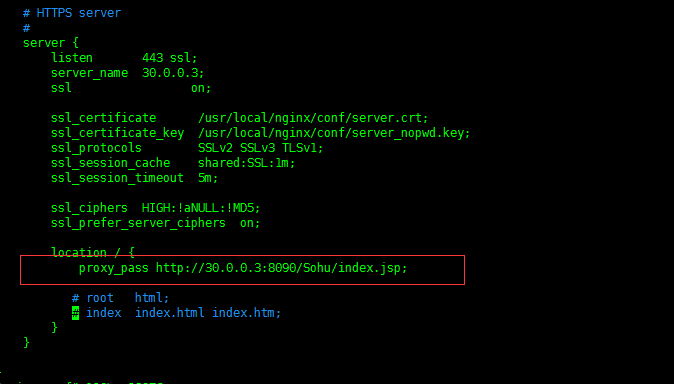
1、创建证书


quit :完整有序的停止nginx
kill -TERM 主进程号 :快速停止Nginx
平滑重启nginx:
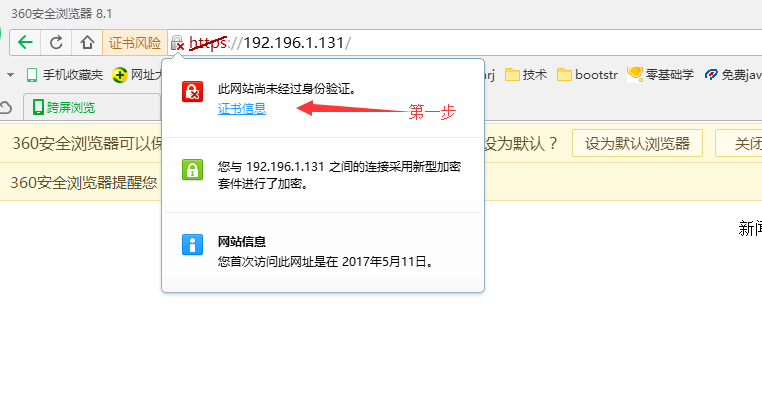
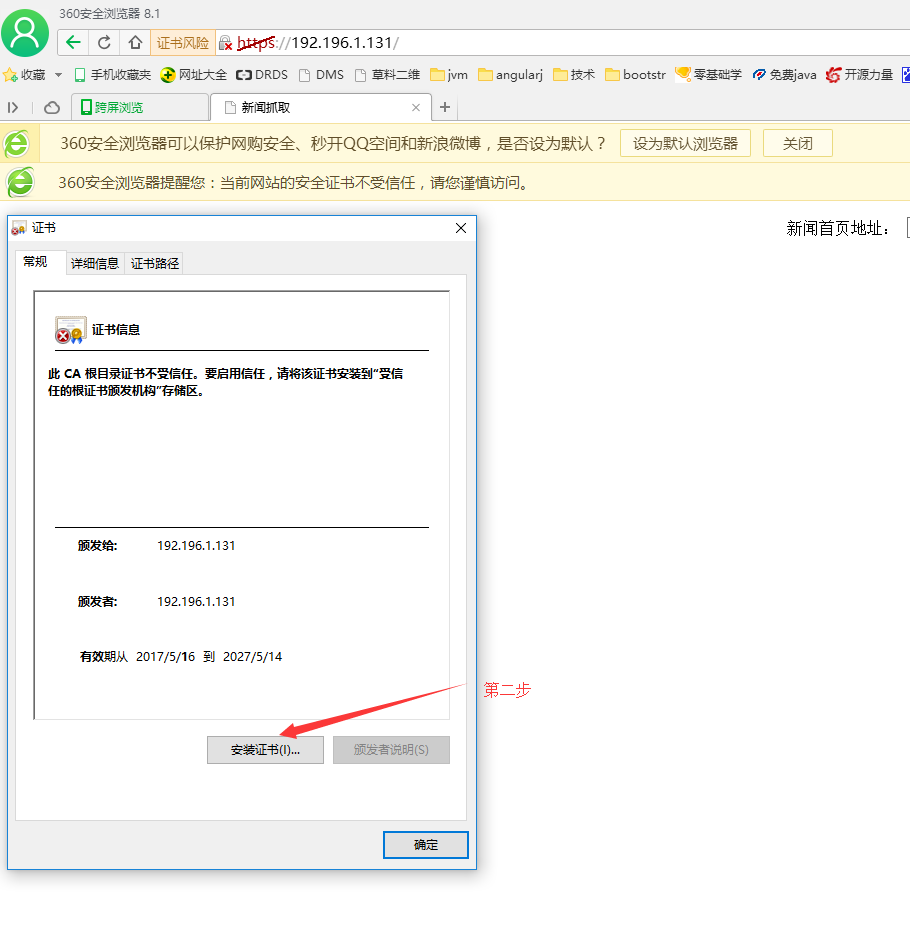
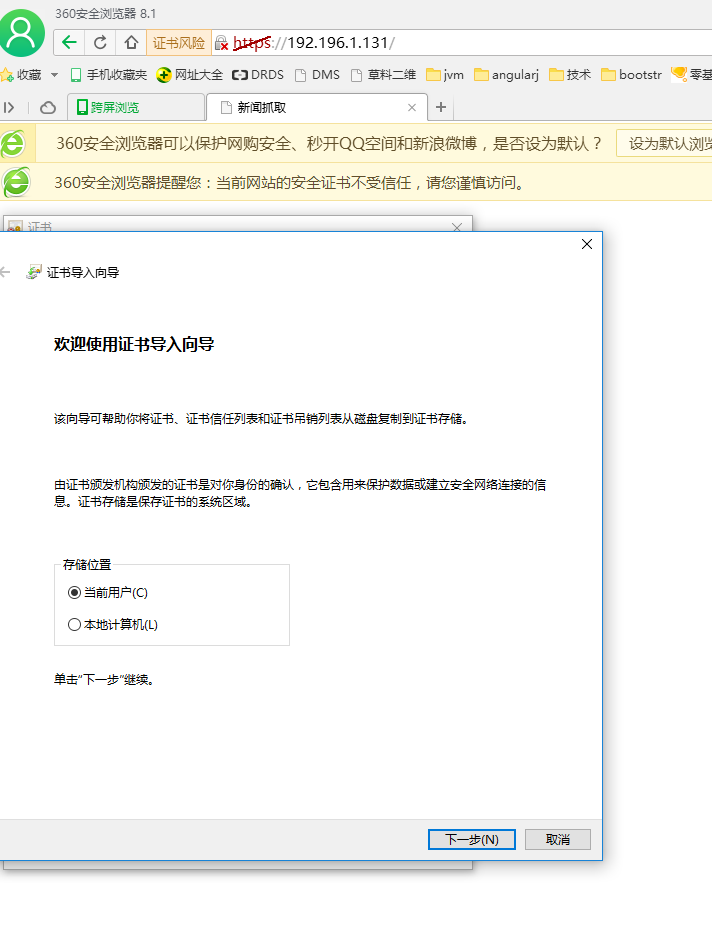
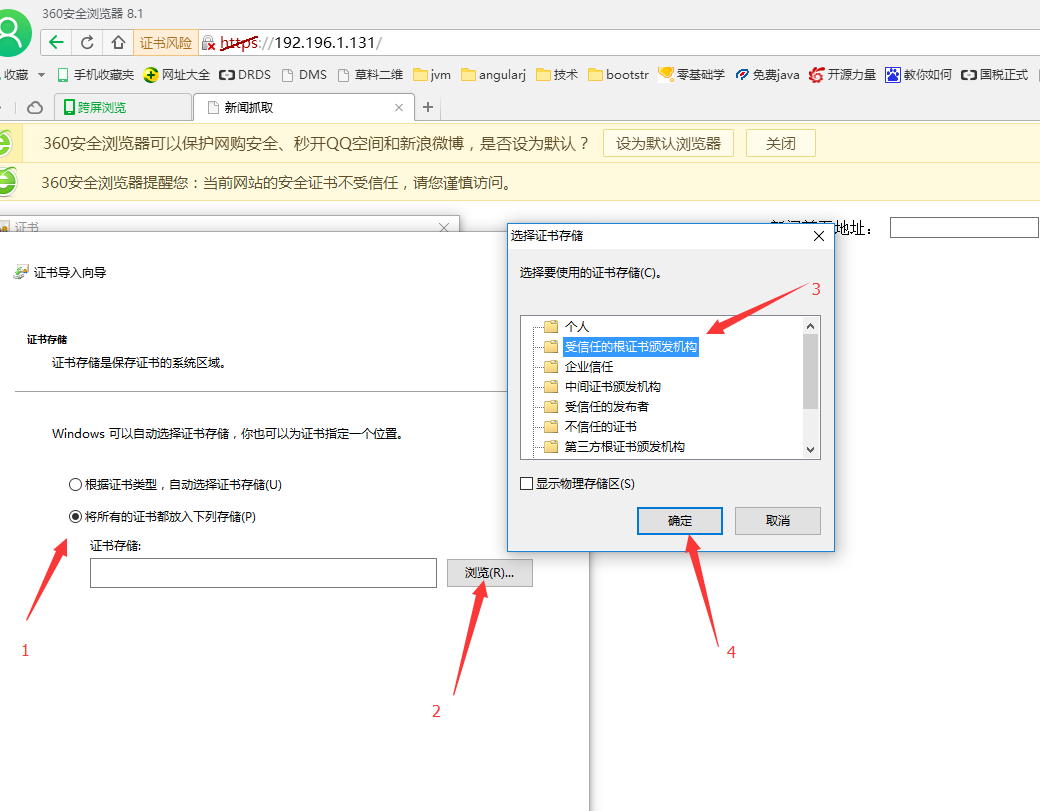
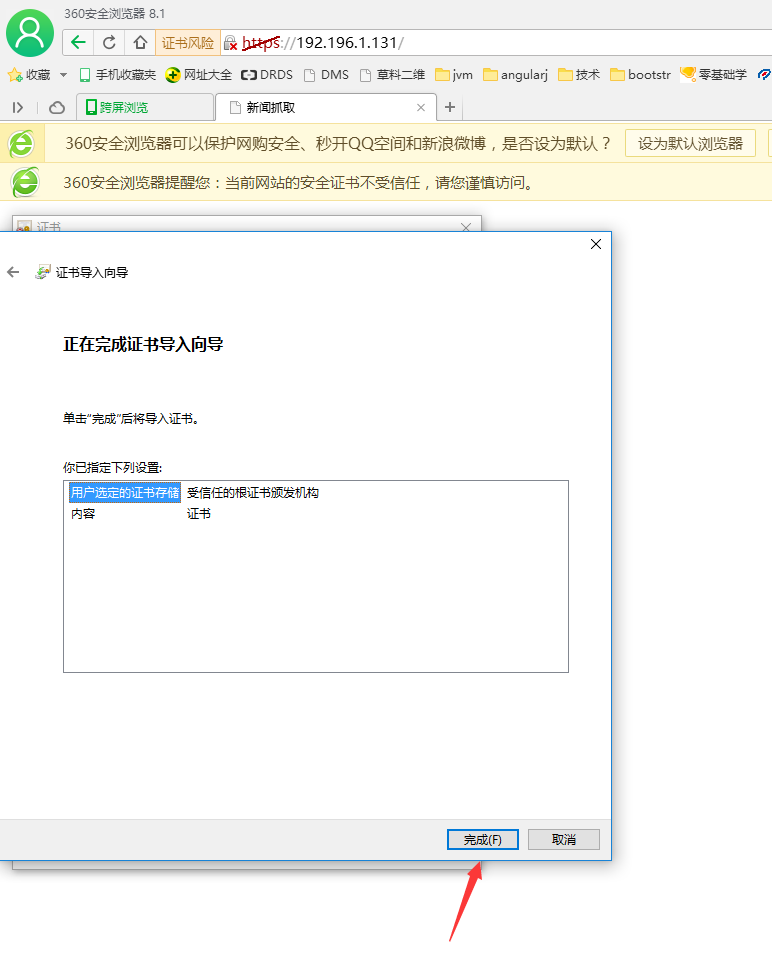
浏览器设置:

nginx配置https服务器的更多相关文章
- Nginx 配置 HTTPS 服务器
Nginx 配置 HTTPS 服务器 Chrome 浏览器地址栏标志着 HTTPS 的绿色小锁头从心理层面上可以给用户专业安全的心理暗示,本文简单总结一下如何在 Nginx 配置 HTTPS 服务器, ...
- windows下用nginx配置https服务器
1.安装nginx 先到nginx官网下在nginx http://nginx.org/en/download.html 将下载好的文件解压出来修改文件名为 nginx ,然后拷贝到C盘下,目录如下: ...
- Nginx 配置 HTTPS(多域名)
平常开发要求比较低, 依然在用 HTTP, 但到了微信小程序就不行了, 腾讯和苹果都对 API 提出了 HTTPS 的要求. 尤其是苹果, 不仅要求 HTTPS, 还要求 TLS 协议版本要在 1.2 ...
- Nginx配置Https
1.申请证书: https://console.qcloud.com/ssl?utm_source=yingyongbao&utm_medium=ssl&utm_campaign=qc ...
- 【转】Linux下nginx配置https协议访问的方法
一.配置nginx支持https协议访问,需要在编译安装nginx的时候添加相应的模块--with-http_ssl_module 查看nginx编译参数:/usr/local/nginx/sbin/ ...
- nginx配置https双向验证(ca机构证书+自签证书)
nginx配置https双向验证 服务端验证(ca机构证书) 客户端验证(服务器自签证书) 本文用的阿里云签发的免费证书实验,下载nginx安装ssl,文件夹有两个文件 这两个文件用于做服务器http ...
- centos6.8下配置https服务器
centos6.8下配置https服务器 1.1 环境 l 系统环境:内核环境为2.6.32版本 64位的CentOS release 6.8 (Final) [root@localhost ~] ...
- RedHat 6.6下安装nginx,配置HTTPS
1.安装依赖包 yum -y install pcre-devel openssl-devel zlib-devel 2.下载nginx安装包到服务器上,当前使用版本nginx-1.15.5.tar. ...
- nginx 配置https并自签名证书
2016-10-28 转载请注明出处:http://daodaoliang.com/ 作者: daodaoliang 版本: V1.0.1 邮箱: daodaoliang@yeah.net 参考链接: ...
随机推荐
- CSS3中的vh、vw及其应用场景
需求:我们项目的需求是 一.vh vw vw和vh是相对于视口(viewport)的宽度和高度.由于现在移动设备的屏幕尺寸之差别,如果仍然根据屏幕的物理分辨率来设计网页,效果很难统一,因此html ...
- 异步解决方案(三)Promise
首先建议大家先看看这篇博文,这是我看过的最清晰给力的博文了: https://www.cnblogs.com/lvdabao/p/es6-promise-1.html 附赠一篇笑死我了的博客,加入有一 ...
- Js 向json对象中添加新元素
即:var json={a:1,b:2} json.c=3 添加新元素直接使用赋值就行了
- Django工程创建
方法一: 1.win+r进入cmd命令窗口: 2.找到Django的安装地址: 3.cmd窗口中利用cd 进入相应的文件夹,再输入命令如下: django-admin.exe startproject ...
- Newtonsoft.Json 自定义序列化格式转化器
public static class JsonHelper { static JsonHelper() { Newtonsoft.Json.JsonSerializerSettings settin ...
- xlrd和xlwd模块
xlrd模块 是python中一个第三方的用于读取excle表格的模块 exlce结构分析 一个excle表格包含多个sheet 一个sheet中包含多行多列 每个单元格具备唯一的行号和列号 常用函数 ...
- my21_myloader -o参数
-o 参数 如果不使用-o参数,遇到第一个有主键或者唯一约束的数据,则退出当前线程:如果有-o参数,则删除原来的表,创建新表,再插入数据,主键不会发生变化. ** Message: Dropping ...
- 性能测试工具LoadRunner07-LR之Virtual User Generator 参数化设置
1.Select next row[选择下一行]: 顺序(Sequential):按照参数化的数据顺序,一个一个的取 随机(Random):参数化中的数据,每次随机的从中抽取数据 唯一(Unique) ...
- python单元测试框架-unittest(三)之用例执行顺序
执行顺序规则: 测试类或测试方法的数字与字母顺序0~9,A-Z 执行如下脚本,理解用例执行顺序 #coding=utf-8 import unittest class Test1(unittest.T ...
- Zend Optimizer安装、配置
Zend Optimizer用优化代码的方法来提高php应用程序的执行速度.实现的原理是对那些在被最终执行之前由运行编译器(Run-Time Compiler)产生的代码进行优化.这里,我们下载最新版 ...