Android Studio 之 RadioButton
•任务
如何通过 RadioButton 实现如图所示的界面?
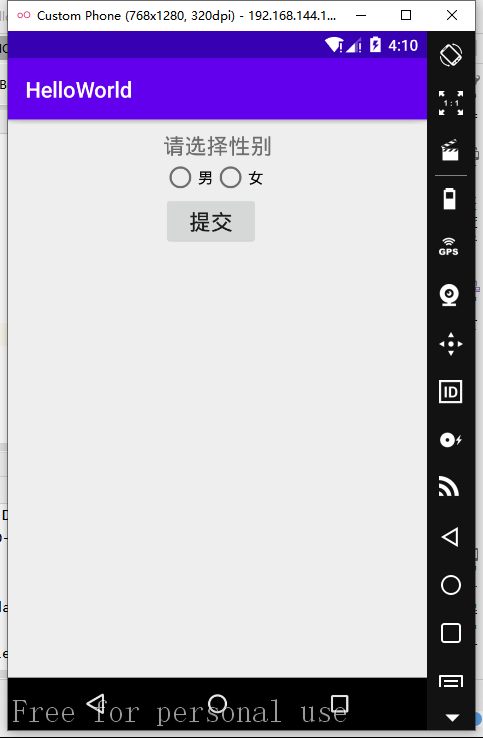
•基本用法
RadioButton 单选按钮,就是只能够选中一个,所以我们需要把 RadioButton 放到 RadioGroup 按钮组中,从而实现单选功能!
另外我们可以为外层 RadioGroup 设置 orientation 属性然后设置 RadioButton 的排列方式,竖直排列或者水平排列。
<?xml version="1.0" encoding="utf-8"?>

<RelativeLayout xmlns:android="http://schemas.android.com/apk/res/android"

    android:layout_width="match_parent"

    android:layout_height="match_parent"

    android:gravity="center_horizontal"

    android:padding="10dp">

    <Button

        android:id="@+id/btnpost"

        android:layout_width="wrap_content"

        android:layout_height="wrap_content"

        android:layout_below="@id/radioGroup"

        android:text="提交"

        android:textSize="20sp" />

    <RadioGroup

        android:id="@+id/radioGroup"

        android:layout_width="wrap_content"

        android:layout_height="wrap_content"

        android:layout_below="@id/tv_1"

        android:orientation="horizontal">

        <RadioButton

            android:id="@+id/rb_1"

            android:layout_width="wrap_content"

            android:layout_height="wrap_content"

            android:checked="true"

            android:text="男" />

        <RadioButton

            android:id="@+id/rb_2"

            android:layout_width="wrap_content"

            android:layout_height="wrap_content"

            android:text="女" />

    </RadioGroup>

    <TextView

        android:id="@+id/tv_1"

        android:layout_width="wrap_content"

        android:layout_height="wrap_content"

        android:text="请选择性别"

        android:textSize="20sp" />

</RelativeLayout>
•获得选中的值
有两种方式可以获取。
第一种是为 RadioButton 设置一个事件监听器 setOnCheckChangeListener
第二种方法是通过单击其他按钮获取选中单选按钮的值
•设置事件监听器
public class RadioButtonActivity extends AppCompatActivity {

    private RadioGroup rg;

    @Override

    protected void onCreate(Bundle savedInstanceState) {

        super.onCreate(savedInstanceState);

        setContentView(R.layout.activity_radio_button);

        rg = findViewById(R.id.rg_1);

        rg.setOnCheckedChangeListener(new RadioGroup.OnCheckedChangeListener() {

            @Override

            public void onCheckedChanged(RadioGroup group, int checkedId) {

                RadioButton rb = group.findViewById(checkedId);

                Toast.makeText(RadioButtonActivity.this, rb.getText(), Toast.LENGTH_SHORT).show();

            }

        });

    }

}
需要注意的是,要为每个 RadioButton 添加一个id,不然单选功能会失效。
•运行效果
不添加 id 的效果图:

•单击其他按钮获取选中单选按钮的值
- 这种方法使用的前提是必须有一个额外的按钮
- 首先为该按钮设置点击事件 setOnClickListener(),然后在该按钮的 onClick() 方法中
- 通过for循环语句遍历当前按钮组,并根据被遍历到的单选按钮的 isChecked()方法判断该按钮是否被选中
- 当被选中时,通过单选按钮的 getText() 方法获取对应的值。
public class RadioButtonActivity extends AppCompatActivity {

    private RadioGroup rg;

    private Button btn;

    @Override

    protected void onCreate(Bundle savedInstanceState) {

        super.onCreate(savedInstanceState);

        setContentView(R.layout.activity_radio_button);

        rg = findViewById(R.id.radioGroup);

        btn = findViewById(R.id.btnpost);

        btn.setOnClickListener(new View.OnClickListener() {

            @Override

            public void onClick(View v) {

                for (int i = 0; i < rg.getChildCount(); i++) {

                    RadioButton rb = (RadioButton) rg.getChildAt(i);

                    if (rb.isChecked()) {

                        Toast.makeText(RadioButtonActivity.this, rb.getText(), Toast.LENGTH_SHORT).show();

                        break;

                    }

                }

            }

        });

    }

}
- getChildCount( ) : 获得按钮组中的单选按钮的数目
- getChinldAt( i ) : 根据索引值获取按钮组中的单选按钮
- isChecked( ) : 判断按钮是否选中
需要注意的是,是为按钮 btn 设置点击事件,也就是说,再点击提交的时候,才会弹出这个 toast。
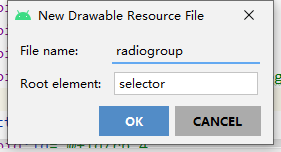
•美化按钮
新建一个 Drawable Resource File。
加入如下代码:
 1 <?xml version="1.0" encoding="utf-8"?>

 2 <selector xmlns:android="http://schemas.android.com/apk/res/android">

 3

 4     <item android:state_checked="false">

 5         <shape>

 6             <stroke android:width="2dp" android:color="#D839D8"/>

 7             <corners android:radius="10dp"/>

 8         </shape>

 9     </item>

10

11     <item android:state_checked="true">

12         <shape>

13             <solid android:color="#631463"/>

14             <corners android:radius="10dp"/>

15         </shape>

16     </item>

17 </selector>
按钮未选中的时候,显示的是描边效果,选中的时候,显示的是填充效果。
<?xml version="1.0" encoding="utf-8"?>

<RelativeLayout xmlns:android="http://schemas.android.com/apk/res/android"

    xmlns:app="http://schemas.android.com/apk/res-auto"

    xmlns:tools="http://schemas.android.com/tools"

    android:layout_width="match_parent"

    android:layout_height="match_parent"

    tools:context=".RadioButtonActivity"

    android:padding="10dp"

    android:gravity="center_horizontal">

    <TextView

        android:id="@+id/tv_2"

        android:layout_width="wrap_content"

        android:layout_height="wrap_content"

        android:layout_marginTop="30dp"

        android:text="为单选按钮更换样式"

        android:textSize="20sp"

        />

    <RadioGroup

        android:id="@+id/rg_2"

        android:layout_width="wrap_content"

        android:layout_height="wrap_content"

        android:layout_below="@id/tv_2"

        android:layout_marginTop="10dp"

        android:orientation="vertical"

        >

        <RadioButton

            android:id="@+id/rb_3"

            android:layout_width="60dp"

            android:layout_height="30dp"

            android:gravity="center"

            android:text="男"

            android:textSize="20sp"

            android:textColorHint="#000000"

            android:checked="true"

            android:button="@null"

            android:background="@drawable/radiogroup"

            />

        <RadioButton

            android:id="@+id/rb_4"

            android:layout_width="60dp"

            android:layout_height="30dp"

            android:layout_marginTop="10dp"

            android:gravity="center"

            android:text="女"

            android:textSize="20sp"

            android:textColor="#000000"

            android:button="@null"

            android:background="@drawable/radiogroup"

            />

    </RadioGroup>

</RelativeLayout>
- android:button="@null" : 去掉默认效果
- android:background="@drawable/radiogroup" : 添加自定义效果
•运行效果

Android Studio 之 RadioButton的更多相关文章
- Android开发自学笔记(Android Studio)—4.界面编程与View组件简单介绍
一.引言 Android应用开发最重要的一份内容就是界面的开发,无论你程序包含的内容多么优秀,如若没有一个良好的用户交互界面,最终也只是会被用户所遗弃.Android SDK提供了大量功能丰富的UI组 ...
- Android Studio 学习 - 基本控件的使用;Intent初学
Android Studio学习第三天. 今天主要学习 1. RadioButton.CheckBox.RatingBar.SeekBar等基础控件的使用. 结合Delphi中相类似的控件,在这些基本 ...
- Android Studio 1.0 (稳定版) 完全攻略
这篇博文中主要从以下几点进行叙述: 1.Android Studio安装与使用 2.Android Studio特性 3.Android Studio优点 Android Studio 安装与使用 A ...
- Android Studio精彩案例(七)《ToolBar使用详解<一>》
转载本专栏文章,请注明出处,尊重原创 .文章博客地址:道龙的博客 本文参考博客:http://blog.csdn.net/h_zhang/article/details/51232773 http:/ ...
- 动手试试Android Studio插件开发
由于业务关系,经常需要写一些表单页面,基本也就是简单的增删改查然后上传,做过几个页面之后就有点想偷懒了,这么低水平重复性的体力劳动,能不能用什么办法自动生成呢,查阅相关资料,发现android stu ...
- 《Android Studio开发实战 从零基础到App上线》资源下载和内容勘误
转载于:https://blog.csdn.net/aqi00/article/details/73065392 资源下载 下面是<Android Studio开发实战 从零基础到App上线&g ...
- Android Studio 3.0+ Record Espresso Test 自动化测试
准备工作 1.将android studio 版本升级到3.0+2.百度下载夜神模拟器 夜神模拟器的基本设置 PS:以上就是夜神模拟器的基本设置 Android Studio 连接夜神模拟器 //夜神 ...
- Android Studio 学习笔记(三):简单控件及实例
控件.组件.插件概念区分 说到控件,就不得不区分一些概念. 控件(Control):编程中用到的部件 组件(Component):软件的组成部分 插件(plugin): 应用程序中已经预留接口的组件 ...
- Android Studio阶段性学习总结_1
这半个月一直在学习Android方面的知识,对Android开发有了一个基本的认识,学会了Android studio的基本操作. 在建立第一个Android studio项目时,我遇到了很大的阻碍, ...
随机推荐
- HTML5 Canvas 画图组件 All In One
HTML5 Canvas 画图组件 All In One Canvas SVG Canvas + SVG refs https://www.infoq.cn/article/1BVg9VDSmqyHv ...
- SwiftUI & MVVM
SwiftUI & MVVM design paradigm / 设计模式 MVVM Model View ViewModel MVVM Architecture 架构 MVC Model V ...
- PWA & Service Workers 版本更新 bug
PWA & Service Workers 版本更新 bug PWA & Service Worker https://developer.mozilla.org/zh-CN/docs ...
- how to create a style element in js (many ways)
how to create a style element in js (many ways) create style in js Constructed StyleSheets CSSStyleS ...
- 2019 front-end job Interview
2019 front-end job Interview 2019 前端面试题 掘金 https://juejin.im/tag/面试 https://juejin.im/post/5c875791e ...
- Dart: 编码和解码各种存档和压缩格式
path archive import 'dart:io'; import 'package:path/path.dart' as p; import 'package:path/path.dart' ...
- 1090 Highest Price in Supply Chain——PAT甲级真题
1090 Highest Price in Supply Chain A supply chain is a network of retailers(零售商), distributors(经销商), ...
- 用OkHttpGo和FastJson获取OneNET云平台数据(解析嵌套数组)
JSON数据格式有两种,一种是 { } 大括号表示的JSON对象,一种是 [ ] 中括号表示的JSON数组.从OneNET获取到的数组是这样的,并用Json解析网址查看https://jsonform ...
- 关于 HTTP 后端人员需要了解的 20+ 图片!
前言 当您网上冲浪时,HTTP 协议无处不在.当您浏览网页.获取一张图片.一段视频时,HTTP 协议就正在发生. 本篇将尽可能用简短的例子和必要的说明来让您了解基础的 HTTP 知识. 目录: 什么是 ...
- Qstring和String的区别
QString qTest; std::string sTest = qTest.toStdString(); qTest = QString::fromStdString(sTest); //进入两 ...