elementUI图片墙上传
elementUI提供了照片墙上传的功能,我们直接拿来用。
以下是实现代码:
<template>

  <div style="padding: 50px;">

    <el-form class="form-wrapper padding" ref="addForm" :model="addForm" :rules="addRules" label-width="110px">

      <el-form-item label="活动图片:" prop="photo">

        <el-upload

          :action="base"

          multiple

          accept="image/png, image/jpeg"

          list-type="picture-card"

          :before-upload="beforeUploadPicture"

          :on-preview="handlePictureCardPreview"

          :on-progress="uploadProgress"

          :on-remove="handleRemove"

          :on-success="uploadSuccess"

          :on-error="uploadError"

          :show-file-list="true">

          <i class="el-icon-plus"></i>

        </el-upload>

      </el-form-item>

      <el-form-item>

        <el-button type="primary" @click="addEnsure">保存</el-button>

      </el-form-item>

    </el-form>

    <el-dialog class="preview-modal" :visible.sync="imgVisible" append-to-body>

      <img width="100%" :src="dialogImageUrl" alt="photo">

    </el-dialog>

  </div>

</template>

<script type="text/ecmascript-6">

  import base from 'api/env'  // 配置了图片上传接口地址的js文件

  export default {

    data() {

      return {

        addForm: {

          photo: ''  // 活动图片

        },

        addRules: { // 表单验证规则

          photo: [{required: true, message: '请上传活动图片', trigger: 'blur'}]

        },

        uploadComplete: true, // 图片上传完成状态

        base: base.imgURL + 'upload/img',

        imgVisible: false, // 上传图片预览

        dialogImageUrl: '' // 图片预览地址

      }

    },

    created() {

      this.initForm();

    },

    methods: {

      initForm() {

        if(this.$refs.addForm){

          this.$refs.addForm.resetFields();

        }

      },

      // 上传图片前调用方法

      beforeUploadPicture(file) {

        if(file.size > 10*1024*1024){

          this.$message.error("上传图片不能大于10M");

          return false;

        }

      },

      // 上传图片时调用

      uploadProgress(event,file, fileList){

        this.uploadComplete = false;

      },

      // 上传图片成功

      uploadSuccess(res, file, fileList) {
        this.uploadComplete = true;

        this.fileChange(fileList);

      },

      // 上传图片出错

      uploadError(err, file, fileList) {

        this.$message.error("上传出错");

      },

      // 移除图片

      handleRemove(file, fileList) {

        this.fileChange(fileList);

      },

      // 设置photo值

      fileChange(fileList) {

        let temp_str = '';

        if(fileList.length > 0){

          for(let i=0; i<fileList.length; i++){

            if(fileList[i].response){

              if(fileList[i].response.code === 0){

                if(i===0){

                  temp_str += fileList[i].response.data;

                } else {

                  // 最终photo的格式是所有已上传的图片的url拼接的字符串(逗号隔开)

                  temp_str += ',' + fileList[i].response.data;

                }

              }

            }

          }

        }

        this.addForm.photo = temp_str;

      },

      // 图片预览

      handlePictureCardPreview(file) {

        this.dialogImageUrl = file.url;

        this.imgVisible = true;

      },

      // 确认添加

      addEnsure(){

        if(!this.uploadComplete){

          this.$message.error("图片正在上传,请稍等");

          return;

        }

        this.$refs.addForm.validate((valid) => {

          if(valid){

            let params = {

              photo: this.addForm.photo,

            };

           console.info(params);

            // 调用接口...

          } else {

            this.$message.error("请填写所有必填项");

          }

        });

      }

    }

  }

</script>
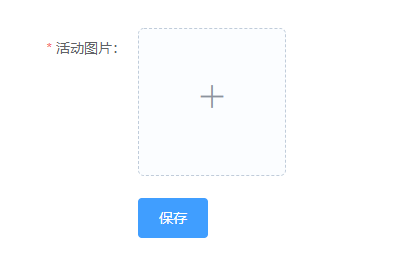
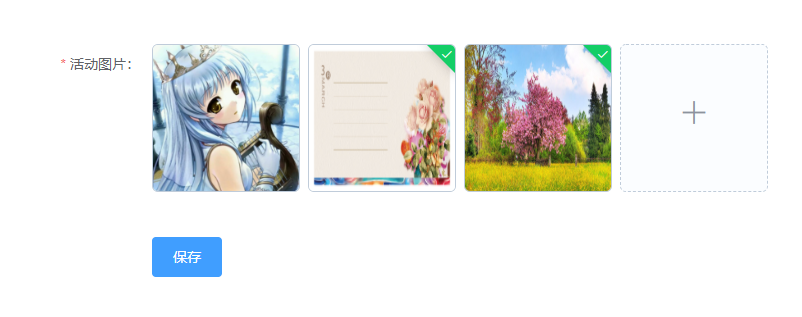
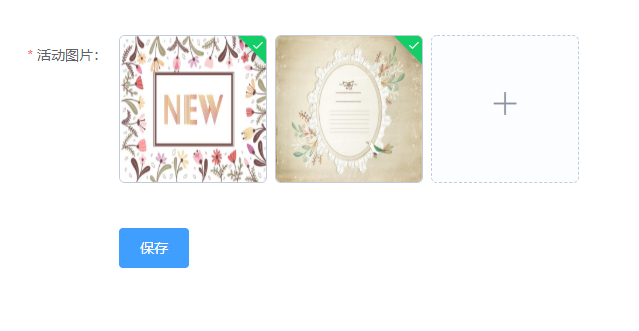
效果图:
<template>

  <div style="padding: 50px;">

    <el-form class="form-wrapper padding" ref="editForm" :model="editForm" :rules="editRules" label-width="110px">

      <el-form-item label="活动图片:" prop="photo">

        <el-upload

          :action="base"

          multiple

          accept="image/png, image/jpeg"

          list-type="picture-card"

          :on-preview="handlePictureCardPreview"

          :on-remove="handleRemove"

          :on-progress="uploadProgress"

          :on-success="uploadSuccess"

          :on-error="uploadError"

          :file-list="editFiles"

          :show-file-list="true">

          <i class="el-icon-plus"></i>

        </el-upload>

      </el-form-item>

      <el-form-item>

        <el-button type="primary" @click="editEnsure">保存</el-button>

      </el-form-item>

    </el-form>

    <el-dialog class="preview-modal" :visible.sync="imgVisible" append-to-body>

      <img width="100%" :src="dialogImageUrl" alt="photo">

    </el-dialog>

  </div>

</template>

<script type="text/ecmascript-6">

  import base from 'api/env' // 配置了图片上传接口地址的js文件

  export default {

    data() {

      return {

        editForm: { // 编辑表单

          photo: ''  // 活动图片

        },

        editRules: { // 表单验证规则

          photo: [{required: true, message: '请上传活动图片', trigger: 'blur'}]

        },

        editFiles: [],// 编辑时已上传图片初始化

        uploadComplete: true,

        base: base.imgURL + 'upload/img',

        imgVisible: false, // 上传图片预览

        dialogImageUrl: '' // 图片预览地址

      }

    },

    created() {

      this.initInfo();

    },

    methods: {

      // 编辑

      initInfo() {

        this.editForm = {

          id: 1,

          photo: ''

        };

        // 这里photo应从服务器获取,存储的是数组,请按照相应格式获取图片url(这里直接给值)

        let temp = [

          {id: 123, photo: 'http://img4.imgtn.bdimg.com/it/u=2011641246,1136238184&fm=27&gp=0.jpg'},

          {id: 124, photo: 'http://img2.imgtn.bdimg.com/it/u=302701032,2300144492&fm=27&gp=0.jpg'}

        ];

        if(temp.length > 0){

          for(let t=0; t<temp.length; t++){

            //通过[{name: 'name', url: 'url地址'}]格式初始化照片墙

            this.editFiles.push({name: 'name' + temp[t].id, url: temp[t].photo});

            if(t===0){

              this.editForm.photo += temp[t].photo

            } else {

              // 最终photo的格式是所有已上传的图片的url拼接的字符串(逗号隔开),根据实际需要修改格式

              this.editForm.photo += ',' + temp[t].photo;

            }

          }

        }

        this.editVisible = true;

      },

      // 确认修改

      editEnsure() {

        if(!this.uploadComplete){

          this.$message.error("图片正在上传,请稍等");

          return;

        }

        console.info(this.editForm.photo);

        // 调用接口...

      },

      // 上传图片前调用方法

      beforeUploadPicture(file) {

        if(file.size > 10*1024*1024){

          this.$message.error("上传图片不能大于10M");

          return false;

        }

      },

      // 上传图片时调用

      uploadProgress(event,file, fileList){

        this.uploadComplete = false;

      },

      // 上传图片成功

      uploadSuccess(res, file, fileList) {
        this.uploadComplete = true;

        this.fileChange(fileList);

      },

      // 上传图片出错

      uploadError(err, file, fileList) {

        this.$message.error("上传出错");

      },

      // 移除图片

      handleRemove(file, fileList) {

        this.fileChange(fileList);

      },

      // 设置photo值

      fileChange(fileList) {

        let temp_str = '';

        if(fileList.length > 0){

          for(let i=0; i<fileList.length; i++){

            if(fileList[i].response){

              if(fileList[i].response.code === 0){

                if(i===0){

                  temp_str += fileList[i].response.data;

                } else {

                  temp_str += ',' + fileList[i].response.data;

                }

              }

            } else if(fileList[i].status && fileList[i].status === 'success'){

              if(i===0){

                temp_str += fileList[i].url;

              } else {

                temp_str += ',' + fileList[i].url;

              }

            }

          }

        }

        this.editForm.photo = temp_str;

      },

      // 图片预览

      handlePictureCardPreview(file) {

        this.dialogImageUrl = file.url;

        this.imgVisible = true;

      }

    }

  }

</script>
接下来就可以继续愉快地上传图片啦。
elementUI图片墙上传的更多相关文章
- vue+elementUI 图片上传问题
图片上传问题,获取后台的图片,并点击可以更换图片,并把图片存储到数据库中: (1)在编辑页面上,action指的图片上传的地址,header指请求头: (2)因为element-ui有自己上传的接口, ...
- elementUI 图片上传限制上传图片的宽高
文件上传,需当上传的文件类型为图片的时候,需要限制图片的宽高. 此处采用了new Promise异步加载的方式,等图片上传加载完成后, 页面代码: <el-form-item label=&qu ...
- 如何用elementui去实现图片上传和表单提交,用axios的post方法
下面是在vue搭建的脚手架项目中的组件component文件夹下面的upload.vue文件中的内容 <!--这个组件主要用来研究upload这个elementui的上传插件组件--> & ...
- 后台管理系统之“图片上传” --vue
图片上传(基于vue) 相信上传图片是所有系统必备的功能吧,工作中的第一个管理系统就在上传图片的功能上卡顿了一整天. 当时用的elementUI组件,但是由于样式和设计图样式差别较大再加上原生相较好理 ...
- 用Vue来实现图片上传多种方式
没有业务场景的功能都是耍流氓,那么我们先来模拟一个需要实现的业务场景.假设我们要做一个后台系统添加商品的页面,有一些商品名称.信息等字段,还有需要上传商品轮播图的需求. 我们就以Vue.Element ...
- vue之element-ui文件上传
vue之element-ui文件上传 文件上传需求 对于文件上传,实际项目中我们的需求一般分两种: 对于单个的文件上传,比如拖动上传个图片之类的,或者是文件. 和表单一起实现上传(这种情况一般都是 ...
- # quill-image-extend-module :实现vue-quill-editor图片上传,复制粘贴,拖拽
改造vue-quill-editor: 结合element-ui上传图片到服务器 quill-image-extend-module vue-quill-editor的增强模块, 功能: 提供图片上传 ...
- vue quill使用&quill 自定义图片上传&自定义mp4 更换标签
pluins 创建quill 目录 创建文件video.js import { Quill } from 'vue-quill-editor' // 源码中是import直接倒入,这里要用Quill. ...
- vue+axios+elementUI文件上传与下载
vue+axios+elementUI文件上传与下载 Simple_Learn 关注 0.5 2018.05.30 10:20 字数 209 阅读 15111评论 4喜欢 6 1.文件上传 这里主要 ...
随机推荐
- [转]在CentOS安装CMake (CentOS7 64位适用)
一.环境描述 1.系统:CentOS 6.4 i386 (min) 2.登录用户:root 3.版本:CMake 2.8.10.2 4.虚拟机:Oracle VM VirtualBox 二.安装步骤 ...
- 十一、LoadRunner组成和工作原理
一.LoadRunner组成 虚拟用户发生器:Vuser Generator 压力调度和监控中心:Controller 压力生产器:Load Generator 压力结果分析工具:Analysis
- Flutter利用GridView实现网格的商品布局
GridView.count 生成的是静态网格 效果: 代码: import 'package:flutter/material.dart'; void main() { runApp(MyApp() ...
- ES6深入浅出-8 新版的类(下集)-2.全部语法
解答提问 两边都没有构造函数的情况 父类没有构造函数,子类有构造函数的情况 下面用到的了this.body这个属性,所以super()必须要放在这行代码的上面. 在调用this之前必须调用super( ...
- java 连接 mongodb 及使用
MongoDB是当今非常流行的一款NoSQL数据库,本文介绍如何使用MongoDB的Java驱动来操作MongoDB. 一.引入MongoDB Java Driver包 如果需要操作MongoDB的J ...
- 【docker 镜像源】解决quay.io和gcr.io国内无法访问的问题
该问题容易导致image pull back off 错误,应当换源: 微软: https://yeasy.gitbooks.io/docker_practice/install/mirror.htm ...
- 【linux基础-err】 tar命令-stdin: not in gzip format
problem gzip: stdin: not in gzip format tar: Error is not recoverable: exiting now 解决方法 最后发现下载的压缩文件有 ...
- PHPStudy后门事件分析
PHP环境集成程序包phpStudy被公告疑似遭遇供应链攻击,程序包自带PHP的php_xmlrpc.dll模块隐藏有后门.经过分析除了有反向连接木马之外,还可以正向执行任意php代码. 影响版本 P ...
- mac的公式编辑器: mathtype/latex
mathtype 收费版,且马上不能在mac系统上使用 latex 搜索一下: ➜ ~ brew search latex ==> Formulae gnome-latex latex2html ...
- 【Chrome插件】Session Buddy--搁置标签页
写在前面:看文章前请先看文章写作时间,避免浪费时间.2019-09-10 使用场景 Chrome打开许多网页,临时有事需要把当前的一些标签页一键保存,等待事后继续处理. 操作演示 原片地址:https ...