WPF侧边导航栏实现
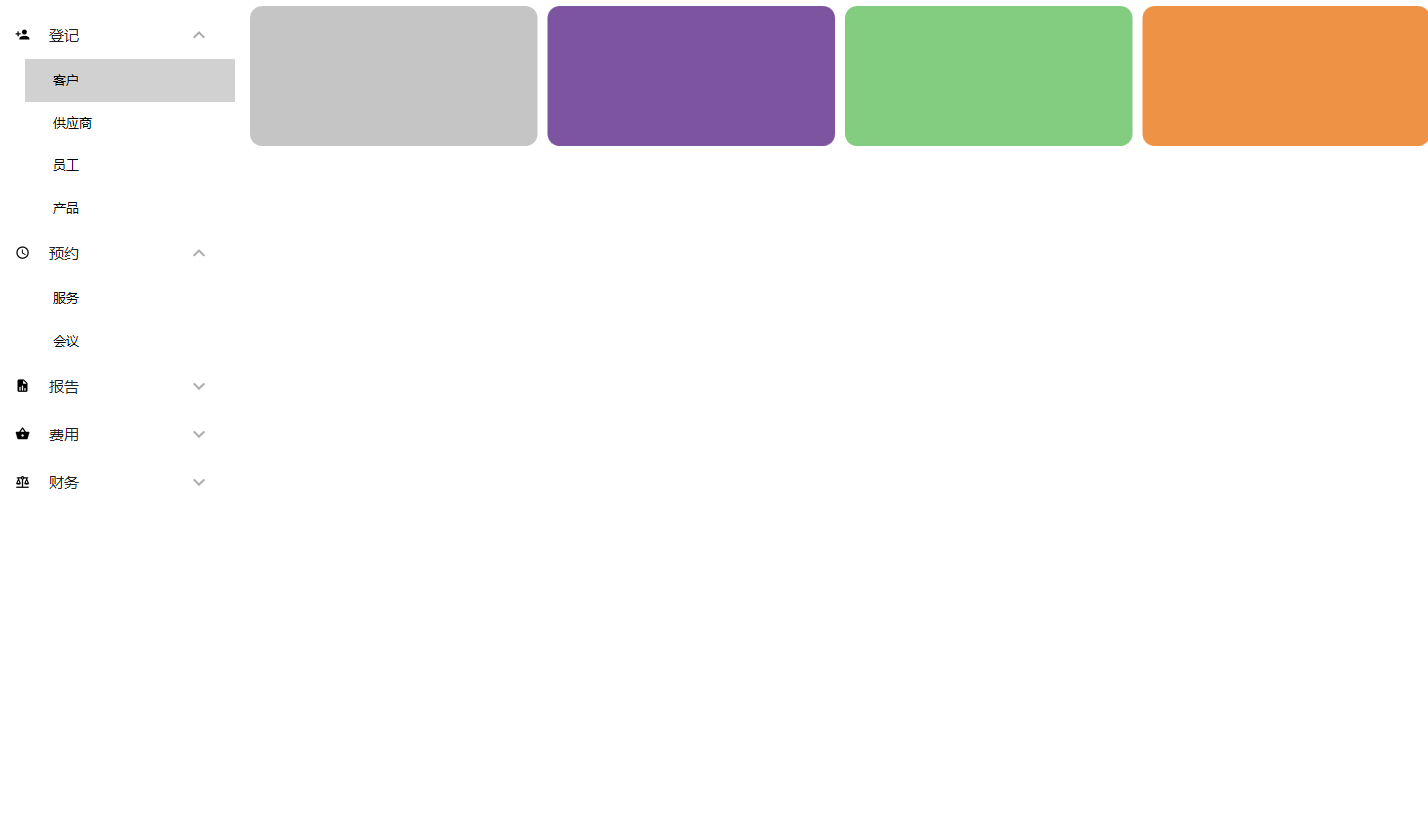
一、先看效果
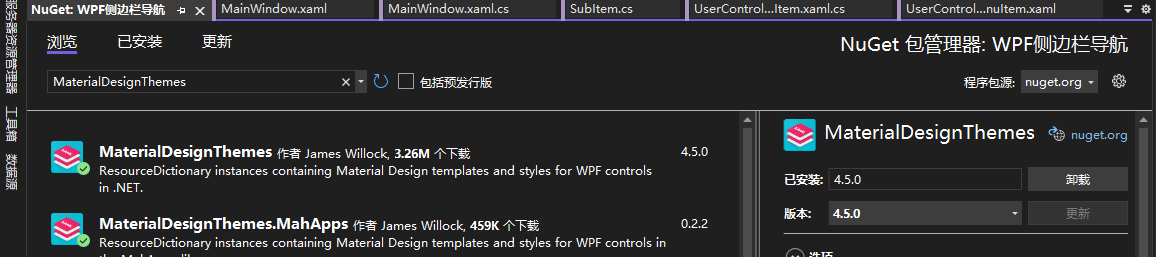
1 添加Nuget库
站长使用.Net Core 3.1创建的WPF工程,创建“DropDownMenu”解决方案后,需要添加两个Nuget库:MaterialDesignThemes和MaterialDesignColors,上图的效果是使用该控件库实现的,非常强大
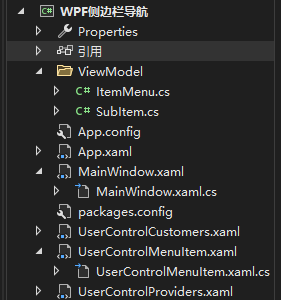
2、项目结构
3、App.xaml引入
<Application x:Class="WPF侧边栏导航.App"

xmlns="http://schemas.microsoft.com/winfx/2006/xaml/presentation"

xmlns:x="http://schemas.microsoft.com/winfx/2006/xaml"

xmlns:local="clr-namespace:WPF侧边栏导航"

StartupUri="MainWindow.xaml">

<Application.Resources>

<ResourceDictionary>

<ResourceDictionary.MergedDictionaries>

<ResourceDictionary Source="pack://application:,,,/MaterialDesignThemes.Wpf;component/Themes/MaterialDesignTheme.Light.xaml"/>

<ResourceDictionary Source="pack://application:,,,/MaterialDesignThemes.Wpf;component/Themes/MaterialDesignTheme.Defaults.xaml"/>

<ResourceDictionary Source="pack://application:,,,/MaterialDesignColors;component/Themes/Recommended/Primary/MaterialDesignColor.Blue.xaml"/>

<ResourceDictionary Source="pack://application:,,,/MaterialDesignColors;component/Themes/Recommended/Accent/MaterialDesignColor.Indigo.xaml"/>

</ResourceDictionary.MergedDictionaries>

</ResourceDictionary>

</Application.Resources>

</Application>
4、 主窗体
1、前端
<Window x:Class="WPF侧边栏导航.MainWindow"

xmlns="http://schemas.microsoft.com/winfx/2006/xaml/presentation"

xmlns:x="http://schemas.microsoft.com/winfx/2006/xaml"

xmlns:d="http://schemas.microsoft.com/expression/blend/2008"

xmlns:mc="http://schemas.openxmlformats.org/markup-compatibility/2006"

xmlns:materialDesign="http://materialdesigninxaml.net/winfx/xaml/themes"

xmlns:local="clr-namespace:WPF侧边栏导航"

mc:Ignorable="d"

Title="MainWindow" Height="450" Width="800" WindowStartupLocation="CenterScreen" WindowState="Maximized">

<Grid>

<Grid.RowDefinitions>

<RowDefinition Height="Auto"/>

<RowDefinition Height="*"/>

</Grid.RowDefinitions>

<Grid.ColumnDefinitions>

<ColumnDefinition Width="250"/>

<ColumnDefinition Width="*"/>

</Grid.ColumnDefinitions>

<!--<materialDesign:ColorZone Mode="PrimaryMid" Grid.ColumnSpan="2" HorizontalAlignment="Stretch">

<Grid>

<materialDesign:PopupBox PlacementMode="BottomAndAlignRightEdges" HorizontalAlignment="Right" Margin="10"/>

</Grid>

</materialDesign:ColorZone>-->

<Grid HorizontalAlignment="Stretch" Grid.Row="1" Background="White">

<!--<Grid.RowDefinitions>

<RowDefinition Height="70"/>

<RowDefinition Height="326*"/>

</Grid.RowDefinitions>-->

<ScrollViewer HorizontalAlignment="Stretch" HorizontalScrollBarVisibility="Disabled" VerticalScrollBarVisibility="Auto" Grid.Row="1">

<StackPanel x:Name="Menu" Margin="10"/>

</ScrollViewer>

</Grid>

<StackPanel x:Name="StackPanelMain" Grid.Row="1" Grid.Column="1" HorizontalAlignment="Stretch">

</StackPanel>

</Grid>

</Window>
2、后端
public partial class MainWindow : Window

{

public MainWindow()

{

InitializeComponent();

var menuRegister = new List<SubItem>();

menuRegister.Add(new SubItem("客户",new UserControlCustomers()));

menuRegister.Add(new SubItem("供应商", new UserControlProviders()));

menuRegister.Add(new SubItem("员工"));

menuRegister.Add(new SubItem("产品"));

var item6 = new ItemMenu("登记", menuRegister, PackIconKind.Register);

var menuSchedule = new List<SubItem>();

menuSchedule.Add(new SubItem("服务"));

menuSchedule.Add(new SubItem("会议"));

var item1 = new ItemMenu("预约", menuSchedule, PackIconKind.Schedule);

var menuReports = new List<SubItem>();

menuReports.Add(new SubItem("客户"));

menuReports.Add(new SubItem("供应商"));

menuReports.Add(new SubItem("产品"));

menuReports.Add(new SubItem("库存"));

menuReports.Add(new SubItem("销售额"));

var item2 = new ItemMenu("报告", menuReports, PackIconKind.FileReport);

var menuExpenses = new List<SubItem>();

menuExpenses.Add(new SubItem("固定资产"));

menuExpenses.Add(new SubItem("流动资金"));

var item3 = new ItemMenu("费用", menuExpenses, PackIconKind.ShoppingBasket);

var menuFinancial = new List<SubItem>();

menuFinancial.Add(new SubItem("现金流"));

var item4 = new ItemMenu("财务", menuFinancial, PackIconKind.ScaleBalance);

Menu.Children.Add(new UserControlMenuItem(item6, this));

Menu.Children.Add(new UserControlMenuItem(item1, this));

Menu.Children.Add(new UserControlMenuItem(item2, this));

Menu.Children.Add(new UserControlMenuItem(item3, this));

Menu.Children.Add(new UserControlMenuItem(item4, this));

}

internal void SwitchScreen(object sender)

{

var screen = ((UserControl)sender);

if (screen != null)

{

StackPanelMain.Children.Clear();

StackPanelMain.Children.Add(screen);

}

}

}
5、 UserControlMenuItem
1、前端
<UserControl x:Class="WPF侧边栏导航.UserControlMenuItem"

xmlns="http://schemas.microsoft.com/winfx/2006/xaml/presentation"

xmlns:x="http://schemas.microsoft.com/winfx/2006/xaml"

xmlns:mc="http://schemas.openxmlformats.org/markup-compatibility/2006"

xmlns:d="http://schemas.microsoft.com/expression/blend/2008"

xmlns:materialDesign="http://materialdesigninxaml.net/winfx/xaml/themes"

xmlns:local="clr-namespace:WPF侧边栏导航"

mc:Ignorable="d"

d:DesignHeight="450" d:DesignWidth="800" Background="White">

<Grid>

<materialDesign:PackIcon Kind="{Binding Icon}" Width="15" Height="15" Margin="10 16" Foreground="Black"/>

<ListBoxItem x:Name="ListViewItemMenu" Content="{Binding Header}" Padding="37 14" FontSize="15" Foreground="Black"/>

<Expander x:Name="ExpanderMenu" Header="{Binding Header}" IsExpanded="False" Width="210" HorizontalAlignment="Right" Background="{x:Null}" Foreground="Black">

<ListView x:Name="ListViewMenu" ItemsSource="{Binding SubItems}" Foreground="Black" ScrollViewer.HorizontalScrollBarVisibility="Disabled" SelectionChanged="ListViewMenu_SelectionChanged">

<ListView.ItemTemplate>

<DataTemplate>

<TextBlock Text="{Binding Name}" Padding="20 5"/>

</DataTemplate>

</ListView.ItemTemplate>

</ListView>

</Expander>

</Grid>

</UserControl>
2、后端
public partial class UserControlMenuItem : UserControl

{

MainWindow _context;

public UserControlMenuItem(ItemMenu itemMenu, MainWindow context)

{

InitializeComponent();

_context = context;

ExpanderMenu.Visibility = itemMenu.SubItems == null ? Visibility.Collapsed : Visibility.Visible;

ListViewItemMenu.Visibility = itemMenu.SubItems == null ? Visibility.Visible : Visibility.Collapsed;

this.DataContext = itemMenu;

}

private void ListViewMenu_SelectionChanged(object sender, SelectionChangedEventArgs e)

{

_context.SwitchScreen(((SubItem)((ListView)sender).SelectedItem).Screen);

}

}
6、 两个导航子菜单用户控件
1、
UserControl x:Class="WPF侧边栏导航.UserControlCustomers"

xmlns="http://schemas.microsoft.com/winfx/2006/xaml/presentation"

xmlns:x="http://schemas.microsoft.com/winfx/2006/xaml"

xmlns:mc="http://schemas.openxmlformats.org/markup-compatibility/2006"

xmlns:d="http://schemas.microsoft.com/expression/blend/2008"

xmlns:local="clr-namespace:WPF侧边栏导航"

mc:Ignorable="d"

d:DesignHeight="450" d:DesignWidth="800">

<Grid>

<Grid.ColumnDefinitions>

<ColumnDefinition Width="*"/>

<ColumnDefinition Width="*"/>

<ColumnDefinition Width="*"/>

<ColumnDefinition Width="*"/>

</Grid.ColumnDefinitions>

<Grid.RowDefinitions>

<RowDefinition Height="150"/>

<RowDefinition Height="*"/>

</Grid.RowDefinitions>

<Border Margin="5" Grid.Column="0" Background="#FFC5C5C5" VerticalAlignment="Stretch" CornerRadius="12"/>

<Border Margin="5" Grid.Column="1" Background="#FF7C54A0" VerticalAlignment="Stretch" CornerRadius="12"/>

<Border Margin="5" Grid.Column="2" Background="#FF83CD80" VerticalAlignment="Stretch" CornerRadius="12"/>

<Border Margin="5" Grid.Column="3" Background="#FFEE9246" VerticalAlignment="Stretch" CornerRadius="12"/>

</Grid>

</UserControl>
2、
<UserControl x:Class="WPF侧边栏导航.UserControlProviders"

xmlns="http://schemas.microsoft.com/winfx/2006/xaml/presentation"

xmlns:x="http://schemas.microsoft.com/winfx/2006/xaml"

xmlns:mc="http://schemas.openxmlformats.org/markup-compatibility/2006"

xmlns:d="http://schemas.microsoft.com/expression/blend/2008"

xmlns:local="clr-namespace:WPF侧边栏导航"

mc:Ignorable="d"

d:DesignHeight="450" d:DesignWidth="800">

<Grid>

<Grid.ColumnDefinitions>

<ColumnDefinition Width="*"/>

<ColumnDefinition Width="*"/>

<ColumnDefinition Width="*"/>

<ColumnDefinition Width="*"/>

</Grid.ColumnDefinitions>

<Grid.RowDefinitions>

<RowDefinition Height="150"/>

<RowDefinition Height="*"/>

</Grid.RowDefinitions>

<Border Margin="5" Grid.Column="0" Background="#FFD4E436" VerticalAlignment="Stretch" CornerRadius="12"/>

<Border Margin="5" Grid.Column="1" Background="#FF81F9FF" VerticalAlignment="Stretch" CornerRadius="12"/>

<Border Margin="5" Grid.Column="2" Background="#FF144BC3" VerticalAlignment="Stretch" CornerRadius="12"/>

<Border Margin="5" Grid.Column="3" Background="#FFD34EBA" VerticalAlignment="Stretch" CornerRadius="12"/>

</Grid>

</UserControl>
7、ViewModels
1、
public class ItemMenu
{
public ItemMenu(string header, List<SubItem> subItems, PackIconKind icon)
{
Header = header;
SubItems = subItems;
Icon = icon;
}
public string Header { get; private set; }
public PackIconKind Icon { get; private set; }
public List<SubItem> SubItems { get; private set; }
public UserControl Screen { get; private set; }
}
2、
public class SubItem
{
public SubItem(string name, UserControl screen = null)
{
Name = name;
Screen = screen;
}
public string Name { get; private set; }
public UserControl Screen { get; private set; }
}
WPF侧边导航栏实现的更多相关文章
- Android 新兴的UI模式——侧边导航栏【转】
侧边导航栏也就是大家熟知的SliddingMenu,英文也叫Fly-In App Menu.Side Navigation等.当然谷歌现在已经推出类似这个效果的组件--Navigation Drawe ...
- 【源码分享】jquery+css实现侧边导航栏
jquery+css实现侧边导航栏 最近做项目的时候,突然想用一个侧边导航栏,网上找了几个插件,有的太丑而且不太符合我的预期.与其修改别人的代码,不如自己来写一个了.废话不多说先上图,感兴趣的请继续看 ...
- [置顶]
bootstrap自定义样式-bootstrap侧边导航栏的实现
前言 bootstrap自带的响应式导航栏是向下滑动的,有时满足不了个性化的需求,需要做一个类似于android drawerLayout 侧滑的菜单,这就是我要实现的bootstrap自定义侧滑菜单 ...
- 【机器学习实践】Jupyter Notebook安装 侧边导航栏功能 操作及其他常用扩展功能介绍
安装过程: 1. 首先我们引入jupyter_contrib_nbextension这个第三方库. 2. 在Anaconda Promot中输入命令: pip install jupyter_con ...
- html+css写出响应式侧边导航栏
html部分:先写用div画好六个导航的卡片,再利用css添加响应效果 <div class='card-holder'> <div class='card-wrapper'> ...
- jQuery实现侧边导航栏效果
效果图: 效果体验:http://keleyi.com/keleyi/phtml/jqmenu/2.htm 以下是完整代码: <!DOCTYPE html> <html> &l ...
- 使用bootstrap3.0搭建一个具有自定义风格的侧边导航栏
由于工作变动,新的项目组,可能会涉及到更多的类似于后台管理系统这一类的项目,而且开发可能更加偏向于传统型的开发,希望今后能够在新的项目中能够用得上vuejs吧! 接手项目的时候,就是一个后台管理系统, ...
- iOS开发-仿大众点评iPad侧边导航栏
昨天其实已经写了一篇侧边栏的文章,不过感觉还不是很清晰,这篇文章算是补充吧,iPad上看了大众点评的侧边栏,基本上百分之九十类似,具体效果可参考下图: 对比昨天主要做了两个修改,一个是图片和文字的显示 ...
- layui禁用侧边导航栏点击事件
layui是一款优秀的前端模块化css框架,作者是贤心 —— 国内的一位前端大佬. 我用layui做过两个完整的项目,对她的感觉就是,这货非常适合做后台管理界面,且基于jquery,很容易上手.当然, ...
- 关于scroll实现侧边导航栏
需求为一个简单的scroll效果,侧边选项卡跟随屏幕向下拖动变颜色的.点击侧边选项卡,跳转到相应模块. 索性上网找了一下类似的效果.附带源码地址 https://blog.csdn.net/drea ...
随机推荐
- vue3 使用clodop打印插件实现不预览直接打印
一.下载安装C-LODOP https://www.lodop.net/download.html 解压文件后点击exe程序,启用服务 将上述的 LodopFuncs.js 文件放到工程某个文件下 二 ...
- 前端下载csv文件
var str = [ 'ssssssssssssssssssssssssssssssssssssssss' ]; var uri = 'data:text/csv;charset=utf-8,%EF ...
- python中下拉框选择
如选择省区城市 provice = driver.find_element_by_id('****') #先给定位的元素付个变量 select(prvice).select_by_bisible_te ...
- Mac上好用的app们
记录下自己在mac上用的一些很不错的app,大多免费. 排名随缘. 不定期更新. Amphetamine 来源 AppStore 说明 欢迎使用Amphetamine,一款为macOS打造的最棒的防睡 ...
- Unity中UGUI图片跟随文本自适应方法
字体和图片层级如下 Text添加Content Size Fitter Image设置锚点
- CCIE DC Multicast Part 4.
Hi Guys, Part 4 of my CCIE DC multicast article is presented below, in this article we are going to ...
- jdbc中druid连接池遇到的问题和jdbcTemplate
无效的源发行版11 这是jdk版本不一致,去项目结构里排查一下 严重: init datasource error com.mysql.jdbc.exceptions.jdbc4.MySQLNonTr ...
- ASP.NET中maxRequestLength和maxAllowedContentLength的区别;上传大文件设置IIS7文件上传的最大大小
https://blog.csdn.net/qq_23663693/article/details/89920039 maxRequestLength表示ASP支持的最大请求大小,而maxAllowe ...
- php 反序列化字符串逃逸
这里总结一下反序列化字符串逃逸的知识点 反序列化字符串逃逸分为 被过滤后字符增多和字符减少的情况 这里就不讲之前的基础知识了 大家看其它师傅写的博客就可以了 很多师傅的文章写的都很细 现在直接就开始进 ...
- scrcpy不使用adb远程控制android
1.开启服务器 CLASSPATH=/data/local/tmp/scrcpy-server.jar app_process / com.genymobile.scrcpy.Server 1.23 ...