springcloud zuul网关整合swagger2,swagger被拦截问题
首先感谢一位博主的分享https://www.cnblogs.com/xiaohouzai/p/8886671.html
话不多说直接上图和代码
首先我们要有一个springcloud分布式项目
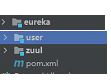
我就简单的一个eureka注册中心然后就是一个user用户然后当然就是zuul网关拉。
eureka的配置我就不多说了,我直接贴zuul网关和swagger的相关配置
zuul中的配置
<dependency>

    <groupId>org.springframework.boot</groupId>

    <artifactId>spring-boot-starter-web</artifactId>

    <version>2.3.2.RELEASE</version>

</dependency>

<--swagger2依赖-->

<dependency>

    <groupId>io.springfox</groupId>

    <artifactId>springfox-swagger2</artifactId>

    <version>2.7.0</version>

</dependency>

<dependency>

    <groupId>io.springfox</groupId>

    <artifactId>springfox-swagger-ui</artifactId>

    <version>2.7.0</version>

</dependency>
zuul 的application.yml
#网关配置

zuul:

  LogFilter:    #自定义过滤器的名称

    pre:        #自定义过滤器类型

      disable: true  # 是否禁用false

  prefix: /api/      #网关前缀如:http://localhost;8080/api/其他服务名

  routes:   #路由规则

    user-server: #用户的服务名

      path: /user/**  #你定义的zuul网关名
import org.springframework.context.annotation.Bean;

import org.springframework.context.annotation.Configuration;

import springfox.documentation.builders.ApiInfoBuilder;

import springfox.documentation.service.ApiInfo;

import springfox.documentation.service.Contact;

import springfox.documentation.spi.DocumentationType;

import springfox.documentation.spring.web.plugins.Docket;

import springfox.documentation.swagger.web.UiConfiguration;

import springfox.documentation.swagger2.annotations.EnableSwagger2;

@Configuration

@EnableSwagger2

public class SwaggerConfig {

    @Bean

    public Docket createRestApi() {

        return new Docket(DocumentationType.SWAGGER_2)

                .apiInfo(apiInfo());

    }

    private ApiInfo apiInfo() {

        return new ApiInfoBuilder()

                .title("分布式某某系统")

                .description("某某系统接口文档说明")

                .termsOfServiceUrl("http://localhost:8081")

                .contact(new Contact("vker", "", "6492178@gmail.com"))

                .version("1.0")

                .build();

    }

    @Bean

    UiConfiguration uiConfig() {

        return new UiConfiguration(null, "list", "alpha", "schema",

                UiConfiguration.Constants.DEFAULT_SUBMIT_METHODS, false, true, 60000L);

    }

}
import org.springframework.context.annotation.Primary;
import org.springframework.stereotype.Component;
import springfox.documentation.swagger.web.SwaggerResource;
import springfox.documentation.swagger.web.SwaggerResourcesProvider;
import java.util.ArrayList;
import java.util.List;
@Component
@Primary
public class DocumentationConfig implements SwaggerResourcesProvider {
@Override
public List<SwaggerResource> get() {
List<SwaggerResource> resources = new ArrayList<>();
//第一个参数随便写,中间的参数是你zuul中application中的配置路径,第三是版本信息,随意
resources.add(swaggerResource("随便填", "/api/user/v2/api-docs", "2.0"));
return resources;
}
private SwaggerResource swaggerResource(String name, String location, String version) {
SwaggerResource swaggerResource = new SwaggerResource();
swaggerResource.setName(name);
swaggerResource.setLocation(location);
swaggerResource.setSwaggerVersion(version);
return swaggerResource;
}
}然后就是user的配置
<dependency>

    <groupId>org.springframework.boot</groupId>

    <artifactId>spring-boot-starter-web</artifactId>

    <version>2.3.2.RELEASE</version>

</dependency>

<--swagger2依赖-->

<dependency>

    <groupId>io.springfox</groupId>

    <artifactId>springfox-swagger2</artifactId>

    <version>2.7.0</version>

</dependency>

<dependency>

    <groupId>io.springfox</groupId>

    <artifactId>springfox-swagger-ui</artifactId>

    <version>2.7.0</version>

</dependency>
import org.springframework.context.annotation.Bean;
import org.springframework.context.annotation.Configuration;
import springfox.documentation.builders.ApiInfoBuilder;
import springfox.documentation.builders.PathSelectors;
import springfox.documentation.builders.RequestHandlerSelectors;
import springfox.documentation.service.ApiInfo;
import springfox.documentation.spi.DocumentationType;
import springfox.documentation.spring.web.plugins.Docket;
import springfox.documentation.swagger2.annotations.EnableSwagger2;
@Configuration
@EnableSwagger2
public class Swagger2Config {
@Bean
public Docket createRestApi(){
return new Docket(DocumentationType.SWAGGER_2)
.apiInfo(apiInfo())
.select()
//为当前包下controller生成API文档
.apis(RequestHandlerSelectors.basePackage("com.cn.me.controller"))
//为有@Api注解的Controller生成API文档
// .apis(RequestHandlerSelectors.withClassAnnotation(Api.class))
//为有@ApiOperation注解的方法生成API文档
// .apis(RequestHandlerSelectors.withMethodAnnotation(ApiOperation.class))
.paths(PathSelectors.any())
.build();
}
private ApiInfo apiInfo() {
return new ApiInfoBuilder()
.title("xxxxx")//自己定义标题
.description("部门、用户等接口")
.version("1.0")
.build();
}
}springcloud zuul网关整合swagger2,swagger被拦截问题的更多相关文章
- SpringCloud Zuul网关的简单理解
Zuul网关功能 请求路由.服务路由.请求过滤 请求路由 参数配置如下所示,所有能够配置path规则的请求,都会被zuul网关转发到对应的url上. zuul.routes.user-service. ...
- spring-cloud zuul网关
API Gateway 是随着微服务(Microservice)这个概念一起兴起的一种架构模式,它用于解决微服务过于分散,没有一个统一的出入口进行流量管理的问题. 使用 Zuul 实现 API Gat ...
- SpringCloud zuul 网关限流分析
最近项目中 spring cloud zuul 运用到限流功能,打算配置一下就直接使用,不过在压测与调优过程中遇到一些没有预测到的问题,附上排查与解析结果 yml.pom配置 强烈推荐,按最新gith ...
- SpringCloud Zuul网关超时
最近在使用SpringCloudZuul网关时,报错"NUMBEROF_RETRIES_NEXTSERVER_EXCEEDED", 查询资料后,发现: ribbon.Connect ...
- springCloud Zuul网关
1.springboot 仅2.0.x 支持,在此选择 2.0.7 2.新建Module eureka-zuul-client 3.导入依赖 <?xml version="1.0&qu ...
- springCloud zuul网关服务
第一步:编写application.properties文件 spring.application.name=api-gateway server.port=5555 zuul.routes.user ...
- 创建swagger的springboot-stater,并在spring cloud zuul网关中引入
Swagger 是一款RESTFUL接口的.基于YAML.JSON语言的文档在线自动生成.代码自动生成的工具. 通过在controller中添加注解,即可轻易实现代码文档化. Swagger提供ui界 ...
- 白话SpringCloud | 第十一章:路由网关(Zuul):利用swagger2聚合API文档
前言 通过之前的两篇文章,可以简单的搭建一个路由网关了.而我们知道,现在都奉行前后端分离开发,前后端开发的沟通成本就增加了,所以一般上我们都是通过swagger进行api文档生成的.现在由于使用了统一 ...
- Spring Cloud Zuul 网关的分布式系统中整合Swagger(转)和 zuul跨域访问问题
首先恭喜自己终于找对了努力的方向,很荣幸能在公司接触到微服务架构,也很高兴公司一个大佬哥们愿意带我,他技术确实很牛逼,我也很佩服他,前后端通吃,干了六年能有这样的水平.最近跟着在搞微服务架构,给我分配 ...
- springboot+cloud 学习(四)Zuul整合Swagger2
前言 在微服务架构下,服务是分散的,怎么把所有服务接口整合到一起是我们需要关注的. 下面举例用zuul作为分布式系统的网关,同时使用swagger生成文档,想把整个系统的文档整合在同一个页面上来说明. ...
随机推荐
- [WPF]使用Fody提高效率
下载安装及使用 代码实例 public class Person:INotifyPropertyChanged { public event PropertyChangedEventHandler P ...
- [Leetcode] 寻找数组的中心索引
题目 代码 class Solution { public: int pivotIndex(vector<int>& nums) { int right=0; for(auto i ...
- 基于Udp通讯的Java局域网群聊小程序
/**基于Udp通讯的Java局域网群聊小程序 */package com.UdpDemo; import java.net.*; import java.awt.*; import java.awt ...
- Lamdba表达式的无参数无返回值的练习-Lambda表达式有参数有返回值的练习
Lamdba表达式的无参数无返回值的练习 题目给定一个厨子Cook接口,内含唯一的抽象方法makeFood,且无参数.无返回值.如下∶public interface cook {void makeF ...
- Unity之Android端权限申请
Unity之Android端权限申请 Unity之Android端权限申请 前言 开篇废话 Unity版本 正题 前期准备 挂载脚本 打包发布 安装App 查看结果 结尾 唠家常 今日无推荐 Unit ...
- JSP第十次作业
1.实现 删除 回复邮件2.实现阅读邮件功能:在main.jsp中点击任意邮件的标题,进入到detail.jsp显示邮件详情,包括发件人,主题,内容,时间.同时需要把邮件状态修改为已读. com.gd ...
- Nginx02 Nginx的的目录结构、基本工作原理、基本配置文件介绍
1 Nginx目录结构 1.1 简要介绍 [root@localhost ~]# tree /usr/local/nginx /usr/local/nginx ├── client_body_temp ...
- WinNTSetup V5.3.0 Bata5 单文件版
前言 WinNTSetup 是一款Windows系统硬盘安装器,支持从PE和本地安装系统,支持支持NT内核的系统. WinNTSetup 包括XP.Win7.Win8.Win8.1.Win10等这些系 ...
- python3中,isinstance() 函数
#isinstance() 函数来判断一个对象是否是一个已知的类型,类似 type(). #返回值:如果对象的类型与参数二的类型相同则返回True,否则返回False 使用isinstance函数的实 ...
- xshell连接时显示“服务器发送了一个意外的数据包。received:3,expected:20“问题的解决方法
xshell连接时显示"服务器发送了一个意外的数据包.received:3,expected:20"问题的解决方法 解决方法:在/etc/ssh/sshd_config最后增加以下 ...