
ASP.NET Core3.1使用IdentityServer4中间件系列随笔(五):创建使用[Code-授权码]授权模式的客户端
配套源码:https://gitee.com/jardeng/IdentitySolution
本篇将创建使用[Code-授权码]授权模式的客户端,来对受保护的API资源进行访问。
1、接上一篇项目,因为之前创建IdentityServer认证服务器没有使用IdentityServer4提供的模板,在Code授权码模式就没有进行登录、授权的界面,所以重新创建一下IdentityServer项目。
重新使用IdentityServer4模板 - is4inmem创建项目。
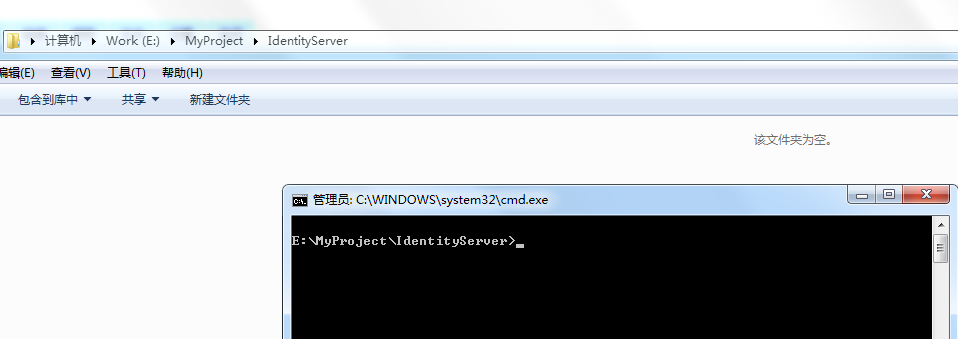

将之前IdentityServer认证服务器Config.cs复制到新建的IdentityServer服务器即可,最后的IdentityServer认证服务器项目结构为:

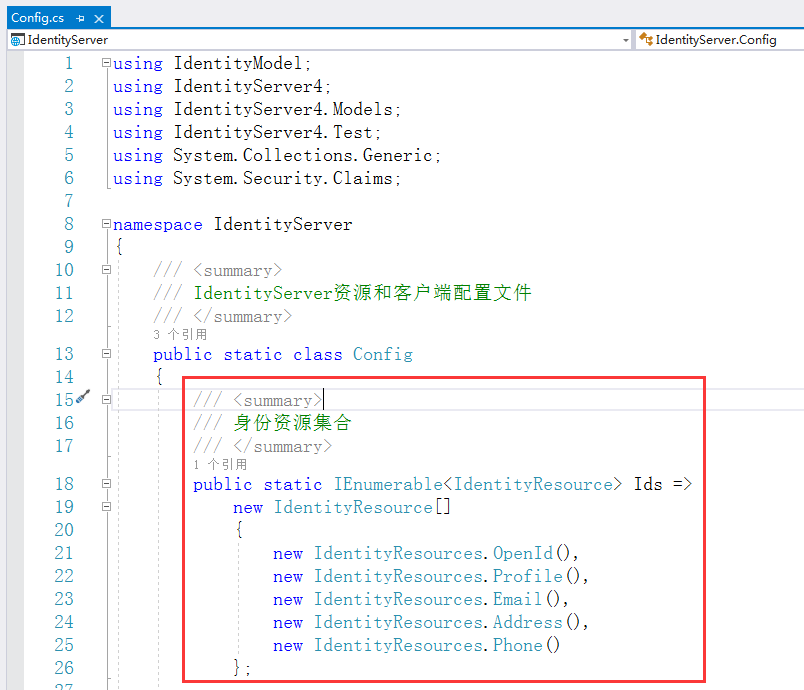
然后在IdentityServer项目Config.cs中添加一个返回身份资源的方法
然后在IdentityServer项目Config.cs中添加一个客户端
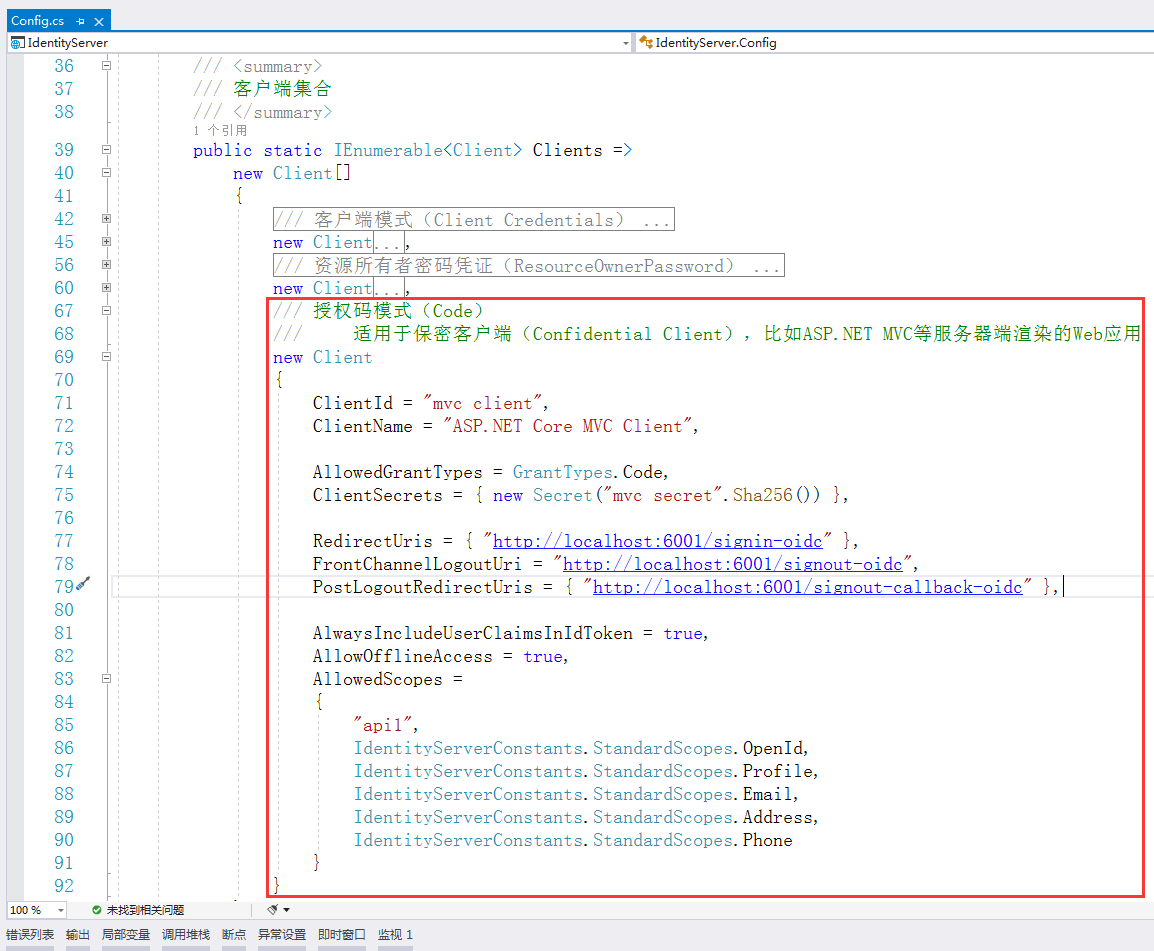
注意:localhost:6001指的是我们将要创建的MVC客户端的项目地址,并非IdentityServer认证服务器的地址
/// 授权码模式(Code)

///     适用于保密客户端(Confidential Client),比如ASP.NET MVC等服务器端渲染的Web应用

new Client

{

    ClientId = "mvc client",

    ClientName = "ASP.NET Core MVC Client",

    AllowedGrantTypes = GrantTypes.Code,

    ClientSecrets = { new Secret("mvc secret".Sha256()) },

    RedirectUris = { "http://localhost:6001/signin-oidc" },

    FrontChannelLogoutUri = "http://localhost:6001/signout-oidc",

    PostLogoutRedirectUris = { "http://localhost:6001/signout-callback-oidc" },

    AlwaysIncludeUserClaimsInIdToken = true,

    AllowOfflineAccess = true,

    AllowedScopes =

    {

        "api1",

        IdentityServerConstants.StandardScopes.OpenId,

        IdentityServerConstants.StandardScopes.Profile,

        IdentityServerConstants.StandardScopes.Email,

        IdentityServerConstants.StandardScopes.Address,

        IdentityServerConstants.StandardScopes.Phone

    }

}
其中,RedirectUris的signin-oidc / FrontChannelLogoutUri的signout-oidc / PostLogoutRedirectUris的signout-callback-oidc,都是固定的地址写法。
完整的Config.cs代码:
using IdentityModel;

using IdentityServer4;

using IdentityServer4.Models;

using IdentityServer4.Test;

using System.Collections.Generic;

using System.Security.Claims;

namespace IdentityServer

{

    /// <summary>

    /// IdentityServer资源和客户端配置文件

    /// </summary>

    public static class Config

    {

        /// <summary>

        /// 身份资源集合

        /// </summary>

        public static IEnumerable<IdentityResource> Ids =>

            new IdentityResource[]

            {

                new IdentityResources.OpenId(),

                new IdentityResources.Profile(),

                new IdentityResources.Email(),

                new IdentityResources.Address(),

                new IdentityResources.Phone()

            };

        /// <summary>

        /// API资源集合

        ///     如果您将在生产环境中使用此功能,那么给您的API取一个逻辑名称就很重要。

        ///     开发人员将使用它通过身份服务器连接到您的api。

        ///     它应该以简单的方式向开发人员和用户描述您的api。

        /// </summary>

        public static IEnumerable<ApiResource> Apis => new List<ApiResource> { new ApiResource("api1", "My API") };

        /// <summary>

        /// 客户端集合

        /// </summary>

        public static IEnumerable<Client> Clients =>

            new Client[]

            {

                /// 客户端模式(Client Credentials)

                ///     可以将ClientId和ClientSecret视为应用程序本身的登录名和密码。

                ///     它将您的应用程序标识到身份服务器,以便它知道哪个应用程序正在尝试与其连接。

                new Client

                {

                    //客户端标识

                    ClientId = "client",

                    //没有交互用户,使用clientid/secret进行身份验证,适用于和用户无关,机器与机器之间直接交互访问资源的场景。

                    AllowedGrantTypes = GrantTypes.ClientCredentials,

                    //认证密钥

                    ClientSecrets = { new Secret("secret".Sha256()) },

                    //客户端有权访问的作用域

                    AllowedScopes = { "api1" }

                },

                /// 资源所有者密码凭证(ResourceOwnerPassword)

                ///     Resource Owner其实就是User,所以可以直译为用户名密码模式。

                ///     密码模式相较于客户端凭证模式,多了一个参与者,就是User。

                ///     通过User的用户名和密码向Identity Server申请访问令牌。

                new Client

                {

                    ClientId = "client1",

                    AllowedGrantTypes = GrantTypes.ResourceOwnerPassword,

                    ClientSecrets = { new Secret("secret".Sha256()) },

                    AllowedScopes = { "api1" }

                },

                /// 授权码模式(Code)

                ///     适用于保密客户端(Confidential Client),比如ASP.NET MVC等服务器端渲染的Web应用

                new Client

                {

                    ClientId = "mvc client",

                    ClientName = "ASP.NET Core MVC Client",

                    AllowedGrantTypes = GrantTypes.Code,

                    ClientSecrets = { new Secret("mvc secret".Sha256()) },

                    RedirectUris = { "http://localhost:6001/signin-oidc" },

                    FrontChannelLogoutUri = "http://localhost:6001/signout-oidc",

                    PostLogoutRedirectUris = { "http://localhost:6001/signout-callback-oidc" },

                    AlwaysIncludeUserClaimsInIdToken = true,

                    AllowOfflineAccess = true,

                    AllowedScopes =

                    {

                        "api1",

                        IdentityServerConstants.StandardScopes.OpenId,

                        IdentityServerConstants.StandardScopes.Profile,

                        IdentityServerConstants.StandardScopes.Email,

                        IdentityServerConstants.StandardScopes.Address,

                        IdentityServerConstants.StandardScopes.Phone

                    }

                }

            };

        /// <summary>

        /// 用户集合

        /// </summary>

        public static List<TestUser> Users =>

            new List<TestUser>

            {

                new TestUser{SubjectId = "", Username = "alice", Password = "alice",

                    Claims =

                    {

                        new Claim(JwtClaimTypes.Name, "Alice Smith"),

                        new Claim(JwtClaimTypes.GivenName, "Alice"),

                        new Claim(JwtClaimTypes.FamilyName, "Smith"),

                        new Claim(JwtClaimTypes.Email, "AliceSmith@email.com"),

                        new Claim(JwtClaimTypes.EmailVerified, "true", ClaimValueTypes.Boolean),

                        new Claim(JwtClaimTypes.WebSite, "http://alice.com"),

                        new Claim(JwtClaimTypes.Address, @"{ 'street_address': 'One Hacker Way', 'locality': 'Heidelberg', 'postal_code': 69118, 'country': 'Germany' }", IdentityServer4.IdentityServerConstants.ClaimValueTypes.Json)

                    }

                },

                new TestUser{SubjectId = "", Username = "bob", Password = "bob",

                    Claims =

                    {

                        new Claim(JwtClaimTypes.Name, "Bob Smith"),

                        new Claim(JwtClaimTypes.GivenName, "Bob"),

                        new Claim(JwtClaimTypes.FamilyName, "Smith"),

                        new Claim(JwtClaimTypes.Email, "BobSmith@email.com"),

                        new Claim(JwtClaimTypes.EmailVerified, "true", ClaimValueTypes.Boolean),

                        new Claim(JwtClaimTypes.WebSite, "http://bob.com"),

                        new Claim(JwtClaimTypes.Address, @"{ 'street_address': 'One Hacker Way', 'locality': 'Heidelberg', 'postal_code': 69118, 'country': 'Germany' }", IdentityServer4.IdentityServerConstants.ClaimValueTypes.Json),

                        new Claim("location", "somewhere")

                    }

                }

            };

    }

}
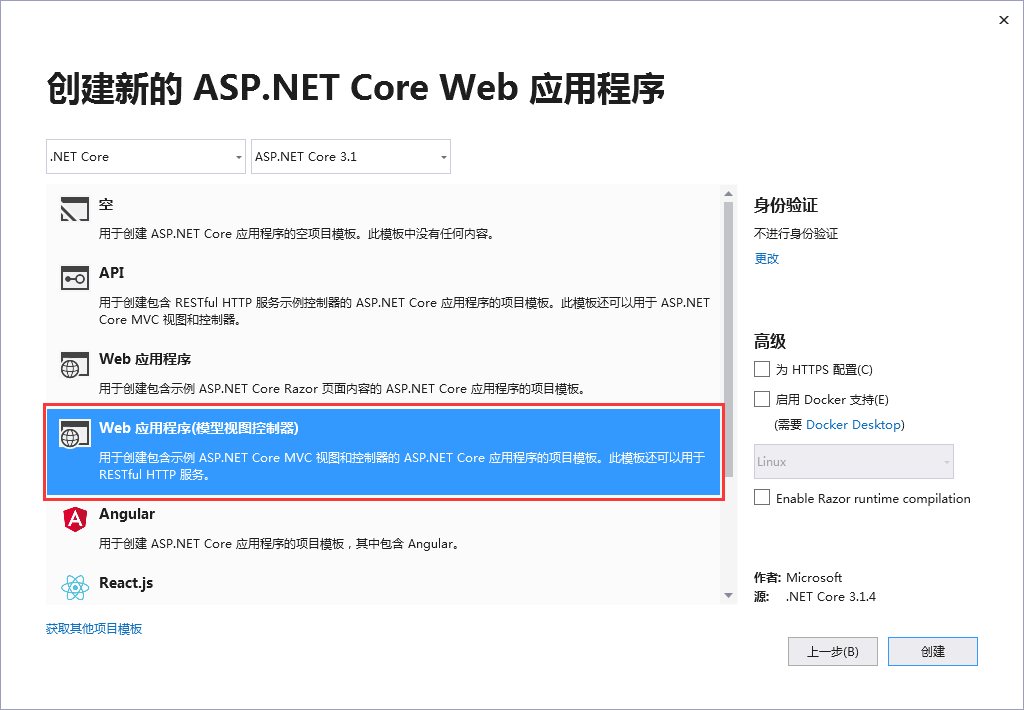
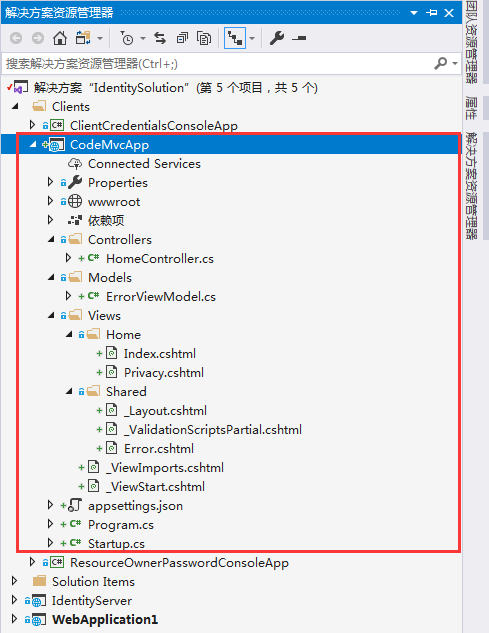
2、创建一个名为 CodeMvcApp 的ASP.NET Core MVC客户端应用。
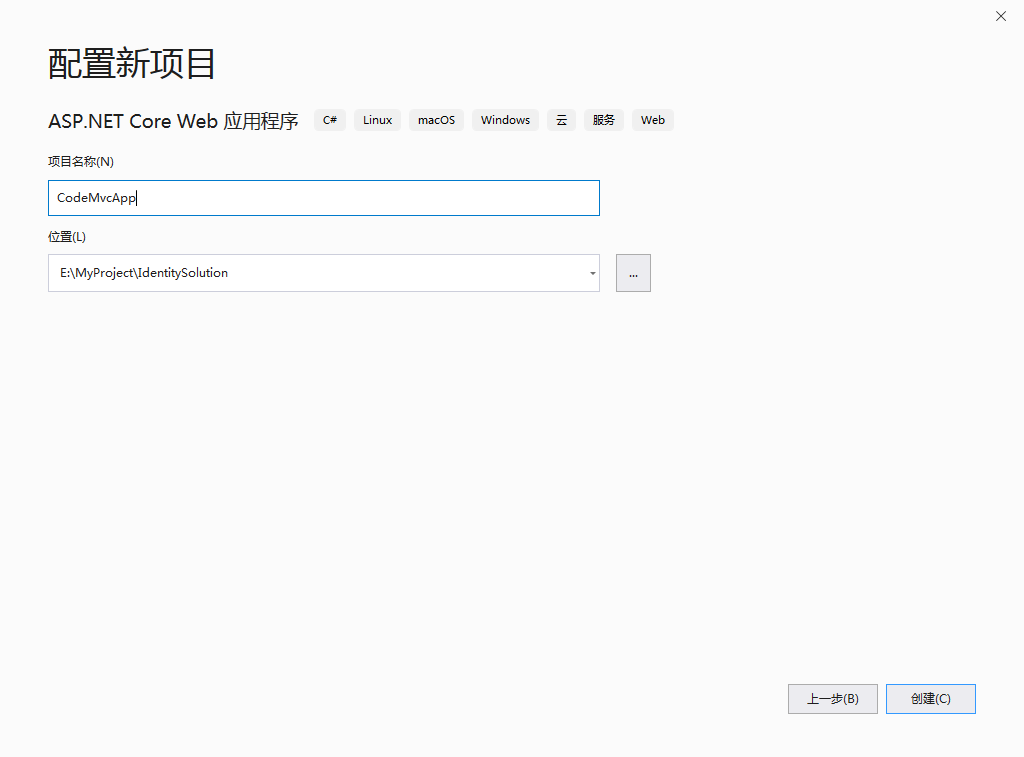
选择Web 应用程序(模型视图控制器)模板
创建完成后的项目截图
3、添加nuget包:IdentityServer4、IdentityModel、System.IdentityModel.Tokens.Jwt
4、配置MVC客户端
> Config.cs的ConfigureServices方法:
public void ConfigureServices(IServiceCollection services)

{

    services.AddControllersWithViews();

    JwtSecurityTokenHandler.DefaultInboundClaimTypeMap.Clear();

    services.AddAuthentication(options =>

    {

        options.DefaultScheme = CookieAuthenticationDefaults.AuthenticationScheme;

        options.DefaultChallengeScheme = OpenIdConnectDefaults.AuthenticationScheme;

    }).AddCookie(CookieAuthenticationDefaults.AuthenticationScheme)

    .AddOpenIdConnect(OpenIdConnectDefaults.AuthenticationScheme, options =>

    {

        options.SignInScheme = CookieAuthenticationDefaults.AuthenticationScheme;

        options.Authority = "http://localhost:5000";

        options.RequireHttpsMetadata = false;

        options.ClientId = "mvc client";

        options.ClientSecret = "mvc secret";

        options.SaveTokens = true;

        options.ResponseType = "code";

        options.Scope.Clear();

        options.Scope.Add("api1");

        options.Scope.Add(OidcConstants.StandardScopes.OpenId);

        options.Scope.Add(OidcConstants.StandardScopes.Profile);

        options.Scope.Add(OidcConstants.StandardScopes.Email);

        options.Scope.Add(OidcConstants.StandardScopes.Phone);

        options.Scope.Add(OidcConstants.StandardScopes.Address);

        options.Scope.Add(OidcConstants.StandardScopes.OfflineAccess);

    });

}
> Config.cs的Configure方法:
public void Configure(IApplicationBuilder app, IWebHostEnvironment env)

{

    if (env.IsDevelopment())

    {

        app.UseDeveloperExceptionPage();

    }

    else

    {

        app.UseExceptionHandler("/Home/Error");

    }

    app.UseStaticFiles();

    app.UseRouting();

    app.UseAuthentication();

    app.UseAuthorization();

    app.UseEndpoints(endpoints =>

    {

        endpoints.MapControllerRoute(

            name: "default",

            pattern: "{controller=Home}/{action=Index}/{id?}");

    });

}
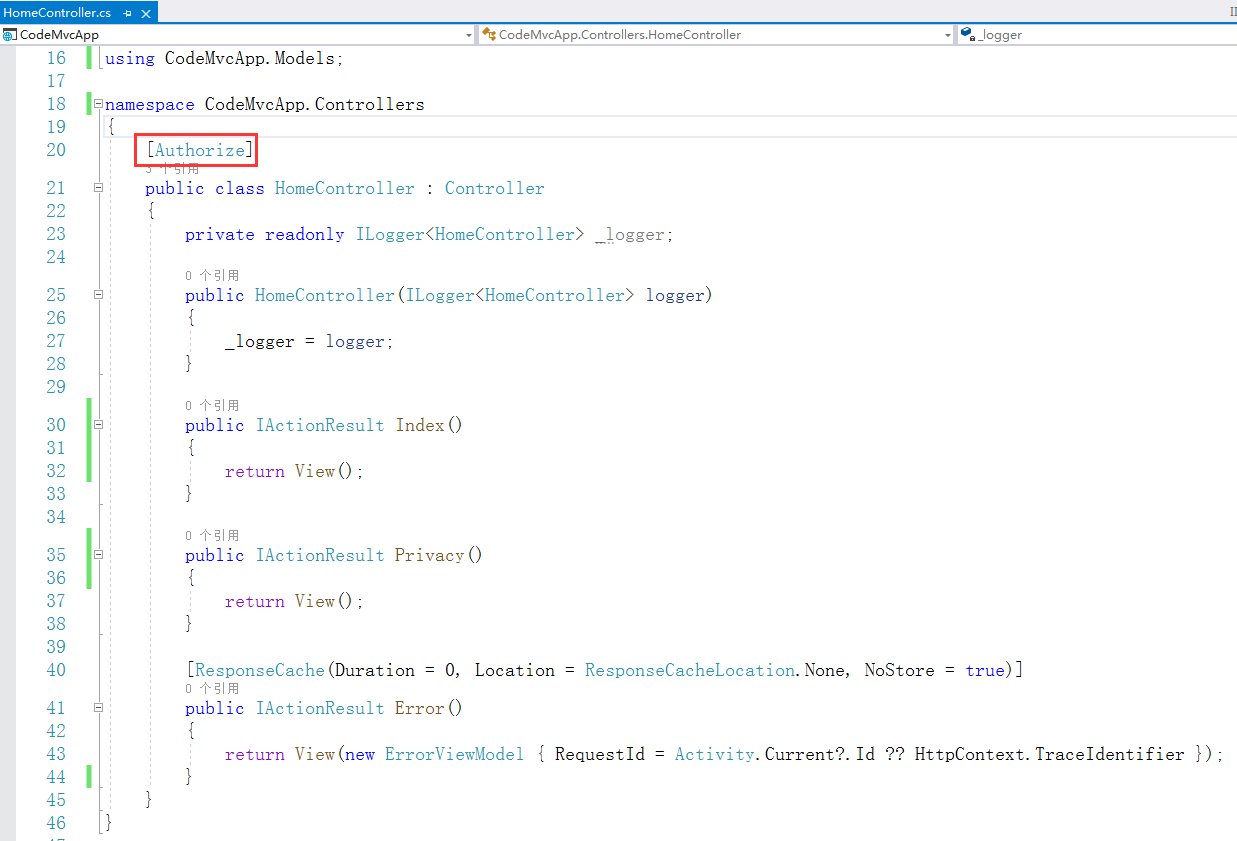
给HomeController控制器加上[Authorize]特性
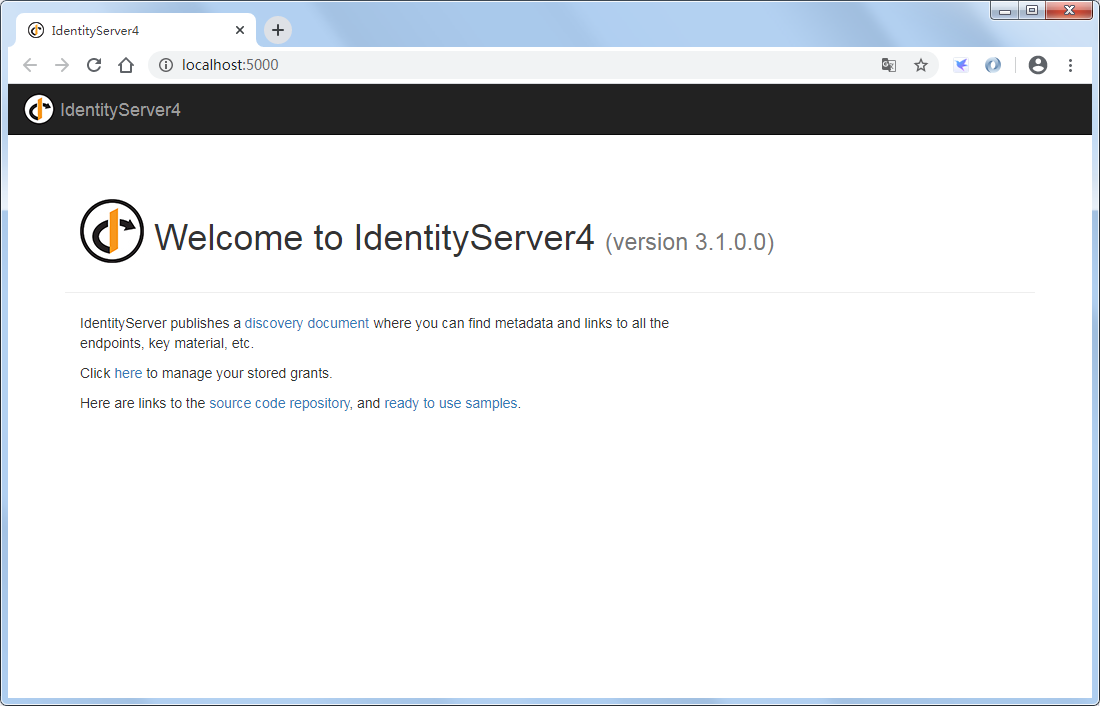
IdentityServer认证服务器需要在开发环境才能出现首页,所以另外打开这个项目并启动。

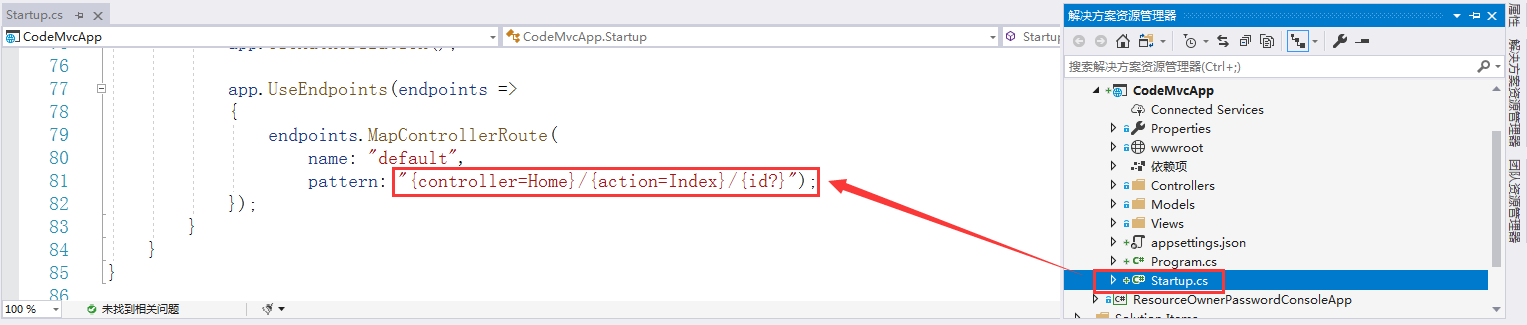
再启动CodeMvcApp项目
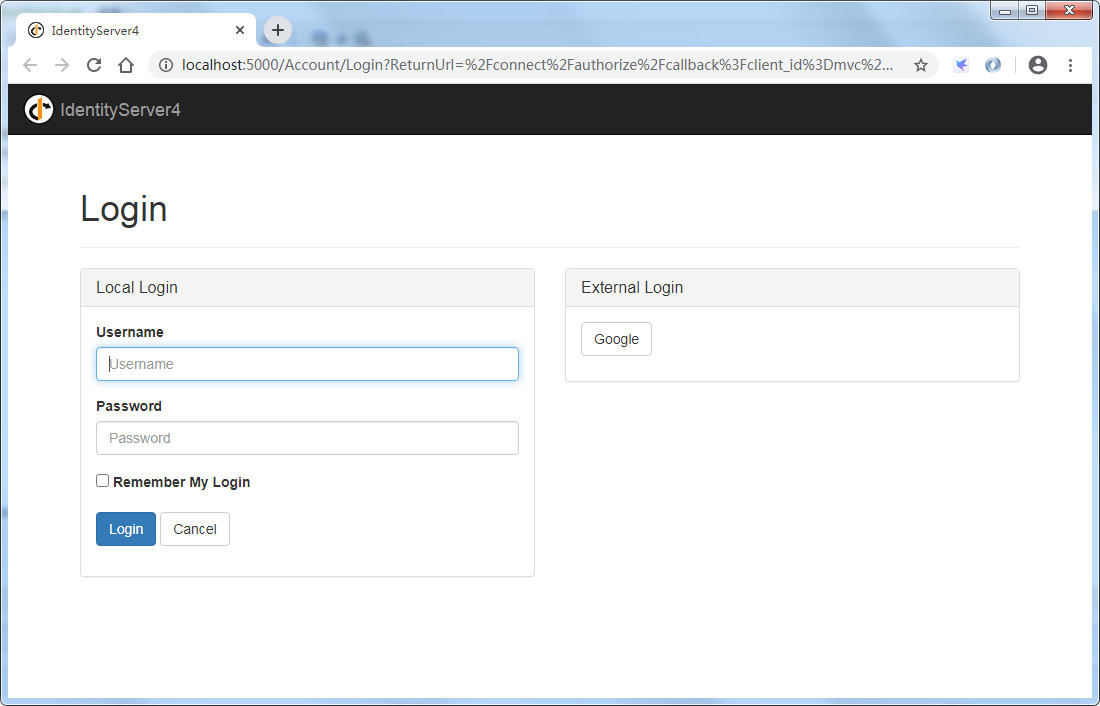
我们看到MVC客户端默认跳转到了localhost:5000(IdentityServer认证服务器)的登录页(Account/Login),因为MVC客户端默认启动的是Home/Index,且Home控制器已被标记Authorize特性,需要登录才能访问
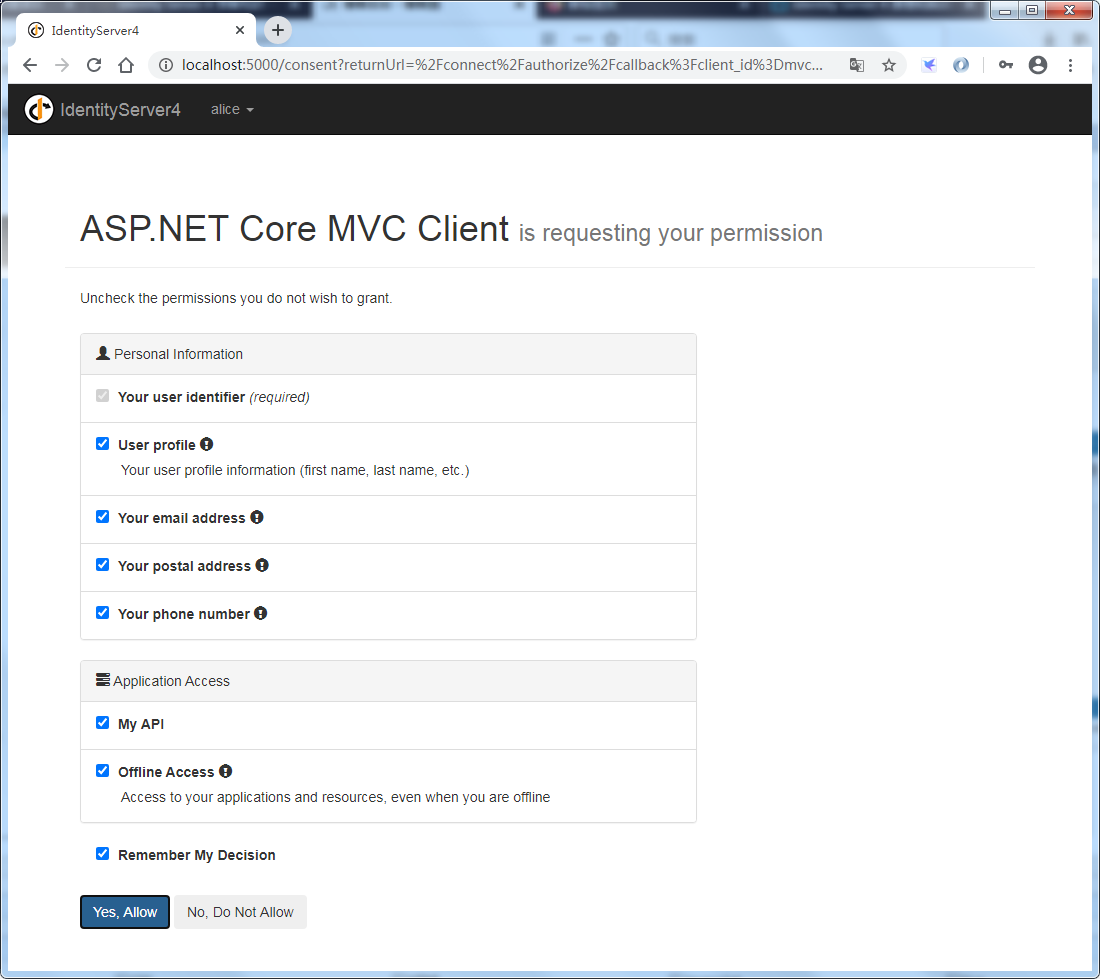
使用 alice / alice 进行登录,进入到了IdentityServer认证服务器的授权页面(consent),点击Yes, Allow
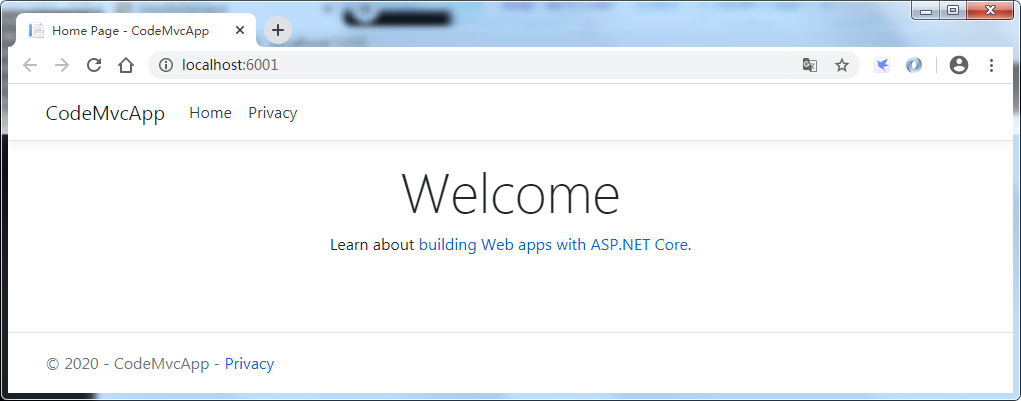
进入到了MVC客户端首页
我们打开IdentityServer认证服务器地址:http://localhost:5000
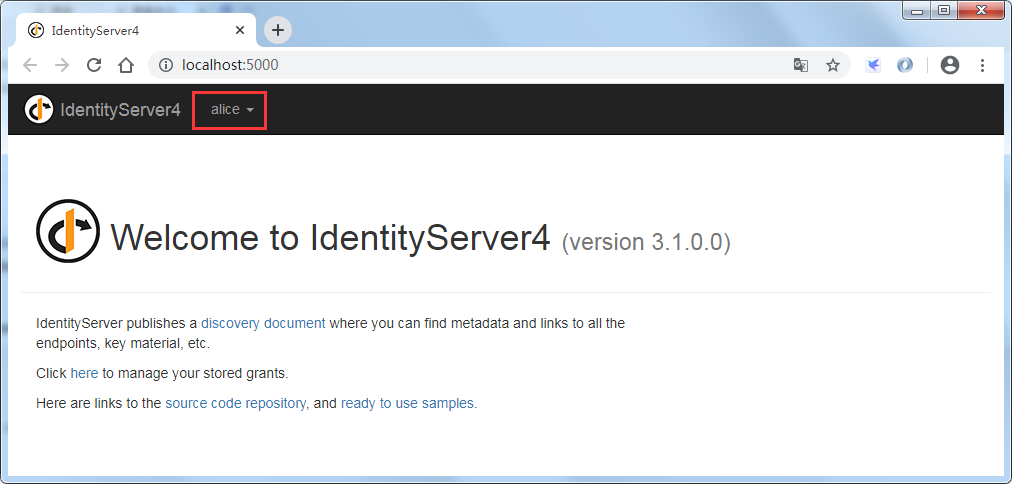
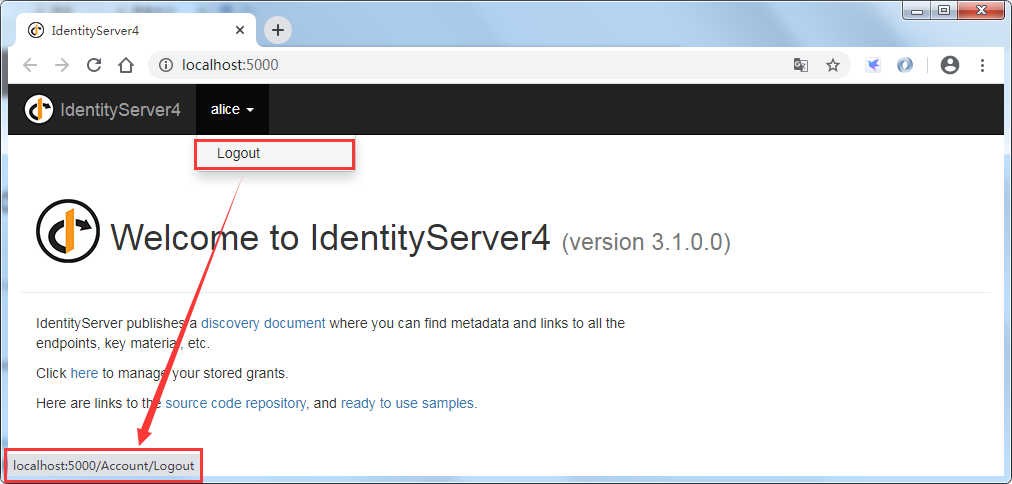
可以看到IdentityServer认证服务器显示了当前的登录用户,此时点击用户名可以显示出Logout登出按钮,点击登出即可完成注销登录
5、获取accecc_token并访问受保护API资源,修改HomeController的Index方法
using System;

using System.Diagnostics;

using System.Net.Http;

using System.Threading.Tasks;

using CodeMvcApp.Models;

using IdentityModel.Client;

using Microsoft.AspNetCore.Authentication;

using Microsoft.AspNetCore.Authorization;

using Microsoft.AspNetCore.Mvc;

using Microsoft.Extensions.Logging;

using Microsoft.IdentityModel.Protocols.OpenIdConnect;

public async Task<IActionResult> Index()

{

    HttpClient client = new HttpClient();

    DiscoveryDocumentResponse disco = await client.GetDiscoveryDocumentAsync("http://localhost:5000/");

    if (disco.IsError)

    {

        throw new Exception(disco.Error);

    }

    string accessToken = await HttpContext.GetTokenAsync(OpenIdConnectParameterNames.AccessToken);

    client.SetBearerToken(accessToken);

    HttpResponseMessage response = await client.GetAsync("http://localhost:6000/WeatherForecast");

    if (!response.IsSuccessStatusCode)

    {

        throw new Exception(response.ReasonPhrase);

    }

    string content = await response.Content.ReadAsStringAsync();

    return View("Index", content);

}
修改Index.cshtml来显示访问API的结果
@{

    ViewData["Title"] = "Home Page";

}

@model string

<div class="text-center">

    <h1 class="display-4">Welcome</h1>

    <p>Learn about <a href="https://docs.microsoft.com/aspnet/core">building Web apps with ASP.NET Core</a>.</p>

</div>

<h2>Api Resource Result:</h2>

<p>@Model</p>
修改一下HomeController的Privacy方法
public async Task<IActionResult> Privacy()

{

    string accessToken = await HttpContext.GetTokenAsync(OpenIdConnectParameterNames.AccessToken);

    string idToken = await HttpContext.GetTokenAsync(OpenIdConnectParameterNames.IdToken);

    string refreshToken = await HttpContext.GetTokenAsync(OpenIdConnectParameterNames.RefreshToken);

    //code只能使用一次,所以获取不到

    //string code = await HttpContext.GetTokenAsync(OpenIdConnectParameterNames.Code);

    ViewData["accessToken"] = accessToken;

    ViewData["idToken"] = idToken;

    ViewData["refreshToken"] = refreshToken;

    return View();

}
修改Privacy.cshtml来显示token相关信息和用户身份声明相关信息
@{

    ViewData["Title"] = "Privacy Policy";

}

<h1>@ViewData["Title"]</h1>

<h2>Access Token:</h2>

<p>@ViewData["accessToken"]</p>

<h2>Id Token:</h2>

<p>@ViewData["idToken"]</p>

<h2>Refresh Token:</h2>

<p>@ViewData["refreshToken"]</p>

<h2>Claims:</h2>

<dl>

    @foreach (var claim in User.Claims)

    {

        <dt>@claim.Type</dt>

        <dd>@claim.Value</dd>

    }

</dl>
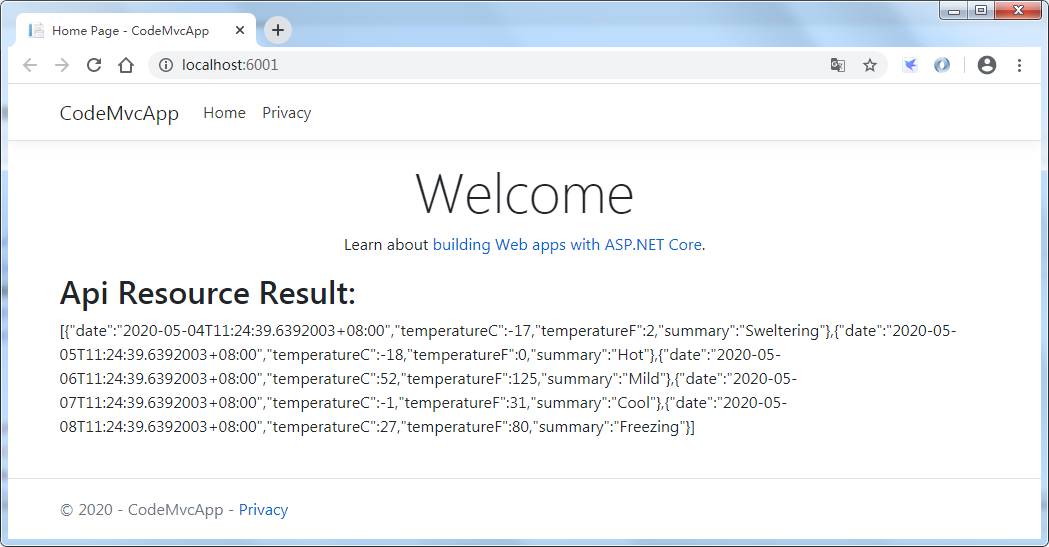
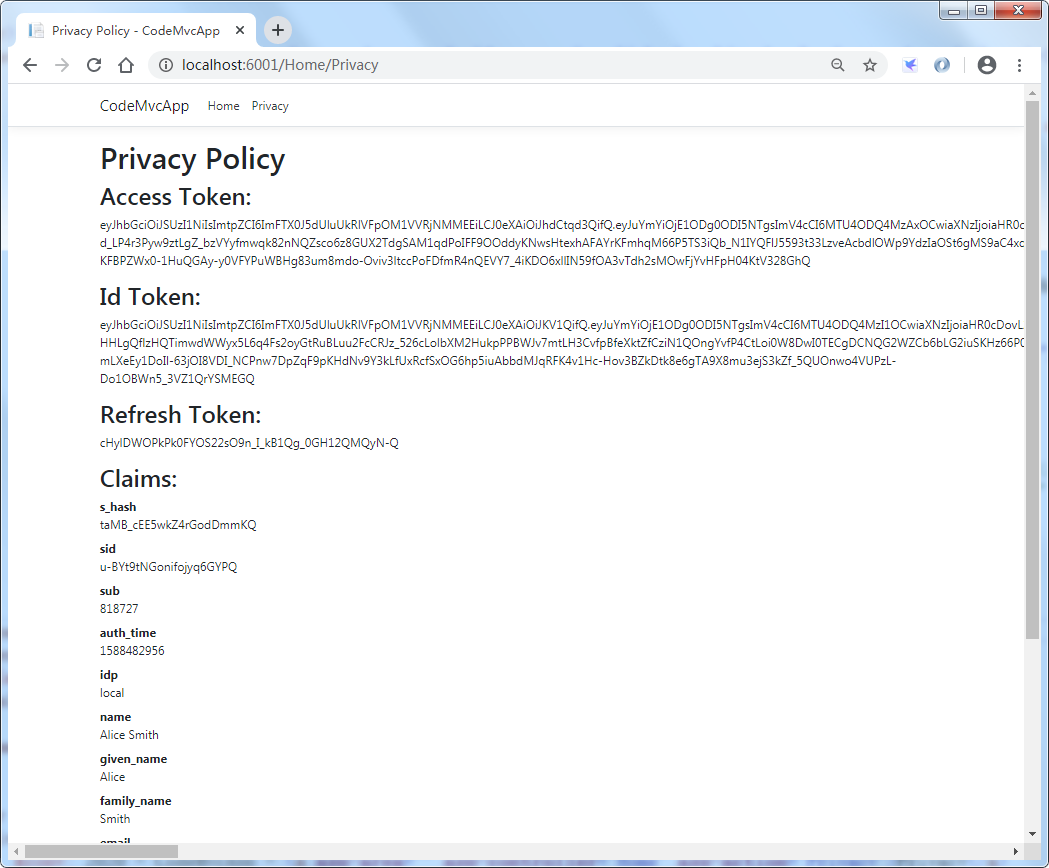
重新启动MVC客户端,成功获取access_token,并使用access_tokem访问受保护的API资源
> Home/Index
> Home/Policy
6、显示登录的用户,并实现登出
修改Views/Shared/_Layout.cshtml,增加当前登录用户名称和登出按钮的显示
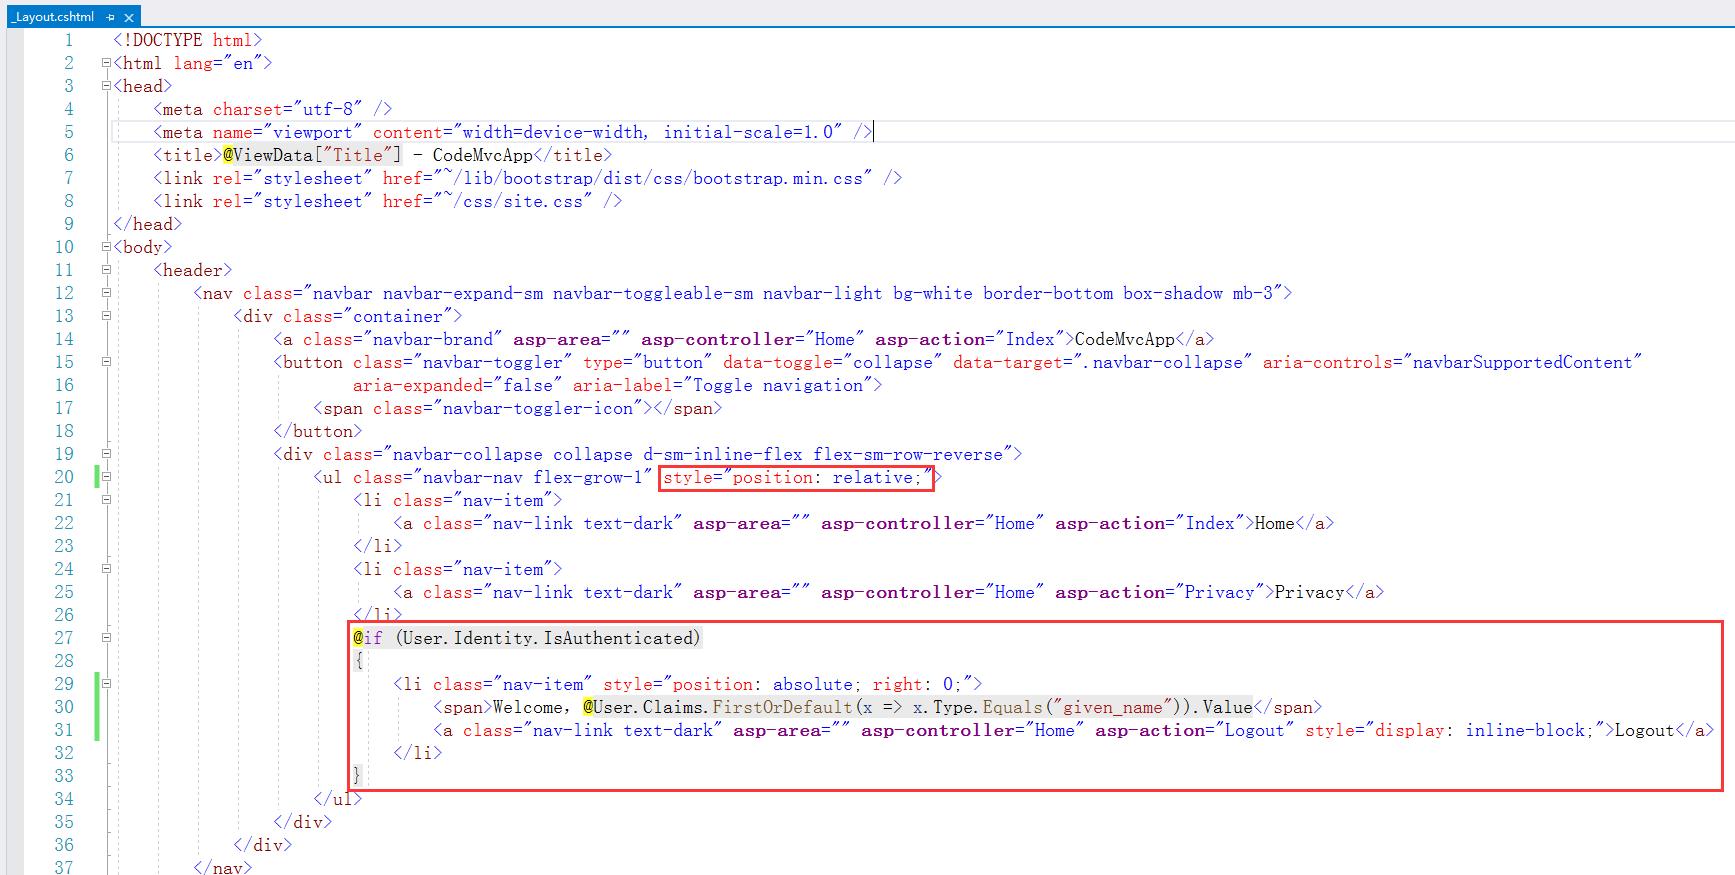
<!DOCTYPE html>
<html lang="en">
<head>
<meta charset="utf-8" />
<meta name="viewport" content="width=device-width, initial-scale=1.0" />
<title>@ViewData["Title"] - CodeMvcApp</title>
<link rel="stylesheet" href="~/lib/bootstrap/dist/css/bootstrap.min.css" />
<link rel="stylesheet" href="~/css/site.css" />
</head>
<body>
<header>
<nav class="navbar navbar-expand-sm navbar-toggleable-sm navbar-light bg-white border-bottom box-shadow mb-3">
<div class="container">
<a class="navbar-brand" asp-area="" asp-controller="Home" asp-action="Index">CodeMvcApp</a>
<button class="navbar-toggler" type="button" data-toggle="collapse" data-target=".navbar-collapse" aria-controls="navbarSupportedContent"
aria-expanded="false" aria-label="Toggle navigation">
<span class="navbar-toggler-icon"></span>
</button>
<div class="navbar-collapse collapse d-sm-inline-flex flex-sm-row-reverse">
<ul class="navbar-nav flex-grow-1" style="position: relative;">
<li class="nav-item">
<a class="nav-link text-dark" asp-area="" asp-controller="Home" asp-action="Index">Home</a>
</li>
<li class="nav-item">
<a class="nav-link text-dark" asp-area="" asp-controller="Home" asp-action="Privacy">Privacy</a>
</li>
@if (User.Identity.IsAuthenticated)
{
<li class="nav-item" style="position: absolute; right: 0;">
<span>Welcome,@User.Claims.FirstOrDefault(x => x.Type.Equals("given_name")).Value</span>
<a class="nav-link text-dark" asp-area="" asp-controller="Home" asp-action="Logout" style="display: inline-block;">Logout</a>
</li>
}
</ul>
</div>
</div>
</nav>
</header>
<div class="container">
<main role="main" class="pb-3">
@RenderBody()
</main>
</div> <footer class="border-top footer text-muted">
<div class="container">
© - CodeMvcApp - <a asp-area="" asp-controller="Home" asp-action="Privacy">Privacy</a>
</div>
</footer>
<script src="~/lib/jquery/dist/jquery.min.js"></script>
<script src="~/lib/bootstrap/dist/js/bootstrap.bundle.min.js"></script>
<script src="~/js/site.js" asp-append-version="true"></script>
@RenderSection("Scripts", required: false)
</body>
</html>
修改HomeController,增加Logout方法
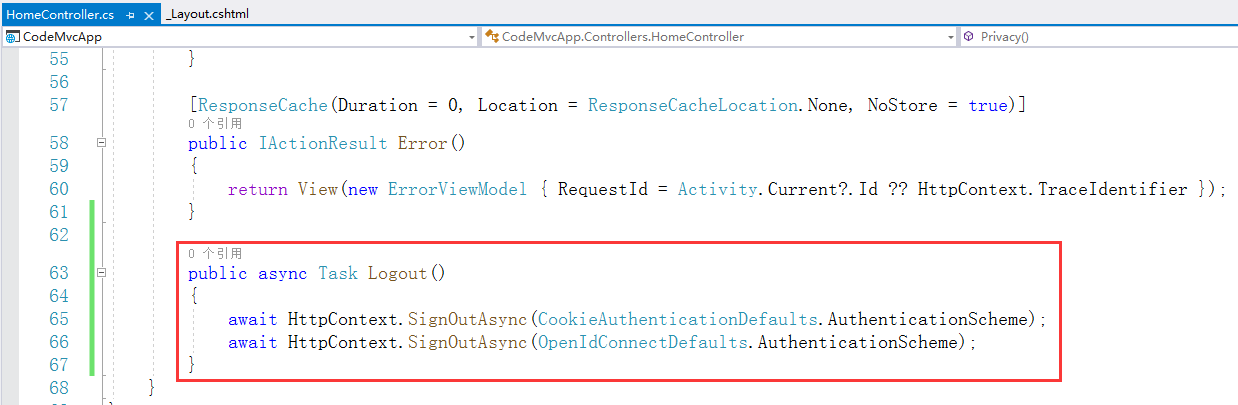
using Microsoft.AspNetCore.Authentication.Cookies;

using Microsoft.AspNetCore.Authentication.OpenIdConnect;

public async Task Logout()

{

    await HttpContext.SignOutAsync(CookieAuthenticationDefaults.AuthenticationScheme);

    await HttpContext.SignOutAsync(OpenIdConnectDefaults.AuthenticationScheme);

}
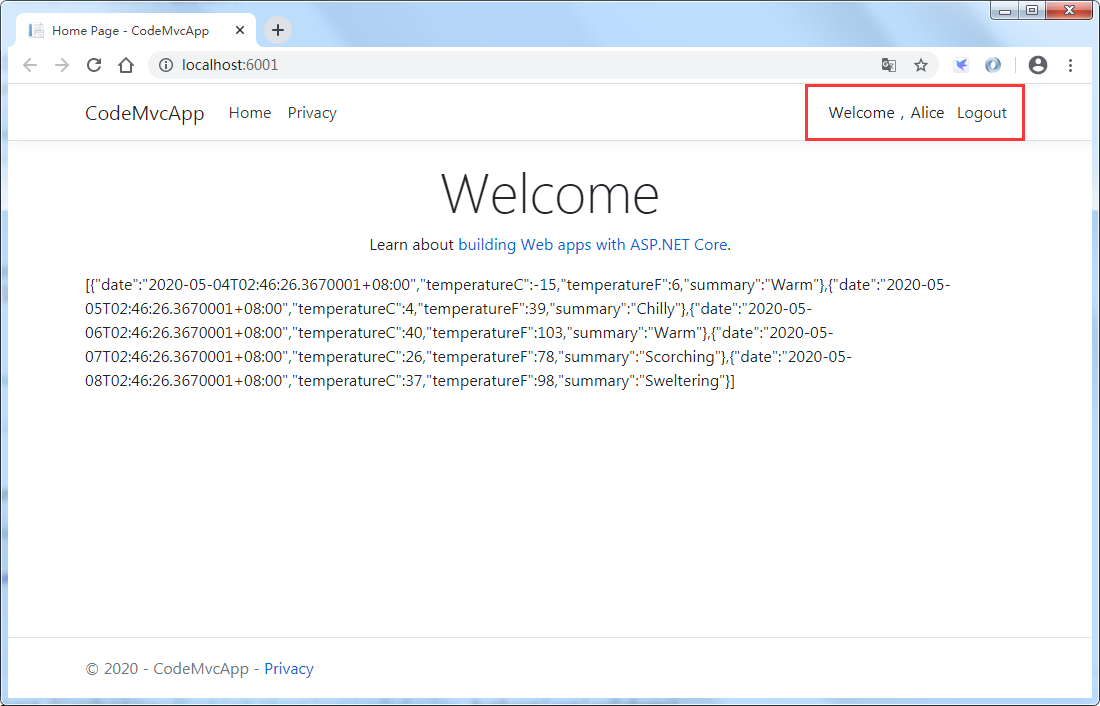
重新运行项目,导航栏右侧就显示了当前用户名和登出按钮
点击Logout登出,跳转到了IdentityServer认证服务器的登出页面(Account/Logout),此时已经登出了,但是界面停在了IdentityServer的注销成功页面
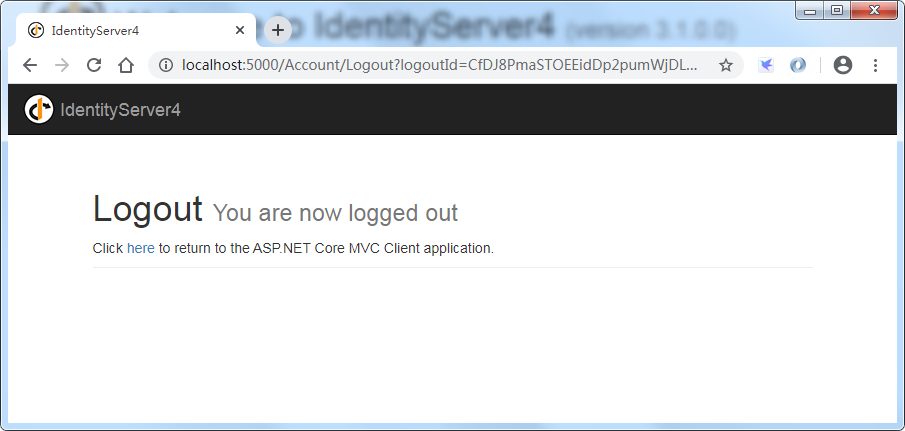
点击“here”,可以跳转到MVC客户端,但是不是很友好

此时我们打开IdentityServer认证服务器地址:http://localhost:5000,看到IdentityServer认证服务器的用户已经显示被注销

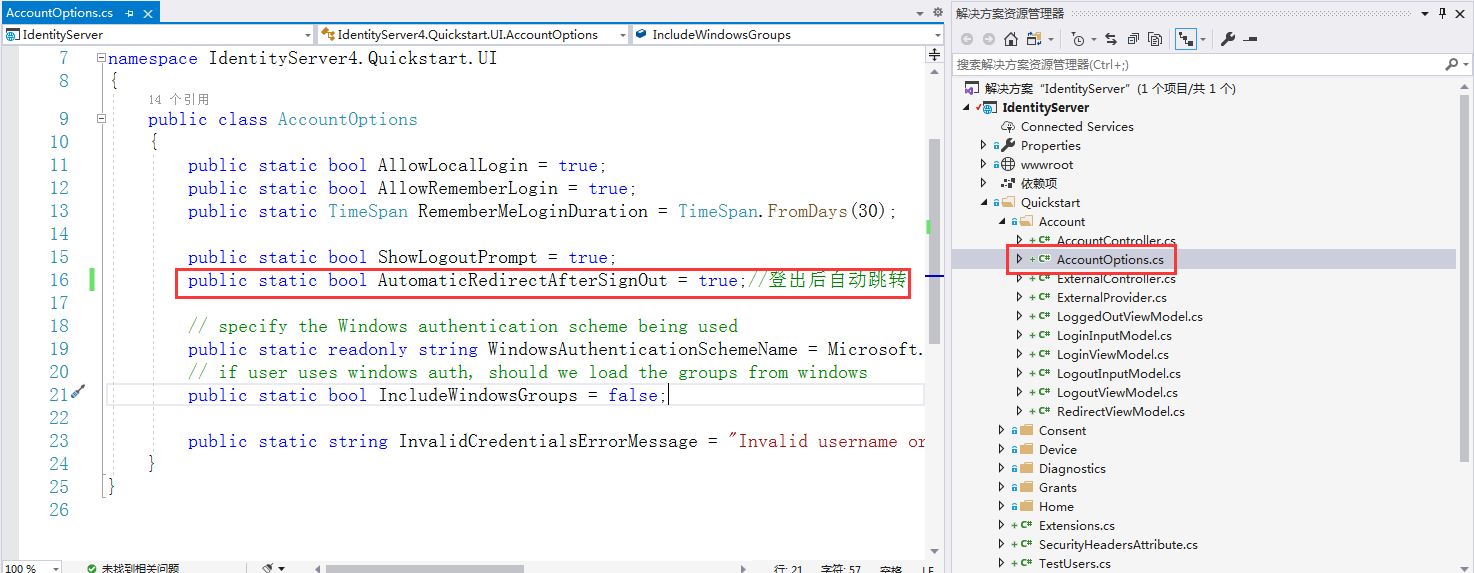
然后来解决上面不友好的问题,修改IdentityServer服务器,打开Quickstart/Account/AccountOptions.cs,将AutomaticRedirectAfterSignOut设置为true,即登出后自动跳转
修改完成后重启IdentityServer认证服务器,再重启MVC客户端即可解决。
7、为MVC客户端刷新Token
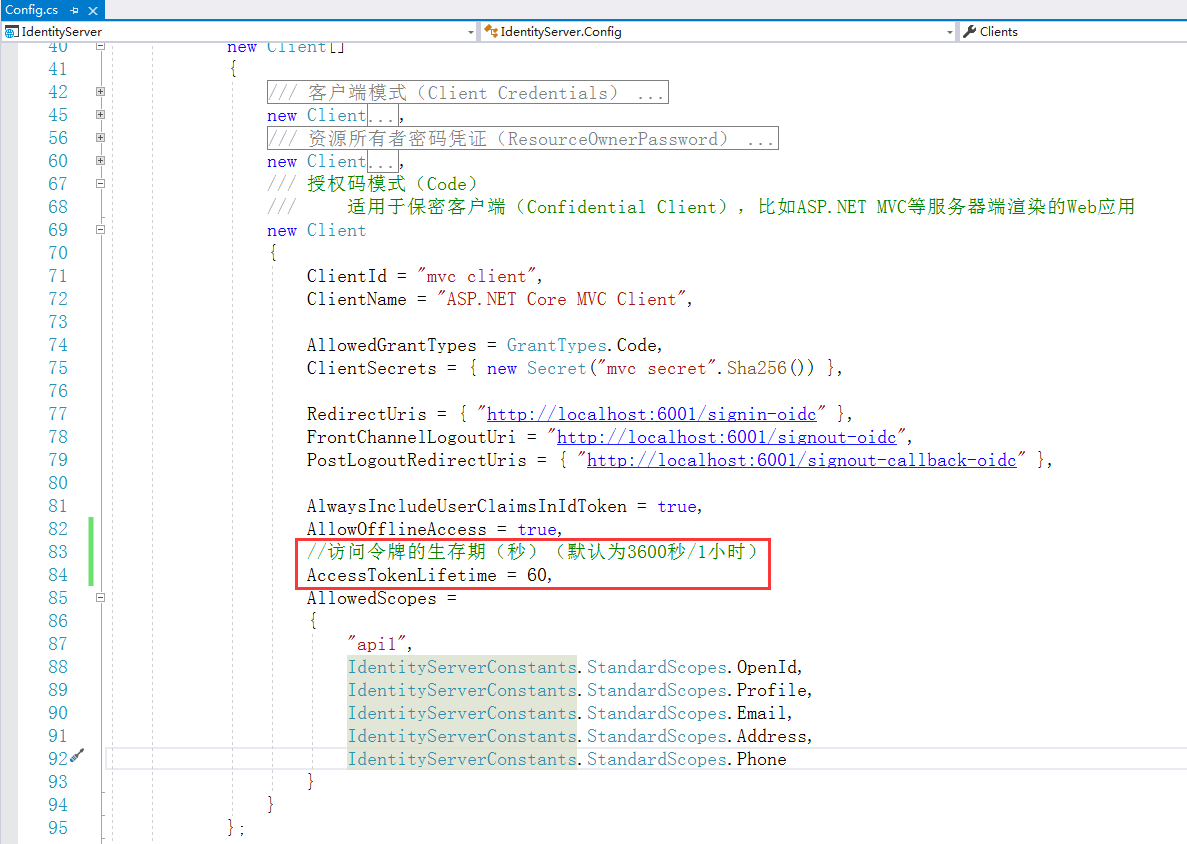
在IdentityServer认证服务器Config.cs中MVC客户端做下修改,加上访问令牌的过期时间(或者叫生存期)
在API项目WebApplication1的Startup.cs/ConfigureServices/AddJwtBearer的options中添加两个参数
因为Jwt验证token时间偏移默认为5分钟,会出现token过期了还能访问Api资源的问题,只有到了验证token的时间偏移,才会禁止访问Api
所以我们设置为1分钟偏移,并启用必须设置token的过期时间选项,以防止token过期了还能对Api进行访问
但是还是会存在一个时间差,比如token已经过期了,API验证token时间还没有到,这个没有什么办法,API可以把验证token的时间设置更短一些,但是也会消耗过多的资源,所以根据实际情况来设置
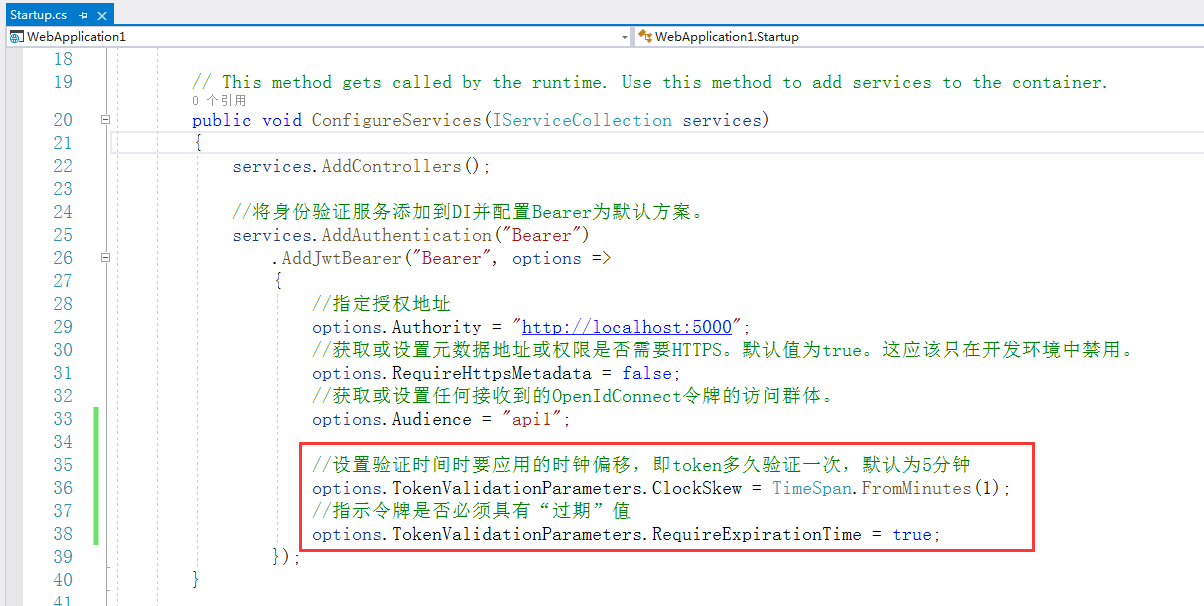
public void ConfigureServices(IServiceCollection services)

{

    services.AddControllers();

    //将身份验证服务添加到DI并配置Bearer为默认方案。

    services.AddAuthentication("Bearer")

        .AddJwtBearer("Bearer", options =>

        {

            //指定授权地址

            options.Authority = "http://localhost:5000";

            //获取或设置元数据地址或权限是否需要HTTPS。默认值为true。这应该只在开发环境中禁用。

            options.RequireHttpsMetadata = false;

            //获取或设置任何接收到的OpenIdConnect令牌的访问群体。

            options.Audience = "api1";

            //设置验证时间时要应用的时钟偏移,即token多久验证一次,默认为5分钟

            options.TokenValidationParameters.ClockSkew = TimeSpan.FromMinutes();

            //指示令牌是否必须具有“过期”值

            options.TokenValidationParameters.RequireExpirationTime = true;

        });

}
然后重新启动IdentityServer认证服务器、Api资源项目WebApplication1、MVC客户端,进入到MVC客户端首页后,等1分钟之后再刷新
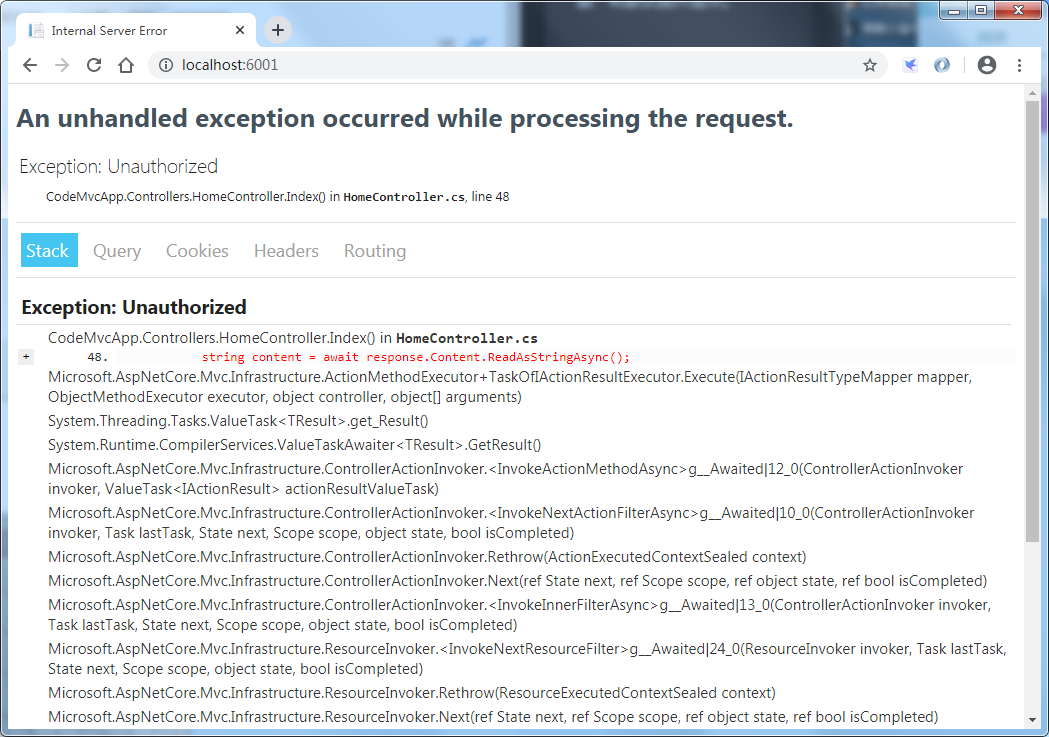
出现了错误,401 Unauthorized未授权,原因是access_token已过期
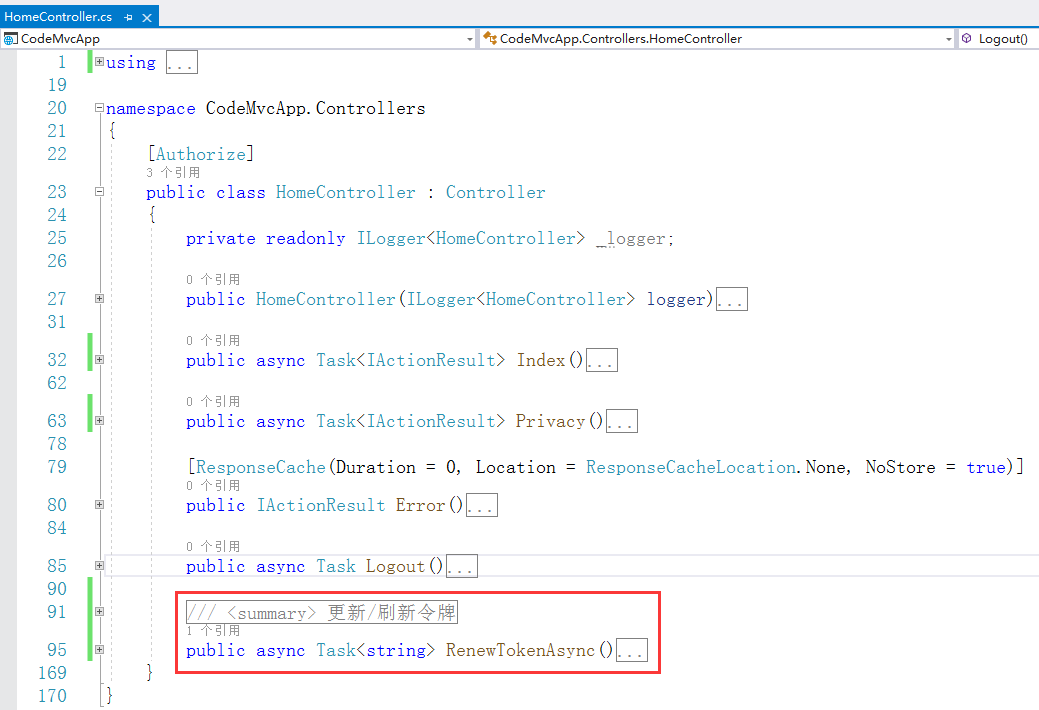
接下来实现刷新token,在HomeController定义一个方法RenewTokenAsync,用于刷新访问令牌
/// <summary>

/// 更新/刷新令牌

/// </summary>

/// <returns>访问令牌</returns>

public async Task<string> RenewTokenAsync()

{

    HttpClient client = new HttpClient();

    DiscoveryDocumentResponse disco = await client.GetDiscoveryDocumentAsync("http://localhost:5000/");

    if (disco.IsError)

    {

        throw new Exception(disco.Error);

    }

    //获取刷新令牌

    string refreshToken = await HttpContext.GetTokenAsync(OpenIdConnectParameterNames.RefreshToken);

    //根据刷新令牌重新获取访问令牌

    TokenResponse tokenResponse = await client.RequestRefreshTokenAsync(new RefreshTokenRequest

    {

        Address = disco.TokenEndpoint,

        ClientId = "mvc client",

        ClientSecret = "mvc secret",

        Scope = "api1 openid profile email phone address",

        GrantType = OpenIdConnectGrantTypes.RefreshToken,

        RefreshToken = refreshToken

    });

    if (tokenResponse.IsError)

    {

        throw new Exception(tokenResponse.Error);

    }

    else

    {

        //重新计算过期时间(当前时间+token的有效期秒)

        var expiresAt = DateTime.UtcNow + TimeSpan.FromSeconds(tokenResponse.ExpiresIn);

        //定义令牌集合,用于重新更新令牌

        var tokens = new[]

        {

            //重新设置身份令牌

            new AuthenticationToken

            {

                Name = OpenIdConnectParameterNames.IdToken,

                Value = tokenResponse.IdentityToken

            },

            //重新设置访问令牌

            new AuthenticationToken

            {

                Name = OpenIdConnectParameterNames.AccessToken,

                Value = tokenResponse.AccessToken

            },

            //重新设置刷新令牌

            new AuthenticationToken

            {

                Name = OpenIdConnectParameterNames.RefreshToken,

                Value = tokenResponse.RefreshToken

            },

            //重新设置过期时间

            new AuthenticationToken

            {

                Name = "expires_at",

                Value = expiresAt.ToString("o", CultureInfo.InvariantCulture)

            }

        };

        //获取身份认证的结果,包含当前的用户标识声明主体(Principal)+会话的其他状态值(Properties)

        var currentAuthenticateResult =

            await HttpContext.AuthenticateAsync(CookieAuthenticationDefaults.AuthenticationScheme);

        //将存储的token都重新更新一遍(将新的tokens存起来)

        currentAuthenticateResult.Properties.StoreTokens(tokens);

        //将当前身份认证结果(用户标识声明主体+会话的其他状态值)代入,重新执行登录动作

        await HttpContext.SignInAsync(CookieAuthenticationDefaults.AuthenticationScheme,

            currentAuthenticateResult.Principal,//身份验证的用户标识的声明主体

            currentAuthenticateResult.Properties//身份验证会话的其他状态值

        );

        return tokenResponse.AccessToken;

    }

}
在HomeController/Index方法中,增加判断条件,调用API资源不成功时,判断如果响应的结果状态码是401 Unauthorized未授权,则重新刷新令牌并重定向到当前Action,即Home/Index

重新运行MVC客户端,即可查验效果
当token过期,会重新获取access_token并更新存储的tokens,重定向到当前Action,即刷新,刷新时就重新调用了API资源,此时token是刷新后的token,就能正常的访问API资源了
Over, Thanks!!!
【参考资料】
微软MVP杨旭老师的IdentityServer4哔哩哔哩教学视频:Identity Server 4 原理和实战
ASP.NET Core3.1使用IdentityServer4中间件系列随笔(五):创建使用[Code-授权码]授权模式的客户端的更多相关文章
- ASP.NET Core3.1使用IdentityServer4中间件系列随笔(三):创建使用[ClientCredentials客户端凭证]授权模式的客户端
配套源码:https://gitee.com/jardeng/IdentitySolution 上一篇<ASP.NET Core3.1使用IdentityServer4中间件系列随笔(二):创建 ...
- ASP.NET Core3.1使用IdentityServer4中间件系列随笔(二):创建API项目,配置IdentityServer保护API资源
配套源码:https://gitee.com/jardeng/IdentitySolution 接上一篇<ASP.NET Core3.1使用IdentityServer4中间件系列随笔(一):搭 ...
- ASP.NET Core3.1使用IdentityServer4中间件系列随笔(四):创建使用[ResourceOwnerPassword-资源所有者密码凭证]授权模式的客户端
配套源码:https://gitee.com/jardeng/IdentitySolution 本篇将创建使用[ResourceOwnerPassword-资源所有者密码凭证]授权模式的客户端,来对受 ...
- ASP.NET Core3.1使用IdentityServer4中间件系列随笔(一):搭建认证服务器
配套源码:https://gitee.com/jardeng/IdentitySolution 1.创建ASP.NET Core Web应用程序,选择空模板. 去掉HTTPS 2.添加nuget包:I ...
- ABP入门系列之3——创建实体/Code First创建数据表
一.首先来看看ABP体系结构 领域层就是业务层,是一个项目的核心,所有业务规则都应该在领域层实现.实体(Entity): 实体代表业务领域的数据和操作,在实践中,通过用来映射成数据库表.仓储(Repo ...
- IdentityServer4系列 | 授权码模式
一.前言 在上一篇关于简化模式中,通过客户端以浏览器的形式请求IdentityServer服务获取访问令牌,从而请求获取受保护的资源,但由于token携带在url中,安全性方面不能保证.因此,我们可以 ...
- asp.net权限认证:OWIN实现OAuth 2.0 之授权码模式(Authorization Code)
asp.net权限认证系列 asp.net权限认证:Forms认证 asp.net权限认证:HTTP基本认证(http basic) asp.net权限认证:Windows认证 asp.net权限认证 ...
- 探索Asp net core3中的 项目文件、Program.cs和通用host(译)
引言 原文地址 在这篇博客中我将探索一些关于Asp.net core 3.0应用的基础功能--.csproj 项目文件和Program源文件.我将会描述他们从asp.net core 2.X在默认模版 ...
- 如何使用Serilog.AspNetCore记录ASP.NET Core3.0的MVC属性
这是Serilog系列的第三篇文章. 第1部分-使用Serilog RequestLogging减少日志详细程度 第2部分-使用Serilog记录所选的终结点属性 第3部分-使用Serilog.Asp ...
随机推荐
- PHP 实例 - AJAX 实时搜索-AJAX Live Search
PHP 实例 - AJAX 实时搜索 AJAX 可为用户提供更友好.交互性更强的搜索体验. AJAX Live Search 在下面的实例中,我们将演示一个实时的搜索,在您键入数据的同时即可得到搜索结 ...
- PHP ftp_size() 函数
定义和用法 ftp_size() 函数返回 FTP 服务器上指定文件的大小. 该函数以字节返回指定文件的大小,如果出错则返回 -1. 语法 ftp_size(ftp_connection,file) ...
- Android JNI之静态注册
这篇说静态注册,所谓静态注册,就是native的方法是直接通过方法名的规定格式和Java端的声明处代码对应起来的,其对应规则如下: JNIEXPORT <返回值> JNICALL Java ...
- Kaggle-pandas(5)
Data-types-and-missing-values 教程 Dtypes DataFrame或Series中列的数据类型称为dtype.您可以使用dtype属性来获取特定列的类型. 例如,我们可 ...
- Linux系统安装MySQL详细教程
首先进入MySQL官网下载rpm安装包 用yum install mysql80-community-release-el7-3.noarch.rpm 安装 yum repolist all|grep ...
- java循环语句for与无限循环
一 for循环 for循环语句是最常用的循环语句,一般用在循环次数已知的情况下. 格式: for(初始化表达式; 循环条件; 操作表达式){ 执行语句 ……… } 循环流程: for(① ; ② ; ...
- 2020-07-08:mysql只有一个表a,什么情况下会造成死锁,解决办法是什么?
福哥答案2020-07-08: 表锁是不会出现死锁的,但锁等待现象是有可能的.行锁是行级别的,有可能出现死锁.环形等待死锁和唯一键死锁 很常见. 避免死锁方法:1.减少事务操作的记录数.2.约定按相同 ...
- LeetCode 931. 下降路径最小和 详解
题目详情 给定一个方形整数数组 A,我们想要得到通过 A 的下降路径的最小和. 下降路径可以从第一行中的任何元素开始,并从每一行中选择一个元素.在下一行选择的元素和当前行所选元素最多相隔一列. 示例: ...
- Vscode+Picgo+github+Markdown Preview Enhanced实现Markdown一键上传图床以及导出pdf文件
目录 安装Vscode 安装及配置Picgo插件 安装Markdown Preview Enhance 安装Vscode 安装Vscode(不解释了) 安装及配置Picgo插件 在github中新建仓 ...
- CC协议是怎么一回事?
CC协议是怎样的? CC-BY-NC-SA (创作共用许可协议) "知识共享"(CC协议)简单介绍 如何使用CC协议? CC 协议使用 FAQ CC协议选择工具 本文章采用 CC ...