安装arbotix simulator仿真环境--9
原创博客:转载请表明出处:http://www.cnblogs.com/zxouxuewei/ 周学伟
安装之前:首先确保已经正常制作了ros工作空间并且安装了rbx1功能包:
cd ~/catkin_ws/src

git clone https://github.com/pirobot/rbx1.git

cd rbx1

git checkout indigo-devel

cd ~/catkin_ws

catkin_make

source ~/catkin_ws/devel/setup.bash

rospack profile
1.安装simulator
sudo apt-get install ros-indigo-arbotix-*
注意:一定要删除任何早期版本的arbotix依赖。
rospack profile
2. 为了确保一切工作,确保roscore运行,然后启动模拟turtlebot如下
roslaunch rbx1_bringup fake_turtlebot.launch

输出信息如下:

.. logging to /root/.ros/log/c0433730-e414-11e5-8d90-c48e8f5baa47/roslaunch-zxwubuntu-Aspire-V3-572G-.log

Checking log directory for disk usage. This may take awhile.

Press Ctrl-C to interrupt

Done checking log file disk usage. Usage is <1GB.

started roslaunch server http://zxwubuntu-Aspire-V3-572G:56323/

SUMMARY

========

CLEAR PARAMETERS

 * /arbotix/

PARAMETERS

 * /arbotix/baud:

 * /arbotix/controllers/base_controller/Kd:

 * /arbotix/controllers/base_controller/Ki:

 * /arbotix/controllers/base_controller/Ko:

 * /arbotix/controllers/base_controller/Kp:

 * /arbotix/controllers/base_controller/accel_limit: 1.0

 * /arbotix/controllers/base_controller/base_frame_id: base_footprint

 * /arbotix/controllers/base_controller/base_width: 0.26

 * /arbotix/controllers/base_controller/ticks_meter:

 * /arbotix/controllers/base_controller/type: diff_controller

 * /arbotix/port: /dev/ttyUSB0

 * /arbotix/rate:

 * /arbotix/read_rate:

 * /arbotix/sim: True

 * /arbotix/sync_read: True

 * /arbotix/sync_write: True

 * /arbotix/write_rate:

 * /robot_description: <?xml version="1....

 * /robot_state_publisher/publish_frequency: 20.0

 * /rosdistro: indigo

 * /rosversion: 1.11.

 * /use_sim_time: False

NODES

  /

    arbotix (arbotix_python/arbotix_driver)

    robot_state_publisher (robot_state_publisher/state_publisher)

ROS_MASTER_URI=http://localhost:11311

core service [/rosout] found

process[arbotix-]: started with pid []

process[robot_state_publisher-]: started with pid []
3.使用一个模型的pi-机器人,运行命令:
roslaunch rbx1_bringup fake_pi_robot.launch
输出信息如下:
PARAMETERS

 * /arbotix/baud:

 * /arbotix/controllers/base_controller/Kd:

 * /arbotix/controllers/base_controller/Ki:

 * /arbotix/controllers/base_controller/Ko:

 * /arbotix/controllers/base_controller/Kp:

 * /arbotix/controllers/base_controller/accel_limit: 1.0

 * /arbotix/controllers/base_controller/base_frame_id: base_link

 * /arbotix/controllers/base_controller/base_width: 0.26

 * /arbotix/controllers/base_controller/ticks_meter:

 * /arbotix/controllers/base_controller/type: diff_controller

 * /arbotix/joints/arm_elbow_flex_joint/id:

 * /arbotix/joints/arm_elbow_flex_joint/invert: True

 * /arbotix/joints/arm_elbow_flex_joint/max_speed:

 * /arbotix/joints/arm_elbow_flex_joint/neutral:

 * /arbotix/joints/arm_shoulder_lift_joint/id:

 * /arbotix/joints/arm_shoulder_lift_joint/invert: True

 * /arbotix/joints/arm_shoulder_lift_joint/max_speed:

 * /arbotix/joints/arm_shoulder_lift_joint/neutral:

 * /arbotix/joints/arm_shoulder_pan_joint/id:

 * /arbotix/joints/arm_shoulder_pan_joint/invert: False

 * /arbotix/joints/arm_shoulder_pan_joint/max_angle:

 * /arbotix/joints/arm_shoulder_pan_joint/max_speed:

 * /arbotix/joints/arm_shoulder_pan_joint/min_angle: -

 * /arbotix/joints/arm_shoulder_pan_joint/neutral:

 * /arbotix/joints/arm_wrist_flex_joint/id:

 * /arbotix/joints/arm_wrist_flex_joint/invert: True

 * /arbotix/joints/arm_wrist_flex_joint/max_angle:

 * /arbotix/joints/arm_wrist_flex_joint/max_speed:

 * /arbotix/joints/arm_wrist_flex_joint/min_angle: -

 * /arbotix/joints/arm_wrist_flex_joint/neutral:

 * /arbotix/joints/gripper_joint/id:

 * /arbotix/joints/gripper_joint/invert: False

 * /arbotix/joints/gripper_joint/max_angle:

 * /arbotix/joints/gripper_joint/max_speed:

 * /arbotix/joints/gripper_joint/min_angle: -

 * /arbotix/joints/gripper_joint/neutral:

 * /arbotix/joints/head_pan_joint/id:

 * /arbotix/joints/head_pan_joint/invert: False

 * /arbotix/joints/head_pan_joint/max_angle:

 * /arbotix/joints/head_pan_joint/max_speed:

 * /arbotix/joints/head_pan_joint/min_angle: -

 * /arbotix/joints/head_pan_joint/neutral:

 * /arbotix/joints/head_tilt_joint/id:

 * /arbotix/joints/head_tilt_joint/invert: False

 * /arbotix/joints/head_tilt_joint/max_angle:

 * /arbotix/joints/head_tilt_joint/max_speed:

 * /arbotix/joints/head_tilt_joint/min_angle: -

 * /arbotix/joints/head_tilt_joint/neutral:

 * /arbotix/port: /dev/ttyUSB0

 * /arbotix/rate:

 * /arbotix/read_rate:

 * /arbotix/sim: True

 * /arbotix/sync_read: True

 * /arbotix/sync_write: True

 * /arbotix/write_rate:

 * /robot_description: <?xml version="1....

 * /robot_state_publisher/publish_frequency: 20.0

 * /rosdistro: indigo

 * /rosversion: 1.11.

 * /use_sim_time: False
4.接下来,把rviz所以我们可以观察模拟机器人在行动:
rosrun rviz rviz -d `rospack find rbx1_nav`/sim.rviz
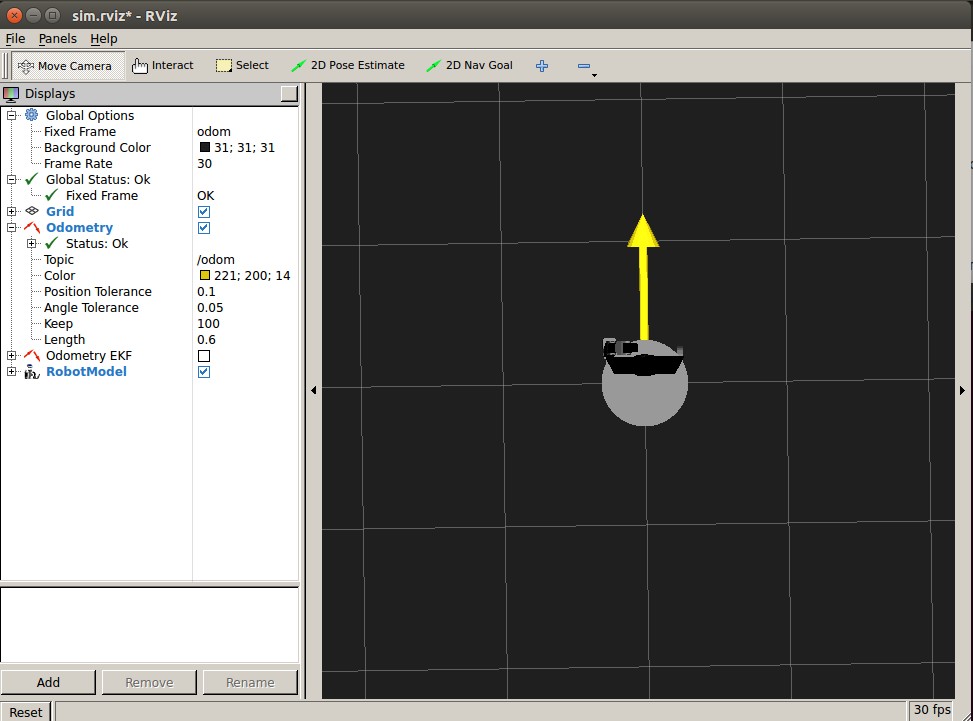
5.发布消息,使机器人移动。要测试模拟,打开另一个终端窗口,并运行以下要使模拟机器人在逆时针方向移动:
rostopic pub -r /cmd_vel geometry_msgs/Twist '{linear: {x: 0.2, y: , z: }, angular: {x: , y: , z: 0.5}}'
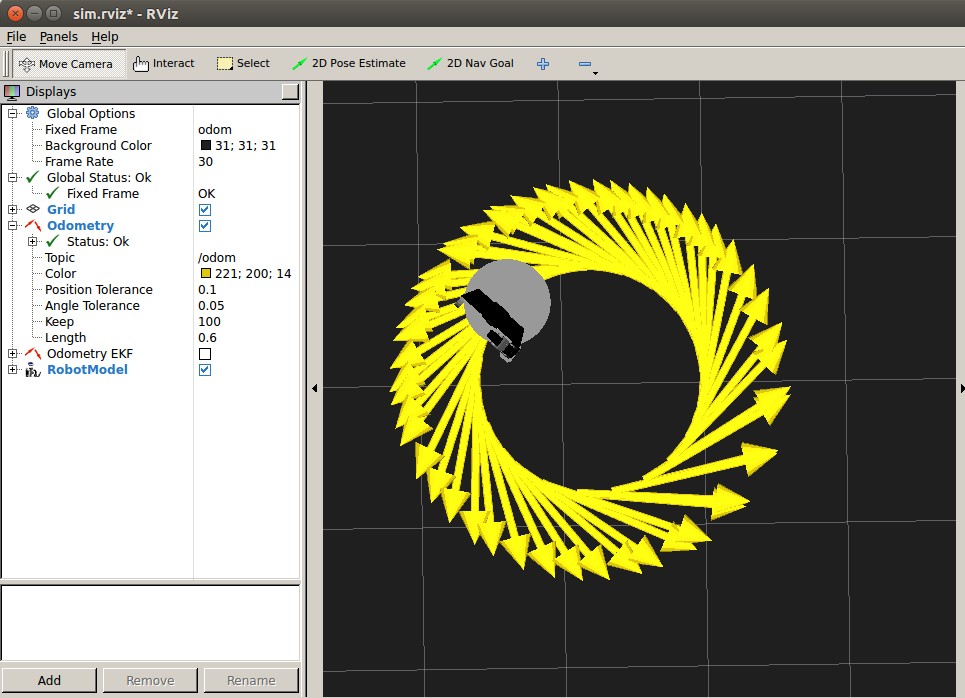
6.需要停止机器人 ,在同一个终端窗口式Ctrl-C,或者发布空Twist message:
rostopic pub - /cmd_vel geometry_msgs/Twist '{}'
安装arbotix simulator仿真环境--9的更多相关文章
- 给ros安装arbotix simulator仿真环境
首先下载程序包.编译.安装. cd ~/catkin_ws/src git clone https://github.com/pirobot/rbx1.git cd rbx1 git checkout ...
- 安装arbotix simulator仿真环境()
先安装rbx1功能包: cd ~/catkin_ws/src git clone https://github.com/pirobot/rbx1.git cd rbx1 git checkout in ...
- 基于 Mathematica 的机器人仿真环境(机械臂篇)[转]
完美的教程,没有之一,收藏学习. 目的 本文手把手教你在 Mathematica 软件中搭建机器人的仿真环境,具体包括以下内容(所使用的版本是 Mathematica 11.1,更早的版本可能缺少某些 ...
- 基于S7-PLCSIM Advanced搭建S7通信仿真环境
写在前面: 之前有专门讲过一期如何搭建西门子PLC的S7通信仿真环境,感兴趣的可以点击查看:戳↓ 1.基于TIA搭建西门子PLC仿真环境及通信方案-联合出品 2.手把手教你搭建西门子PLC仿真环境 那 ...
- 【新阁教育】穷学上位机系列——搭建STEP7仿真环境
经常有学员问我,学习上位机要不要买PLC硬件? 我一般的回答是:富则自行购买,穷则搭建仿真. PLC硬件,对于学习上位机来说,是锦上添花的事,经济条件允许,有则更好,条件不允许,我们也可以通过搭建仿真 ...
- 【探索之路】机器人篇(5)-Gazebo物理仿真环境搭建_让机器人运动起来
如果完成了前两步,那么其实我们已经可以去连接我们的现实中的机器人了. 但是,做机器人所需要的材料还没有到,所以我们这里先在电脑平台上仿真一下.这里我们用到的就算gazebo物理仿真环境,他能很好的和R ...
- 【转】linux和windows下安装python集成开发环境及其python包
本系列分为两篇: 1.[转]windows和linux中搭建python集成开发环境IDE 2.[转]linux和windows下安装python集成开发环境及其python包 3.windows和l ...
- 关于JDK 安装,以及Java环境的设置
关于JDK 安装,以及Java环境的设置 1.下载JDK1.6,选择对应的安装路径 2.配置相应的Java 环境变量 A.属性名称:JAVA_HOME 属性值:C:\Program Files\Jav ...
- Greenplum 数据库安装部署(生产环境)
Greenplum 数据库安装部署(生产环境) 硬件配置: 16 台 IBM X3650, 节点配置:CPU 2 * 8core,内存 128GB,硬盘 16 * 900GB,万兆网卡. 万兆交换机. ...
随机推荐
- ECMAScript 6新特性(1)数组篇
数组现有的方法: .concat():连接两个或更多的数组,并返回结果. .join():把数组的所有元素放入一个字符串.元素通过指定的分隔符进行分隔. .pop():删除并返回数组的最后一个元素 . ...
- C/C++遍历Windows文件夹下的所有文件
因为文件夹中往往包含文件和文件夹.想要遍历所有的文件,必须遍历文件夹中所有的文件夹.很显然,这个描述满足递归的两个要素:(1)问题的规模在不断的缩小,且新问题的模式与旧问题相同.很显然文件夹中含有子文 ...
- Python开发入门与实战2-第一个Django项目
2.第一个Django项目 上一章节我们完成了python,django和数据库等运行环境的安装,现在我们来创建第一个django project吧,迈出使用django开发应用的第一步. 2.1.创 ...
- YAML 语言语法
发现很多开源的软件的配置文件都使用了这种语言来描述,据说是简单强大,很不巧,ansible也使用了这种语言来描述配置,学习ansible之前,先学习一下YAML语言. YAML基本语法规则如下: 大小 ...
- jQuery 操作CSS
<!DOCTYPE html> <html> <head> <meta charset="UTF-8"> <title> ...
- NSString的几种常用方法
NSString的几种常用方法 要把 “2011-11-29” 改写成 “2011/11/29”一开始想用ios的时间格式,后来用NSString的方法搞定. [string stringByRe ...
- 去掉NavigationBar底部的黑线
UINavigationBar *navigationBar = self.navigationController.navigationBar; [navigationBar setBackgr ...
- JS原生回到顶部效果
// 回到顶部 onload = function () { var oBtnTop = document.getElementById('toTop'); var timer = null; oBt ...
- EditTest输入类型设置
1,当输入为文字性密码时,输入前有提示效果,输入后有遮蔽效果 android:hint="@string/hint_etPassword" android:inputType=&q ...
- 2016 - 1 - 19NSOpertation的依赖关系和监听
一:NSOperation的依赖: 1.概念:队列中的A操作需要等其他B操作或者某些操作执行完毕后才执行,就叫做A依赖与B或者A依赖于其他某些操作. 2.注意点:不能循环依赖,否则卡死.如: [op2 ...