React Native(十三)——ios键盘挡住textInput
渐入佳境
用React Native重构的项目也快接近尾声,剩下的就是适配ios的功能了。慢慢地也从中琢磨出了一点门道,于是就遇见了键盘遮挡textInput问题斑斑;
正常页面:
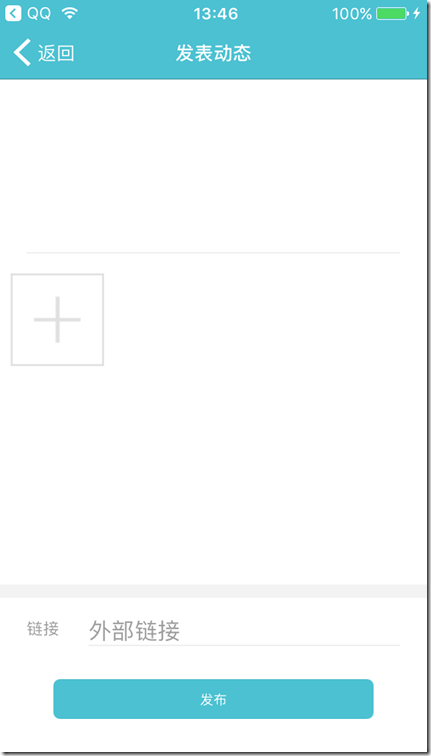
android点击下面的“外部链接”,效果:
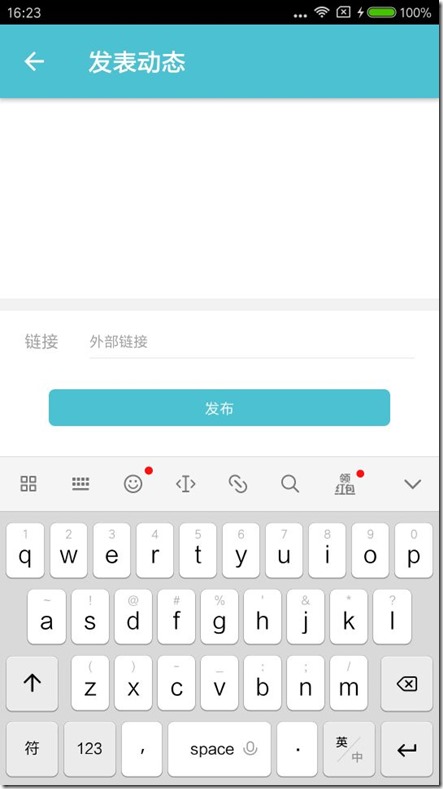
而同样代码在ios中(键盘遮挡住了需要输入链接地址的地方……):
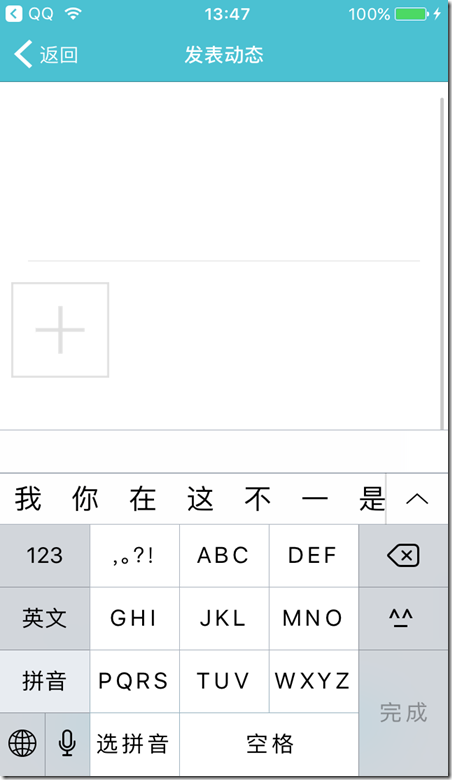
区别在这
页面简单介绍(部分代码):
...

return (

                <ScrollView style={{ backgroundColor: skin.tint }}>

                    <View style={publishStyle.container}>

                        <View style={publishStyle.contentOuter}>

                            <TextInput

                                style={publishStyle.contentText}

                                clearButtonMode="while-editing"

                                returnKeyType="done"

                                ref="input"

                                onBlur={Keyboard.dismiss}

                                underlineColorAndroid="transparent"

                                multiline={true}

                                onChangeText={this._contentChange}

                                maxLength={140}

                                enablesReturnKeyAutomatically={true}

                                blurOnSubmit={true}

                                defaultValue={this.state.content}

                                onSubmitEditing={this._onSubmitEditing}

                            />

                        </View>

                        <View

                            style={{

                                marginTop: 10,

                                height: 240

                            }}

                        >

                            {this.createImageItem()}

                        </View>

                        <View style={{ height: 10, backgroundColor: '#F2F2F2' }} />

                        <View style={publishStyle.urlOuter}>

                            <Text

                                style={{

                                    color: skin.subtitle,

                                    flex: 1

                                }}

                            >

                                链接

                            </Text>

                            <TextInput

                                style={publishStyle.urlText}

                                clearButtonMode="while-editing"

                                returnKeyType="done"

                                underlineColorAndroid="transparent"

                                placeholderTextColor={skin.subtitle}

                                multiline={true}

                                placeholder="外部链接"

                                onChangeText={this._urlChange}

                                onBlur={Keyboard.dismiss}

                                defaultValue={this.state.url}

                                enablesReturnKeyAutomatically={true}

                                blurOnSubmit={true}

                                onSubmitEditing={this._onSubmitEditing}

                            />

                        </View>

                        <TouchableHighlight

                            onPress={this.clickPublish}

                            activeOpacity={1}

                            underlayColor={skin.tint}

                            style={publishStyle.buttonOuter}

                            disabled={this.state.canClick}

                        >

                            <View style={publishStyle.buttonText}>

                                <Text style={{ color: skin.tint, fontSize: 12 }}>发布</Text>

                            </View>

                        </TouchableHighlight>

                    </View>

                </ScrollView>

            );
原以为ScrollView在android以及ios中均可以显示右边的滚动条,亲身实践后意外的才发现只有android正常,ios并没有滚动条显示,最终解决的办法就是在ios的时候在ScrollView外套一层KeyboardAvoidingView,(android ios 分别做处理)
即:
…
render() {

        if (Platform.OS === 'ios') {

            return (

                <KeyboardAvoidingView behavior="padding" style={{ backgroundColor: skin.tint, flex: 1 }}>

                    <ScrollView

                        style={{ backgroundColor: skin.tint }}

                        ref={scrollView => {

                            _scrollView = scrollView;

                        }}

                    >

                        <View style={publishStyle.container}>

                            <View style={publishStyle.contentOuter}>

                                <TextInput

                                    style={publishStyle.contentText}

                                    clearButtonMode="while-editing"

                                    returnKeyType="done"

                                    ref="input"

                                    onBlur={Keyboard.dismiss}

                                    underlineColorAndroid="transparent"

                                    multiline={true}

                                    onChangeText={this._contentChange}

                                    maxLength={140}

                                    enablesReturnKeyAutomatically={true}

                                    blurOnSubmit={true}

                                    defaultValue={this.state.content}

                                    onSubmitEditing={this._onSubmitEditing}

                                />

                            </View>

                            <View

                                style={{

                                    marginTop: 10,

                                    height: 250,

                                    marginBottom: 10

                                }}

                            >

                                {this.createImageItem()}

                            </View>

                            <View style={{ height: 10, backgroundColor: '#F2F2F2' }} />

                            <View style={publishStyle.urlOuter}>

                                <Text

                                    style={{

                                        color: skin.subtitle,

                                        flex: 1

                                    }}

                                >

                                    链接

                                </Text>

                                <TextInput

                                    style={publishStyle.urlText}

                                    clearButtonMode="while-editing"

                                    returnKeyType="done"

                                    underlineColorAndroid="transparent"

                                    placeholderTextColor={skin.subtitle}

                                    multiline={true}

                                    placeholder="外部链接"

                                    onChangeText={this._urlChange}

                                    onBlur={Keyboard.dismiss}

                                    defaultValue={this.state.url}

                                    enablesReturnKeyAutomatically={true}

                                    blurOnSubmit={true}

                                    onSubmitEditing={this._onSubmitEditing}

                                    onFocus={this._urlOnFocus}

                                />

                            </View>

                            <TouchableHighlight

                                onPress={this.clickPublish}

                                activeOpacity={1}

                                underlayColor={skin.tint}

                                style={publishStyle.buttonOuter}

                                disabled={this.state.canClick}

                            >

                                <View style={publishStyle.buttonText}>

                                    <Text style={{ color: skin.tint, fontSize: 16 }}>发布</Text>

                                </View>

                            </TouchableHighlight>

                            {this.state.urlHasFocus ? <View style={{ height: 60 }} /> : null}

                        </View>

                    </ScrollView>

                </KeyboardAvoidingView>

            );

        } else {

            return (

                <ScrollView style={{ backgroundColor: skin.tint }}>

                    <View style={publishStyle.container}>

                        <View style={publishStyle.contentOuter}>

                            <TextInput

                                style={publishStyle.contentText}

                                clearButtonMode="while-editing"

                                returnKeyType="done"

                                ref="input"

                                onBlur={Keyboard.dismiss}

                                underlineColorAndroid="transparent"

                                multiline={true}

                                onChangeText={this._contentChange}

                                maxLength={140}

                                enablesReturnKeyAutomatically={true}

                                blurOnSubmit={true}

                                defaultValue={this.state.content}

                                onSubmitEditing={this._onSubmitEditing}

                            />

                        </View>

                        <View

                            style={{

                                marginTop: 10,

                                height: 250,

                                marginBottom: 10

                            }}

                        >

                            {this.createImageItem()}

                        </View>

                        <View style={{ height: 10, backgroundColor: '#F2F2F2' }} />

                        <View style={publishStyle.urlOuter}>

                            <Text

                                style={{

                                    color: skin.subtitle,

                                    flex: 1

                                }}

                            >

                                链接

                            </Text>

                            <TextInput

                                style={publishStyle.urlText}

                                clearButtonMode="while-editing"

                                returnKeyType="done"

                                underlineColorAndroid="transparent"

                                placeholderTextColor={skin.subtitle}

                                multiline={true}

                                placeholder="外部链接"

                                onChangeText={this._urlChange}

                                onBlur={Keyboard.dismiss}

                                defaultValue={this.state.url}

                                enablesReturnKeyAutomatically={true}

                                blurOnSubmit={true}

                                onSubmitEditing={this._onSubmitEditing}

                            />

                        </View>

                        <TouchableHighlight

                            onPress={this.clickPublish}

                            activeOpacity={1}

                            underlayColor={skin.tint}

                            style={publishStyle.buttonOuter}

                            disabled={this.state.canClick}

                        >

                            <View style={publishStyle.buttonText}>

                                <Text style={{ color: skin.tint, fontSize: 16 }}>发布</Text>

                            </View>

                        </TouchableHighlight>

                    </View>

                </ScrollView>

            );

        }

    }
这样就解决了android 以及ios中键盘被挡住事件的问题。
React Native(十三)——ios键盘挡住textInput的更多相关文章
- React Native & Android & iOS & APK
React Native & Android & iOS & APK https://play.google.com/apps/publish/signup/ $ 25 bui ...
- React Native & Android & iOS
React Native & Android & iOS React Native & Android & iOS https://facebook.github.io ...
- react native 获取 软键盘高度 和 新增软键盘的组件
import React, { Component } from 'react'; import { AppRegistry, StyleSheet, Text, View, Keyboard, Te ...
- react native 之 获取键盘高度
多说不如多撸: /** * Created by shaotingzhou on 2017/2/23. *//** * Sample React Native App * https://github ...
- 如何让你的 React Native 应用在键盘弹出时优雅地响应
原文地址:How to make your React Native app respond gracefully when the keyboard pops up 原文作者:Spencer Car ...
- [React Native]高度自增长的TextInput组件
之前我们学习了从零学React Native之11 TextInput了解了TextInput相关的属性. 在开发中,我们有时候有这样的需求, 希望输入区域的高度随着输入内容的长度而增长, 如下: 这 ...
- React Native视频播放(iOS)
网站链接:http://www.ncloud.hk/%E6%8A%80%E6%9C%AF%E5%88%86%E4%BA%AB/learn-react-native-video/ React Nativ ...
- [React Native] Basic iOS Routing -- NavigatorIOS
Inside the app component, we use NavigatiorIOS to render the compoent: class githubnotetaker extends ...
- iOS 键盘挡住UITextField
iOS经常使用的两个功能:点击屏幕和return隐藏虚拟键盘和解决虚拟键盘挡住UITextField的方法 iOS上面对键盘的处理非常不人性化,所以这些功能都须要自己来实现, 首先是点击return ...
随机推荐
- C语言实现Linux下删除非空目录
#include <sys/stat.h> #include <dirent.h> #include <fcntl.h> /** * 递归删除目录(删除该目录以及该 ...
- 【WPF】WPF DataGrid List数据源 双向绑定通知机制之ObservableCollection使用以及MultiBinding 的应用
以下代码实现了DataGrid的简单绑定List数据源 重点要提一下的是,绑定List数据源,但是不能直接用List.比如下面的代码,使用List<GridItem>只能实现数据修改的绑定 ...
- static为什么一般与final一起用?
static和final的意义是不同的,static修饰的时候代表对象是静态的,而final修饰的时候代表对象只能赋值一次,他们连用的时候是因为定义的那个对象既要它是静态的,也要求它的值不能再被修改. ...
- asp 读文件 比较ip
<% Dim UserIPAddress Set UserIPAddress = Request.ServerVariables("HTTP_X_FORWARDED_FOR" ...
- Objective-C MacOS以管理员权限执行程序
在MacOS下非常多操作是须要管理员权限的, 比方我们执行chmod.在命令行下能够使用sudo chmod来申请以管理员权限执行.可是使用XCode写的程序是不能使用sudo的. 须要自己写代码来申 ...
- [SQL Server] 复制数据库任务
假设你要生产环境下的数据做相应的测试,比如修改及测试存储过程.更改和优化索引等.但是你用户在连接数据库的情况下,你又不能断开数据库的连接.如何取得数据库的副本呢? 一. 利用数据库任务中的复制数据库 ...
- oracle 杀掉当前用户的进程
select ' alter system kill session '''|| sid ||','||serial# || ''';' from v$SESSION where username=' ...
- Intellij修改模板代码
比如class的注释之类的,直接地址为 其中Include才是真正的内容
- glsl 全屏 uv 旋转
原图 只是把fbo后的uv扭个角度就行了
- 管道符和作业控制 shell变量 环境变量配置文件
8.6 管道符和作业控制 8.7/8.8 shell变量 8.9 环境变量配置文件 管道符和作业控制 管道符:表示把一个文件的输出内容传送到后面的命令 grep 用来过滤指定关键词的命令 “|” 为 ...