Hue集成Hadoop和Hive
一、环境准备
1、下载Hue:https://dl.dropboxusercontent.com/u/730827/hue/releases/3.12.0/hue-3.12.0.tgz
2、安装依赖
yum groupinstall -y "Development Tools" "Development Libraries"

yum install -y apache-maven ant asciidoc cyrus-sasl-devel cyrus-sasl-gssapi gcc gcc-c++ krb5-devel libxml2-devel libxslt-devel make mysql mysql-devel openldap-devel python-devel sqlite-devel gmp-devel libffi-devel
二、MySQL配置
1、    为root用户设置密码;

2、    配置远程登录

3、    创建hue数据库

4、    flush hosts

5、    flush privileges
三、解压、编译并安装
tar -zxvf hue-3.12.0.tgz -C /opt

cd /opt/ hue-3.12.0

make apps
四、集成环境配置
1、配置HDFS
vim /opt/hadoop-2.7.3/etc/hadoop/hdfs-site.xml
<property>

     <name>dfs.webhdfs.enabled</name>

     <value>true</value>

</property>

<property>

     <name>dfs.permissions.enabled</name>

     <value>false</value>

</property>
2、配置core-site.xml
vim /opt/hadoop-2.7.3/etc/hadoop/core-site.xml
<property>

     <name>hadoop.proxyuser.hue.hosts</name>

      <value>*</value>

</property>

<property>

      <name>hadoop.proxyuser.hue.groups</name>

      <value>*</value>

</property>

<property>

       <name>hadoop.proxyuser.root.hosts</name>

       <value>*</value>
 </property>

  <property>

       <name>hadoop.proxyuser.root.groups</name>

        <value>*</value>

 </property>
3、配置yarn-site.xml
vim /opt/hadoop-2.7.3/etc/hadoop/yarn-site.xml
<!--打开HDFS上日志记录功能-->

<property>

    <name>yarn.log-aggregation-enable</name>

    <value>true</value>

</property>

<!--在HDFS上聚合的日志最长保留多少秒。3天-->

<property>

     <name>yarn.log-aggregation.retain-seconds</name>

     <value>259200</value>

</property>
4、配置httpfs-site.xml
vim /opt/hadoop-2.7.3/etc/hadoop/httpfs-site.xml
<property>

    <name>httpfs.proxyuser.hue.hosts</name>

    <value>*</value>

</property>

<property>

    <name>httpfs.proxyuser.hue.groups</name>

    <value>*</value>

</property>
5、配置文件同步
将以上配置文件同步到其他Hadoop主机
添加hue用户及用户组
sudo useradd hue

sudo chmod -R 755 /opt/hue-3.12.0/

sudo chown -R hue:hue /opt/hue-3.12.0/
五、Hue的配置
vim /opt/hue-3.8.1/desktop/conf/hue.ini
1、配置HDFS超级用户
# This should be the hadoop cluster admin
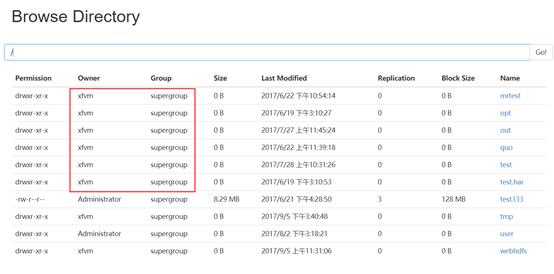
default_hdfs_superuser=xfvm
超级用户参见HDFS WEBUI
2、配置desktop
[desktop]

  # Set this to a random string, the longer the better.

  # This is used for secure hashing in the session store.

  secret_key=jFE93j;2[290-eiw.KEiwN2s3['d;/.q[eIW^y#e=+Iei*@Mn<qW5o

  # Webserver listens on this address and port

  http_host=xfvm04

  http_port=8888

  # Time zone name

  time_zone=Asia/Shanghai
3、配置HDFS
 [[hdfs_clusters]]

    # HA support by using HttpFs

    [[[default]]]

      # Enter the filesystem uri

      fs_defaultfs=hdfs://xfvm01:8020

      # NameNode logical name.

      ## logical_name=

      # Use WebHdfs/HttpFs as the communication mechanism.

      # Domain should be the NameNode or HttpFs host.

      # Default port is 14000 for HttpFs.

      webhdfs_url=http://xfvm01:50070/webhdfs/v1
4、配置YARN
   [[[default]]]

      # Enter the host on which you are running the ResourceManager

      resourcemanager_host=xfvm01

      # The port where the ResourceManager IPC listens on

      resourcemanager_port=8132

      #参考yarn-site.xml中的yarn.resourcemanager.address.rm1

      # Whether to submit jobs to this cluster

      submit_to=True

      # Resource Manager logical name (required for HA)

      ## logical_name=

      # Change this if your YARN cluster is Kerberos-secured

      ## security_enabled=false

      # URL of the ResourceManager API

      resourcemanager_api_url=http://xfvm01:8188

#参考yarn-site.xml中的yarn.resourcemanager.webapp.address.rm1

      # URL of the ProxyServer API

      proxy_api_url=http://xfvm01:8130

      #参考yarn-site.xml中的yarn.resourcemanager.scheduler.address.rm1

      #端口固定:8088

      # URL of the HistoryServer API

      #参考mapred-site.xml中的mapreduce.jobhistory.webapp.address

      history_server_api_url=http://xfvm03:19888
5、配置HIVE
[beeswax]

  # Host where HiveServer2 is running.

  # If Kerberos security is enabled, use fully-qualified domain name (FQDN).

  hive_server_host=xfvm04

  # Port where HiveServer2 Thrift server runs on.

  hive_server_port=10000
6、配置zookeeper
[zookeeper]

  [[clusters]]

    [[[default]]]

      # Zookeeper ensemble. Comma separated list of Host/Port.

      # e.g. localhost:2181,localhost:2182,localhost:2183

      host_ports=xfvm02:2181,xfvm03:2181,xfvm04:2181
7、配置MySQL
 # mysql, oracle, or postgresql configuration.

    ## [[[mysql]]]

      # Name to show in the UI.

      nice_name="My SQL DB"

      # For MySQL and PostgreSQL, name is the name of the database.

      # For Oracle, Name is instance of the Oracle server. For express edition

      # this is 'xe' by default.

      name=mysqldb

      # Database backend to use. This can be:

      # 1. mysql

      # 2. postgresql

      # 3. oracle

      engine=mysql

      # IP or hostname of the database to connect to.

      host=xfvm04

      # Port the database server is listening to. Defaults are:

      # 1. MySQL: 3306

      # 2. PostgreSQL: 5432

      # 3. Oracle Express Edition: 1521

      port=3306

      # Username to authenticate with when connecting to the database.

      user=root

      # Password matching the username to authenticate with when

      # connecting to the database.

      password=123456
8、配置禁用组件(还未安装的组件)
# Comma separated list of apps to not load at server startup.

  # e.g.: pig,zookeeper

  app_blacklist=pig,hbase,spark,impala,oozie
六、Hive环境变量的配置(hiveserver2,使用Mysql作为独立的元数据库)
1、编辑hive-site.xml
<property>

    <name>hive.metastore.uris</name>

    <value>thrift://192.168.10.24:9083</value>

    <description>Thrift URI for the remote metastore. Used by metastore client to connect to remote metastore.</description>

  </property>

  <property>

    <name>hive.server2.thrift.bind.host</name>

    <value>192.168.10.24</value>

    <description>Bind host on which to run the HiveServer2 Thrift service.</description>

  </property>
七、MySQL初始化
进入hue安装目录的/bin目录
./hue syncdb

./hue migrate
八、启动顺序
1、启动Hive metastore
$ bin/hive --service metastore &
2、启动hiveserver2
$ bin/hive --service hiveserver2 &
3、启动Hue
$bin/supervisor
4、浏览器:http://xfvm04:8888,输入用户名和密码即可登录
Hue集成Hadoop和Hive的更多相关文章
- cdh版本的hue安装配置部署以及集成hadoop hbase hive mysql等权威指南
hue下载地址:https://github.com/cloudera/hue hue学习文档地址:http://archive.cloudera.com/cdh5/cdh/5/hue-3.7.0-c ...
- 安装hue及hadoop和hive整合
环境: centos7 jdk1.8.0_111 Hadoop 2.7.3 Hive1.2.2 hue-3.10.0 Hue安装: 1.下载hue-3.10.0.tgz: https://dl.dro ...
- [转]云计算之hadoop、hive、hue、oozie、sqoop、hbase、zookeeper环境搭建及配置文件
云计算之hadoop.hive.hue.oozie.sqoop.hbase.zookeeper环境搭建及配置文件已经托管到githubhttps://github.com/sxyx2008/clou ...
- 【Hadoop离线基础总结】Hue与Hadoop集成
目录 1.更改所有hadoop节点的core-site.xml配置 2.更改所有hadoop节点的hdfs-site.xml 3.重启hadoop集群 4.停止hue的服务,并继续配置hue.ini ...
- hue集成hive访问报database is locked
这个问题这应该是hue默认的SQLite数据库出现错误,你可以使用mysql postgresql等来替换 hue默认使用sqlite作为元数据库,不推荐在生产环境中使用.会经常出现database ...
- 高可用Hadoop平台-Hue In Hadoop
1.概述 前面一篇博客<高可用Hadoop平台-Ganglia安装部署>,为大家介绍了Ganglia在Hadoop中的集成,今天为大家介绍另一款工具——Hue,该工具功能比较丰富,下面是今 ...
- hue集成各种组件
一.Hue安装 可以编译安装,我这里有已经编译好的,直接解压使用: hue默认端口:8888 http://gethue.com/ https://github.com/cloudera/hue ht ...
- Hadoop生态圈-Hive快速入门篇之Hive环境搭建
Hadoop生态圈-Hive快速入门篇之Hive环境搭建 作者:尹正杰 版权声明:原创作品,谢绝转载!否则将追究法律责任. 一.数据仓库(理论性知识大多摘自百度百科) 1>.什么是数据仓库 数据 ...
- Windows10系统下Hadoop和Hive开发环境搭建填坑指南
前提 笔者目前需要搭建数据平台,发现了Windows系统下,Hadoop和Hive等组件的安装和运行存在大量的坑,而本着有坑必填的目标,笔者还是花了几个晚上的下班时候在多个互联网参考资料的帮助下完成了 ...
随机推荐
- 天地图使用过程中由于display:none导致加载部分地图瓦片失败
在为按钮添加点击事件让地图显示的时候,初始加载未加载到当前页面尺寸的所有地图瓦片,在display:none之后停止加载地图,所以display:none属性去掉,改为dom解析完成之后$('#map ...
- (转)java.util.Scanner应用详解
java.util.Scanner应用详解 java.util.Scanner是Java5的新特征,主要功能是简化文本扫描.这个类最实用的地方表现在获取控制台输入,其他的功能都很鸡肋,尽管Java ...
- C语言指针2(空指针,野指针)
//最近,有朋友开玩笑问 int *p *是指针还是p是指针还是*p是指针,当然了,知道的都知道p是指针 //野指针----->>>指没有指向一个地址的指针(指针指向地址请参考上一 ...
- javascript中typeof和instanceof用法的总结
今天在看相应的javascript书籍时,遇到了typeof和instanceof的问题,一直不太懂,特地查资料总结如下: JavaScript 中 typeof 和 instanceof 常用来判断 ...
- js中常用的日期总结
js开发中经常用到日期,这里总结一下: /** * 获取当前日期 * 格式:2017-07-31 13:45:14 */ function getNowFormatDate() { var date ...
- 关于在HTML中使用的script标签
本文是<JavaScript高级程序设计>(第三版)中的第二章的个人学习的总结. 在HTML中使用JavaScript <script>标签 在HTML5中script主要有以 ...
- [js高手之路] es6系列教程 - 函数的默认参数详解
在ES6之前,我们一般用短路表达式处理默认参数 function show( a, b ){ var a = a || 10; var b = b || 20; console.log( a, b ) ...
- 使用Hibernate模板调用存储过程
前提是该Dao类已经已经继承了org.springframework.orm.hibernate5.support.HibernateDaoSupport,并且在整个项目中已经配置好了事务,或者是手动 ...
- 再起航,我的学习笔记之JavaScript设计模式05(简单工程模式)
我的学习笔记是根据我的学习情况来定期更新的,预计2-3天更新一章,主要是给大家分享一下,我所学到的知识,如果有什么错误请在评论中指点出来,我一定虚心接受,那么废话不多说开始我们今天的学习分享吧! 前几 ...
- 在linux环境下安装Node
liunx安装node的方法 cd /usr/src //node 安装的位置 一 : 普通用户: 安装前准备环境: 1.检查Linux 版本 命令: cat /etc/redhat-releas ...