
javacpp-FFmpeg系列之3: 像素图像数据转换(BGR与BufferdImage互转,RGB与BufferdImage互转,BufferdImage转Base64编码)
javacpp-ffmpeg系列:
javacpp-FFmpeg系列之1:视频拉流解码成YUVJ420P,并保存为jpg图片
javacpp-FFmpeg系列之2:通用拉流解码器,支持视频拉流解码并转换为YUV、BGR24或RGB24等图像像素数据
javacpp-FFmpeg系列之3: 图像数据转换(BGR与BufferdImage互转,RGB与BufferdImage互转)
补充:
javacpp-FFmpeg系列补充:FFmpeg解决avformat_find_stream_info检索时间过长问题
前言
ffmpeg获取的数据一般为yuv,argb,rgb,bgr,abgr等图像像素数据,我们可能需要转换为java的图像,来方便我们显示他们,当然不需要转换也可以达到我们的目的。
在线演示demo:https://blog.csdn.net/eguid_1/article/details/82842904
项目维护地址:https://github.com/eguid/easyCV
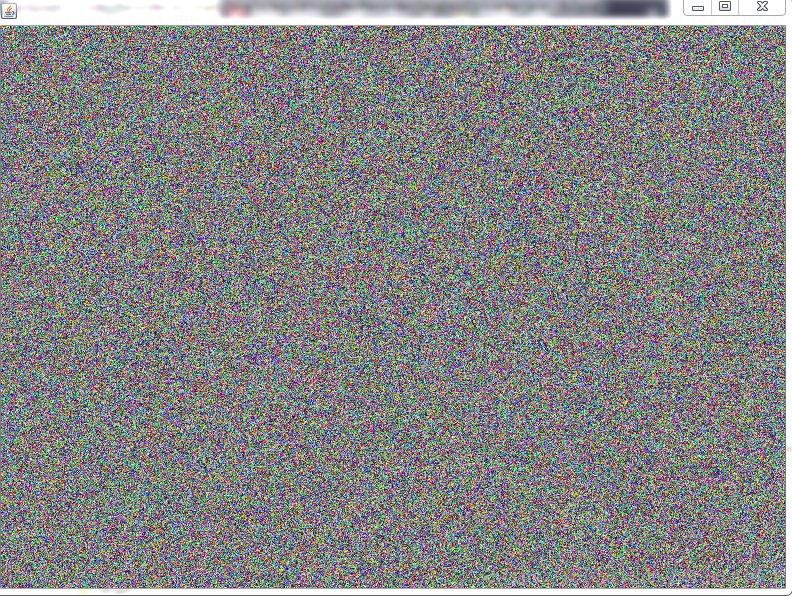
一、那么先来个RGB像素使用的小demo压压惊
(密集恐惧症预警)
通过这个RGB像素的小demo,更容易理解RGB像素格式
public static int getRGB(int[] rgbarr) {//RGB24数组转整型RGB24
int rgb = ((int) rgbarr[0]) & 0xff | (((int) rgbarr[1]) & 0xff) << 8 | (((int) rgbarr[2]) & 0xff) << 16
| 0xff000000;
return rgb;
}
private static int createRandomRgb() {//随机生成RGB24
int[] rgbarr = new int[3];
rgbarr[0] = (int) (Math.random() * 255);
rgbarr[1] = (int) (Math.random() * 255);
rgbarr[2] = (int) (Math.random() * 255);
return getRGB(rgbarr);
}//eguid原创文章,转载请注明出处和作者名(blog.csdn.net/eguid_1)
public static void main(String[] args){
int width = 800, height = 600;//使用整型RGB24
BufferedImage image = new BufferedImage(width, height, BufferedImage.TYPE_INT_RGB);
for (int i = 0; i < width; i++) {
for (int j = 0; j < height; j++) {
int rgb = createRandomRgb();
image.setRGB(i, j, rgb);
}
}
JLabel label = new JLabel();
label.setSize(width, height);
label.setIcon(new ImageIcon(image));JFrame frame = new JFrame();
frame.setSize(width, height);
frame.setDefaultCloseOperation(JFrame.EXIT_ON_CLOSE);
frame.add(label);
frame.setVisible(true);
Timer timer=new Timer("定时刷新", true);
timer.scheduleAtFixedRate(new TimerTask() {
@Override
public void run() {
for (int i = 0; i < width; i++) {
for (int j = 0; j < height; j++) {
int rgb =createRandomRgb();
image.setRGB(i, j, rgb);
}
}
label.repaint();
}
}, 100, 1000/25);
}
运行结果:
二、像素图像数据转换为java图像
上一章我们已经通过ffmpeg获取到了AVFrame,要是能预览这帧视频图像那岂不是更好?
要完成转换为java的图像数据这个转换我们分为两步转换流程。
1、像素图像转换为ByteBuffer
不管是yuv,还是rgb或是bgr,都可以使用该函数转换为ByteBuffer,不同的是ByteBuffer转换为BufferedImage的异同。
//eguid原创文章,转载请注明出处和作者名(https://blog.csdn.net/eguid_1)
public ByteBuffer saveFrame(AVFrame pFrame, int width, int height){
BytePointer data = pFrame.data(0);
int size = width * height * 3;
ByteBuffer buf = data.position(0).limit(size).asBuffer();
return buf;
}
2、ByteBuffer转换为BufferImage
由于不同像素数据转换方法都不相同,以RGB和BGR为例:
(1)BGR24转BufferedImage
/**
* 24位BGR转BufferedImage
* @param src -源数据
* @param width -宽度
* @param height-高度
* @return
*/
public static BufferedImage BGR2BufferedImage(ByteBuffer src,int width,int height) {
BufferedImage image = new BufferedImage(width, height, BufferedImage.TYPE_3BYTE_BGR);
Raster ra = image.getRaster();
DataBuffer out = ra.getDataBuffer();
DataBufferByte db=(DataBufferByte)out;
ByteBuffer.wrap(db.getData()).put(src);
return image;
}
/**
* 24位整型BGR转BufferedImage
* @param src -源数据
* @param width -宽度
* @param height-高度
* @return
*/
public static BufferedImage BGR2BufferedImage(IntBuffer src,int width,int height) {
BufferedImage image = new BufferedImage(width, height, BufferedImage.TYPE_INT_BGR);
Raster ra = image.getRaster();
DataBuffer out = ra.getDataBuffer();
DataBufferInt db=(DataBufferInt)out;
IntBuffer.wrap(db.getData()).put(src);
return image;
}
(2)RGB24转BufferedImage
/**
* 24位整型RGB转BufferedImage
* @param src -源数据
* @param width -宽度
* @param height-高度
* @return
*/
public static BufferedImage RGB2BufferedImage(IntBuffer src,int width,int height) {
BufferedImage image = new BufferedImage(width, height, BufferedImage.TYPE_INT_RGB);
Raster ra = image.getRaster();
DataBuffer out = ra.getDataBuffer();
DataBufferInt db=(DataBufferInt)out;
IntBuffer.wrap(db.getData()).put(src);
return image;
}
三、一个方便预览BufferImage的小函数
/**
* 使用窗口显示BufferedImage图片
* @param image -BufferedImage
*/
public static void viewImage(BufferedImage image) {
int width=image.getWidth(),height=image.getHeight();
JLabel label = new JLabel();
label.setSize(width, height);
label.setIcon(new ImageIcon(image));JFrame frame = new JFrame();
frame.setSize(width, height);
frame.setDefaultCloseOperation(JFrame.EXIT_ON_CLOSE);
frame.add(label);
frame.setVisible(true);
}
四、补充
1、BufferImage转Base64编码,方便网页显示
/**
* bufferedImage转base64
* @param format -格式(jpg,png,bmp,gif,jpeg等等)
* @return
* @throws IOException
*/
public static String bufferedImage2Base64(BufferedImage image, String format) throws IOException {
Encoder encoder = Base64.getEncoder();
ByteArrayOutputStream baos = new ByteArrayOutputStream();// 字节流
ImageIO.write(image, format, baos);// 写出到字节流
byte[] bytes=baos.toByteArray();
// 编码成base64
String jpg_base64 = encoder.encodeToString(bytes);
return jpg_base64;
}
2、保存成图片文件
//eguid原创文章,转载请注明出处和作者名(blog.csdn.net/eguid_1)
public static void saveImage(BufferedImage image,String format,String file) throws IOException {
ImageIO.write(image, format, new File(file));
}
javacpp-FFmpeg系列之3: 像素图像数据转换(BGR与BufferdImage互转,RGB与BufferdImage互转,BufferdImage转Base64编码)的更多相关文章
- Caffe框架,图像数据转换成LMDB数据格式
小码农最近在研究深度学习,对所学知识做点记录,以供以后翻阅.在Caffe框架中,数据的格式都是LMDB的,如何将图像数据转换成这个格式呢? 首先,将图像数据和标签生成txt文档,执行一下代码: fin ...
- ffmpeg 系列博客
https://www.ffmpeg.org/download.html#build-macffmpeg 系列博文https://me.csdn.net/blog/leixiaohua1020http ...
- BASE64编码和解码(VC源代码) 并 内存加载 CImage 图像
BASE64可以用来将binary的字节序列数据编码成ASCII字符序列构成的文本.完整的BASE64定义可见 RFC1421和 RFC2045.编码后的数据比原始数据略长,为原来的4/3.在电子 ...
- OpenCV中图像的BGR格式及Img对象的属性说明
1. 图像的BGR格式说明 OpenCV中图像读入的数据格式是numpy的ndarray数据格式.是BGR格式,取值范围是[0,255]. 如下图所示,分为三个维度: 第一维度:Height 高度,对 ...
- rust实战系列-base64编码
前言 某些只能使用ASCII字符的场景,往往需要传输非ASCII字符的数据,这时就需要一种编码可以将数据转换成ASCII字符,而base64编码就是其中一种. 编码原理很简单,将原始数据以3字节(24 ...
- caffe学习系列(1):图像数据转换成db(leveldb/lmdb)文件
参考:http://www.cnblogs.com/denny402/p/5082341.html 上述博文用caffe自带的两张图片为例,将图片转为db格式.博主对命令参数进行了详细的解释,很赞. ...
- Caffe学习系列(11):图像数据转换成db(leveldb/lmdb)文件
在深度学习的实际应用中,我们经常用到的原始数据是图片文件,如jpg,jpeg,png,tif等格式的,而且有可能图片的大小还不一致.而在caffe中经常使用的数据类型是lmdb或leveldb,因此就 ...
- Java版流媒体编解码和图像处理(JavaCPP+FFmpeg)
欢迎访问我的GitHub https://github.com/zq2599/blog_demos 内容:所有原创文章分类汇总及配套源码,涉及Java.Docker.Kubernetes.DevOPS ...
- OpenCV从入门到放弃系列之——如何扫描图像、利用查找表和计时
目的 如何遍历图像中的每一个像素? OpenCV的矩阵值是如何存储的? 如何测试我们所实现算法的性能? 查找表是什么?为什么要用它? 测试用例 颜色空间缩减.具体做法就是:将现有颜色空间值除以某个输入 ...
随机推荐
- <LeetCode OJ> 141 / 142 Linked List Cycle(I / II)
Given a linked list, determine if it has a cycle in it. Follow up: Can you solve it without using ex ...
- 1verilog 位拼接
位拼接还可以用重复法来简化表达式.见下例: {4{w}} //这等同于{w,w,w,w} 位拼接还可以用嵌套的方式来表达.见下例: {b,{3{a,b}}} //这等同 ...
- mac 升级系统后 ”任何来源“被取消了找回方法
找回方法 终端输入: sudo spctl --master-disable
- Android防止过快点击造成多次事件
问题 onClick事件是Android开发中最常见的事件. 比方,一个submitButton.功能是点击之后会提交一个订单, 则一般代码例如以下,当中submitOrder()函数会跳转到下一页进 ...
- 小程序踩坑之不同屏幕下动态改变translate值
案例还原 小程序做一个进度条,可以通过拽转控制进度 那么肯定有一个进度条,不过小程序自己会做适配宽高 6s下这个div的width 是250 6splus就是276 但是问题来了,我拖拽用的是tran ...
- ubuntu14.04设置sublime text3为默认文本编辑器
更新时间2017年07月20日17:35:04 原来的方法貌似并不试用,现在才发现,其实ubuntu下也和Windows下一样... 右键,属性,然后如图所示 set as default 即可. 之 ...
- eclipse maven安装配置
下载在Apache下载Maven,下载地址:http://maven.apache.org/download.html,在win7下载文件为:apache-maven-3.1.0-bin.zip. ...
- delphi Base64编码/解码及数据压缩/解压知识
一.Base64编码/解码 一般用到的是Delphi自带的单元EncdDecd,当然还有第三方提供的单元或控件,其中我所接触到的认为比较好的有Indy的TIdMimeEncode / TIdMimeD ...
- 【题解】CF359B Permutation
[题解]CF359B Permutation 求一个长度为\(2n\)的序列,满足\(\Sigma |a_{2i}-a_{2i-1}|-|\Sigma a_{2i}-a_{2i-1}|=2k\) 这种 ...
- php分10个不同等级压缩优化图片(PNG)
今天找到一个php写的压缩图片程序,可以分10个等级(0-9)来压缩,0等级时压缩比率不是很大,图片不会失真:随着压缩等级不断增大,图片会变得越来越不清晰,通常压缩后图片大小可以减少到原来的50%,压 ...