PhpSpreadsheet的简单使用
由于PHPExcel已经不再维护,PhpSpreadsheet是PHPExcel的下一个版本。PhpSpreadsheet是一个用纯PHP编写的库,并引入了命名空间,PSR规范等。这里简单介绍下PhpSpreadsheet的导入导出功能。
1、安装
- 使用composer安装:
composer require phpoffice/phpspreadsheet
- GitHub下载:
https://github.com/PHPOffice/PhpSpreadsheet
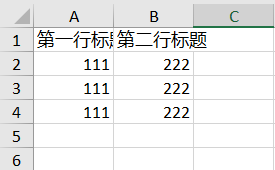
2、excel文件导出
/**

 * excel文件导出

 */

function export()

{

    require_once __DIR__ . '/vendor/autoload.php';

    $data = [

        ['title1' => '111', 'title2' => '222'],

        ['title1' => '111', 'title2' => '222'],

        ['title1' => '111', 'title2' => '222']

    ];

    $title = ['第一行标题', '第二行标题'];

    // Create new Spreadsheet object

    $spreadsheet = new \PhpOffice\PhpSpreadsheet\Spreadsheet();

    $sheet = $spreadsheet->getActiveSheet();

    // 方法一,使用 setCellValueByColumnAndRow

    //表头

    //设置单元格内容

    foreach ($title as $key => $value) {

        // 单元格内容写入

        $sheet->setCellValueByColumnAndRow($key + 1, 1, $value);

    }

    $row = 2; // 从第二行开始

    foreach ($data as $item) {

        $column = 1;

        foreach ($item as $value) {

            // 单元格内容写入

            $sheet->setCellValueByColumnAndRow($column, $row, $value);

            $column++;

        }

        $row++;

    }

    // 方法二,使用 setCellValue

    //表头

    //设置单元格内容

    $titCol = 'A';

    foreach ($title as $key => $value) {

        // 单元格内容写入

        $sheet->setCellValue($titCol . '1', $value);

        $titCol++;

    }

    $row = 2; // 从第二行开始

    foreach ($data as $item) {

        $dataCol = 'A';

        foreach ($item as $value) {

            // 单元格内容写入

            $sheet->setCellValue($dataCol . $row, $value);

            $dataCol++;

        }

        $row++;

    }

    // Redirect output to a client’s web browser (Xlsx)

    header('Content-Type: application/vnd.openxmlformats-officedocument.spreadsheetml.sheet');

    header('Content-Disposition: attachment;filename="01simple.xlsx"');

    header('Cache-Control: max-age=0');

    // If you're serving to IE 9, then the following may be needed

    header('Cache-Control: max-age=1');

    // If you're serving to IE over SSL, then the following may be needed

    header('Expires: Mon, 26 Jul 1997 05:00:00 GMT'); // Date in the past

    header('Last-Modified: ' . gmdate('D, d M Y H:i:s') . ' GMT'); // always modified

    header('Cache-Control: cache, must-revalidate'); // HTTP/1.1

    header('Pragma: public'); // HTTP/1.0

    $writer = \PhpOffice\PhpSpreadsheet\IOFactory::createWriter($spreadsheet, 'Xlsx');

    $writer->save('php://output');

    exit;

}
结果:
3、excel文件保存到本地
/**

 * excel文件保存到本地

 */

function save()

{

    require_once __DIR__ . '/vendor/autoload.php';

    $data = [

        ['title1' => '111', 'title2' => '222'],

        ['title1' => '111', 'title2' => '222'],

        ['title1' => '111', 'title2' => '222']

    ];

    $title = ['第一行标题', '第二行标题'];

    // Create new Spreadsheet object

    $spreadsheet = new \PhpOffice\PhpSpreadsheet\Spreadsheet();

    $sheet = $spreadsheet->getActiveSheet();

    //表头

    //设置单元格内容

    $titCol = 'A';

    foreach ($title as $key => $value) {

        // 单元格内容写入

        $sheet->setCellValue($titCol . '1', $value);

        $titCol++;

    }

    $row = 2; // 从第二行开始

    foreach ($data as $item) {

        $dataCol = 'A';

        foreach ($item as $value) {

            // 单元格内容写入

            $sheet->setCellValue($dataCol . $row, $value);

            $dataCol++;

        }

        $row++;

    }

    // Save

    $writer = \PhpOffice\PhpSpreadsheet\IOFactory::createWriter($spreadsheet, 'Xlsx');

    $writer->save('01simple.xlsx');

}
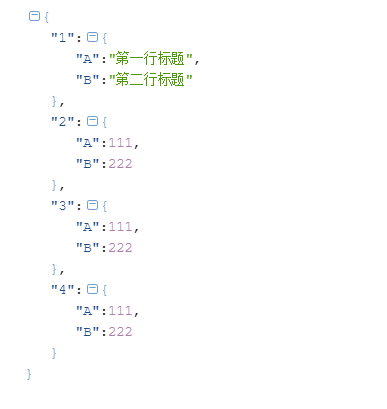
4、读取excel文件内容
/**

 * 读取excel文件内容

 */

function read()

{

    require_once __DIR__ . '/vendor/autoload.php';

    $inputFileName = dirname(__FILE__) . '/01simple.xlsx';

    $spreadsheet = \PhpOffice\PhpSpreadsheet\IOFactory::load($inputFileName);

    // 方法二

    $sheetData = $spreadsheet->getActiveSheet()->toArray(null, true, true, true);

    return $sheetData;

}
结果:
可能出现的问题:
1、Fatal error: Uncaught Error: Class 'PhpOffice\PhpSpreadsheet\Spreadsheet' not found
这是因为没有自动加载。可以手动引入加载文件。
require_once __DIR__ . '/vendor/autoload.php';
或者:
require_once __DIR__ . '/vendor/phpoffice/phpspreadsheet/src/Bootstrap.php';
2、Fatal error: Interface 'Psr\SimpleCache\CacheInterface' not found
这是因为没有psr文件,缺少simple-cache模块。如果使用composer安装的话会自动生成。没有的话可以手动下载。
GitHub下载地址:https://github.com/php-fig/simple-cache/releases
PhpSpreadsheet的简单使用的更多相关文章
- 使用PhpSpreadsheet将Excel导入到MySQL数据库
本文以导入学生成绩表为例,给大家讲解使用PhpSpreadsheet将Excel导入的MySQL数据库. 准备 首先我们需要准备一张MySQL表,表名t_student,表结构如下: CREATE T ...
- phpspreadsheet开发手记
坑安装简单示例通过模板来生成文件释放内存单元格根据索引获取英文列设置值合并单元格居中显示宽度设置批量设置单元格格式直接输出下载自动计算列宽函数formula单元格变可点击的超链 PhpSpreadsh ...
- PhpSpreadsheet如何读取excel文件
PhpSpreadsheet如何读取excel文件 一.总结 一句话总结:万能的百度,直接搜代码就好,绝对有,毕竟github上面4000+的关注,说明很多人用了这个,使用照着demo倒是异常简单 二 ...
- [thinkphp使用phpspreadsheet时出现]Cannot redeclare xxxxxx() (previously declared in C:\WWW\xxx.xxx:xxx)
[thinkphp使用phpspreadsheet时出现]Cannot redeclare xxxxxx() (previously declared in C:\WWW\xxx.xxx:xxx) 一 ...
- Laravel Excel安装及最简单使用
官网:https://docs.laravel-excel.com/ 1.安装 1.1.安装要求: PHP: ^7.0 Laravel: ^5.5 PhpSpreadsheet: ^1.6 ...
- php读写excel —— PhpSpreadsheet组件
前言 PhpSpreadsheet是一个纯PHP类库,它提供了一组类,允许您从不同的电子表格文件格式(如Excel和LibreOffice Calc)读取和写入.用PHP读取Excel.CSV文件 还 ...
- PhpSpreadsheet 导出特定格式 — 广告请款单
需求说明 最近需要实现一个导出这种格式的Excel表单,之前都有用过导出Excel的功能,但大都是表头+数据的形式,只用于获取数据,没有太多样式要求,不用合并单元格.合并居中等,也不用对每一行数据特异 ...
- phpspreadsheet
2019-5-9 8:20:07 星期四 昨天在看PHPExcel的时候, github上作者说已经停止更新了, 推荐使用phpspreadsheet, 查看了一下官方文档, 功能还挺强大的, 可以读 ...
- phpspreadsheet 中文文档(七)技巧和诀窍
2019年10月11日14:08:35 以下页面为您提供了一些使用广泛的PhpSpreadsheet食谱.请注意,这些文件没有提供有关特定PhpSpreadsheet API函数的完整文档,而只是一个 ...
随机推荐
- 【Web技术】334- yarn、npm、cnpm 三者如何优雅的在一起使用 ?
前端得包管理你有过几个? 一位用不好包管理器的前端,是一个入门级前端,一个用不好webpack的前端,是一个初级前端 三个包管理器是可以一起用的,只要你够胆大心细,就没任何问题! 在javeScrip ...
- 【JS】312- 复习 JavaScript 严格模式(Strict Mode)
点击上方"前端自习课"关注,学习起来~ 注:本文为 < JavaScript 完全手册(2018版) >第30节,你可以查看该手册的完整目录. 严格模式是一项 ES5 ...
- CSS-sprite(雪碧图、精灵图)
Css Sprite(优点) 减少图片的字节. 减少网页的http请求,从而大大的提高页面的性能. 解决了网页设计师在图片命名上的困扰,只需对一张集合的图片上命名就可以了,不需要对每一个小元素进行命名 ...
- 通过Redis 实现分布式锁_利用Jedis 客户端
前言 分布式锁一般有三种实现方式: 数据库乐观锁:2. 基于Redis的分布式锁:3. 基于ZooKeeper的分布式锁. 本篇博客将介绍第二种方式,基于Redis实现分布式锁. 虽然网上已经有各种介 ...
- 5种JVM垃圾收集器特点和8种JVM内存溢出原因
先来看看5种JVM垃圾收集器特点 一.常见垃圾收集器 现在常见的垃圾收集器有如下几种: 新生代收集器: Serial ParNew Parallel Scavenge 老年代收集器: Serial O ...
- 时间轮算法(TimingWheel)是如何实现的?
前言 我在2. SOFAJRaft源码分析-JRaft的定时任务调度器是怎么做的?这篇文章里已经讲解过时间轮算法在JRaft中是怎么应用的,但是我感觉我并没有讲解清楚这个东西,导致看了这篇文章依然和没 ...
- 《Java基础知识》Java IO流详解
Java IO概念 1. 用于设备之间的数据传输. 2. Java 将操作数据流的功能封装到了IO包中. 3. 数据流流向分:输入流和输出流,操作对象为文件. 4. 流按照操作数据分:字节流(通用)和 ...
- 新手如何快速入门node.js
附Java/C/C++/机器学习/算法与数据结构/前端/安卓/Python/程序员必读书籍书单大全: 书单导航页(点击右侧 极客侠栈 即可打开个人博客):极客侠栈 ①[Java]学习之路吐血整理技术书 ...
- Python使用openpyxl操作excel表格
前言 本文的文字及图片来源于网络,仅供学习.交流使用,不具有任何商业用途,版权归原作者所有,如有问题请及时联系我们以作处理. PS:如有需要Python学习资料的小伙伴可以加点击下方链接自行获取 ht ...
- 2019年Java面试题基础系列228道(2)
21.描述一下 JVM 加载 class 文件的原理机制? JVM 中类的装载是由类加载器(ClassLoader)和它的子类来实现的,Java 中的类加载器是一个重要的 Java 运行时系统组件,它 ...