vue2.0 之 douban (四)创建Swipe图片轮播组件
swiper中文文档:http://www.swiper.com.cn
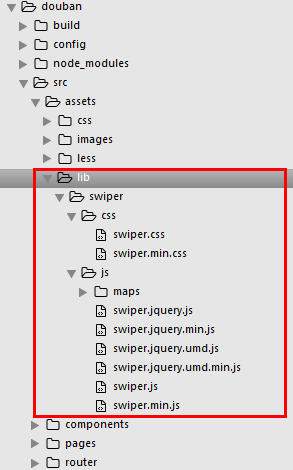
1.我们在components文件夹里创建一个swipe组件,将需要用到的js以及css文件复制到assets/lib文件夹下,如图:
然后根据swiper的使用方法:http://www.swiper.com.cn/usage/index.html
将html结构复制到swipe组件里,引入css文件,以及js
<template>

  <div class="swiper-container">

    <div class="swiper-wrapper">

      <div class="swiper-slide">Slide 1</div>

        <div class="swiper-slide">Slide 2</div>

        <div class="swiper-slide">Slide 3</div>

    </div>

    <!-- 分页器 -->

   <div class="swiper-pagination"></div>

  </div>

</template>

<script>

  import '../assets/lib/swiper/js/swiper.js'

  export default {

    mounted() {

     var mySwiper = new Swiper ('.swiper-container', {

     loop: true,

    // 如果需要分页器

    pagination: '.swiper-pagination',

  })

    }

  }

</script>

<style>

  @import '../assets/lib/swiper/css/swiper.css';

  .swiper-pagination-bullet-active {

    background: #fff;

  }

</style>
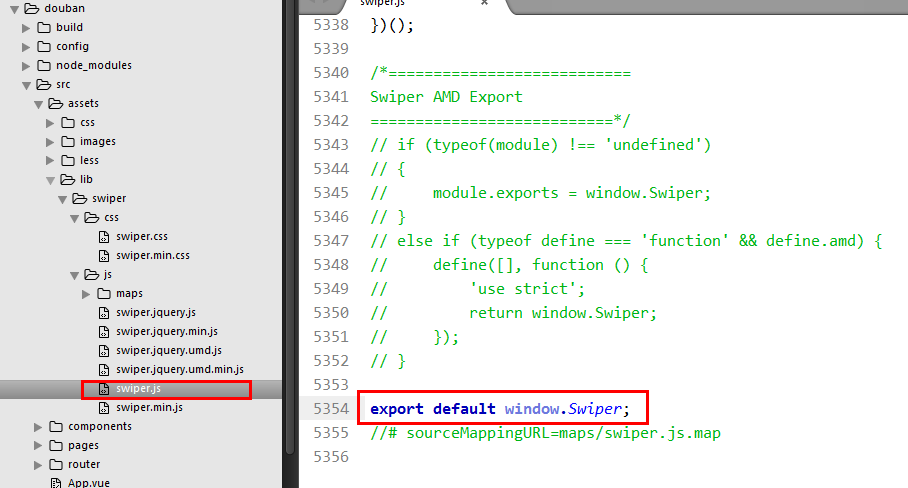
保存预览会报错,我们将swiper.js尾部需要修改一下
将AMD模式删掉,改成
export default window.Swiper;
我们可能在一个页面引用多个swipe组件,就会发生命名冲突,所以我们在实例化swiper的时候,类名需要变化一下,例如:
<m-swipe swipeid="swipe01"></m-swipe>

<m-swipe swipeid="swipe02"></m-swipe>
<div class="swiper-container" :class="swipeid">

  <div class="swiper-wrapper">

    <div class="swiper-slide">Slide 1</div>

      <div class="swiper-slide">Slide 2</div>

      <div class="swiper-slide">Slide 3</div>

  </div>

  <!-- 分页器 -->

  <div class=".swiper-pagination"></div>

</div>

export default {

  props: {

    swipeid: {

      type: String,

      default: 'swipe01'

    }

  },

  mounted() {

    var That = this;

    new Swiper('.'+That.swipeid, {

      loop: true,

      // 如果需要分页器

      pagination: '.swiper-pagination',

    })

  }

}
2.组件化
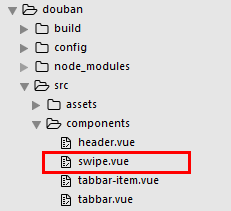
swipe.vue
<template>

  <div class="swiper-container" :class="swipeid">

    <div class="swiper-wrapper">

      <slot name="swiper-con"></slot>

    </div>

    <!-- 分页器 -->

    <div :class="{'swiper-pagination':pagination}"></div>

  </div>

</template>

<script>

  import '../assets/lib/swiper/js/swiper.js'

  export default {

    props: {

      swipeid: {

        type: String,

        default: ''

      },

      effect: {

        type: String,

        default: 'slide'

      },

      loop: {

        type: Boolean,

        default: true

      },

      direction: {

        type: String,

        default: 'horizontal'

      },

      pagination: {

        type: Boolean,

        default: true

      },

      autoplay: {

        type: Number,

        default: 5000,

      },

      paginationType: {

        type: String,

        default: 'bullets'

      }

    },

    mounted() {

      var That = this;

      new Swiper('.'+That.swipeid, {

        //循环

        loop: That.loop,

        //分页器

        pagination: '.swiper-pagination',

        //分页类型

        paginationType: That.paginationType, //fraction,progress,bullets

        //自动播放

        autoplay: That.autoplay,

        //方向

        direction: That.direction,

        //特效

        effect: That.effect, //slide,fade,coverflow,cube

      })

    }

  }

</script>

<style>

  @import '../assets/lib/swiper/css/swiper.css';

  .swiper-pagination-bullet-active {

    background: #fff;

  }

</style>
Index.vue
<template>

  <div>

    <m-header title="豆瓣app" :bg="true" fixed>

      <a href="javascript:;" slot="right">分享</a>

    </m-header>

    <div class="page-content">

      <m-swipe swipeid="swipe01" :autoplay="1000" effect="cube">

        <div class="swiper-slide slide02" slot="swiper-con">Slide 1</div>

        <div class="swiper-slide slide01" slot="swiper-con">Slide 2</div>

        <div class="swiper-slide slide03" slot="swiper-con">Slide 3</div>

      </m-swipe>

      <m-swipe swipeid="swipe021" :loop="false" paginationType="fraction" :autoplay="2000">

        <div class="swiper-slide slide01" slot="swiper-con">Slide 1</div>

        <div class="swiper-slide slide02" slot="swiper-con">Slide 2</div>

        <div class="swiper-slide slide03" slot="swiper-con">Slide 3</div>

      </m-swipe>

    </div>

  </div>

</template>

<script>

  import mHeader from '../../components/header'

  import mSwipe from '../../components/swipe'

  export default {

    name: 'index',

    components: {

      mHeader,

      mSwipe

    }

  }

</script>

<style lang="less">

.is-fixed ~ .page-content{

padding-top:44px;

}

.slide01{

  background: #41b883;

  text-align: center;

  line-height: 200px;

  font-size: 30px;

  color: #fff;

}

.slide02{

  background: #364a60;

  text-align: center;

  line-height: 200px;

  font-size: 30px;

  color: #fff;

}

.slide03{

  background: #ea6f5a;

  text-align: center;

  line-height: 200px;

  font-size: 30px;

  color: #fff;

}

</style>
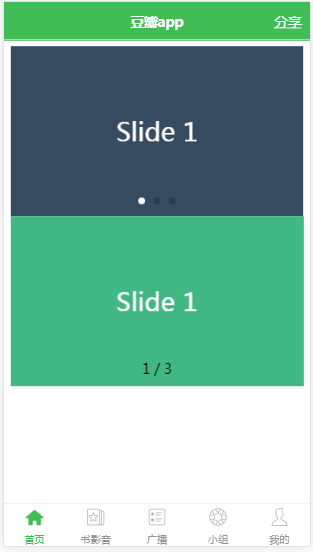
效果图
vue2.0 之 douban (四)创建Swipe图片轮播组件的更多相关文章
- 一分钟搞定AlloyTouch图片轮播组件
轮播图也涉及到触摸和触摸反馈,同时,AlloyTouch可以把惯性运动打开或者关闭,并且设置min和max为运动区域,超出会自动回弹. 除了一般的竖向滚动,AlloyTouch也可以支持横向滚动,甚至 ...
- Angular2组件与指令的小实践——实现一个图片轮播组件
如果说模块系统是Angular2的灵魂,那其组件体系就是其躯体,在模块的支持下渲染出所有用户直接看得见的东西,一个项目最表层的东西就是组件呈现的视图.而除了直接看的见的躯体之外,一个完整的" ...
- Omi-touch实战 移动端图片轮播组件的封装
pc端的轮播,移动端的轮播都很常见.一年前,我还为手机端没有左滑,右滑事件从而封装了一个swipe库,可以自定义超过多少滑动时间就不触发,也可以设置滑动多少距离才触发,这一个功能的代码就达到400多行 ...
- 如何将angular-ui的图片轮播组件封装成一个指令
在项目开发中我们经常会遇到图片轮播的功能点: 如果我们开发人员自己原生手写,将会花费很多的时间,最终得不偿失. 接下来就详细说说如何使用angular-ui发热图片轮播模块,并且将它写成一个指令(便于 ...
- Vue学习—Vue写一个图片轮播组件
1.先看效果: 熟悉的图片轮播,只要是个网站,百分之90以上会有个图片轮播.我认为使用图片轮播. 第一可以给人以一种美观的感受,而不会显得网站那么呆板, 第二可以增加显示内容,同样的区域可以显示更多内 ...
- 如何将angular-ui-bootstrap的图片轮播组件封装成一个指令
在项目开发中我们经常会遇到图片轮播的功能点: 如果我们开发人员自己原生手写,将会花费很多的时间,最终得不偿失. 接下来就详细说说如何使用angular-ui发热图片轮播模块,并且将它写成一个指令(便于 ...
- vue2.0:(四)、首页入门,组件拆分1
为什么需要组件拆分呢?这样才能更符合模块化这样一个理念. 首先是index.html,代码如下: <!DOCTYPE html> <html> <head> < ...
- JavaScript实现图片轮播组件
效果: 自动循环播放图片,下方有按钮可以切换到对应图片. 添加一个动画来实现图片切换. 鼠标停在图片上时,轮播停止,出现左右两个箭头,点击可以切换图片. 鼠标移开图片区域时,从当前位置继续轮播. 提供 ...
- EUI Scroller实现图片轮播 组件 ItemScroller
一 自定义组件如下 /** * 文 件 名:ItemScroll.ts * 功 能: 滚动组件 * 内 容: 自定义组件,支持多张图片水平(垂直)切换滚动 * * Example: * 1. 从自定义 ...
随机推荐
- Python生成文本格式的excel\xlwt生成文本格式的excel\Python设置excel单元格格式为文本\Python excel xlwt 文本格式
Python生成文本格式的excel\xlwt生成文本格式的excel\Python设置excel单元格格式为文本\Python excel xlwt 文本格式 解决: xlwt 中设置单元格样式主要 ...
- 如何配置vsftpd服务器
1,通过yum查看本地是否存在vsftpd rpm -qa|grep vsftpd [root@node2 ~]# rpm -qa |grep vsftpdvsftpd-3.0.2-25.el7.x8 ...
- 剑指offer-顺序打印二叉树节点(系列)-树-python
转载自 https://blog.csdn.net/u010005281/article/details/79761056 非常感谢! 首先创建二叉树,然后按各种方式打印: class treeNo ...
- MongoDB的使用学习之(七)MongoDB的聚合查询(两种方式)附项目源码
先来张在路上…… 铛铛铛……项目源码下载地址:http://files.cnblogs.com/ontheroad_lee/MongoDBDemo.rar 此项目是用Maven创建的,没有使用Mave ...
- UITextView学习笔记
=================================== UITextView =================================== 1.UITextView常用属性 ...
- linux 深入应用 NFS
以下实验大家用主机名来区分服务器端和客户端, 服务器端为 NFS_Server ip-192.168.1.4: 客户端为 NFS_Client ip-192.168.1.5: 实例一 将/tmp 分享 ...
- 时钟管脚设置问题 xilinx ERROR:Place:864 - Incompatible IOB's are locked to the same bank 0
ERROR:Place:1108 - A clock IOB / BUFGMUX clock component pair have been found that are not placed ...
- Error response from daemon: Container ************** is not running
$ sudo docker run -d centos:last 8022826ebd567e2b1818e90ce33c3b68ea9aeac0286001154eb05fc2283e0238$ s ...
- 实现自己的BeanFactory、AOP以及声明式事务
实现自己的BeanFactory 在使用spring时,我们很少用& ...
- flutter 基础组件
TextWidget class TextWidget extends StatelessWidget { final TextStyle _textStyle = TextStyle( fontSi ...