Ionic3 与Electron制作桌面应用
Ionic3 与Electron制作桌面应用
ionic:https://ionicframework.com
electron:https://electron.atom.io
ionic是一个混合开发框架,electron是一个开发跨平台桌面应用的框架。
此教程包括三个步骤:
1. 创建ionic项目,开启服务
2. 在项目中添加electron依赖
3. 添加webpack配置和electron主体脚本以electron的方式运行项目
在教程第二部分,首先会创建一个简单的angular2服务来访问electron的api;然后给不同平台编译分包。
最终源代码地址:https://github.com/lohanitech/ion-electron
准备工作和预备知识:
1 安装和了解ionic
2 安装和了解electron
1. 创建Ionic项目,开启服务
运行如下命令
ionic start ion-electron
进入ion-electron文件夹运行:
ionic serve
可以在本地浏览器中输入 http://localhost:8100 预览效果
2. 在项目中安装electron依赖
在项目中运行如下命令:
npm install electron electron-builder foreman --save-dev
electron是我们要整合进来的一个桌面开发
electron-builder用于编译electron的脚本
foreman用于模拟多进程的node包。
安装完成后,package.json如下:
"name": "ion-electron",

  "author": {

    "name": "Damodar Lohani",

    "email": "example@example.com",

    "url": "https://lohanitech.com/members/damodar-lohani"

  },

  "description": "ionic framework based electron project",

  "main": "electron/electron.js",

  "config": {

    "ionic_bundler": "webpack",

    "ionic_webpack": "./config/webpack.config.js"

  },

  "build": {

    "appId": "com.lohanitech.ionic-electron-test",

    "electronVersion": "1.7.5",

    "asar":false,

    "files": [

      "www/**/*",

      "electron/*"

    ]

  }
3. 添加webpack配置和electron主体脚本以electron的方式运行项目
在项目中新建一个文件夹名为config,并在其中加入一个文件名为webpack.config.js,将如下代码复制进去。
首先是ionic相关的配置,(目前位于 node_modules/@ionic/app-scripts/config/webpack.config.js),在源文件中加入:
externals: [

    (function () {

        var IGNORES = ["fs","child_process","electron","path","assert","cluster","crypto","dns","domain","events","http","https","net","os","process","punycode","querystring","readline","repl","stream","string_decoder","tls","tty","dgram","url","util","v8","vm","zlib"];

        return function (context, request, callback) {

            if (IGNORES.indexOf(request) >= 0) {

                return callback(null, "require('" + request + "')");

            }

            return callback();

        };

    })()

  ],
最新的webpack配置变为如下(最新的配置文件我们需要在dev配置和production配置中添加):
/*

 * The webpack config exports an object that has a valid webpack configuration

 * For each environment name. By default, there are two Ionic environments:

 * "dev" and "prod". As such, the webpack.config.js exports a dictionary object

 * with "keys" for "dev" and "prod", where the value is a valid webpack configuration

 * For details on configuring webpack, see their documentation here

 * https://webpack.js.org/configuration/

 */

var path = require('path');

var webpack = require('webpack');

var ionicWebpackFactory = require(process.env.IONIC_WEBPACK_FACTORY);

var ModuleConcatPlugin = require('webpack/lib/optimize/ModuleConcatenationPlugin');

var PurifyPlugin = require('@angular-devkit/build-optimizer').PurifyPlugin;

var optimizedProdLoaders = [

  {

    test: /\.json$/,

    loader: 'json-loader'

  },

  {

    test: /\.js$/,

    loader: [

      {

        loader: process.env.IONIC_CACHE_LOADER

      },

{

        loader: '@angular-devkit/build-optimizer/webpack-loader',

        options: {

          sourceMap: true

        }

      },

    ]

  },

  {

    test: /\.ts$/,

    loader: [

      {

        loader: process.env.IONIC_CACHE_LOADER

      },

{

        loader: '@angular-devkit/build-optimizer/webpack-loader',

        options: {

          sourceMap: true

        }

      },

{

        loader: process.env.IONIC_WEBPACK_LOADER

      }

    ]

  }

];

function getProdLoaders() {

  if (process.env.IONIC_OPTIMIZE_JS === 'true') {

    return optimizedProdLoaders;

  }

  return devConfig.module.loaders;

}

var devConfig = {

  entry: process.env.IONIC_APP_ENTRY_POINT,

  output: {

    path: '{{BUILD}}',

    publicPath: 'build/',

    filename: '[name].js',

    devtoolModuleFilenameTemplate: ionicWebpackFactory.getSourceMapperFunction(),

  },

  externals: [

    (function () {

        var IGNORES = ["fs","child_process","electron","path","assert","cluster","crypto","dns","domain","events","http","https","net","os","process","punycode","querystring","readline","repl","stream","string_decoder","tls","tty","dgram","url","util","v8","vm","zlib"];

        return function (context, request, callback) {

            if (IGNORES.indexOf(request) >= 0) {

                return callback(null, "require('" + request + "')");

            }

            return callback();

        };

    })()

  ],

  devtool: process.env.IONIC_SOURCE_MAP_TYPE,

resolve: {

    extensions: ['.ts', '.js', '.json'],

    modules: [path.resolve('node_modules')]

  },

module: {

    loaders: [

      {

        test: /\.json$/,

        loader: 'json-loader'

      },

      {

        test: /\.ts$/,

        loader: process.env.IONIC_WEBPACK_LOADER

      }

    ]

  },

plugins: [

    ionicWebpackFactory.getIonicEnvironmentPlugin(),

    ionicWebpackFactory.getCommonChunksPlugin()

  ],

// Some libraries import Node modules but don't use them in the browser.

  // Tell Webpack to provide empty mocks for them so importing them works.

  node: {

    fs: 'empty',

    net: 'empty',

    tls: 'empty'

  }

};

var prodConfig = {

  entry: process.env.IONIC_APP_ENTRY_POINT,

  output: {

    path: '{{BUILD}}',

    publicPath: 'build/',

    filename: '[name].js',

    devtoolModuleFilenameTemplate: ionicWebpackFactory.getSourceMapperFunction(),

  },

  externals: [

    (function () {

        var IGNORES = ["fs","child_process","electron","path","assert","cluster","crypto","dns","domain","events","http","https","net","os","process","punycode","querystring","readline","repl","stream","string_decoder","tls","tty","dgram","url","util","v8","vm","zlib"];

        return function (context, request, callback) {

            if (IGNORES.indexOf(request) >= 0) {

                return callback(null, "require('" + request + "')");

            }

            return callback();

        };

    })()

  ],

  devtool: process.env.IONIC_SOURCE_MAP_TYPE,

resolve: {

    extensions: ['.ts', '.js', '.json'],

    modules: [path.resolve('node_modules')]

  },

module: {

    loaders: getProdLoaders()

  },

plugins: [

    ionicWebpackFactory.getIonicEnvironmentPlugin(),

    ionicWebpackFactory.getCommonChunksPlugin(),

    new ModuleConcatPlugin(),

    new PurifyPlugin()

  ],

// Some libraries import Node modules but don't use them in the browser.

  // Tell Webpack to provide empty mocks for them so importing them works.

  node: {

    fs: 'empty',

    net: 'empty',

    tls: 'empty'

  }

};

module.exports = {

  dev: devConfig,

  prod: prodConfig

}
这是ionic的webpack配置,只需稍作改动就可以与electron一起使用了。
添加election主脚本
在项目内创建一个文件夹名为electron,在其中新建一个electron.js。这个是创建和加载electron窗口的主脚本。打开electron.js,贴入以下代码:
'use strict';

const electron = require('electron');

// Module to control application life.

const {

    app } = electron;

// Module to create native browser window.

const {

    BrowserWindow

} = electron;

let win;

function createWindow() {

    // Create the browser window.

    win = new BrowserWindow({

        width: 1024,

        height: 600

    });

    var url = 'file://' + __dirname + '/../www/index.html';

    var Args = process.argv.slice(2);

    Args.forEach(function (val) {

        if (val === "test") {

            url = 'http://localhost:8100'

        }

    });

    // and load the index.html of the app.

    win.loadURL(url);

    // Open the DevTools.

    win.webContents.openDevTools();

    // Emitted when the window is closed.

    win.on('closed', () => {

        // Dereference the window object, usually you would store windows

        // in an array if your app supports multi windows, this is the time

        // when you should delete the corresponding element.

        win = null;

    });

}

// This method will be called when Electron has finished

// initialization and is ready to create browser windows.

// Some APIs can only be used after this event occurs.

app.on('ready', createWindow);

// Quit when all windows are closed.

app.on('window-all-closed', () => {

    // On OS X it is common for applications and their menu bar

    // to stay active until the user quits explicitly with Cmd + Q

    if (process.platform !== 'darwin') {

        app.quit();

    }

});

app.on('activate', () => {

    // On OS X it's common to re-create a window in the app when the

    // dock icon is clicked and there are no other windows open.

    if (win === null) {

        createWindow();

    }

});
在package.json中加入启动脚本
在package.json的scripts中贴入以下代码:
"scripts": {

    "dev": "nf start",

    "start":"ionic-app-scripts serve",

    "electron dist": "electron .",

    "ebuild":"npm run build && node_modules/.bin/build",

    "clean": "ionic-app-scripts clean",

    "build": "ionic-app-scripts build",

    "ionic:build": "ionic-app-scripts build",

    "ionic:serve": "ionic-app-scripts serve"

  }
由于现在加入了foreman,我们需要给他添加配置。在项目根目录下新建文件Procfile,贴入代码:
ionic: npm start


electron: node electron-wait-ionic.js
在根目录下新建electron-wait-ionic.js,更新如下:
const net = require('net');

const port = 8100;

process.env.E_URL = `http://localhost:${port}`;

const client = new net.Socket();

let startedElectron = false;

const tryConnection = () => client.connect({port: port}, () => {

        client.end();

        if(!startedElectron) {

            console.log('starting electron');

            startedElectron = true;

            const exec = require('child_process').exec;

            exec('electron .');

        }

    }

);

tryConnection();

client.on('error', (error) => {

    setTimeout(tryConnection, 1000);

});
这个脚本的作用是尝试连接端口8100,因为8100端口在electron接入的时候会激活。如果连接失败会接着连接。
此时,运行npm run dev会以开发模式运行项目。
由于electron在完全编译之前会运行服务,所以第一次可能会看到空白页面,发生这种情况的话可以根据console输出信息,在编译完成后按ctrl+r重新加载electron窗口即可。
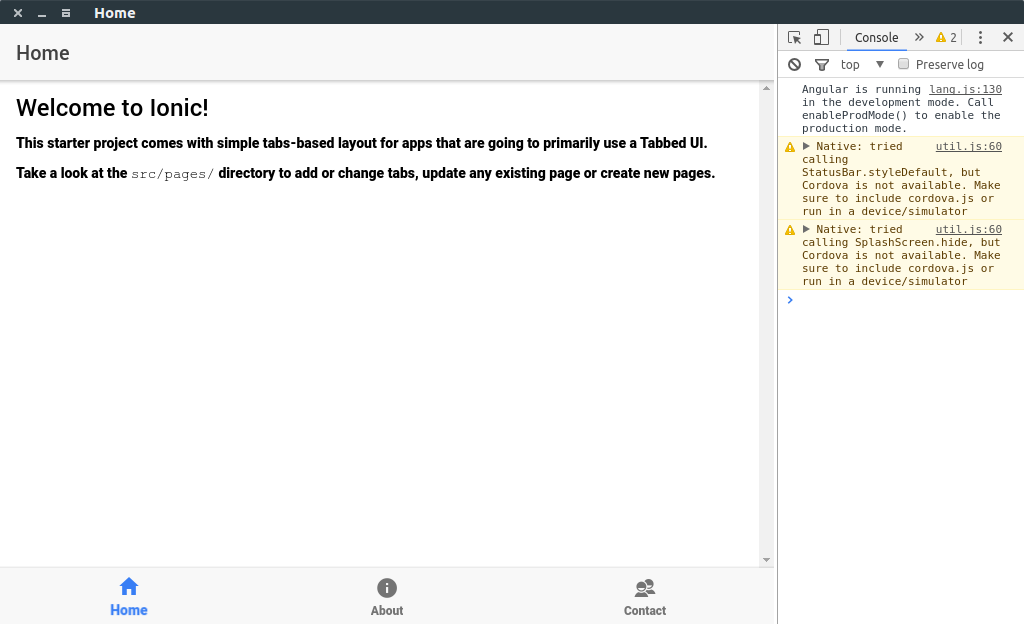
正常工作的效果图如下:
完成此教程可以查看第二部分来学习如何在Ionic项目中访问electron的api。
Ionic3 与Electron制作桌面应用的更多相关文章
- electron+vue制作桌面应用--自定义标题栏
electron会默认显示边框和标题栏,如下图 我们来看一下如何自定义一个更加有(gao)意(da)思(shang)的标题栏,例如网易云音乐这种 首先我们要把默认的标题栏删掉,找到主进程中创建窗体部分 ...
- 使用 Electron 构建桌面应用(拖动控制篇)
使用 Electron 构建桌面应用(拖动控制篇) 当窗口被定义了大小,我们也就是在自定义这个窗口,使得它不可拉伸没有框架,让它看起来就像一个真正的声效器浮在桌面上. 现在问题来了 – 要如何移动或者 ...
- AngularJS 和 Electron 构建桌面应用
译]使用 AngularJS 和 Electron 构建桌面应用 原文: Creating Desktop Applications With AngularJS and GitHub Electro ...
- 在deepin系统中制作桌面快捷方式
在使用deepin-wine 安装一些软件的时候,每次启动都需要到.deepinwine目录下运行deepin-wine xx.exe.笔者在安装过HeidiSql之后,一直苦于这种情况.比较好的解决 ...
- electron制作聊天界面(仿制qq)
效果图: 样式使用scss和flex布局 这也是制作IM系统的最后一个界面了!在制作之前参考了qq和千牛 需要注意的点 qq将滚动条美化了 而且在无操作的情况下是不会显示的 滚动条美化 ::-webk ...
- 使用 AngularJS 和 Electron 构建桌面应用
GitHub 的 Electron 框架(以前叫做 Atom Shell)允许你使用 HTML, CSS 和 JavaScript 编写跨平台的桌面应用.它是io.js 运行时的衍生,专注于桌面应用而 ...
- node-webkit制作桌面应用
心血来潮突然想用js尝试写桌面应用,突然发现我大js真的无所不能.在网上搜到了这么一个东东:node-webkit.用Node.js来进行系统资源的访问,用HTML+CSS完成页面的搭建.哇,一切突然 ...
- Electron 实战桌面计算器应用
前言 Electron 是一个搭建跨平台桌面应用的框架,仅仅使用 JavaScript.HTML 以及 CSS,即可快速而容易地搭建一个原生应用.这对于想要涉及其他领域的开发者来说是一个非常大的福利. ...
- electron --- 构建桌面应用
最近无意间看到了electron和nw的相关信息,感到很惊讶,因为学习前端也有一段时间了,竟然发现js还有这么强大的功能,因为js不仅可以写网页.写webapp.写hybrid,以及前不久出现的小程序 ...
- 使用Electron开发桌面应用
Electron 框架的前身是 Atom Shell,可以让你写使用 JavaScript,HTML 和 CSS 构建跨平台的桌面应用程序.它是基于io.js 和 Chromium 开源项目,并用于在 ...
随机推荐
- bulkWrite探秘
MongoDB有很多有趣的内置方法,其中为了批量处理一些写入操作,并且可以按照一定顺序执行,自从3.2版本之后提供了该批量方法:bulkWrite. 它的语法很简单: db.collection.bu ...
- Spring Boot 通用对象列表比较和去重
1.前言 在Excel批量导入数据时,常常需要与数据库中已存在数据的比较,并且需要考虑导入数据重复的可能性. 导入的行数据,一般有一个实体类(对象)与之对应,往往这个实体类在数据库中的字段要比 ...
- 从0搭建Vue3组件库(十):如何搭建一个 Cli 脚手架
本篇文章将实现一个名为create-easyest脚手架的开发,只需一个命令npm init easyest就可以将整个组件库开发框架拉到本地. 创建 Cli 包 首先,我们在 packages 目录 ...
- 4. Mybatis的增删改查(CRUD)
1.新增 <!--int insertUser();--> <insert id="insertUser"> insert into t_user va ...
- 【翻译】rocksdb write stall
翻译自官方wiki:https://github.com/facebook/rocksdb/wiki/Write-Stalls 转载请注明出处:https://www.cnblogs.com/morn ...
- Linux下ElasticSearch及IK分词插件安装
ElasticSearch及IK分词插件相关安装 一. 简介 ElasticSearch是一个基于Lucene的搜索服务器.它提供了一个分布式多用户能力的全文搜索引擎,基于RESTful web接口. ...
- yolov5实战之模型剪枝
续yolov5实战之二维码检测 目录 前沿 为什么要做轻量化 什么是剪枝 稀疏化训练 剪枝 微调 结语 模型下载 前沿 在上一篇yolov5的博客中,我们用yolov5训练了一个二维码检测器,可以 ...
- 当使用POI打开Excel文件遇到out of memory时该如何处理?
摘要:本文由葡萄城技术团队于博客园原创并首发.转载请注明出处:葡萄城官网,葡萄城为开发者提供专业的开发工具.解决方案和服务,赋能开发者. 当我们开发处理Excel文件时,Apache POI 是许多人 ...
- 前端Vue组件之仿京东拼多多领取优惠券弹出框popup 可用于电商商品详情领券场景使用
随着技术的发展,开发的复杂度也越来越高,传统开发方式将一个系统做成了整块应用,经常出现的情况就是一个小小的改动或者一个小功能的增加可能会引起整体逻辑的修改,造成牵一发而动全身.通过组件化开发,可以有效 ...
- 从零玩转系列之SpringBoot3-核心原理
一.简介 1.前置知识 ● Java17 ● Spring.SpringMVC.MyBatis ● Maven.IDEA 2.环境要求 环境&工具 版本(or later) SpringBoo ...