ESP32+Arduino入门教程(二):连接OLED屏
前言
文中视频效果可在此次观看:ESP32+Arduino入门教程(二):连接OLED屏
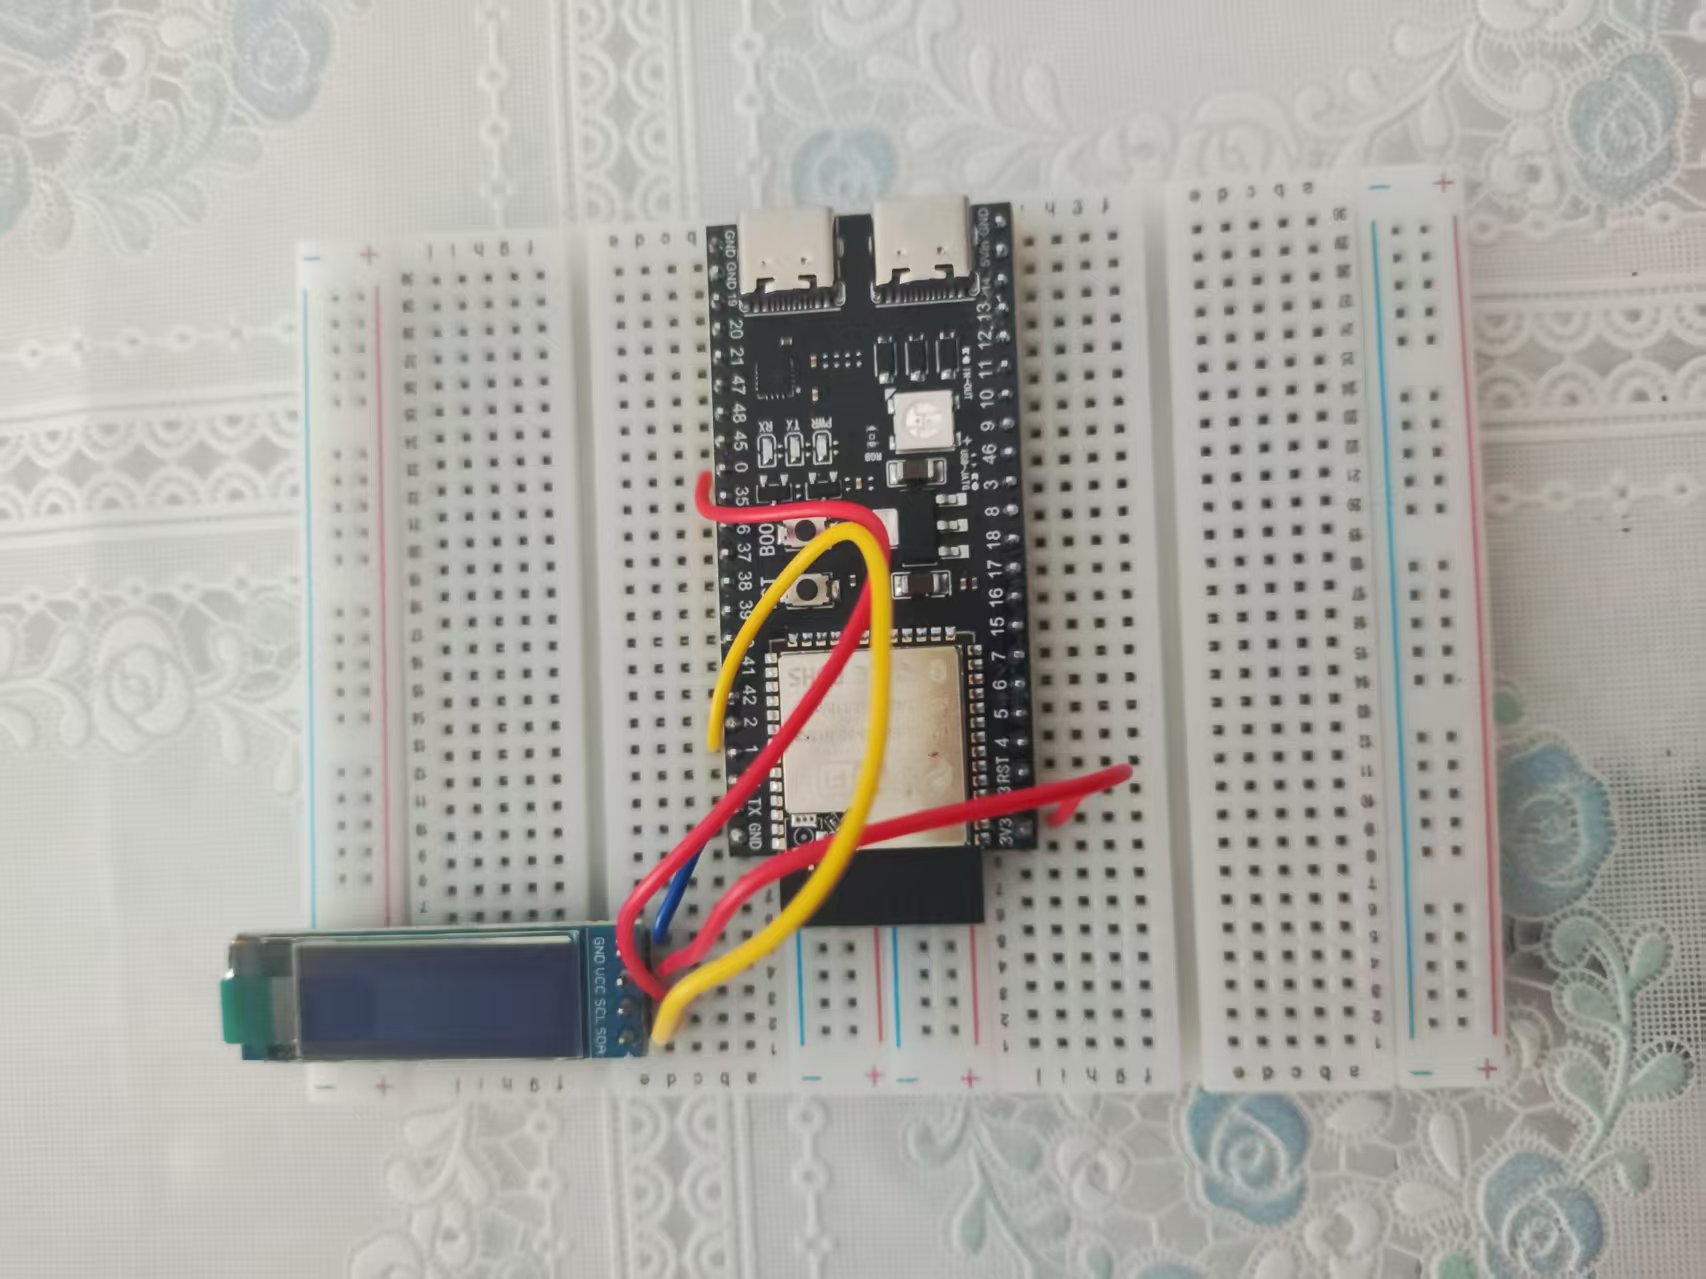
接线
现在先来看看接线。
我的是0.91寸的4针OLED屏。
| OLED引脚 | ESP32-S3引脚 |
|---|---|
| GND | GND |
| VCC | 3.3V |
| SCL | 0 |
| SDA | 1 |
接线完成之后如下所示:
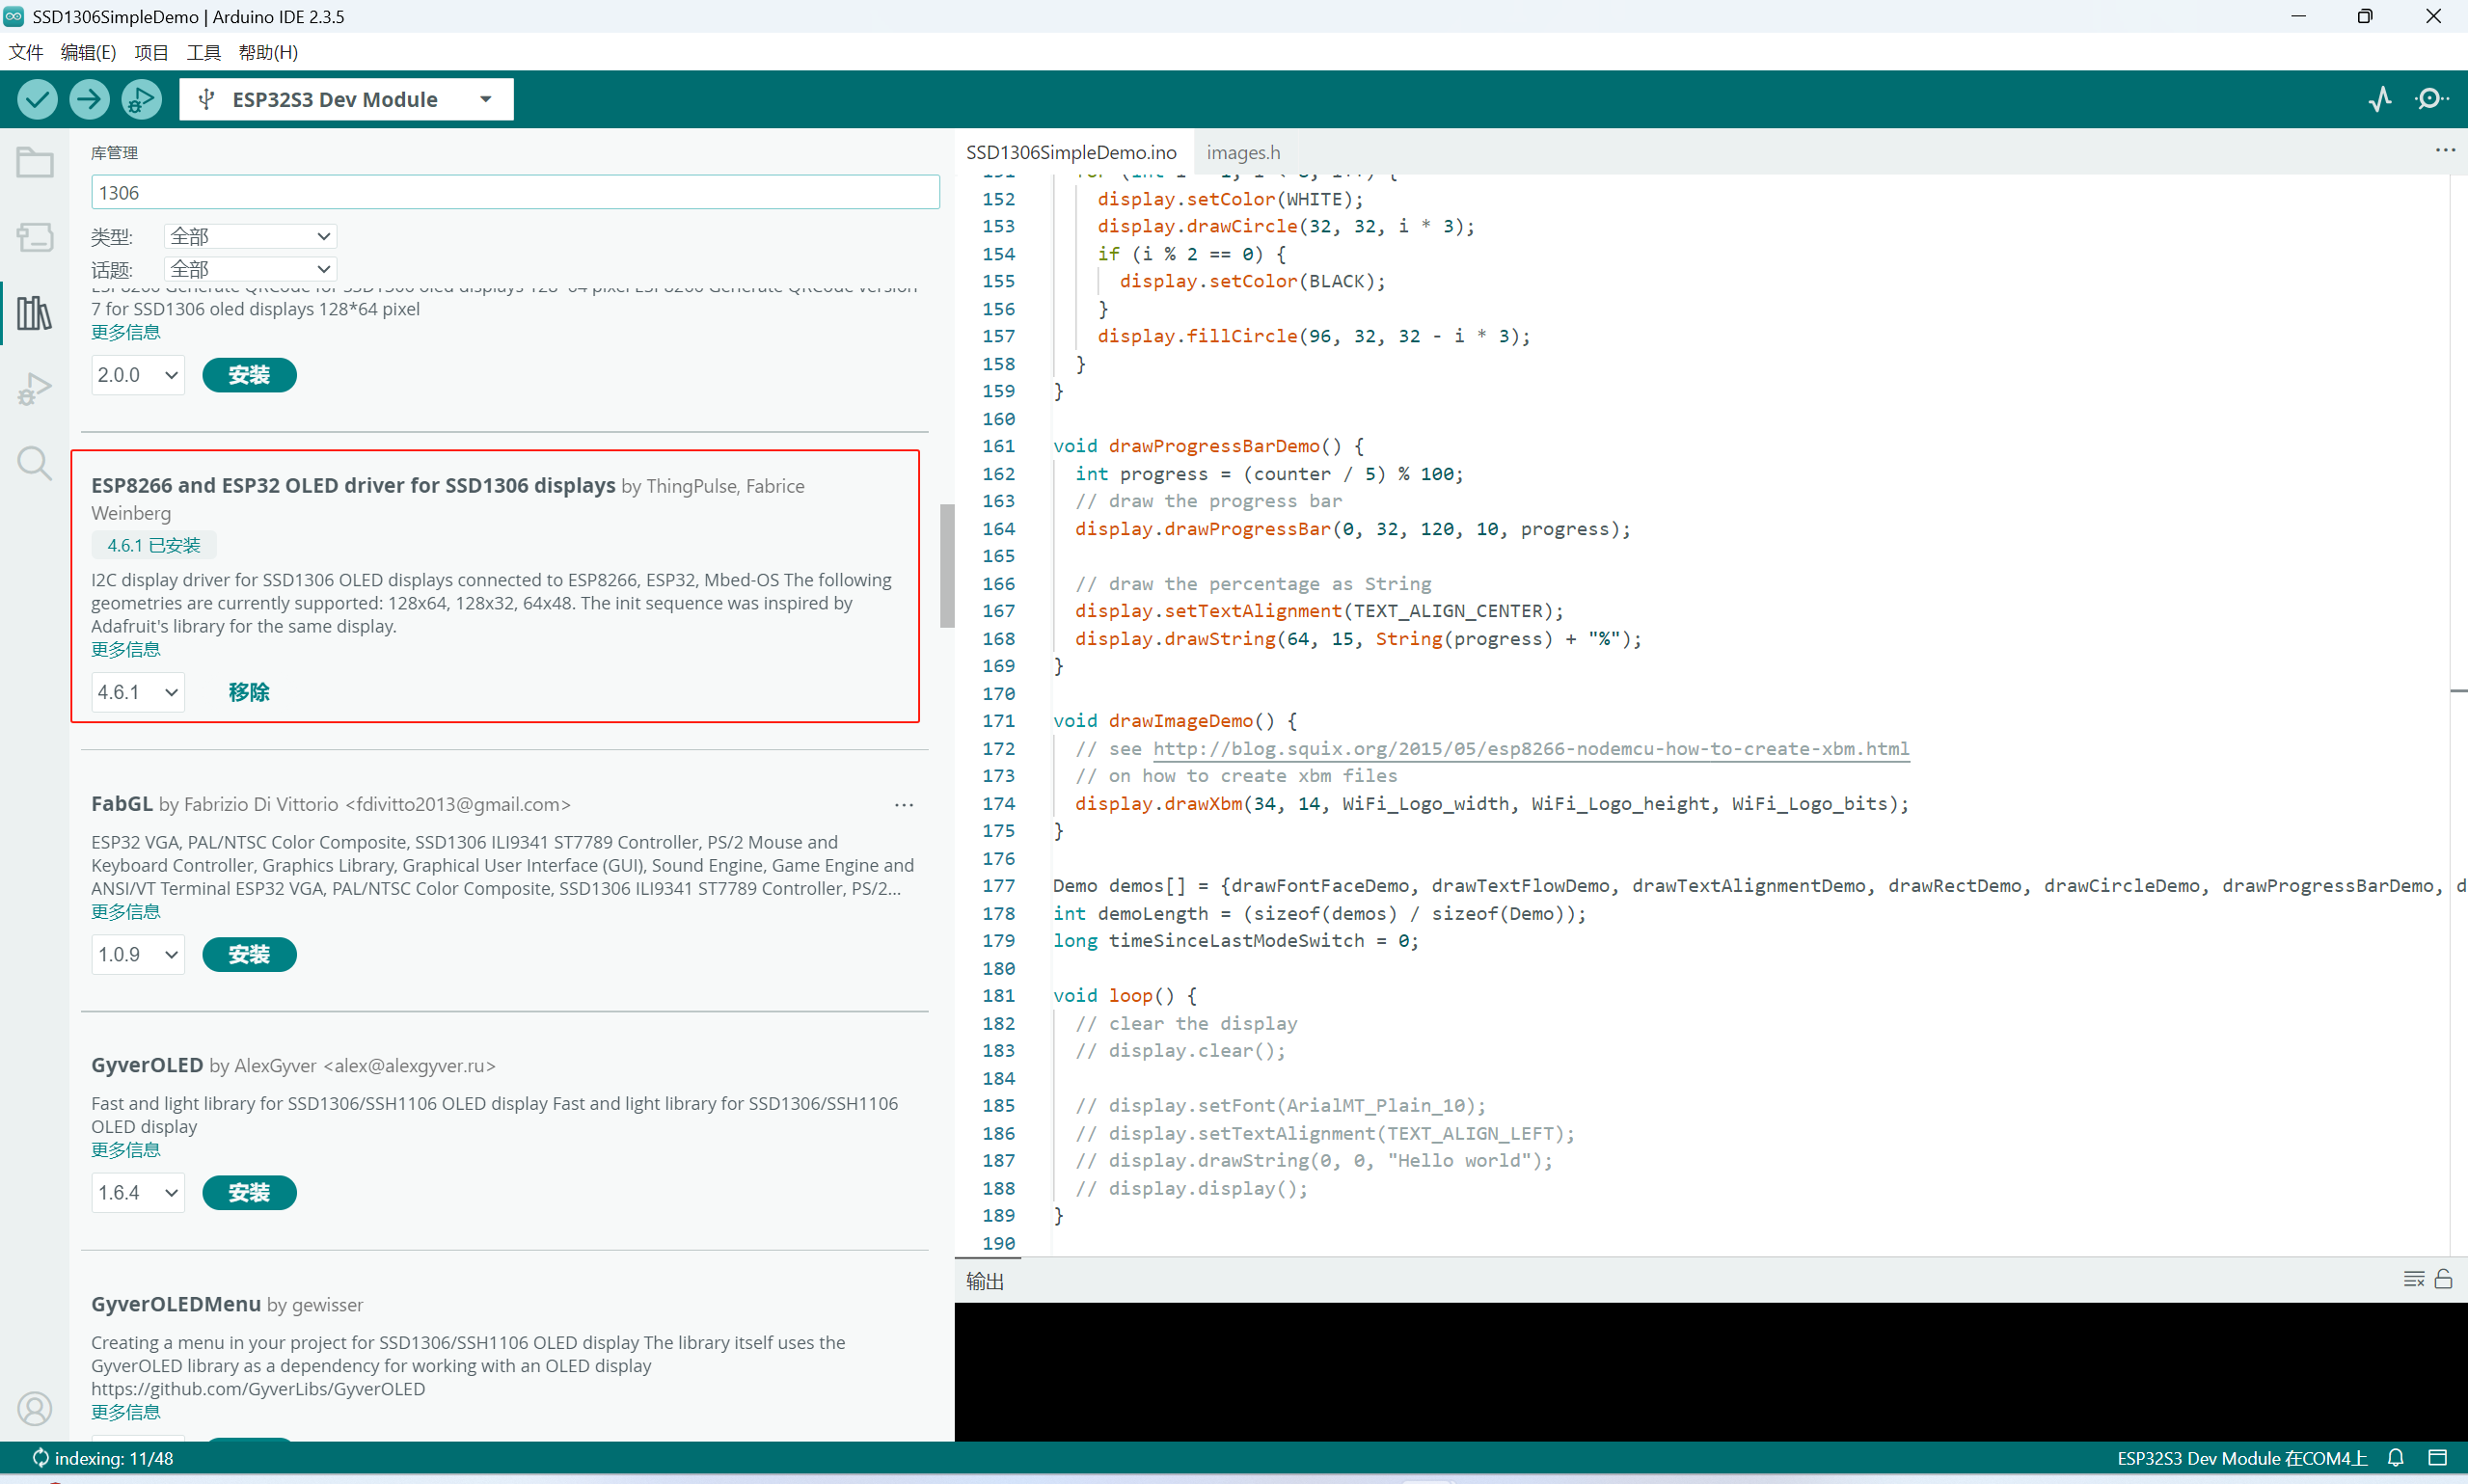
安装库
连接OLED屏使用的是这个库:
GitHub地址:https://github.com/ThingPulse/esp8266-oled-ssd1306
介绍
基于 SSD1306 和 SH1106 的 128x64、128x32、64x48 像素 OLED 显示屏在 ESP8266/ESP32 上的驱动程序。
这是一个适用于 Arduino/ESP8266 & ESP32 和 mbed-os 平台的 SSD1306 和 SH1106 128x64、128x32、64x48 和 64x32 OLED 显示屏的驱动程序。可以使用 I2C 或 SPI 版本的显示屏。
安装成功之后打开示例:

运行示例
修改示例中的这个位置:
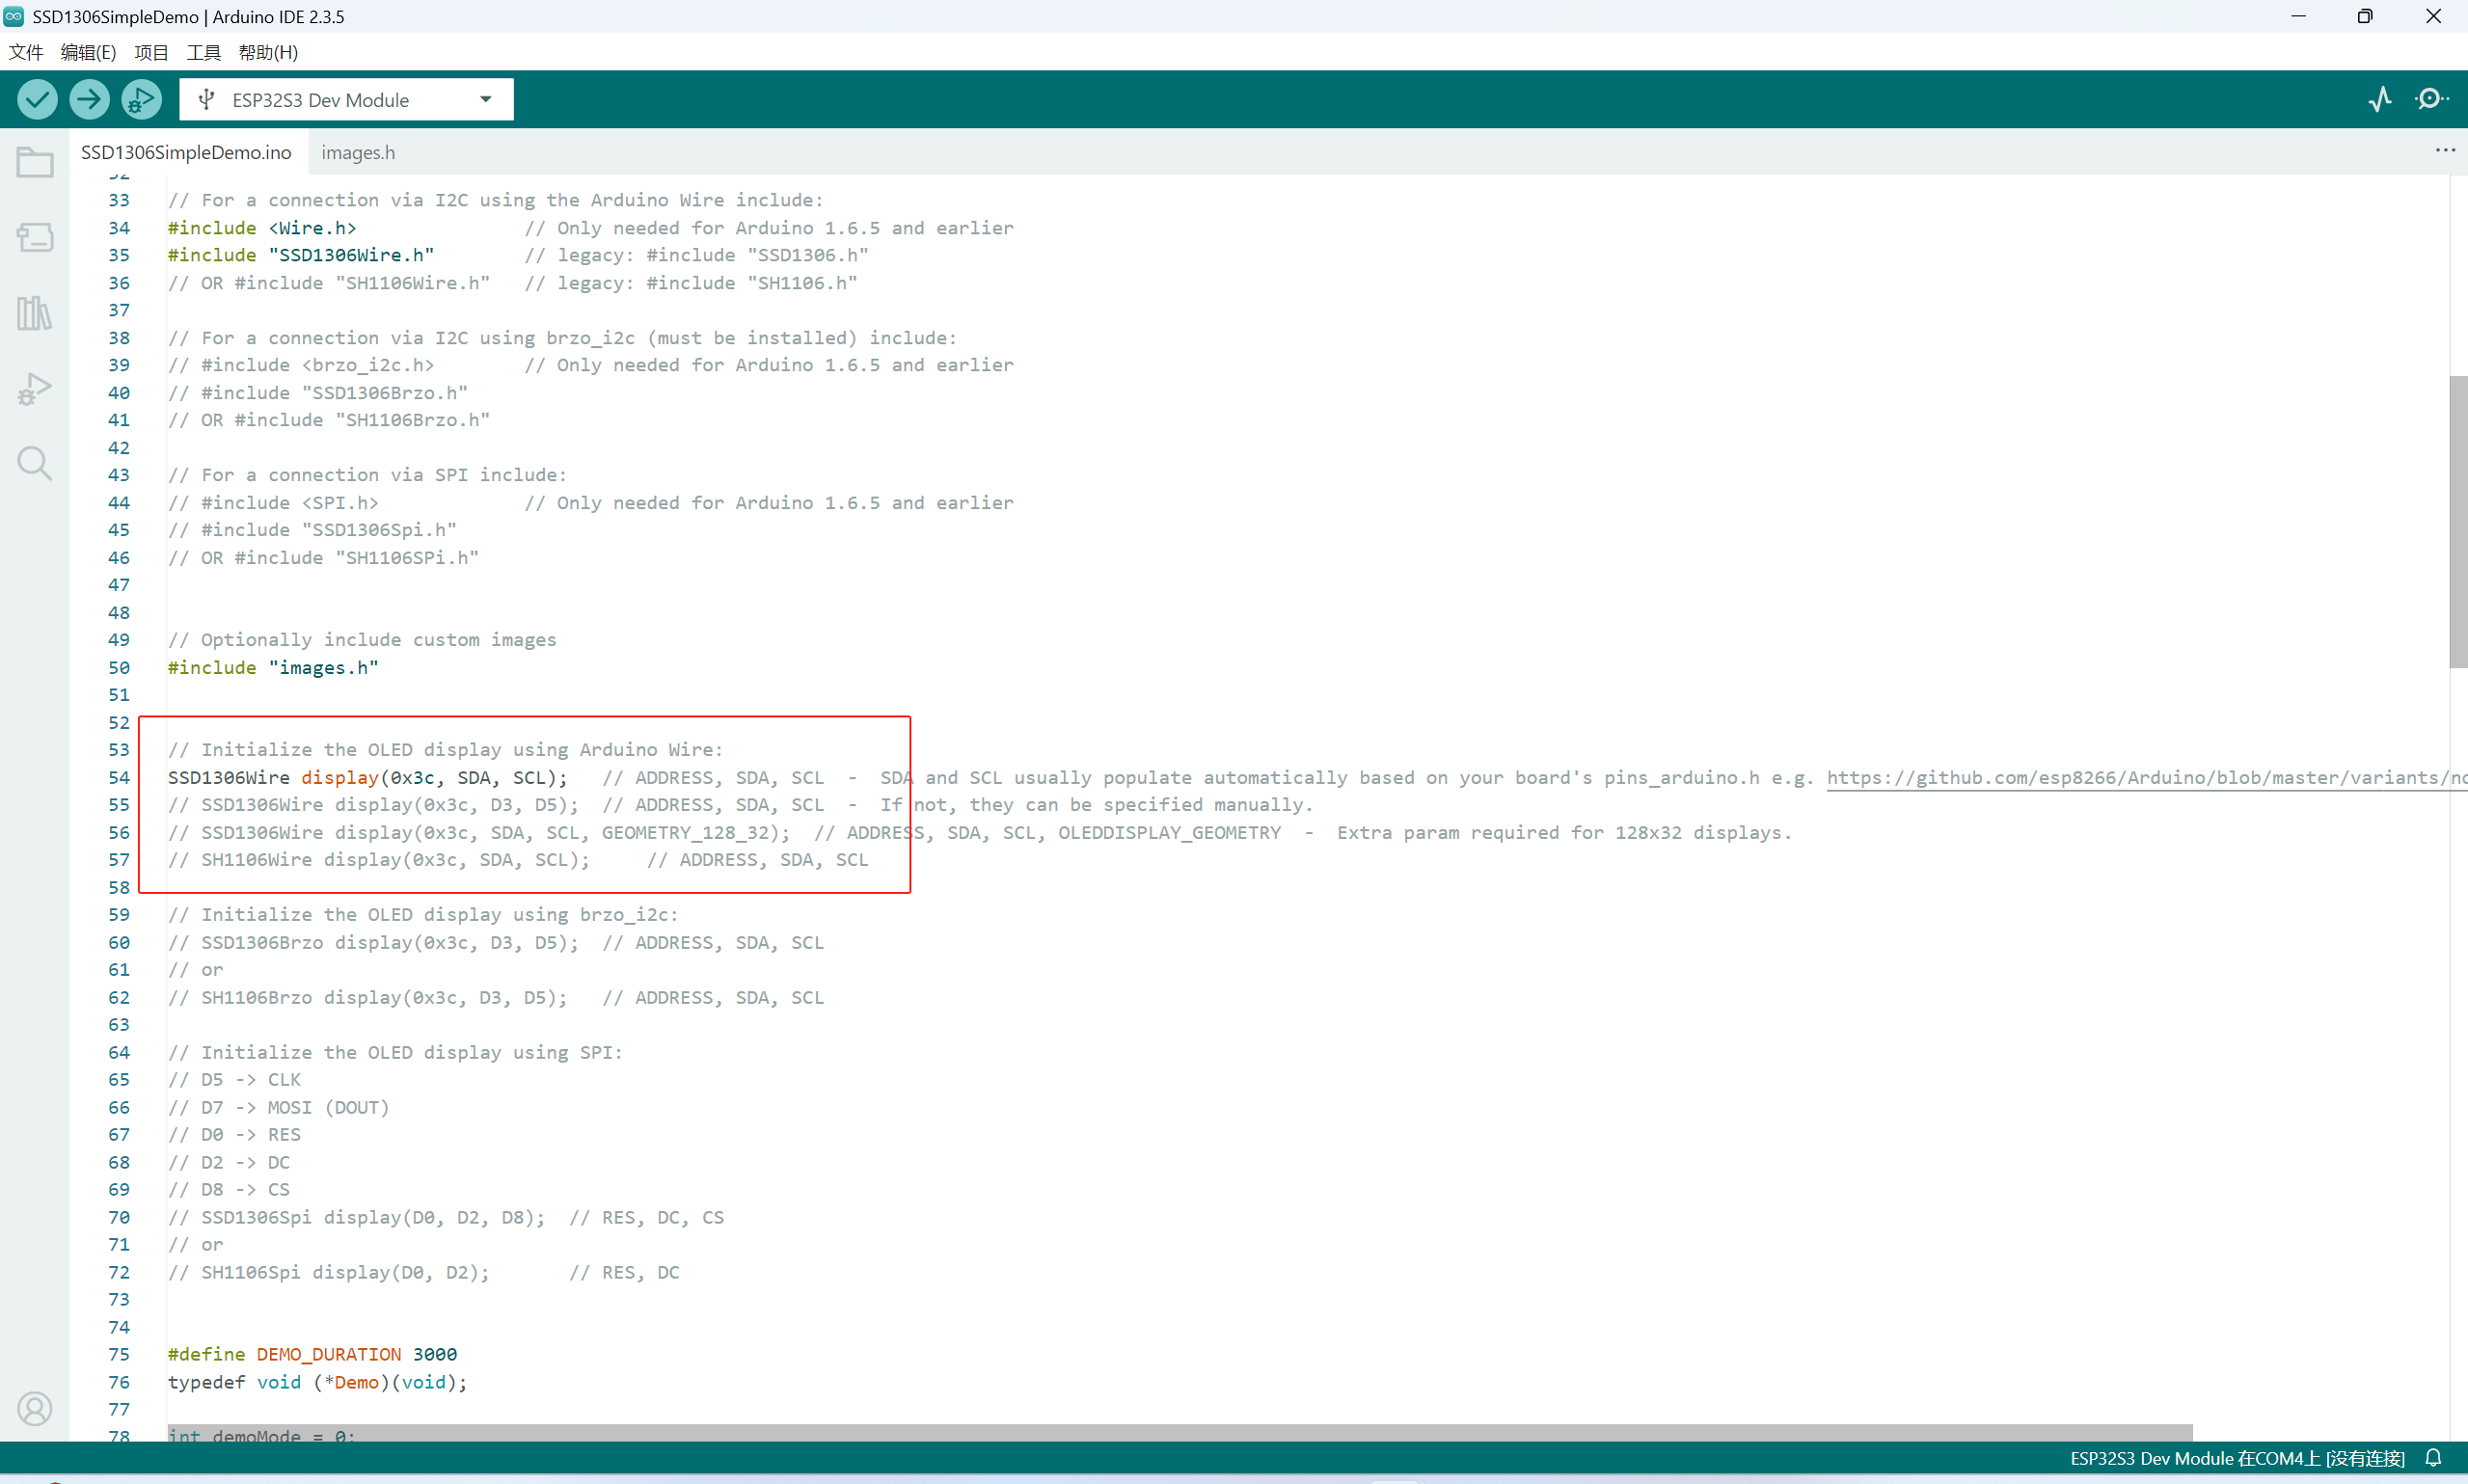
修改为:
也就是修改为SDA与SCL连接的引脚。
现在编译并烧录一下查看效果:
显示英文
现在成功运行了示例,就可以看示例进行学习。
先学着显示英文。
新建一个项目:
#include <Wire.h> // Only needed for Arduino 1.6.5 and earlier
#include "SSD1306Wire.h"
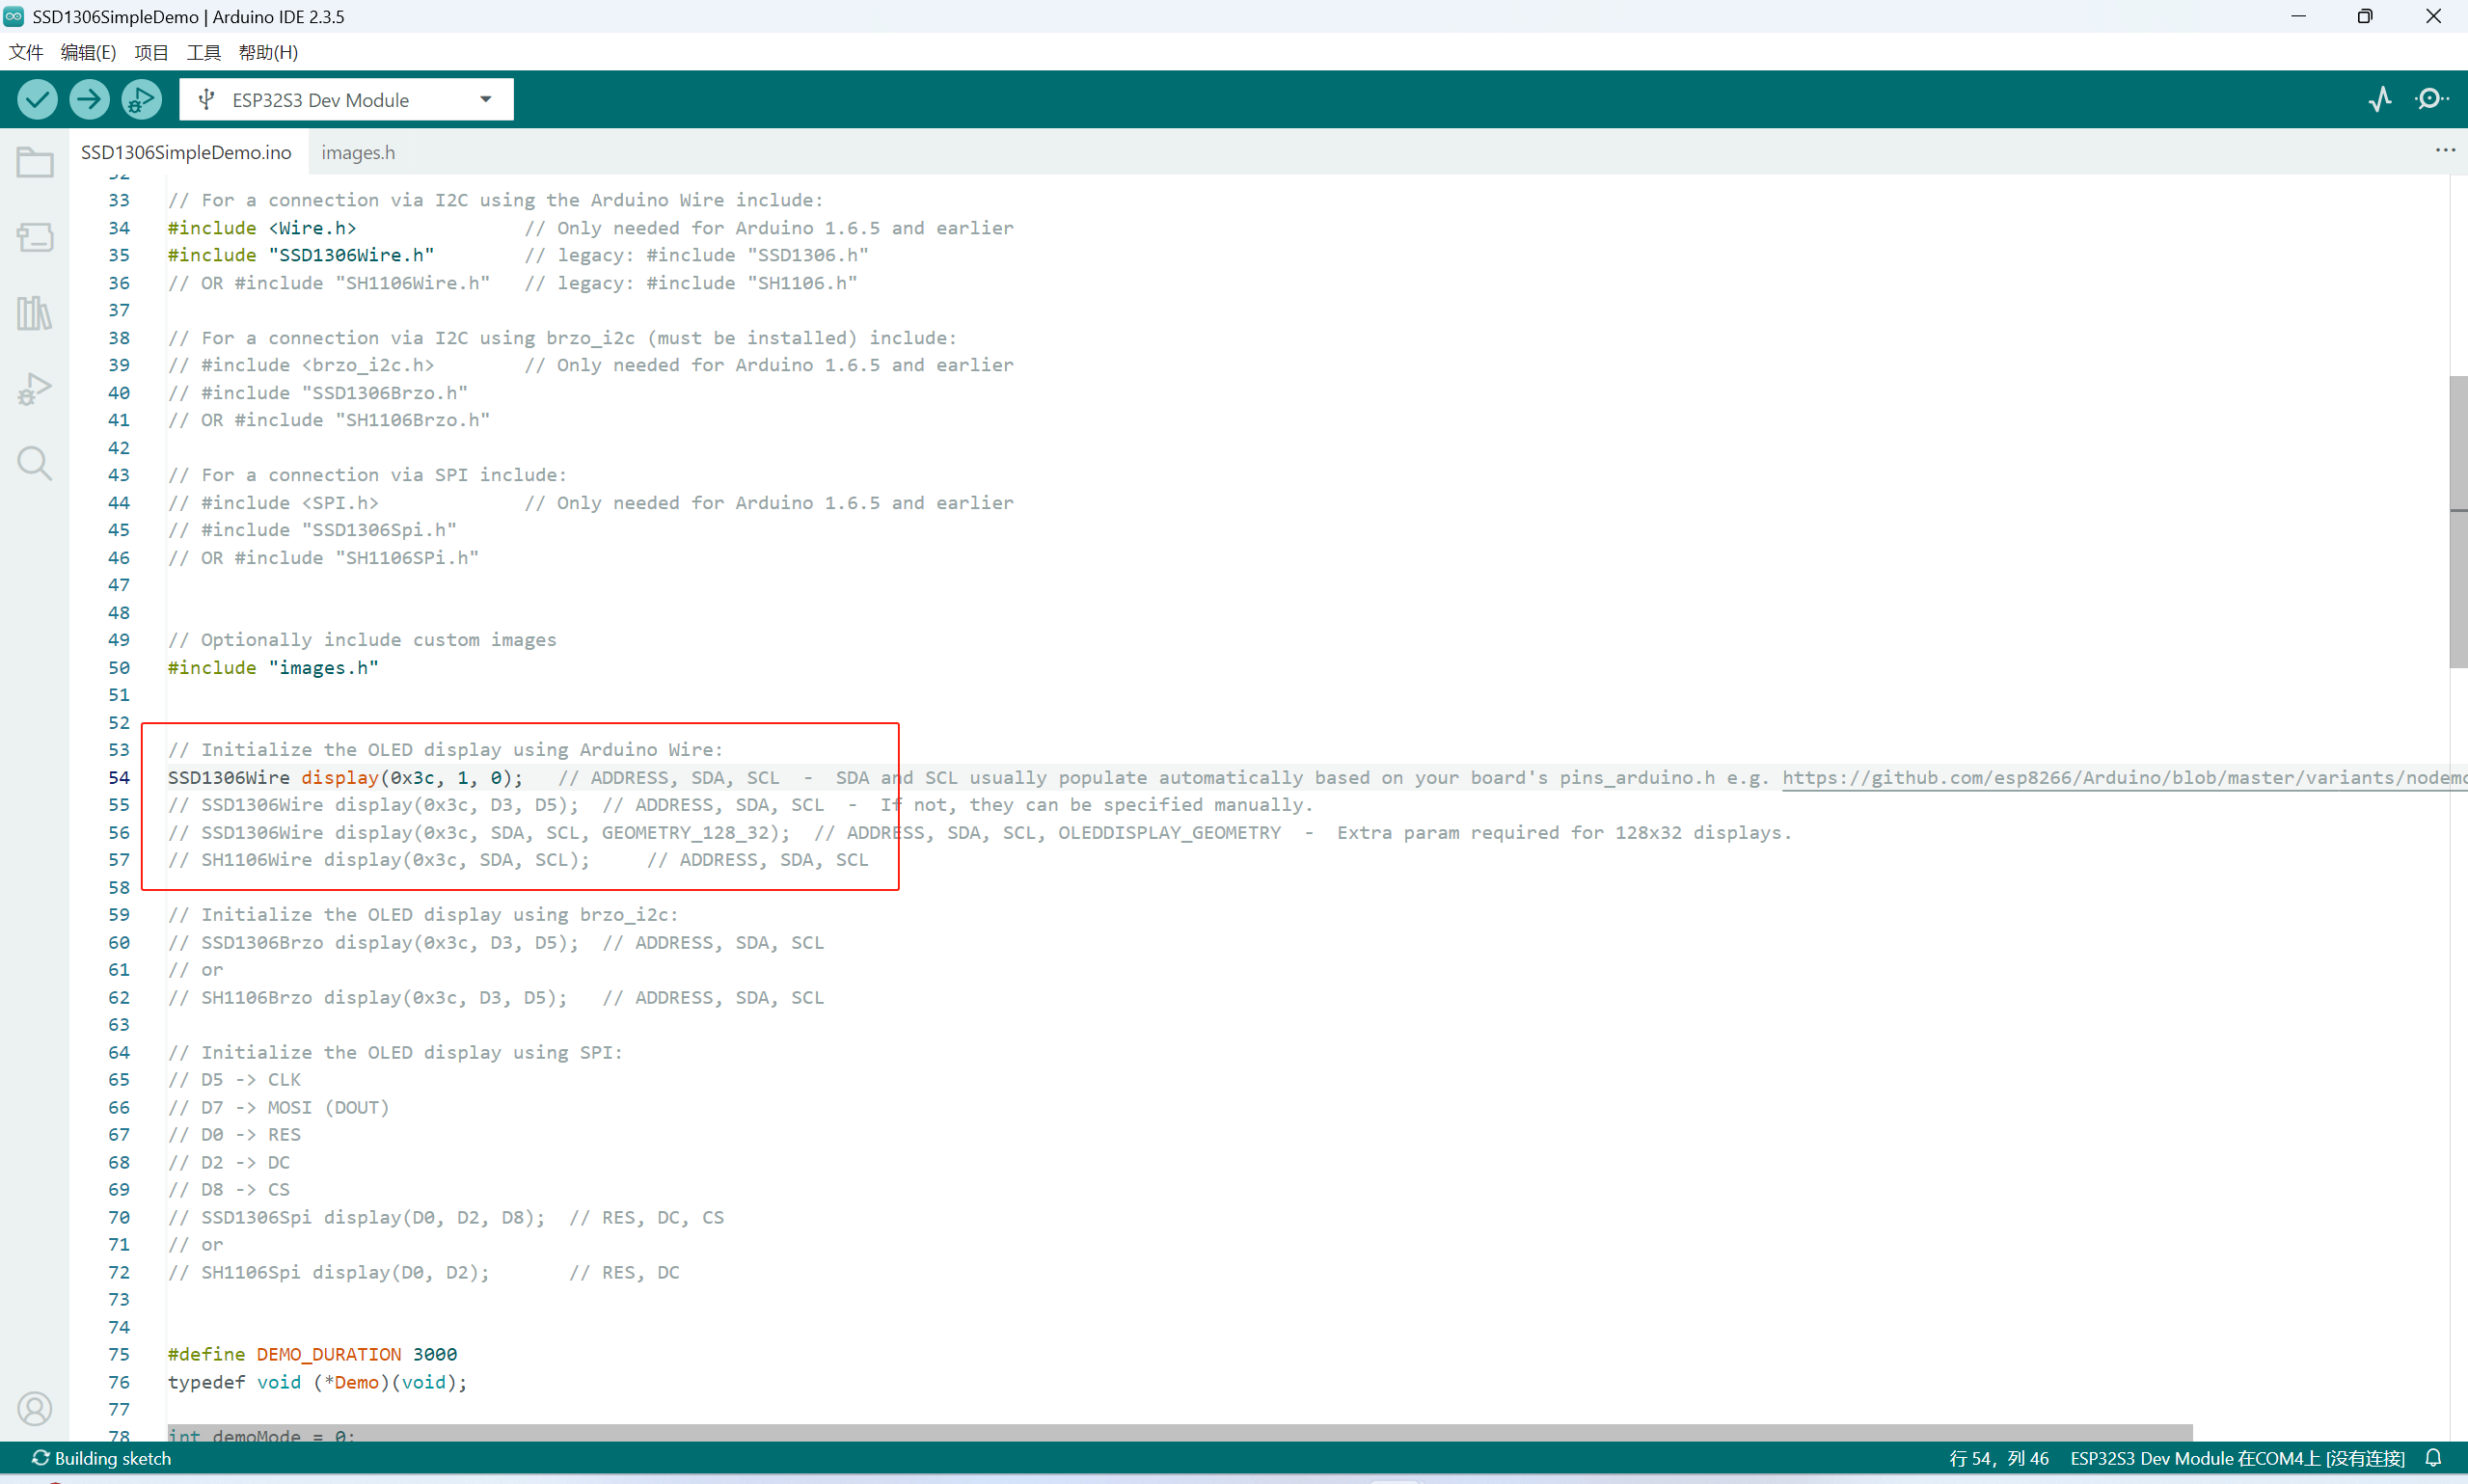
// Initialize the OLED display using Arduino Wire:
SSD1306Wire display(0x3c, 1, 0, GEOMETRY_128_32);
void setup() {
// put your setup code here, to run once:
Serial.begin(115200);
// Initialising the UI will init the display too.
display.init();
display.flipScreenVertically();
display.setFont(ArialMT_Plain_24);
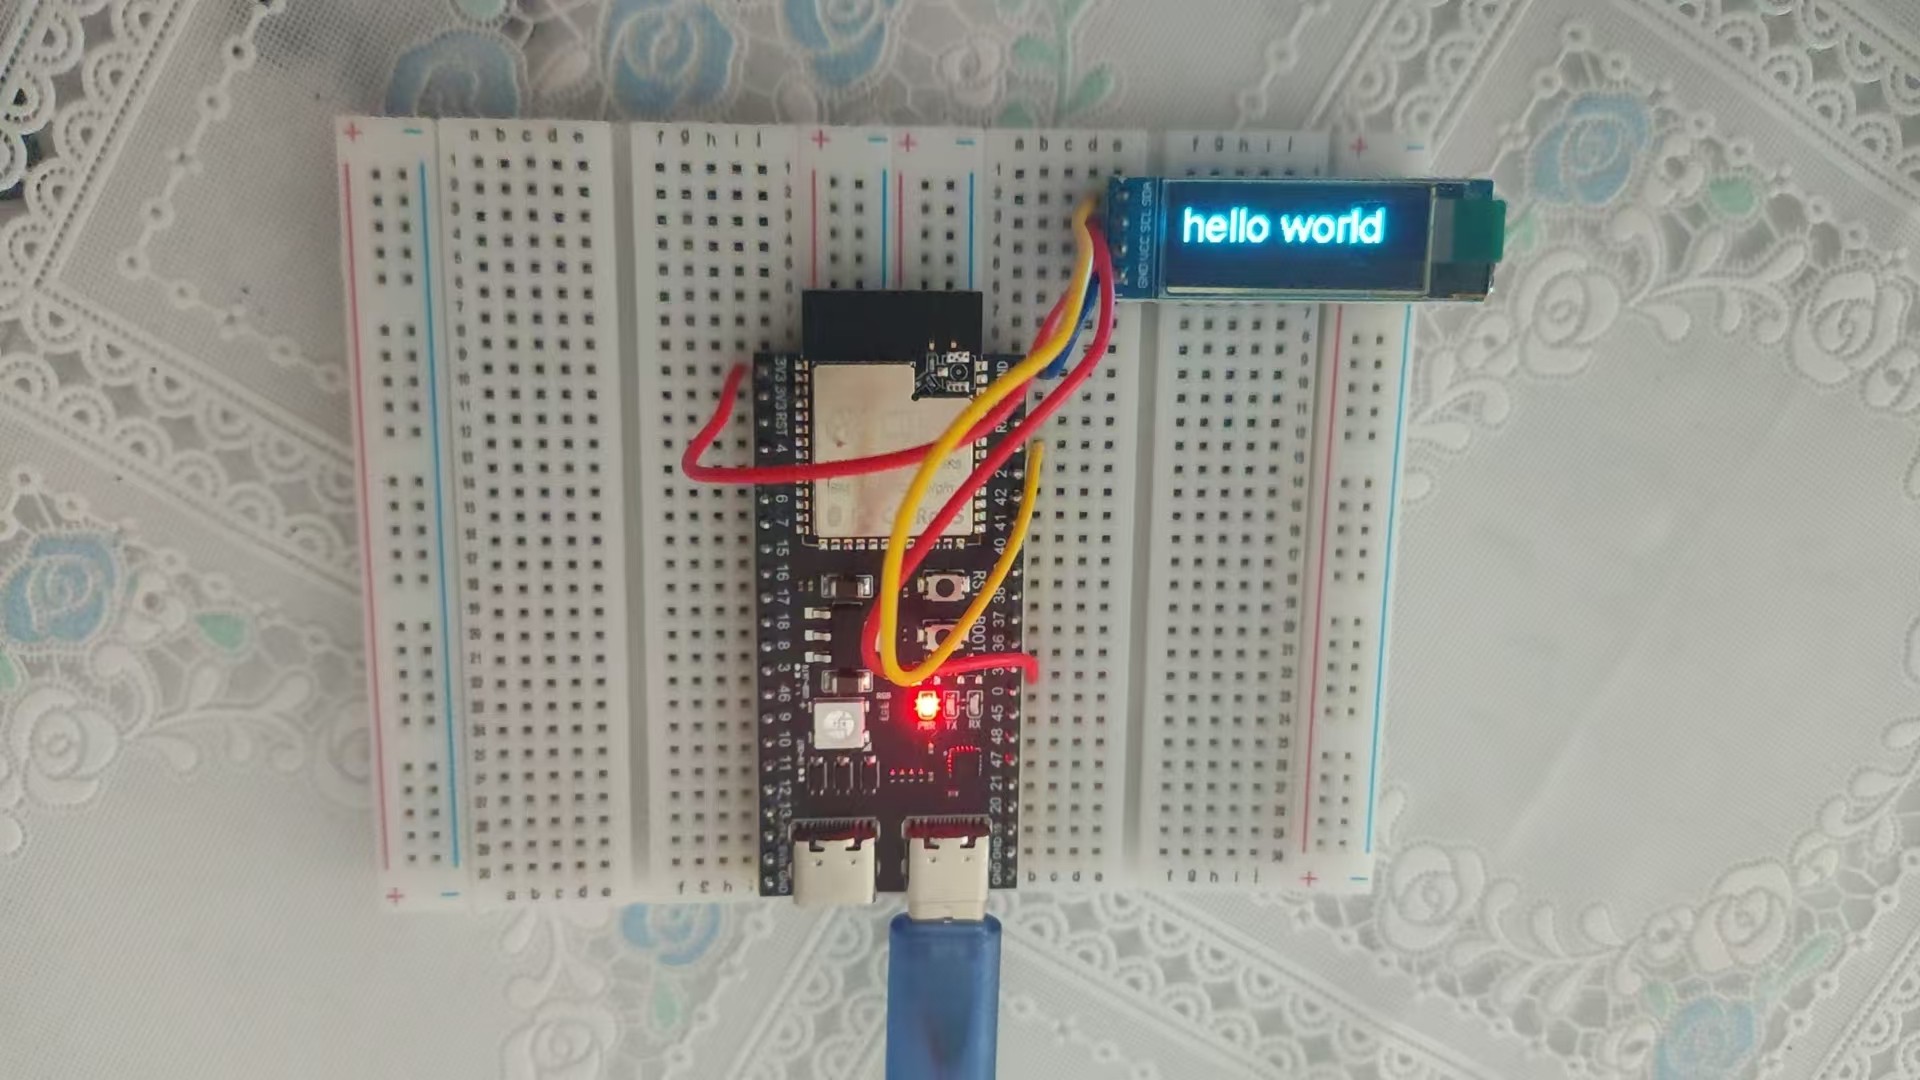
display.drawString(0, 0, "hello world");
display.display();
}
void loop() {
}
效果:
比如现在我想要在显示"hello world"之后从1%到100%循环显示。
代码如下:
#include <Wire.h>               // Only needed for Arduino 1.5 and earlier

#include "SSD1306Wire.h"

// Initialize the OLED display

SSD1306Wire display(0x3c, 1, 0, GEOMETRY_128_32);

bool showHelloWorld = true;     // 初始显示 "hello world"

int percentage = 1;             // 从 1% 开始

unsigned long lastUpdate = 0;   // 记录上次更新时间

const int updateInterval = 200; // 更新间隔(毫秒)

void setup() {

  Serial.begin(115200);

  display.init();

  display.flipScreenVertically();

  display.setFont(ArialMT_Plain_24);

  // 初始显示 "hello world"

  display.clear();

  display.drawString(0, 0, "hello world");

  display.display();

  lastUpdate = millis(); // 记录初始时间

}

void loop() {

  unsigned long currentTime = millis();

  // 如果当前时间 - 上次更新时间 >= 间隔时间,则更新显示

  if (currentTime - lastUpdate >= updateInterval) {

    lastUpdate = currentTime;

    if (showHelloWorld) {

      // 显示 "hello world" 后,切换到百分比显示

      showHelloWorld = false;

    } else {

      // 更新百分比(1% ~ 100%)

      display.clear();

      display.drawString(0, 0, String(percentage) + "%");

      display.display();

      percentage++;

      if (percentage > 100) {

        percentage = 1; // 循环显示

      }

    }

  }

}
滚动播放
代码如下:
#include <Wire.h>

#include "SSD1306Wire.h"

SSD1306Wire display(0x3c, 1, 0, GEOMETRY_128_32);

String longText = "This is a very long text that cannot fit on the screen at once. It will scroll horizontally.";

int textPosition = 0;  // 当前滚动位置

unsigned long lastScrollTime = 0;

const int scrollDelay = 150;  // 滚动速度(毫秒)

void setup() {

  Serial.begin(115200);

  display.init();

  display.flipScreenVertically();

  display.setFont(ArialMT_Plain_10);  // 使用小字体以显示更多内容

}

void loop() {

  if (millis() - lastScrollTime >= scrollDelay) {

    lastScrollTime = millis();

    display.clear();

    display.drawString(-textPosition, 0, longText);  // 负坐标实现左滚动

    display.display();

    textPosition++;  // 每次移动1像素

    // 如果文本完全滚出屏幕,重置位置

    if (textPosition > display.getStringWidth(longText)) {

      textPosition = 0;

    }

  }

}
显示中文
显示中文需要安装额外的库:U8g2lib
代码:
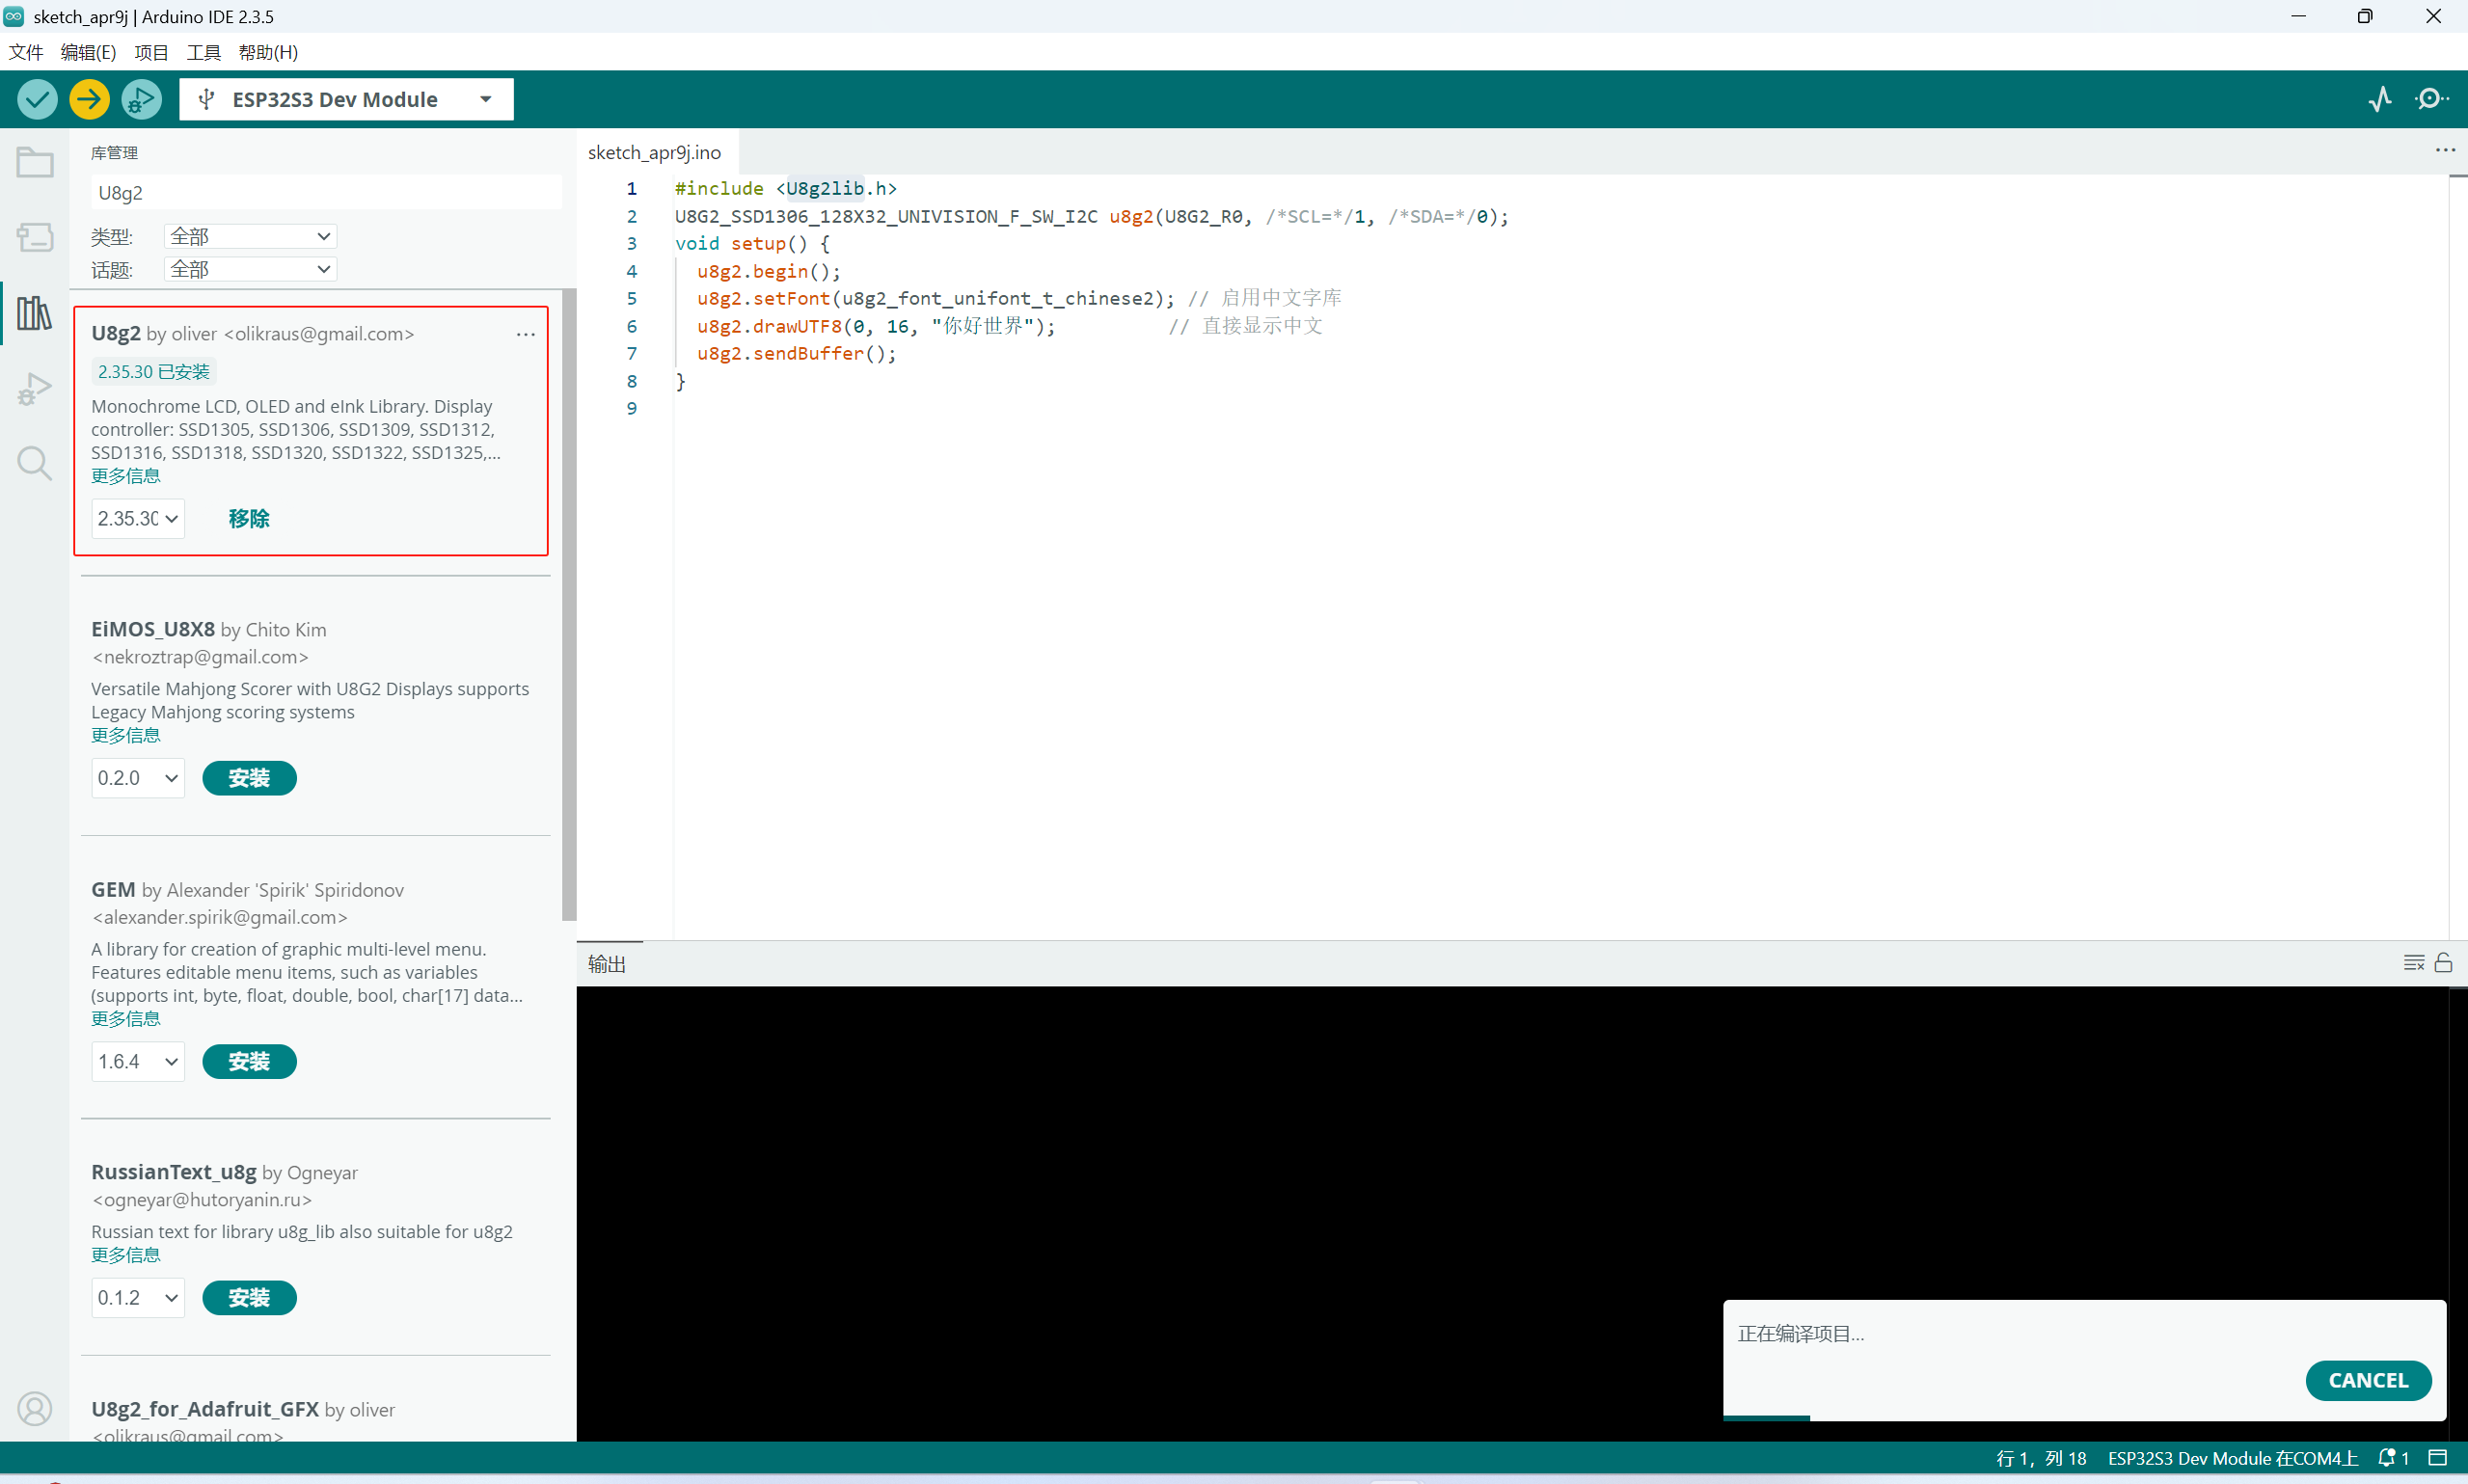
#include <U8g2lib.h>
U8G2_SSD1306_128X32_UNIVISION_F_SW_I2C u8g2(U8G2_R0, /*SCL=*/0, /*SDA=*/1, /*RESET=*/U8X8_PIN_NONE);
void setup() {
Serial.begin(115200);
u8g2.begin();
u8g2.enableUTF8Print();
// 使用更紧凑的字体
u8g2.setFont(u8g2_font_unifont_t_chinese2);
// 获取字体实际高度并计算安全 Y 坐标
uint8_t fontHeight = u8g2.getMaxCharHeight();
uint8_t yPos = 32 - fontHeight; // 确保底部不超出屏幕
Serial.print("Font Height: ");
Serial.println(fontHeight);
Serial.print("Y Position: ");
Serial.println(yPos);
u8g2.clearBuffer();
u8g2.setCursor(0, yPos);
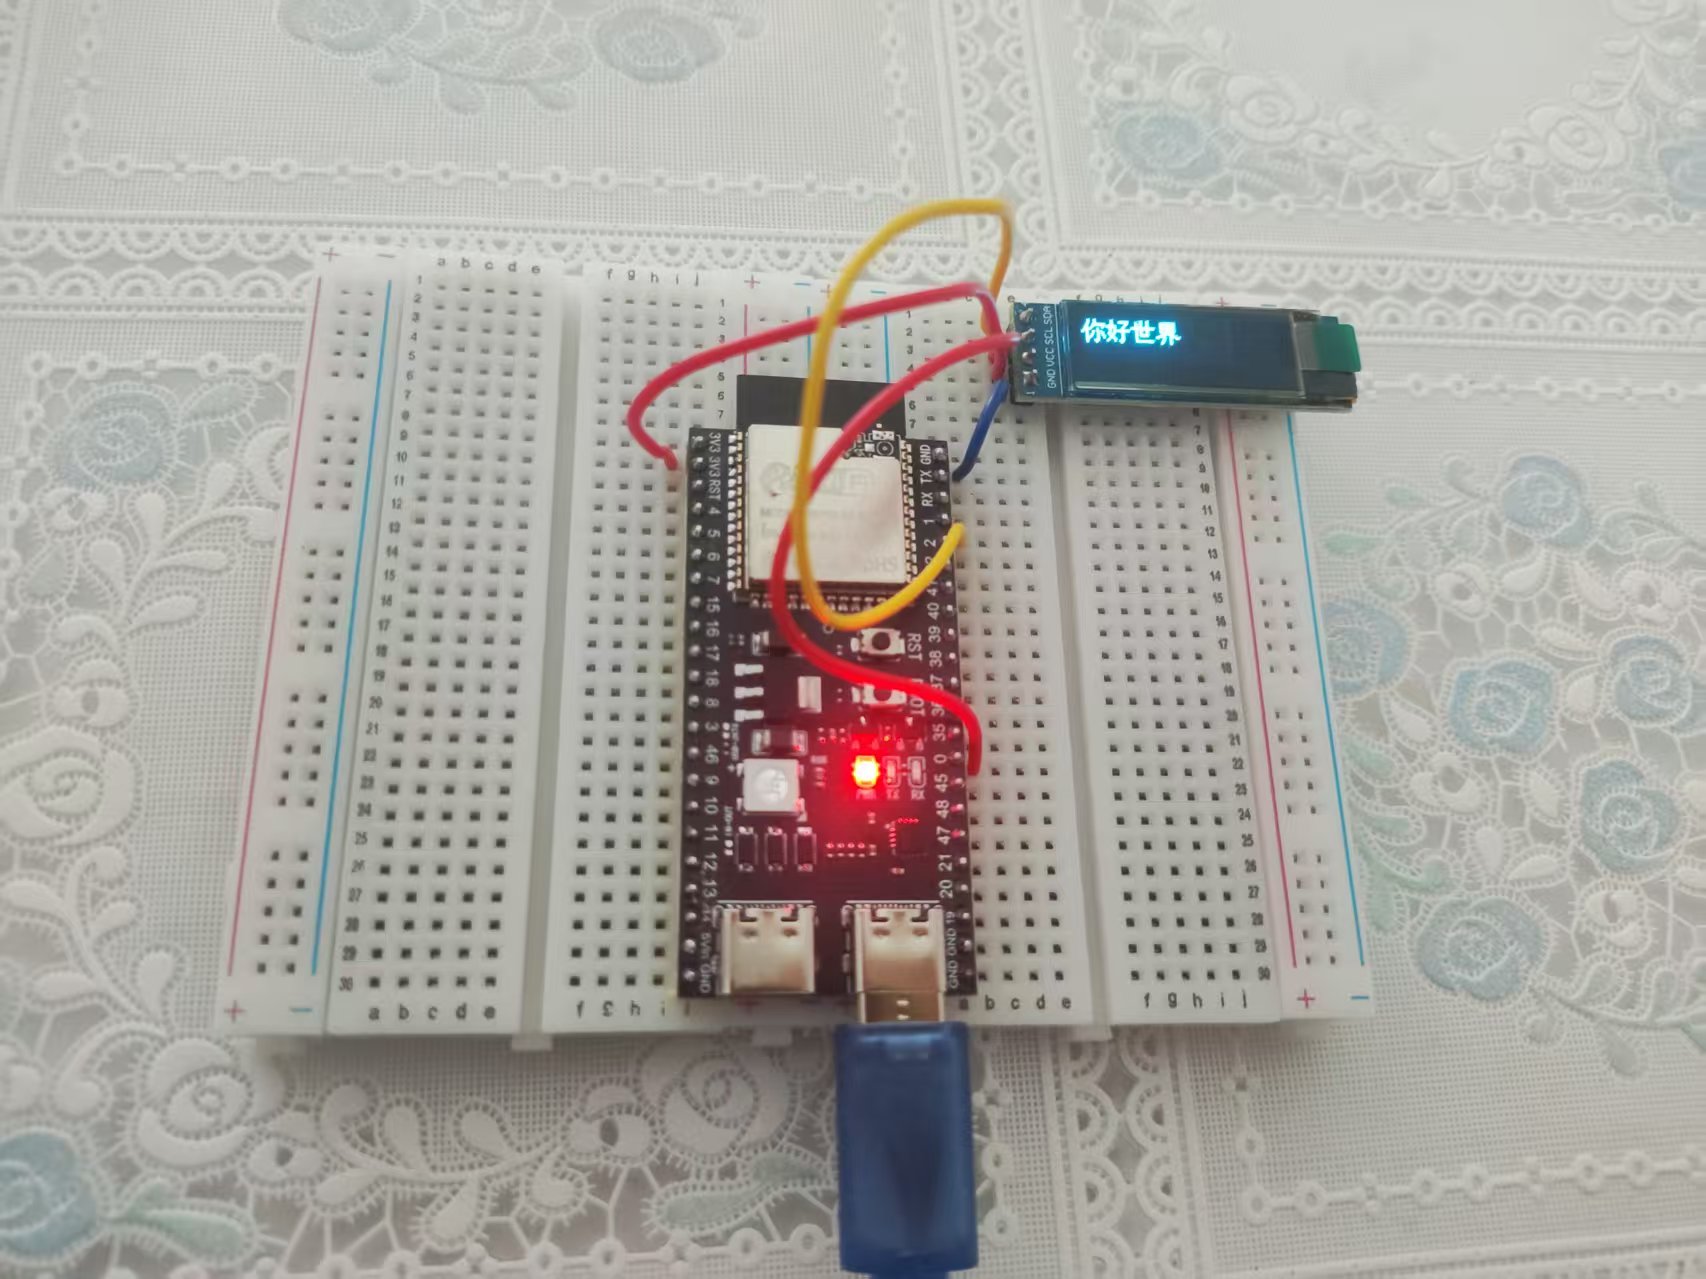
u8g2.print("你好世界");
u8g2.sendBuffer();
delay(100);
}
void loop() {}
效果:
水平滚动显示中文
代码如下:
#include <U8g2lib.h>

U8G2_SSD1306_128X32_UNIVISION_F_SW_I2C u8g2(U8G2_R0, /*SCL=*/0, /*SDA=*/1, /*RESET=*/U8X8_PIN_NONE);

// 要显示的中文长文本

const char *longText = "这是一个很长很长的中文文本,它将会在屏幕上水平滚动显示。";

// 滚动相关的变量

int16_t textWidth;        // 文本的实际宽度

int16_t scrollPosition = 0; // 当前滚动位置

unsigned long lastScrollTime = 0; // 上次滚动的时间

const unsigned long scrollInterval = 5; // 滚动间隔时间(毫秒)

uint8_t fontHeight;          //字体高度

uint8_t yPos;              //Y坐标

void setup() {

  Serial.begin(115200);

  u8g2.begin();

  u8g2.enableUTF8Print();

  // 使用更紧凑的字体,适合中文显示

  u8g2.setFont(u8g2_font_unifont_t_chinese2);

  // 获取字体实际高度并计算安全 Y 坐标

  fontHeight = u8g2.getMaxCharHeight();

  yPos = 32 - fontHeight; // 确保底部不超出屏幕

  Serial.print("Font Height: ");

  Serial.println(fontHeight);

  Serial.print("Y Position: ");

  Serial.println(yPos);

  // 计算文本的实际宽度

  textWidth = u8g2.getUTF8Width(longText);

  Serial.print("Text Width: ");

  Serial.println(textWidth);

}

void loop() {

  // 获取当前时间

  unsigned long currentTime = millis();

  // 检查是否需要滚动

  if (currentTime - lastScrollTime >= scrollInterval) {

    lastScrollTime = currentTime;

    // 更新滚动位置

    scrollPosition+=5;

    // 如果滚动到文本末尾,则重置滚动位置

    if (scrollPosition > textWidth) {

      scrollPosition = 0;

    }

    // 重绘屏幕

    drawScrollingText();

  }

}

// 绘制滚动文本的函数

void drawScrollingText() {

  u8g2.clearBuffer();

  // 计算绘制文本的起始 X 坐标(负数表示文本部分在屏幕外)

  int16_t xPos = 0 - scrollPosition;

  // 绘制文本

  u8g2.setCursor(xPos, yPos);

  u8g2.print(longText);

  u8g2.sendBuffer();

}
感觉效果不是很好。
中文分段显示
代码如下:
#include <U8g2lib.h>

// 定义屏幕对象(根据实际使用的屏幕和接口调整构造函数参数)

U8G2_SSD1306_128X32_UNIVISION_F_SW_I2C u8g2(U8G2_R0, /*SCL=*/0, /*SDA=*/1, /*RESET=*/U8X8_PIN_NONE);

// 要显示的中文长文本

const char *longText = "这是一个很长很长的中文文本,它将会在屏幕上分段显示。";

// 显示相关的全局变量

uint8_t fontHeight;         // 字体高度

uint8_t yPos;               // 文本在 Y 轴上的显示位置

const uint16_t screenWidth = 128; // OLED 屏幕宽度

// 控制段显示的时间(毫秒)

const unsigned long segmentDisplayTime = 2000;  // 每段显示 2 秒

unsigned long lastSegmentChange = 0;            // 上一次切换段的时间

// 记录当前段在文本中的起始字节索引

int currentSegmentStart = 0;

// 用于测量 UTF-8 字符占用的字节数

int utf8CharBytes(char c) {

  if ((c & 0x80) == 0) return 1;          // ASCII

  else if ((c & 0xE0) == 0xC0) return 2;    // 2 字节

  else if ((c & 0xF0) == 0xE0) return 3;    // 3 字节

  else if ((c & 0xF8) == 0xF0) return 4;    // 4 字节

  return 1; // 默认返回 1

}

// 根据当前起始位置和屏幕宽度,计算下一段的起始位置

int getNextSegmentStart(const char* text, int startIndex, int maxWidth) {

  int bytePos = startIndex;

  int segmentWidth = 0;

  int lastValidPos = bytePos;

  // 累计添加字符直到超出屏幕宽度

  while (text[bytePos] != '\0') {

    int charBytes = utf8CharBytes(text[bytePos]);

    char buffer[10] = {0};  // 临时存放单个字符,最多支持 4 字节编码

    for (int i = 0; i < charBytes; i++) {

      buffer[i] = text[bytePos + i];

    }

    int charWidth = u8g2.getUTF8Width(buffer);

    // 如果再加当前字符会超过最大宽度,则退出循环

    if (segmentWidth + charWidth > maxWidth) {

      break;

    }

    segmentWidth += charWidth;

    lastValidPos = bytePos + charBytes;

    bytePos += charBytes;

  }

  // 如果到达文本末尾,则下次从0开始

  if (text[bytePos] == '\0') {

    return 0;

  }

  return lastValidPos;

}

// 将当前段字符提取并显示到屏幕

void drawSegment(const char* text, int startIndex) {

  u8g2.clearBuffer();

  char segment[256] = {0};  // 存放本段字符串,注意长度根据文本长度自行调整

  int bytePos = startIndex;

  int segmentWidth = 0;

  int segIndex = 0;

  // 逐字符读取,直到累计宽度超过屏幕宽度或遇到字符串终结符

  while (text[bytePos] != '\0') {

    int charBytes = utf8CharBytes(text[bytePos]);

    char temp[10] = {0};

    for (int i = 0; i < charBytes; i++) {

      temp[i] = text[bytePos + i];

    }

    int charWidth = u8g2.getUTF8Width(temp);

    // 达到最大宽度就停止

    if (segmentWidth + charWidth > screenWidth) {

      break;

    }

    // 将当前字符复制到 segment 中

    for (int i = 0; i < charBytes; i++) {

      segment[segIndex++] = text[bytePos + i];

    }

    segmentWidth += charWidth;

    bytePos += charBytes;

  }

  segment[segIndex] = '\0';  // 末尾加上结束符

  // 将段文本显示在屏幕上,Y 坐标保持之前计算的值

  u8g2.setCursor(0, yPos);

  u8g2.print(segment);

  u8g2.sendBuffer();

}

void setup() {

  Serial.begin(115200);

  u8g2.begin();

  u8g2.enableUTF8Print();

  // 设置支持中文的字体

  u8g2.setFont(u8g2_font_wqy12_t_gb2312);

  // 获取字体高度,计算 Y 坐标(确保文字不会超出屏幕)

  fontHeight = u8g2.getMaxCharHeight();

  //yPos = 32 - fontHeight; // OLED 分辨率 128x32

  yPos = (32 + fontHeight) / 2;

  Serial.print("Font Height: ");

  Serial.println(fontHeight);

  // 如果需要第一次直接显示部分文本,可在 setup 中调用 drawSegment()

  drawSegment(longText, currentSegmentStart);

}

void loop() {

  unsigned long currentTime = millis();

  // 判断是否到达切换段的时间

  if (currentTime - lastSegmentChange >= segmentDisplayTime) {

    lastSegmentChange = currentTime;

    // 根据当前段计算下段起始位置

    currentSegmentStart = getNextSegmentStart(longText, currentSegmentStart, screenWidth);

  }

  drawSegment(longText, currentSegmentStart);

}
ESP32+Arduino入门教程(二):连接OLED屏的更多相关文章
- SpringBoot入门教程(二)CentOS部署SpringBoot项目从0到1
在之前的博文<详解intellij idea搭建SpringBoot>介绍了idea搭建SpringBoot的详细过程, 并在<CentOS安装Tomcat>中介绍了Tomca ...
- RabbitMQ入门教程(二):简介和基本概念
原文:RabbitMQ入门教程(二):简介和基本概念 版权声明:本文为博主原创文章,遵循CC 4.0 BY-SA版权协议,转载请附上原文出处链接和本声明. 本文链接:https://blog.csdn ...
- 无废话ExtJs 入门教程二十一[继承:Extend]
无废话ExtJs 入门教程二十一[继承:Extend] extjs技术交流,欢迎加群(201926085) 在开发中,我们在使用视图组件时,经常要设置宽度,高度,标题等属性.而这些属性可以通过“继承” ...
- 无废话ExtJs 入门教程二十[数据交互:AJAX]
无废话ExtJs 入门教程二十[数据交互:AJAX] extjs技术交流,欢迎加群(521711109) 1.代码如下: 1 <!DOCTYPE html PUBLIC "-//W3C ...
- 无废话ExtJs 入门教程二[Hello World]
无废话ExtJs 入门教程二[Hello World] extjs技术交流,欢迎加群(201926085) 我们在学校里学习任何一门语言都是从"Hello World"开始,这里我 ...
- mongodb入门教程二
title: mongodb入门教程二 date: 2016-04-07 10:33:02 tags: --- 上一篇文章说了mongodb最基本的东西,这边博文就在深入一点,说一下mongo的一些高 ...
- PySide——Python图形化界面入门教程(二)
PySide——Python图形化界面入门教程(二) ——交互Widget和布局容器 ——Interactive Widgets and Layout Containers 翻译自:http://py ...
- Elasticsearch入门教程(二):Elasticsearch核心概念
原文:Elasticsearch入门教程(二):Elasticsearch核心概念 版权声明:本文为博主原创文章,遵循CC 4.0 BY-SA版权协议,转载请附上原文出处链接和本声明. 本文链接:ht ...
- JasperReports入门教程(二):中文打印
JasperReports入门教程(二):中文打印 背景 在上一篇中我们介绍了JasperReport的基本入门,也展示了一个报表.但是我们的示例都是使用的英文,如果我们把需要打印的数据改为中文会怎么 ...
- WebGL入门教程(二)-webgl绘制三角形
前面已经介绍过了webgl,WebGL入门教程(一)-初识webgl(http://www.cnblogs.com/bsman/p/6128447.html),也知道了如何绘制一个点,接下来就用web ...
随机推荐
- 阿里云-数据库-ClickHouse
https://help.aliyun.com/product/144466.html 云数据库ClickHouse是开源列式数据库管理系统ClickHouse在阿里云上的托管服务,用户可以在阿里云上 ...
- 计算今天是该年的第几天(c语言实现)
遇到一个有意思的编程题,使用C语言实现计算今天是该年的第几天. 实现代码如下: #include<stdio.h> int d[12]={31,28,31,30,31,30,31,31,3 ...
- 某次信创环境Oceanbase数据库偶发乱码问题
资料迁移,整理分享. 问题发生在2023年 一.环境介绍及问题简述 数据库 oceanbase 操作系统 Linux (麒麟) WEB中间件 Tongweb 数据库表编码 GBK 中间件默认使用的HT ...
- 小程序之navigator跳转方式
navigator中的open-type可以决定小程序的跳转方式: 是否关闭当前页面 或者说以何种方式进行跳转 标签<navigator>中 open-type属性表示小程序的跳转方式: ...
- Python介绍以及应用场景
Python介绍以及应用场景 Python简介 Python,作为一种解释型.面向对象的高级编程语言,自1989年圣诞节期间由荷兰计算机科学家Guido van Rossum创造以来,已经取得了举 ...
- 自己如何在本地电脑从零搭建DeepSeek!手把手教学,快来看看! (建议收藏)
在人工智能飞速发展的今天,大语言模型的应用越来越广泛.DeepSeek 作为近期爆火的一款大语言模型,受到了众多开发者的青睐. 今天这篇内容,就来聊聊,如何在本地自己的电脑上部署DeepSeek. 1 ...
- Centos 7 安装Redis5 详细步骤 备忘录笔记
通过wget下载tar包 wget http://download.redis.io/releases/redis-5.0.5.tar.gz 解压包 tar -zxvf redis-5.0.5.tar ...
- acwing329 围栏障碍训练场 题解
考试压轴题,意识到这题是线段树优化 \(dp\) 时追悔莫及. 为了简化题目,我将从起点到原点变成了从原点到起点(这样就可以省去两个数组的空间). 想到设 \(dp_{i,j}\) 表示在第 \(i\ ...
- 借Processing语言及IDE做DOS批处理的事务( 批量修改文件夹或文件的名字 )
一直想用Processing语言做一些批处理的事务,因为其自带的IDE功能紧凑易用,极度轻量,又加上Java语言的生态极具友好,处理一些windows相关操作完全可行,简单快捷. 这次就是用它做[批量 ...
- tinyint、int的区别
1.tinyint(1字节--4位[带符号]) 很小的整数.带符号的范围是-128到127.无符号的范围是0到255. 2.smallint(2字节--6位[带符号]) 小的整数.带符号的范围是-32 ...