搭建微信小程序基本的https与wss环境
年底了写一篇小程序环境搭建的文章, 主要是怎么搭建一个线上环境以及怎么不改动原有http Api的情况
1、准备工作
 域名一个

 免费证书(推荐: 腾讯云、阿里云、便宜ssl 都是免费的 配置好后先将证书下载下来)

 Centos服务器一台

 nginx 1.10.2
- 1
- 2
- 3
- 4
- 5
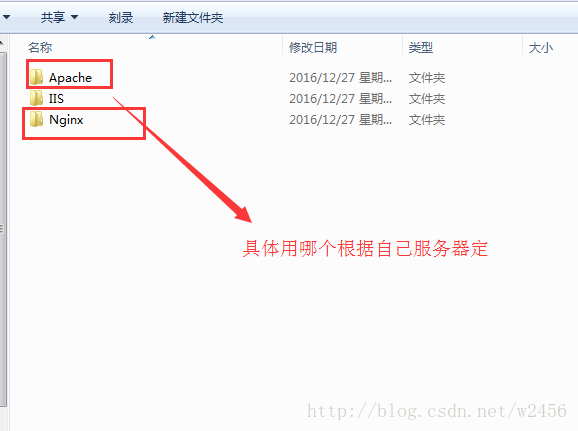
2、 安装nginx
安装教程 http://www.runoob.com/linux/nginx-install-setup.html
注意安装的时候 编译 --with-stream --with-stream_ssl_module 两个模块
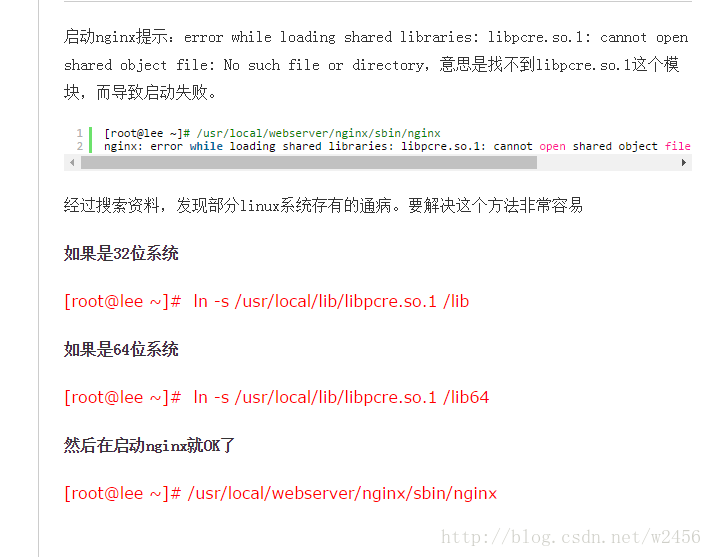
如果启动nginx报错看下图解决
- 1
- 2
- 3
- 4
3、 配置nginx实现ssl反向代理
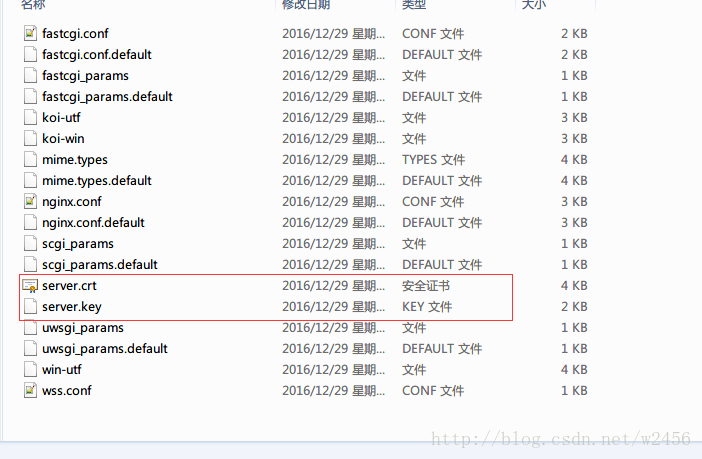
  将下载好的证书根据自己的服务器选择证书这里选择nginx证书

  主要用到server.crt以及server.key两个证书上传到服务器

  这里我们直接上传到nginx目录的conf下了
- 1
- 2
- 3
- 4
修改nginx.conf(有注释的地方改 其他的保持原样就行了)
“`
#user  nobody;

worker_processes  1;

#error_log  logs/error.log;

#error_log  logs/error.log  notice;

#error_log  logs/error.log  info;

#pid        logs/nginx.pid;

events {

    worker_connections  1024;

}

http {

    include       mime.types;

    default_type  application/octet-stream;

    #log_format  main  '$remote_addr - $remote_user [$time_local] "$request" '

    # '$status $body_bytes_sent "$http_referer" '

    # '"$http_user_agent" "$http_x_forwarded_for"';

    #access_log  logs/access.log  main;

    sendfile        on;

    #tcp_nopush     on;

    #keepalive_timeout  0;

    keepalive_timeout  65;

    #gzip  on;

    server {

        listen       8090; #这里将原来的80端口改成8090

        server_name  xxx.xxx.xxx; #这里就写你自己的域名就行了

        #charset koi8-r;

        #access_log  logs/host.access.log  main;

        location / {

            root   html;

            index  index.html index.htm;

        }

        #error_page  404              /404.html;

        # redirect server error pages to the static page /50x.html

        #

        error_page   500 502 503 504  /50x.html;

        location = /50x.html {

            root   html;

        }

        # proxy the PHP scripts to Apache listening on 127.0.0.1:80

        #

        #location ~ .php$ {

        #    proxy_pass   http://127.0.0.1;

        #}

        # pass the PHP scripts to FastCGI server listening on           127.0.0.1:9000

        #

        #location ~ .php$ {

        #    root           html;

        #    fastcgi_pass   127.0.0.1:9000;

        #    fastcgi_index  index.php;

        #    fastcgi_param  SCRIPT_FILENAME  /scripts$fastcgi_script_name;

        #    include        fastcgi_params;

        #}

        # deny access to .htaccess files, if Apache's document root

        # concurs with nginx's one

        #

        #location ~ /.ht {

        #    deny  all;

        #}

    }

    # another virtual host using mix of IP-, name-, and port-based configuration

    #

    #server {

    #    listen       8000;

    #    listen       somename:8080;

    #    server_name  somename  alias  another.alias;

    #    location / {

    #        root   html;

    #        index  index.html index.htm;

    #    }

    #}

    # HTTPS server

    #

    #server {

    #    listen       443 ssl;

    #    server_name  localhost;

    #    ssl_certificate      cert.pem;

    #    ssl_certificate_key  cert.key;

    #    ssl_session_cache    shared:SSL:1m;

    #    ssl_session_timeout  5m;

    #    ssl_ciphers  HIGH:!aNULL:!MD5;

    #    ssl_prefer_server_ciphers  on;

    #    location / {

    #        root   html;

    #        index  index.html index.htm;

    #    }

    #}

    include /usr/nginx/conf/wss.conf;# 这里我们将反向代理新建一个文件引入进来

    client_max_body_size    3m;# 上传大小单位M 微信小程序上传大图片时可能需要设置

}
- 1
- 2
- 3
- 4
- 5
- 6
- 7
- 8
- 9
- 10
- 11
- 12
- 13
- 14
- 15
- 16
- 17
- 18
- 19
- 20
- 21
- 22
- 23
- 24
- 25
- 26
- 27
- 28
- 29
- 30
- 31
- 32
- 33
- 34
- 35
- 36
- 37
- 38
- 39
- 40
- 41
- 42
- 43
- 44
- 45
- 46
- 47
- 48
- 49
- 50
- 51
- 52
- 53
- 54
- 55
- 56
- 57
- 58
- 59
- 60
- 61
- 62
- 63
- 64
- 65
- 66
- 67
- 68
- 69
- 70
- 71
- 72
- 73
- 74
- 75
- 76
- 77
- 78
- 79
- 80
- 81
- 82
- 83
- 84
- 85
- 86
- 87
- 88
- 89
- 90
- 91
- 92
- 93
- 94
- 95
- 96
新建wss.conf
#主要是配置原来的ws 和 http 接口

upstream websocket {

    server 10.5.11.xxx:8283;# 远程websocket服务器地址

}

upstream web{

    server www.xxx.com;# 远程http接口

}

# 通过下面的反向代理到上面的接口去

server {

    listen 443;#默认https和wss协议端口

    ssl on;

    ssl_certificate /usr/nginx/conf/server.crt;#你的上传到服务器的证书位置

    ssl_certificate_key /usr/nginx/conf/server.key;#你的上传到服务器的证书位置

    ssl_session_timeout 5m;

    ssl_session_cache shared:SSL:50m;

    ssl_protocols SSLv3 SSLv2 TLSv1 TLSv1.1 TLSv1.2;

    ssl_ciphers ALL:!ADH:!EXPORT56:RC4+RSA:+HIGH:+MEDIUM:+LOW:+SSLv2:+EXP;

    underscores_in_headers on;#开启自定义头信息的下划线

    #wss协议转发 小程序里面要访问的链接

    location /wss {

        proxy_pass http://websocket;#代理到上面的地址去

        proxy_http_version 1.1;

        proxy_set_header Upgrade $http_upgrade;

        proxy_set_header Connection "Upgrade";

    }

    #https协议转发 小程序里面要访问的链接

    location /{

    proxy_pass http://web;#代理到原有的http的地址去

    proxy_set_header   X-Real-IP        $remote_addr;

        proxy_set_header   X-Forwarded-For  $proxy_add_x_forwarded_for;

    add_header Access-Control-Allow-Origin *;#跨域访问设置

    }

}

```
搭建微信小程序基本的https与wss环境的更多相关文章
- 微信小程序之后台https域名绑定以及免费的https证书申请
微信小程序在11月3号发布了,这是一个全新的生态,没有赶上微信公众号红利的开发者,运营者可别错过这趟车了. 但是微信的后台需要全https,之前我还不相信,后台注册了后进后台才发现,服务器配置如下图 ...
- 微信小程序开发之https服务器搭建三步曲
本篇文章主要讲述3个方面的内容,如下: 1.SSL证书的获取 2.服务器 Nginx SSL 证书的配置. 3.如何兼容80端口和443端口以及为什么要同时兼容这两个端口. 1.SSL证书的获取 ht ...
- 一个小时快速搭建微信小程序教程
「小程序」这个划时代的产品发布快一周了,互联网技术人都在摩拳擦掌,跃跃欲试.可是小程序目前还在内测,首批只发放了 200 个内测资格(泪流满面).本以为没有 AppID 这个月就与小程序无缘了,庆幸的 ...
- 一个小时快速搭建微信小程序
「小程序」这个划时代的产品发布快一周了,互联网技术人都在摩拳擦掌,跃跃欲试.可是小程序目前还在内测,首批只发放了 200 个内测资格(泪流满面).本以为没有 AppID 这个月就与小程序无缘了,庆幸的 ...
- 搭建微信小程序服务
准备域名和证书 任务时间:20min ~ 40min 小程序后台服务需要通过 HTTPS 访问,在实验开始之前,我们要准备域名和 SSL 证书. 域名注册 如果您还没有域名,可以在腾讯云上选购,过程可 ...
- 如何一键式搭建微信小程序
有了微信小程序,对你到底意味着什么? 对于用户来说,再也不用担心手机的内存不够用了!一个小程序只有1M,随便卸载一个App,就能安装很多小程序! 对于老板来说,你不再需要花费数十万来去请外包公司帮你去 ...
- 腾讯云&搭建微信小程序服务
准备域名和证书 任务时间:20min ~ 40min 小程序后台服务需要通过 HTTPS 访问,在实验开始之前,我们要准备域名和 SSL 证书. 域名注册 如果您还没有域名,可以在腾讯云上选购,过程可 ...
- 基于centos搭建微信小程序服务,配置及数据库等
基于centos搭建小程序, ps:请提前20天准备将域名备案,申请ssl证书 实验上机地址:https://cloud.tencent.com/developer/labs/lab/10004 准备 ...
- 使用wepy框架搭建微信小程序采坑记(一)
1.什么是wepy 这个框架是腾讯内部出的一个类MVVM的小程序开发框架.大体上来说语法是类VUE的,所以如果有VUE开发经验的话迁移成本会低一些.至于具体的怎么使用我就不赘言了,有问题查文档(官方文 ...
随机推荐
- 【转】如何应用Query语句进行规则的语法设置?
在Altium Designer中, 设计规则通常用来定义用户的设计需求. 这些规则涵盖了设计的方方面面, 从布线宽度, 对象的安全间距,内电层的连接风格, 过孔风格等等. 设计规则不仅能在PCB设计 ...
- 40+ 个非常有用的 Oracle 查询语句
40+ 个非常有用的 Oracle 查询语句,主要涵盖了日期操作,获取服务器信息,获取执行状态,计算数据库大小等等方面的查询.这些是所有 Oracle 开发者都必备的技能,所以快快收藏吧! 日期/时间 ...
- ReentrantLock与synchronized
1.ReentrantLock 拥有Synchronized相同的并发性和内存语义,此外还多了 锁投票,定时锁等候和中断锁等候 线程A和B都要获取对象O的锁定,假设A获取了对象O锁,B将等待A释放对O ...
- C#利用Zxing.net生成条形码和二维码并实现打印的功能
开篇:zxing.net是.net平台下编解条形码和二维码的工具. 下载地址:http://pan.baidu.com/s/1kTr3Vuf Step1:使用VS2010新建一个窗体程序项目: ...
- 第一篇:打造专属开发工具Eclipse篇
第一篇:打造专属开发工具Eclipse篇 eclipse 优化 1.动画很酷,但如果可以的话,我总是在所有的工具中禁用动画.所以classic或者window classic主题是我最常用的主题 , ...
- bzoj千题计划267:bzoj3129: [Sdoi2013]方程
http://www.lydsy.com/JudgeOnline/problem.php?id=3129 如果没有Ai的限制,就是隔板法,C(m-1,n-1) >=Ai 的限制:m减去Ai &l ...
- bzoj千题计划189:bzoj1867: [Noi1999]钉子和小球
http://www.lydsy.com/JudgeOnline/problem.php?id=1867 dp[i][j] 落到(i,j)的方案数 dp[i][j]=0.5*dp[i-1][j] ...
- linux解压
tar –xvf file.tar //解压 tar包tar -xzvf file.tar.gz //解压tar.gztar -xjvf file.tar.bz2 //解压 tar.bz2tar –x ...
- 使用 maven 搭建web开发基本架构
我觉得可能,对于还没有使用过 IDEA 进行开发的童鞋来说,直接撸代码是有些尴尬的.那么我会把示例代码之前的那些事再在这里写一遍 按图步骤进行即可进行基本项目结构搭建 现在基本流行 maven 管理项 ...
- Ubuntu 查看CPU温度
按照这篇文章: http://www.webupd8.org/2014/06/psensor-updated-with-option-to-display.html