Angular SPA基于Ocelot API网关与IdentityServer4的身份认证与授权(三)
在前面两篇文章中,我介绍了基于IdentityServer4的一个Identity Service的实现,并且实现了一个Weather API和基于Ocelot的API网关,然后实现了通过Ocelot API网关整合Identity Service做身份认证的API请求。今天,我们进入前端开发,设计一个简单的Angular SPA,并在Angular SPA上调用受Ocelot API网关和Identity Service保护的Weather API。
回顾
- 《Angular SPA基于Ocelot API网关与IdentityServer4的身份认证与授权(一)》
- 《Angular SPA基于Ocelot API网关与IdentityServer4的身份认证与授权(二)》
Angular SPA的实现
我们搭建一个Angular SPA的应用程序,第一步先实现一些基础功能,比如页面布局和客户端路由;第二步先将Ocelot API网关中设置的身份认证功能关闭,并设计一个Component,在Component中调用未受保护的Weather API,此时可以毫无阻拦地在Angular SPA中调用Weather API并将结果显示在页面上;第三步,我们在Ocelot API网关上开启身份认证,然后修改Angular SPA,使其提供登录按钮以实现用户登录与身份认证,进而访问受保护的Weather API。在进行接下来的实操演练之前,请确保已经安装Angular 8 CLI。
基础功能的实现
在文件系统中,使用ng new命令,新建一个Angular 8的单页面应用,为了有比较好的界面布局,我使用了Bootstrap。方法很简单,在项目目录下,执行npm install --save bootstrap,然后,打开angular.json文件,将bootstrap的js和css添加到配置中:
"styles": [

    "src/styles.css",

    "node_modules/bootstrap/dist/css/bootstrap.min.css"

],

"scripts": [

    "node_modules/bootstrap/dist/js/bootstrap.min.js"

]
然后,修改app.component.html,使用下面代码覆盖:
<nav class="navbar navbar-expand-md navbar-dark bg-dark">

  <a class="navbar-brand" href="#">Identity Demo</a>

  <button class="navbar-toggler" type="button" data-toggle="collapse" data-target="#navbarSupportedContent" aria-controls="navbarSupportedContent" aria-expanded="false" aria-label="Toggle navigation">

    <span class="navbar-toggler-icon"></span>

  </button>

  <div class="collapse navbar-collapse" id="navbarSupportedContent">

    <ul class="navbar-nav mr-auto">

      <li class="nav-item active">

        <a class="nav-link" href="#">首页 <span class="sr-only">(current)</span></a>

      </li>

      <li class="nav-item">

        <a class="nav-link" href="#">API</a>

      </li>

      <li class="nav-item">

        <a class="nav-link" href="#">关于</a>

      </li>

    </ul>

    <form class="form-inline my-2 my-md-0">

      <ul class="navbar-nav mr-auto">

        <a class="nav-link" href="javascript:void(0)">登录</a>

      </ul>

    </form>

  </div>

</nav>
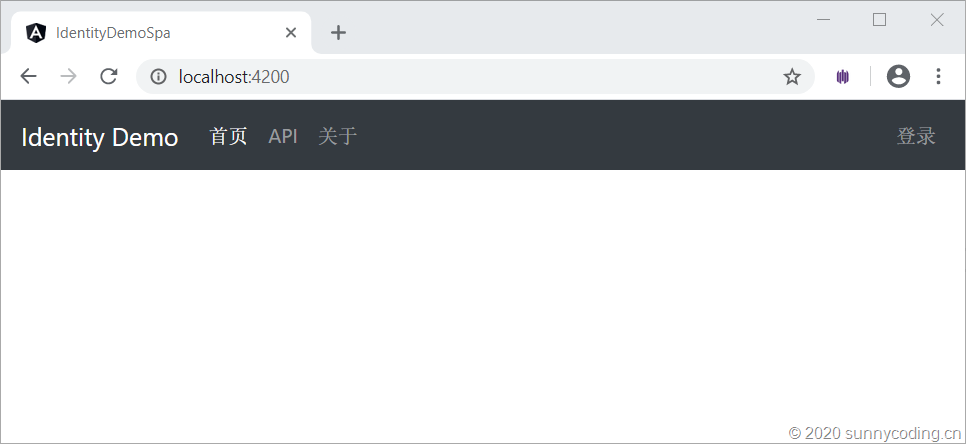
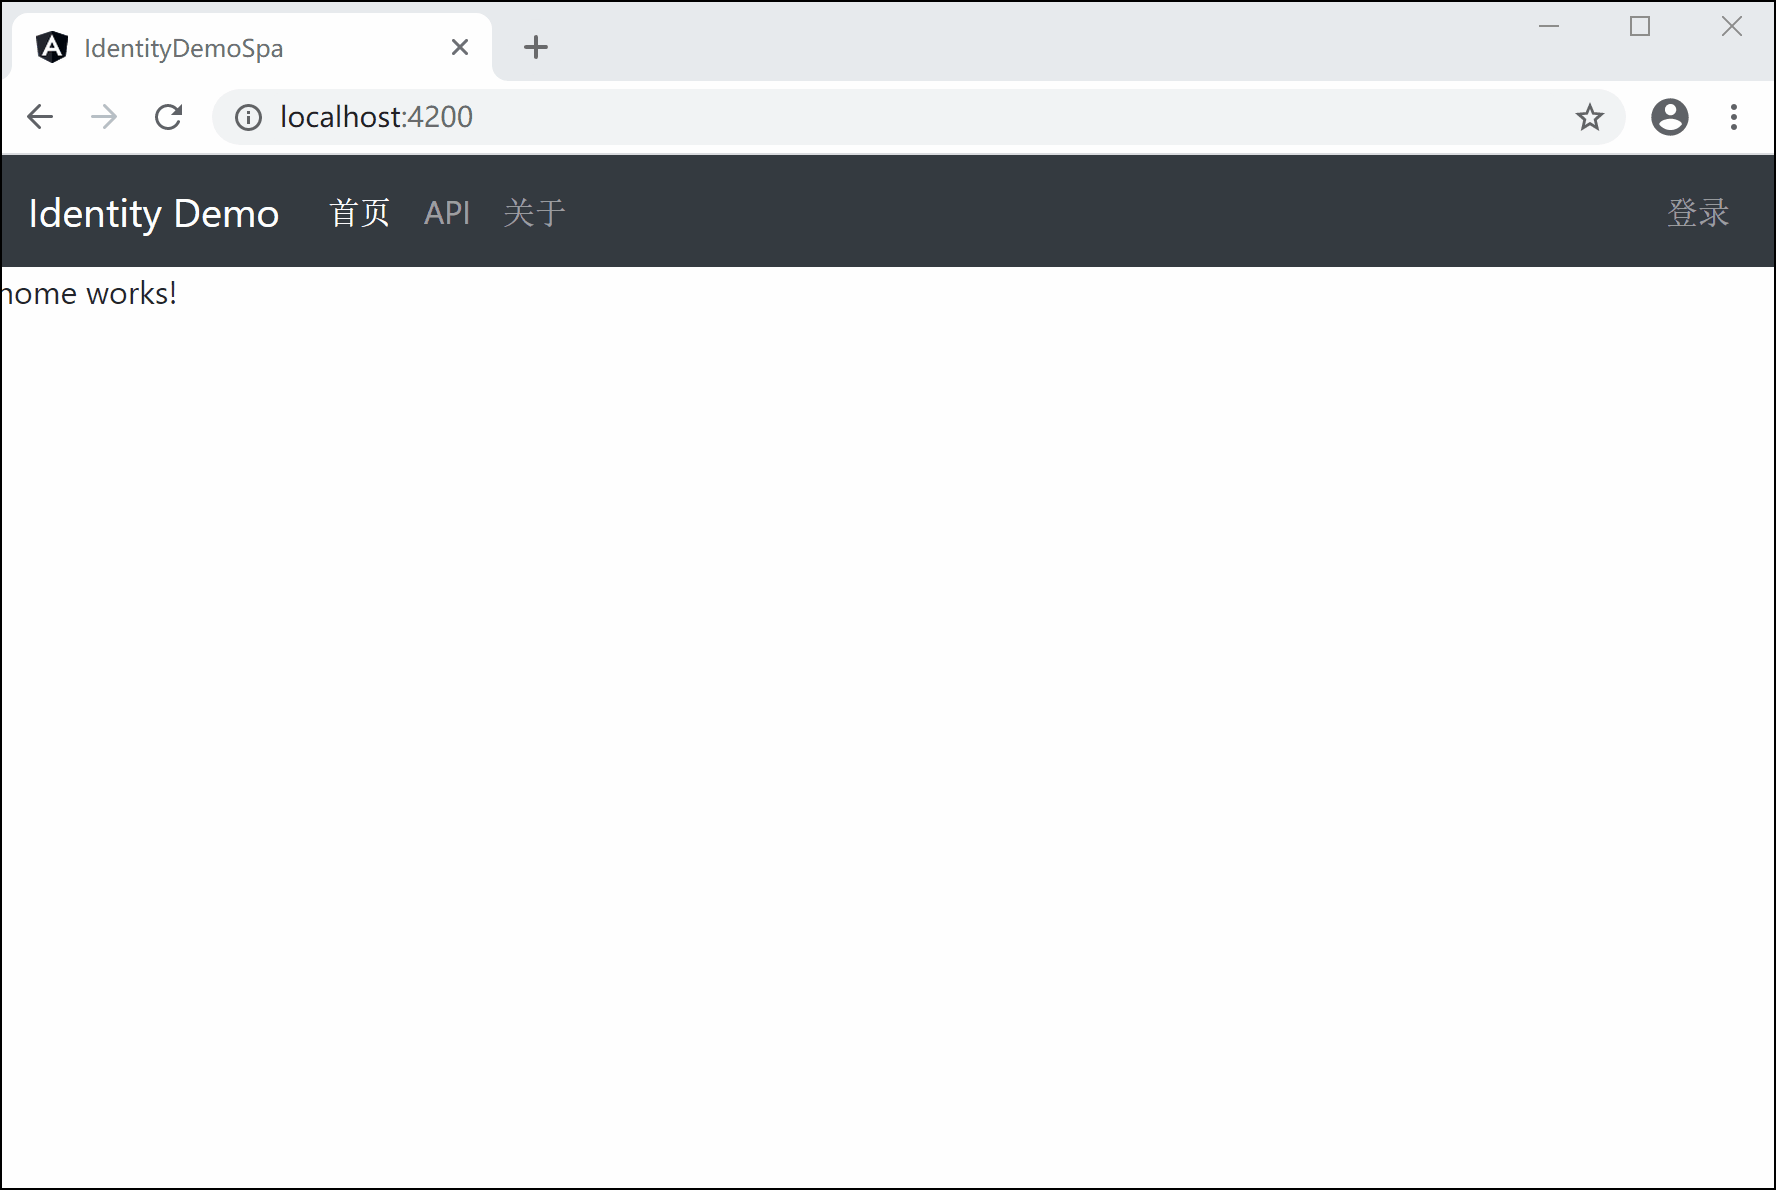
ng serve跑起来,得到一个具有标题栏的空页面:
接下来,使用ng g c命令创建3个component,分别是HomeComponent,ApiComponent和AboutComponent,并且修改app.modules.ts文件,将这三个components加入到router中:
import { BrowserModule } from '@angular/platform-browser';

import { NgModule } from '@angular/core';

import { Routes, RouterModule } from '@angular/router';

import { AppComponent } from './app.component';

import { HomeComponent } from './home/home.component';

import { ApiComponent } from './api/api.component';

import { AboutComponent } from './about/about.component';

const appRoutes: Routes = [

  { path: 'about', component: AboutComponent },

  { path: 'home', component: HomeComponent },

  { path: 'api', component: ApiComponent },

  { path: '**', component: HomeComponent }

];

@NgModule({

  declarations: [

    AppComponent,

    HomeComponent,

    ApiComponent,

    AboutComponent

  ],

  imports: [

    BrowserModule,

    RouterModule.forRoot(

      appRoutes,

      { enableTracing: false }

    )

  ],

  providers: [],

  bootstrap: [AppComponent]

})

export class AppModule { }
然后,在app.component.html中,加入:
<router-outlet></router-outlet>
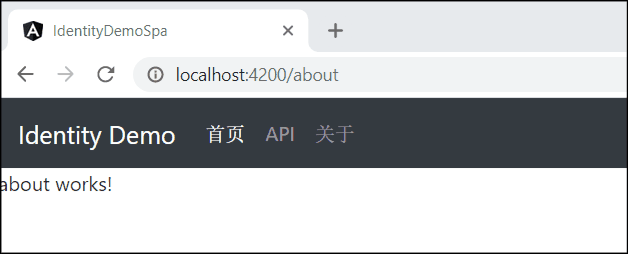
再次运行站点,可以看到,我们已经可以通过菜单来切换component了:
在Angular页面中调用API显示结果
Angular调用API的方法我就不详细介绍了,Angular的官方文档有很详细的内容可以参考。在这个演练中,我们需要注意的是,首先将上篇文章中对于Weather API的认证功能关闭,以便测试API的调用是否成功。关闭认证功能其实很简单,只需要将Ocelot API网关中有关Ocelot的配置的相关节点注释掉就行了:
{

  "ReRoutes": [

    {

      "DownstreamPathTemplate": "/weatherforecast",

      "DownstreamScheme": "http",

      "DownstreamHostAndPorts": [

        {

          "Host": "localhost",

          "Port": 5000

        }

      ],

      "UpstreamPathTemplate": "/api/weather",

      "UpstreamHttpMethod": [ "Get" ],

      //"AuthenticationOptions": {

      //  "AuthenticationProviderKey": "AuthKey",

      //  "AllowedScopes": []

      //}

    }

  ]

}
接下来修改Angular单页面应用,在app.module.ts中加入HttpClientModule:
imports: [

    BrowserModule,

    HttpClientModule,

    RouterModule.forRoot(

      appRoutes,

      { enableTracing: false }

    )

  ],
然后实现一个调用Weather API的Service(服务):
import { Injectable } from '@angular/core';

import { HttpClient } from '@angular/common/http';

import { WeatherData } from '../models/weather-data';

import { Observable } from 'rxjs';

@Injectable({

  providedIn: 'root'

})

export class WeatherService {

  constructor(private httpClient: HttpClient) { }

  getWeather(): Observable<WeatherData[]> {

    return this.httpClient.get<WeatherData[]>('http://localhost:9000/api/weather');

  }

}
在这个Service实现中,没有加入异常处理部分,因为作为一个研究性质的项目,没有必要进行异常处理,到浏览器的调试窗口查看错误信息就行。上面的代码引用了一个类型,就是WeatherData,它其实非常简单,对应着Weather API所返回的数据模型:
export class WeatherData {

    constructor(public temperatureF: number,

        public temperatureC: number,

        private summary: string,

        private date: string) { }

}
现在,修改api.component.ts,通过调用这个WeatherService来获取Weather API的数据:
import { Component, OnInit } from '@angular/core';

import { WeatherService } from '../services/weather.service';

import { WeatherData } from '../models/weather-data';

@Component({

  selector: 'app-api',

  templateUrl: './api.component.html',

  styleUrls: ['./api.component.css']

})

export class ApiComponent implements OnInit {

  data: WeatherData[];

  constructor(private api: WeatherService) { }

  ngOnInit() {

    this.api.getWeather()

      .subscribe(ret => this.data = ret);

  }

}
并显示在前端:
<div class="container" *ngIf="data">

    <table class="table table-striped">

        <thead>

          <tr>

            <th scope="col">Summary</th>

            <th scope="col">TempF</th>

            <th scope="col">TempC</th>

            <th scope="col">Date</th>

          </tr>

        </thead>

        <tbody>

          <tr *ngFor="let d of data">

            <td>{{d.summary}}</td>

            <td>{{d.temperatureF}}</td>

            <td>{{d.temperatureC}}</td>

            <td>{{d.date}}</td>

          </tr>

        </tbody>

      </table>

</div>
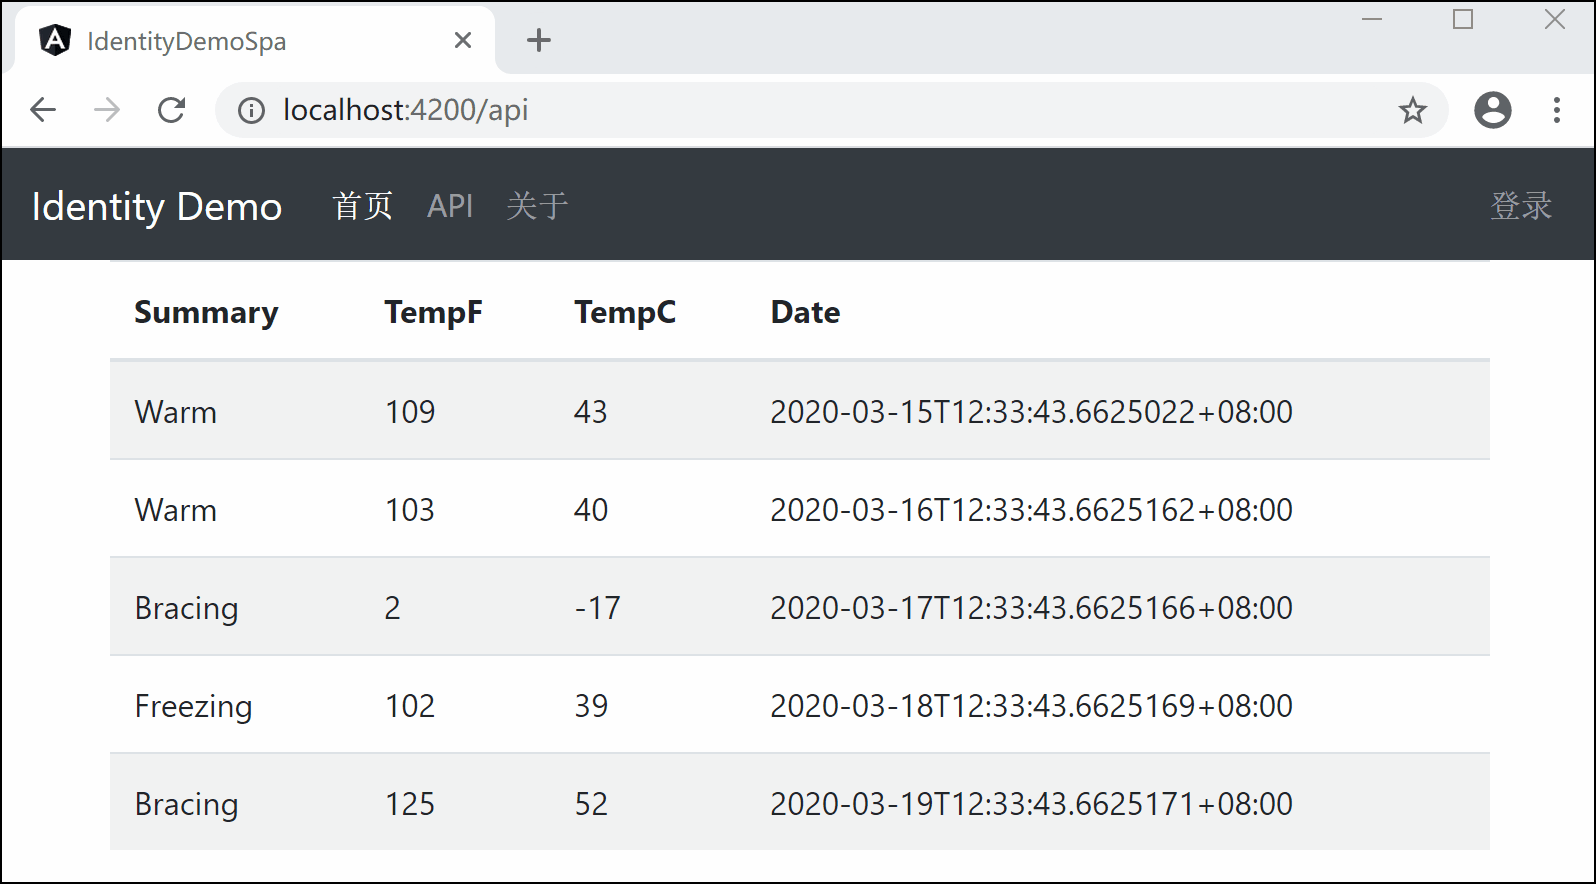
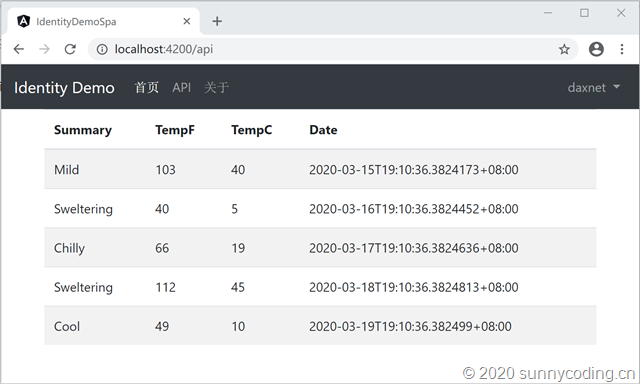
完成之后,启动Weather API和Ocelot API网关,然后运行Angular单页面应用,我们已经可以在API这个页面显示调用结果了:
开启身份认证
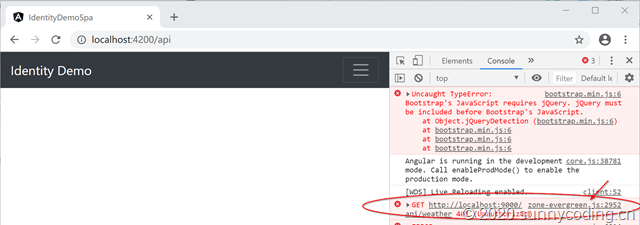
在Ocelot API网关的配置中,打开被注释掉的部分,重新启用身份认证功能,再次刷新Angular页面,发现页面已经打不开了,在开发者工具的Console中输出了错误信息:401 (Unauthorized),表示身份认证部分已经起作用了。
下面我们来解决这个问题。既然是需要身份认证才能访问Weather API,那么我们就在Angular页面上实现登录功能。首先在Angular单页面应用中安装oidc-client,oidc-client是一款为Javascript应用程序提供OpenID Connect和OAuth2协议支持的框架,在Angular中使用也非常的方便。用npm install来安装这个库:
npm install oidc-client
然后,实现一个用于身份认证的Service:
import { Injectable } from '@angular/core';

import { BehaviorSubject } from 'rxjs';

import { UserManager, UserManagerSettings, User } from 'oidc-client';

@Injectable({

  providedIn: 'root'

})

export class AuthService {

  private authStatusSource = new BehaviorSubject<boolean>(false);

  private userNameStatusSource = new BehaviorSubject<string>('');

  private userManager = new UserManager(this.getUserManagerSettings());

  private user: User | null;

  authStatus$ = this.authStatusSource.asObservable();

  userNameStatus$ = this.userNameStatusSource.asObservable();

  constructor() {

    this.userManager.getUser().then(user => {

      this.user = user;

      this.authStatusSource.next(this.isAuthenticated());

      this.userNameStatusSource.next(this.user.profile.name);

    });

  }

  async login() {

    await this.userManager.signinRedirect();

  }

  async logout() {

    await this.userManager.signoutRedirect();

  }

  async completeAuthentication() {

    this.user = await this.userManager.signinRedirectCallback();

    this.authStatusSource.next(this.isAuthenticated());

    this.userNameStatusSource.next(this.user.profile.name);

  }

  isAuthenticated(): boolean {

    return this.user != null && !this.user.expired;

  }

  get authorizationHeaderValue(): string {

    return `${this.user.token_type} ${this.user.access_token}`;

  }

  private getUserManagerSettings(): UserManagerSettings {

    return {

      authority: 'http://localhost:7889',

      client_id: 'angular',

      redirect_uri: 'http://localhost:4200/auth-callback',

      post_logout_redirect_uri: 'http://localhost:4200/',

      response_type: 'id_token token',

      scope: 'openid profile email api.weather.full_access',

      filterProtocolClaims: true,

      loadUserInfo: true,

      automaticSilentRenew: true,

      silent_redirect_uri: 'http://localhost:4200/silent-refresh.html'

    };

  }

}
AuthService为Angular应用程序提供了用户身份认证的基本功能,比如登录、注销,以及判断是否经过身份认证(isAuthenticated)等。需要注意的是getUserManagerSettings方法,它为oidc-client提供了基本的参数配置,其中的authority为Identity Service的URL;redirect_uri为认证完成后,Identity Service需要返回到哪个页面上;post_logout_redirect_uri表示用户注销以后,需要返回到哪个页面上;client_id和scope为Identity Service中为Angular应用所配置的Client的ClientId和Scope(参考Identity Service中的Config.cs文件)。
接下来,修改app.component.html,将原来的“登录”按钮改为:
<form class="form-inline my-2 my-md-0">

    <ul class="navbar-nav mr-auto">

    <a *ngIf="!isAuthenticated" class="nav-link" href="javascript:void(0)" (click)="onLogin()">登录</a>

    <li *ngIf="isAuthenticated" class="nav-item dropdown">

      <a class="nav-link dropdown-toggle" href="#" id="navbarDropdown" role="button" data-toggle="dropdown"

        aria-haspopup="true" aria-expanded="false">

        {{userName}}

      </a>

      <div class="dropdown-menu" aria-labelledby="navbarDropdown">

        <a class="dropdown-item" href="javascript:void(0)" (click)="onLogOut()">注销</a>

      </div>

    </li>

    </ul>

</form>
然后,修改app.component.ts,完成登录和注销部分的代码:
import { Component, OnInit, OnDestroy } from '@angular/core';

import { AuthService } from './services/auth.service';

import { Subscription } from 'rxjs';

@Component({

  selector: 'app-root',

  templateUrl: './app.component.html',

  styleUrls: ['./app.component.css']

})

export class AppComponent implements OnInit, OnDestroy {

  title = 'identity-demo-spa';

  isAuthenticated: boolean;

  authStatusSubscription: Subscription;

  userNameSubscription: Subscription;

  userName: string;

  constructor(private authService: AuthService) { }

  ngOnDestroy(): void {

    this.authStatusSubscription.unsubscribe();

    this.userNameSubscription.unsubscribe();

  }

  ngOnInit(): void {

    this.authStatusSubscription = this.authService.authStatus$.subscribe(status => this.isAuthenticated = status);

    this.userNameSubscription = this.authService.userNameStatus$.subscribe(status => this.userName = status);

  }

  async onLogin() {

    await this.authService.login();

  }

  async onLogOut() {

    await this.authService.logout();

  }

}
我们还需要增加一个新的component:AuthCallbackComponent,用来接收登录成功之后的回调,它会通知AuthService以更新登录状态和用户信息:
import { Component, OnInit } from '@angular/core';

import { AuthService } from '../services/auth.service';

import { Router, ActivatedRoute } from '@angular/router';

@Component({

  selector: 'app-auth-callback',

  templateUrl: './auth-callback.component.html',

  styleUrls: ['./auth-callback.component.css']

})

export class AuthCallbackComponent implements OnInit {

  constructor(private authService: AuthService, private router: Router, private route: ActivatedRoute) { }

  async ngOnInit() {

    await this.authService.completeAuthentication();

    this.router.navigate(['/home']);

  }

}
最后将AuthCallbackComponent添加到Route中:
const appRoutes: Routes = [

  { path: 'about', component: AboutComponent },

  { path: 'home', component: HomeComponent },

  { path: 'api', component: ApiComponent },

  { path: 'auth-callback', component: AuthCallbackComponent },

  { path: '**', component: HomeComponent }

];
重新运行Angular应用,你会看到以下效果:
现在我们就可以在Angular的页面中完成用户登录和注销了。如你所见:
- 登录界面来自Identity Service,本身也是由IdentityServer4提供的界面,开发者可以自己修改Identity Service来定制界面
- 登录成功后,原本的“登录”按钮变成了显示用户名称的下拉菜单,选择菜单就可以点击“注销”按钮退出登录
- 此时访问API页面,仍然无法正确调用Weather API,因为我们还没有将Access Token传入API调用
登录状态下的API调用
接下来,我们将Access Token传入,使得Angular应用可以使用登录用户获取的Access Token正确调用Weather API。修改AuthService如下:
export class WeatherService {

  constructor(private httpClient: HttpClient, private authService: AuthService) { }

  getWeather(): Observable<WeatherData[]> {

    const authHeaderValue = this.authService.authorizationHeaderValue;

    const httpOptions = {

      headers: new HttpHeaders({

        'Content-Type': 'application/json',

        Authorization: authHeaderValue

      })

    };

    return this.httpClient.get<WeatherData[]>('http://localhost:9000/api/weather', httpOptions);

  }

}
再次运行Angular应用,可以看到,已经可以在登录的状态下成功调用Weather API。你也可以试试,在退出登录的状态下,是否还能正确调用API。
小结
本文详细介绍了Angular单页面应用作为Ocelot API网关的客户端,通过Identity Service进行身份认证和API调用的整个过程。当然,很多细节部分没有做到那么完美,本身也是为了能够演示开发过程中遇到的问题。从下一讲开始,我会开始介绍基于Ocelot API网关的授权问题。
源代码
访问以下Github地址以获取源代码:
https://github.com/daxnet/identity-demo
Angular SPA基于Ocelot API网关与IdentityServer4的身份认证与授权(三)的更多相关文章
- Angular SPA基于Ocelot API网关与IdentityServer4的身份认证与授权(四)
在上一讲中,我们已经完成了一个完整的案例,在这个案例中,我们可以通过Angular单页面应用(SPA)进行登录,然后通过后端的Ocelot API网关整合IdentityServer4完成身份认证.在 ...
- Angular SPA基于Ocelot API网关与IdentityServer4的身份认证与授权(二)
上文已经介绍了Identity Service的实现过程.今天我们继续,实现一个简单的Weather API和一个基于Ocelot的API网关. 回顾 <Angular SPA基于Ocelot ...
- Angular SPA基于Ocelot API网关与IdentityServer4的身份认证与授权(一)
好吧,这个题目我也想了很久,不知道如何用最简单的几个字来概括这篇文章,原本打算取名<Angular单页面应用基于Ocelot API网关与IdentityServer4+ASP.NET Iden ...
- .Netcore 2.0 Ocelot Api网关教程(5)- 认证和授权
本文介绍Ocelot中的认证和授权(通过IdentityServer4),本文只使用最简单的IdentityServer,不会对IdentityServer4进行过多讲解. 1.Identity Se ...
- 微服务(入门三):netcore ocelot api网关结合consul服务发现
简介 api网关是提供给外部调用的统一入口,类似于dns,所有的请求统一先到api网关,由api网关进行指定内网链接. ocelot是基于netcore开发的开源API网关项目,功能强大,使用方便,它 ...
- ASP.NET Core on K8S学习之旅(13)Ocelot API网关接入
本篇已加入<.NET Core on K8S学习实践系列文章索引>,可以点击查看更多容器化技术相关系列文章. 上一篇介绍了Ingress的基本概念和Nginx Ingress的基本配置和使 ...
- .Netcore 2.0 Ocelot Api网关教程(7)- 限流
本文介绍Ocelot中的限流,限流允许Api网关控制一段时间内特定api的总访问次数.限流的使用非常简单,只需要添加配置即可. 1.添加限流 修改 configuration.json 配置文件,对 ...
- .Netcore 2.0 Ocelot Api网关教程(6)- 配置管理
本文介绍Ocelot中的配置管理,配置管理允许在Api网关运行时动态通过Http Api查看/修改当前配置.由于该功能权限很高,所以需要授权才能进行相关操作.有两种方式来认证,外部Identity S ...
- .Netcore 2.0 Ocelot Api网关教程(2)- 路由
.Netcore 2.0 Ocelot Api网关教程(1) 路由介绍 上一篇文章搭建了一个简单的Api网关,可以实现简单的Api路由,本文介绍一下路由,即配置文件中ReRoutes,ReRoutes ...
随机推荐
- 对话Roadstar投资人:一家自动驾驶公司之死(三)
...
11. Roadstar 如何收场? 雷锋网:你觉得 Roadstar 造成今天这样的局面,是什么导致的? 投资人代表 1:刚才我们也数次表达了,在每个人身上,可能每个人的诉求,不能达到同步,与公司的 ...
- 什么是最好的在线UML软件工具?
在线UML软件工具允许您创建UML图表,而UML绘图工具可帮助维护您的建模工件并促进不同图表中元素的可重用性.一些UML建模工具还提供复杂的建模功能,例如模型转换,报告,代码工程等. 如果您正在寻找U ...
- 我的Android进阶之旅------> Android为TextView组件中显示的文本加入背景色
通过上一篇文章 我的Android进阶之旅------> Android在TextView中显示图片方法 (地址:http://blog.csdn.net/ouyang_peng/article ...
- uniq 只能相邻行去重
uniq只可以将相邻行重复数据进行去重处理: [root@localhost /data/mysql/mysql3306]#last | cut -d ' ' -f 1 | tail -15 > ...
- phpsocket.io
https://github.com/walkor/phpsocket.io phpsocket.io A server side alternative implementation of sock ...
- 2019 ICPC 南京网络赛 F Greedy Sequence
You're given a permutation aa of length nn (1 \le n \le 10^51≤n≤105). For each i \in [1,n]i∈[1,n], c ...
- CUDA编程学习相关
1. CUDA编程之快速入门:https://www.cnblogs.com/skyfsm/p/9673960.html 2. CUDA编程入门极简教程:https://blog.csdn.net/x ...
- 白话typescript中的【extends】和【infer】(含vue3的UnwrapRef)
大家好,我是小雨小雨,致力于分享有趣的.实用的技术文章. 内容分为翻译和原创,如果有问题,欢迎随时评论或私信,希望和大家一起进步. 分享不易,希望能够得到大家的支持和关注. extends types ...
- 请不要浪费你的生命,一文多发推广就用它(OpenWrite)
你我的共同困惑 你是否跟我一样?刚开始尝试写作,自己没有名气,有以下几个困惑: 想要推广自己,想在多个平台发文? 多平台发文之后,想要看各个平台的流量如何? 有了流量,想要引流用户到自己的网站? 网站 ...
- H. Subsequences (hard version) dp
H. Subsequences (hard version) 这个题目好难啊,根本就不知道怎么dp,看了题解,理解了好一会才会的. 首先dp[i][j] 表示前面 i 个字符,形成长度为 j 的不 ...