
.Net Core 3.0 IdentityServer4 快速入门02
.Net Core 3.0 IdentityServer4 快速入门
—— resource owner password credentials(密码模式)
一、前言
OAuth2.0默认有四种授权模式(GrantType):
1)授权码模式
2)简化模式
3)密码模式(resource owner password credentials)
4)客户端模式(client_credentials)
上一小节接受了 客户端模式 ,本小节将介绍 密码模式,OAuth2.0资源所有者密码授权功能允许客户端将用户名和密码发送到授权服务器,并获得该用户的访问令牌
认证步骤:

1)用户将用户名和密码提供给客户端
2)客户端再将用户名和密码发送给授权服务器(Id4)请求令牌
3)授权服务器(Id4)验证用户的有效性,返回给客户端令牌
4)Api资源收到第一个(首次)请求之后,会到授权服务器(Id4)获取公钥,然后用公钥验证Token是否合法,如果合法将进行后面的有效性验证,后面的请求都会用首次请求的公钥来验证(jwt去中心化验证的思想)
Resource Owner 其实就是User,密码模式相较于客户端模式,多了一个参与者,就是User,通过User的用户名和密码向Identity Server 申请访问令牌,这种模式下要求客户端不得存储密码,但我们并不能确保客户端是否存储了密码,所以该模式仅仅适用于受信任的客户端。因此该模式不推荐使用
二、创建授权服务器
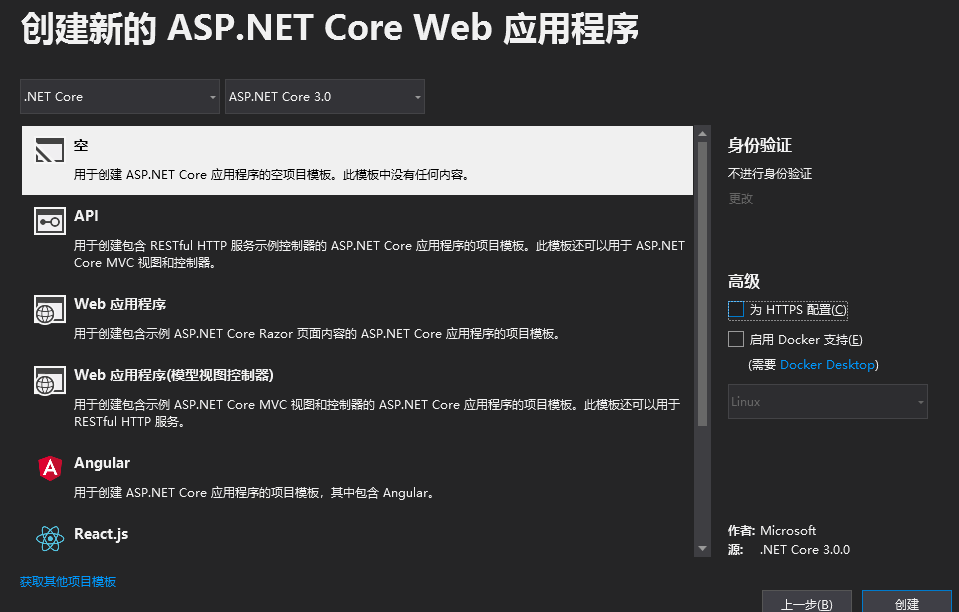
1)安装Id4
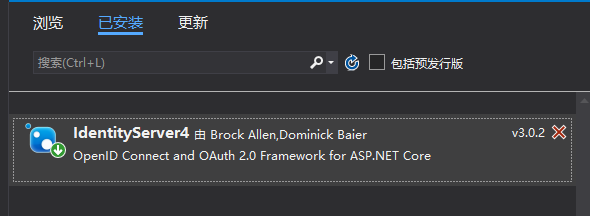
2)创建一个Config类模拟配置要保护的资源和可以访问的api客户端服务器
 using IdentityServer4;

 using IdentityServer4.Models;

 using IdentityServer4.Test;

 using System.Collections.Generic;

 namespace IdentityServer02

 {

     public static class Config

     {

         /// <summary>

         /// 需要保护的api资源

         /// </summary>

         public static IEnumerable<ApiResource> Apis =>

             new List<ApiResource>

             {

                 new ApiResource("api1","My Api")

             };

         public static IEnumerable<Client> Clients =>

             new List<Client>

             {

                 //客户端

                 new Client

                 {

                     ClientId="client",

                     ClientSecrets={ new Secret("aju".Sha256())},

                     AllowedGrantTypes=GrantTypes.ResourceOwnerPassword,

                     //如果要获取refresh_tokens ,必须在scopes中加上OfflineAccess

                     AllowedScopes={ "api1", IdentityServerConstants.StandardScopes.OfflineAccess},

                     AllowOfflineAccess=true

                 }

             };

         public static List<TestUser> Users = new List<TestUser>

         {

             new TestUser

             {

                 SubjectId="",

                 Password="Aju_001",

                 Username="Aju_001"

             },

             new TestUser

             {

                  SubjectId="",

                 Password="Aju_002",

                 Username="Aju_002"

             }

         };

     }

 }
与客户端模式不一致的地方就在于(AllowedGrantTypes=GrantTypes.ResourceOwnerPassword)此处设置为资源所有者(密码模式)
3)配置StartUp
 using Microsoft.AspNetCore.Builder;

 using Microsoft.AspNetCore.Hosting;

 using Microsoft.Extensions.DependencyInjection;

 using Microsoft.Extensions.Hosting;

 namespace IdentityServer02

 {

     public class Startup

     {

         // This method gets called by the runtime. Use this method to add services to the container.

         // For more information on how to configure your application, visit https://go.microsoft.com/fwlink/?LinkID=398940

         public void ConfigureServices(IServiceCollection services)

         {

             var builder = services.AddIdentityServer()

                 .AddInMemoryApiResources(Config.Apis)

                 .AddInMemoryClients(Config.Clients)

                 .AddTestUsers(Config.Users);             builder.AddDeveloperSigningCredential();

         }

         // This method gets called by the runtime. Use this method to configure the HTTP request pipeline.

         public void Configure(IApplicationBuilder app, IWebHostEnvironment env)

         {

             if (env.IsDevelopment())

             {

                 app.UseDeveloperExceptionPage();

             }

             // app.UseRouting();

             app.UseIdentityServer();

         }

     }

 }
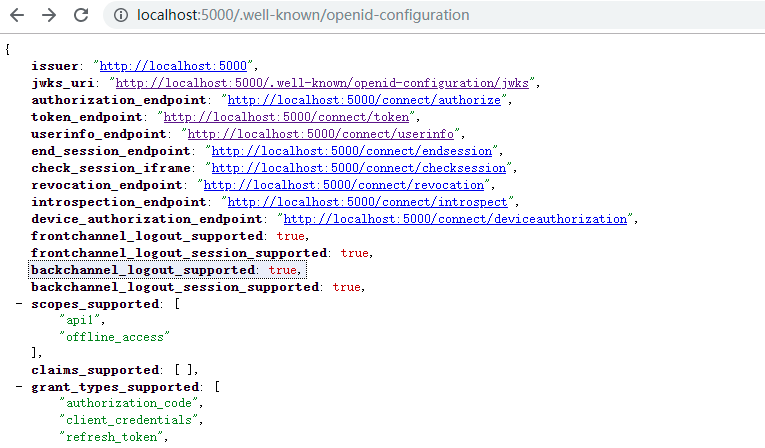
5)验证配置是否成功
在浏览器中输入(http://localhost:5000/.well-known/openid-configuration)看到如下发现文档算是成功的
三、创建Api资源
1)步骤如创建授权服务的1)
2)安装包
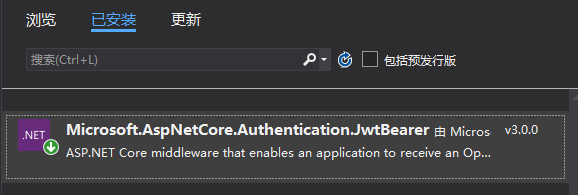
3)创建一个受保护的ApiController
 using Microsoft.AspNetCore.Authorization;

 using Microsoft.AspNetCore.Mvc;

 using System.Linq;

 namespace Api02.Controllers

 {

     [Route("Api")]

     [Authorize]

     public class ApiController : ControllerBase

     {

         public IActionResult Get()

         {

             return new JsonResult(from c in User.Claims select new { c.Type, c.Value });

         }

     }

 }
4)配置StartUp
 using Microsoft.AspNetCore.Builder;

 using Microsoft.AspNetCore.Hosting;

 using Microsoft.Extensions.Configuration;

 using Microsoft.Extensions.DependencyInjection;

 using Microsoft.Extensions.Hosting;

 namespace Api02

 {

     public class Startup

     {

         public Startup(IConfiguration configuration)

         {

             Configuration = configuration;

         }

         public IConfiguration Configuration { get; }

         // This method gets called by the runtime. Use this method to add services to the container.

         public void ConfigureServices(IServiceCollection services)

         {

             services.AddControllers();

             services.AddAuthentication("Bearer").AddJwtBearer("Bearer", options =>

             {

                 options.Authority = "http://localhost:5000";

                 options.RequireHttpsMetadata = false;

                 options.Audience = "api1";

             });

         }

         // This method gets called by the runtime. Use this method to configure the HTTP request pipeline.

         public void Configure(IApplicationBuilder app, IWebHostEnvironment env)

         {

             if (env.IsDevelopment())

             {

                 app.UseDeveloperExceptionPage();

             }

             app.UseRouting();

             app.UseAuthentication();//认证

             app.UseAuthorization();//授权

             app.UseEndpoints(endpoints =>

             {

                 endpoints.MapControllers();

             });

         }

     }

 }
四、创建客户端(控制台 模拟客户端)
 using IdentityModel.Client;

 using Newtonsoft.Json.Linq;

 using System;

 using System.Net.Http;

 using System.Threading.Tasks;

 namespace Client02

 {

     class Program

     {

         static async Task Main(string[] args)

         {

             // Console.WriteLine("Hello World!");

             var client = new HttpClient();

             var disco = await client.GetDiscoveryDocumentAsync("http://localhost:5000");

             if (disco.IsError)

             {

                 Console.WriteLine(disco.Error);

                 return;

             }

             var tokenResponse = await client.RequestPasswordTokenAsync(

                 new PasswordTokenRequest

                 {

                     Address = disco.TokenEndpoint,

                     ClientId = "client",

                     ClientSecret = "aju",

                     Scope = "api1 offline_access",

                     UserName = "Aju",

                     Password = "Aju_password"

                 });

             if (tokenResponse.IsError)

             {

                 Console.WriteLine(tokenResponse.Error);

                 return;

             }

             Console.WriteLine(tokenResponse.Json);

             Console.WriteLine("\n\n");

             //call api

             var apiClient = new HttpClient();

             apiClient.SetBearerToken(tokenResponse.AccessToken);

             var response = await apiClient.GetAsync("http://localhost:5001/api");

             if (!response.IsSuccessStatusCode)

             {

                 Console.WriteLine(response.StatusCode);

             }

             else

             {

                 var content = await response.Content.ReadAsStringAsync();

                 Console.WriteLine(JArray.Parse(content));

             }

             Console.ReadLine();

         }

     }

 }
五、验证
1)直接获取Api资源
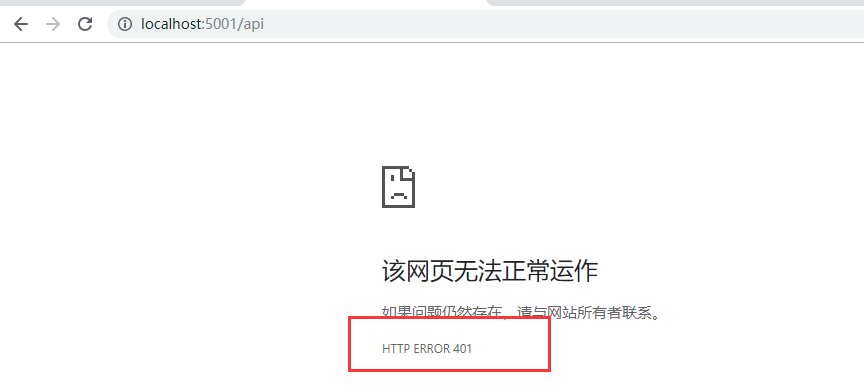
出现了401未授权提示,这就说明我们的Api需要授权
2)运行客户端访问Api资源
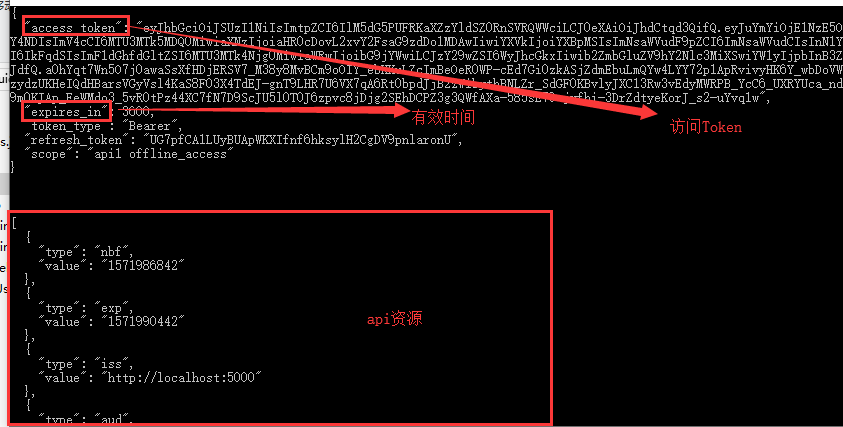
六、自定义用户验证
在创建授权服务器的时候我们在Config中默认模拟(写死)两个用户,这显得有点不太人性化,那我们就来自定义验证用户信息
1)创建 自定义 验证 类 ResourceOwnerValidator
 using IdentityModel;

 using IdentityServer4.Models;

 using IdentityServer4.Validation;

 using System.Threading.Tasks;

 namespace IdentityServer02

 {

     public class ResourceOwnerValidator : IResourceOwnerPasswordValidator

     {

         public Task ValidateAsync(ResourceOwnerPasswordValidationContext context)

         {

             if (context.UserName == "Aju" && context.Password == "Aju_password")

             {

                 context.Result = new GrantValidationResult(

                     subject: context.UserName,

                     authenticationMethod: OidcConstants.AuthenticationMethods.Password);

             }

             else

             {

                 context.Result = new GrantValidationResult(TokenRequestErrors.InvalidGrant, "无效的秘钥");

             }

             return Task.FromResult("");

         }

     }

 }
2)在授权服务器StartUp配置类中,修改如下:

3)在客户端中将 用户名 和 密码 修改成 我们在自定义 用户 验证类 中写的用户名和密码,进行测试
七、通过refresh_token 获取 Token
1)refresh_token
获取请求授权后会返回 access_token、expire_in、refresh_token 等内容,每当access_token 失效后用户需要重新授权,但是有了refresh_token后,客户端(Client)检测到Token失效后可以直接通过refresh_token向授权服务器申请新的token

八、参考文献
http://docs.identityserver.io/en/latest/index.html
如果对您有帮助,请点个推荐(让更多需要的人看到哦)

.Net Core 3.0 IdentityServer4 快速入门02的更多相关文章
- .Net Core 3.0 IdentityServer4 快速入门
.Net Core 3.0 IdentityServer4 快速入门 一.简介 IdentityServer4是用于ASP.NET Core的OpenID Connect和OAuth 2.0框架. 将 ...
- Spring Boot 2.0 的快速入门(图文教程)
摘要: 原创出处 https://www.bysocket.com 「公众号:泥瓦匠BYSocket 」欢迎关注和转载,保留摘要,谢谢! Spring Boot 2.0 的快速入门(图文教程) 大家都 ...
- .Net Core 2.0 EntityFrameworkCore CodeFirst入门教程
最近难得有时间闲下来,研究了一下.net core 2.0,总的来说,目前除了一些第三方的库不支持外,基本上可以满足我们的项目需求了! 我们就以一个网站开发为例,搭建一个简单的三层架构,先熟悉一下.n ...
- 从0开始快速入门学Java----基本篇
由于是0基础入门java,所以花了比较多的时间学习了基本语法知识,阶段性梳理下知识: 1. Java的介绍+JDK安装及环境变量配置+第一个程序HelloWorld的编写 这部分开始遇到的问题比较多, ...
- NSIS 2.0界面快速入门
NSIS 2.0 版本支持定制的用户界面.所谓的 Modern UI(下称 MUI) 就是一种模仿最新的 Windows 界面风格的界面系统.MUI 改变了 NSIS 脚本的编写习惯,它使用 NSIS ...
- ETCD快速入门-02 ETCD安装
2.ETCD安装 etcd 安装可以通过源码构建也可以使用官方构建的二进制文件进行安装.我们以二进制文件为例,系统为CentOS 7.9,操作步骤如下所示: 2.1 Linux ETCD_VE ...
- React Router 4.0中文快速入门
import React from 'react' import { BrowserRouter as Router, Route, Link } from 'react-router-dom' co ...
- docker快速入门02——在docker下开启mysql5.6 binlog日志
1.检查容器状态 [root@localhost ~]# docker ps 执行这个命令可以看到所有正在运行当中的容器,如果加上-a参数,就可以看到所有的容器包括停止的. 我们可以看到容器正在运行当 ...
- 微信小程序_快速入门02
01我们学习了环境的准备和简单的demo,现在是时候来学习简单的页面编写了,首先我们来学习一些常用的基础标签: 一.view盒子,就是类似于div的盒子,可以用来存其他元素的容器. 二.text 文本 ...
随机推荐
- Senparc.Weixin.MP SDK 微信公众平台开发教程(二十二):如何安装 Nuget(dll) 后使用项目源代码调试
最近碰到开发者问:我使用 nuget 安装了 Senparc.Weixin SDK,但是有一些已经封装好的过程想要调试,我又不想直接附加源代码项目,这样就没有办法同步更新了,我应该怎么办? 这其实是一 ...
- 安全性测试:OWASP ZAP 2.8 使用指南(三):ZAP代理设置
ZAP本地代理设置 如前文所言,ZAP的工作机制,是通过“中间代理”的形式实现. ZAP的代理设置可以从菜单中的:工具 - 选项 - Local Proxies加载. 在这里可以设置ZAP用来接受接入 ...
- Hadoop入门 之 Hadoop的安装
1.安装Hadoop的三大步骤 答:1.Linux环境,2.JDK环境,3.配置Hadoop. 2.安装Linux 答:利用阿里云,腾讯云等公有云.选择Ubuntu进行安装,然后利用小putty进行操 ...
- Node 与JS的区别
1.nodejs是运行于服务器端的:2.global:代表node当中的一个全局对象,类似于浏览器当中的window,定义全局对象:global.a:3.作用域:nodejs中一个文件就是一个作用域: ...
- 极光推送消息——RegistrationID方式
1.工具类 package com.test.util; import cn.jiguang.common.resp.APIConnectionException; import cn.jiguang ...
- Ubuntu 启动zookeeper报错
在启动zk客户端连接server时报错: 2019-03-30 23:06:24,915 [myid:localhost:2181] - INFO [main-SendThread(localhost ...
- Ajax async属性
async: 默认是true:异步,false:同步. 其他属性扩展: 1.url: 要求为String类型的参数,(默认为当前页地址)发送请求的地址. 2.type: 要求为String类型的参数, ...
- python简单爬虫(爬取pornhub特定关键词的items图片集)
请提前搭好梯子,如果没有梯子的话直接403. 1.所用到的包 requests: 和服务器建立连接,请求和接收数据(当然也可以用其他的包,socket之类的,不过requests是最简单好用的) Be ...
- wordpress新注册用户或重置密码链接失效
在网上找了好多个博客,一个比一个不要脸,要更改的是两个文件,最后都抄成一个文件了. 原文链接https://www.cnblogs.com/liudecai/p/6474611.html 我是按照这个 ...
- JAVA TCP/IP网络通讯编程(二)
一个实例通过client端和server端通讯 客户端通过TCP/IP传输资源文件,比如图片,文字,音频,视频等..... 服务端接受到文件存入本地磁盘,返回接受到:“收到来自于"+s.ge ...