LNMP环境配置(1)
安装Nginx、MySQL、PHP
概念
LNMP是Linux Nginx MySQL PHP 的简写,把Nginx、MySQL以及PHP安装在Linux系统上,组成一个环境来运行PHP的脚本语言。
Nginx是类似Apache的一种Web服务软件
MySQL是比较小型的数据库软件
Apache和PHP需要在同一台机器上
(先安装c编译语言)

安装MySQL
切换目录

下载源码包

解压

给文件改名

挪动位置

建立MySQL用户

创建datadir,数据库文件会放到这里面

更改权限

可能的安装包(出现错误)


最后(出现两个ok)

复制配置文件

配置文件
# vi /etc/my.cnf

basedir是MySQL包所在路径
datadir是定义的存放数据的地方
port定义MySQL服务监听的端口(默认是3306)
server_id定义ID号
socket定义服务监听的的套接字地址
复制启动脚本文件并修改其属性

修改启动脚本
# vi /etc/init.d/mysqld

把启动脚本加入系统服务项,设定开机启动

检查MySQL是否启动(大于两行)

安装PHP
下载PHP

配置编译选项
./configure \
> --prefix=/usr/local/php-fpm \
> --with-config-file-path=/usr/local/php-fpm/etc \
> --enable-fpm \
> --with-fpm-user=php-fpm \
> --with-fpm-group=php-fpm \
> --with-mysql=/usr/local/mysql \
> --with-mysql-sock=/tmp/mysql.sock \
> --with-libxml-dir \
> --with-gd \
> --with-jpeg-dir \
> --with-png-dir \
> --with-freetype-dir \
> --with-iconv-dir \
> --with-zlib-dir \
> --with-mcrypt \
> --enable-soap \
> --enable-gd-native-ttf \
> --enable-ftp \
> --enable-mbstring \
> --enable-exif \
> --disable-ipv6 \
> --with-pear \
> --with-curl \
> --with-openssl
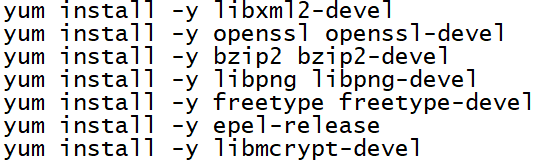
可能出现的错误

编译安装

修改配置文件
# cp php.ini-production /usr/local/php-fpm/etc/php.ini
# vi /usr/local/php-fpm/etc/php-fpm.conf
写入以下内容
[global]
pid = /usr/local/php-fpm/var/run/php-fpm.pid
error_log = /usr/local/php-fpm/var/log/php-fpm.log
[www]
listen = /tmp/php-fcgi.sock
listen.mode = 666
user = php-fpm
group = php-fpm
pm = dynamic
pm.max_children = 50
pm.start_servers = 20
pm.min_spare_servers = 5
pm.max_spare_servers = 35
pm.max_requests = 500
rlimit_files =1024
检验配置是否正确

复制配置文件
# cp /usr/local/src/php-5.6.30/sapi/fpm/init.d.php-fpm /etc/init.d/php-fpm
设置权限
# chmod 755 /etc/init.d/php-fpm
创建用户
# useradd -s /sbin/nologin php-fpm
启动php-fpm

设置开机启动

检测是否启动

安装Nginx
下载nginx
解压

配置编译选项


编译和安装
编写启动脚本

加入以下内容
#!/bin/bash
# chkconfig: - 30 21
# description: http service.
# Source Function Library
. /etc/init.d/functions
# Nginx Settings
NGINX_SBIN="/usr/local/nginx/sbin/nginx"
NGINX_CONF="/usr/local/nginx/conf/nginx.conf"
NGINX_PID="/usr/local/nginx/logs/nginx.pid"
RETVAL=0
prog="Nginx"
start()
{
echo -n $"Starting $prog: "
mkdir -p /dev/shm/nginx_temp
daemon $NGINX_SBIN -c $NGINX_CONF
RETVAL=$?
echo
return $RETVAL
}
stop()
{
echo -n $"Stopping $prog: "
killproc -p $NGINX_PID $NGINX_SBIN -TERM
rm -rf /dev/shm/nginx_temp
RETVAL=$?
echo
return $RETVAL
}
reload()
{
echo -n $"Reloading $prog: "
killproc -p $NGINX_PID $NGINX_SBIN -HUP
RETVAL=$?
echo
return $RETVAL
}
restart()
{
stop
start
}
configtest()
{
$NGINX_SBIN -c $NGINX_CONF -t
return 0
}
case "$1" in
start)
start
;;
stop)
stop
;;
reload)
reload
;;
restart)
restart
;;
configtest)
configtest
;;
*)
echo $"Usage: $0 {start|stop|reload|restart|configtest}"
RETVAL=1
esac
exit $RETVAL
保存后更改权限

设置开机启动

更改配置文件
清空配置文件

编写启动脚本
# vi /usr/local/nginx/conf/nginx.conf
加入以下内容
user nobody nobody;
worker_processes 2;
error_log /usr/local/nginx/logs/nginx_error.log crit;
pid /usr/local/nginx/logs/nginx.pid;
worker_rlimit_nofile 51200;
events
{
use epoll;
worker_connections 6000;
}
http
{
include mime.types;
default_type application/octet-stream;
server_names_hash_bucket_size 3526;
server_names_hash_max_size 4096;
log_format combined_realip '$remote_addr $http_x_forwarded_for [$time_local]'
' $host "$request_uri" $status'
' "$http_referer" "$http_user_agent"';
sendfile on;
tcp_nopush on;
keepalive_timeout 30;
client_header_timeout 3m;
client_body_timeout 3m;
send_timeout 3m;
connection_pool_size 256;
client_header_buffer_size 1k;
large_client_header_buffers 8 4k;
request_pool_size 4k;
output_buffers 4 32k;
postpone_output 1460;
client_max_body_size 10m;
client_body_buffer_size 256k;
client_body_temp_path /usr/local/nginx/client_body_temp;
proxy_temp_path /usr/local/nginx/proxy_temp;
fastcgi_temp_path /usr/local/nginx/fastcgi_temp;
fastcgi_intercept_errors on;
tcp_nodelay on;
gzip on;
gzip_min_length 1k;
gzip_buffers 4 8k;
gzip_comp_level 5;
gzip_http_version 1.1;
gzip_types text/plain application/x-javascript text/css text/htm
application/xml;
server
{
listen 80;
server_name localhost;
index index.html index.htm index.php;
root /usr/local/nginx/html;
location ~ \.php$
{
include fastcgi_params;
fastcgi_pass unix:/tmp/php-fcgi.sock;
fastcgi_index index.php;
fastcgi_param SCRIPT_FILENAME /usr/local/nginx/html$fastcgi_script_name;
}
}
}
检验配置

启动nginx

检测是否启动

测试能否正确解析

测试

LNMP环境配置(1)的更多相关文章
- CentOS 下 LNMP 环境配置
安装配置 Nginx 安装配置 MySQL 安装配置 PHP Nginx 与 PHP-FPM 集成 环境配置验证 LNMP 环境代表 Linux 系统下 Nginx + MySQL + PHP 网 ...
- WIN10 vagrant和virtualbox虚拟机和一键搭建lnmp环境配置thinkphp虚拟主机
版本:win10系统 virtualbox:5.1.26 vagrant :1.9.7 centos 7.0 xshell/git 首先下载好对应版本的软件 配置vagrant和virtualbox ...
- VM虚拟机 Centos7 lnmp环境 配置域名问题 windows浏览器访问的问题
CentOS7 ip地址为 192.168.0.155 搭有 LNMP集成环境 执行 lnmp vhost add 配置服务器 指定目录的域名 mark.com 这时windows 机器的 浏览器想 ...
- CentOS 7 lnmp环境配置laravel项目的问题总结!
一.最常见的几个问题 1.部署好站点后,访问站点的时候始终是“File Not Found”!(nginx中的路由配置问题) 2.除了根目录可以访问其它的访问全是403问题!(权限问题) 3.除了根目 ...
- [LNMP]——LNMP环境配置
LNMP=Linux+Nginx+Mysql+PHP Install Nginx //安装依赖包 # yum install openssl openssl-devel zlib-devel //安装 ...
- LNMP环境配置SSL证书 lnmp ssl add
.4新增的添加SSL功能 lnmp ssl add 如果需要添加输入 y ,不添加输入 n 回车. 选择了添加SSL会提示 有两个选项,1 选项为使用自己准备好的SSL证书和key. > &g ...
- 【Linux运维】LNMP环境配置
安装准备: Centos7.3 MYSQL5.6 PHP5.6 NGINX1.10.3 一.安装Mysql mysql:[root@host129 src]#cd /usr/local/src/ [r ...
- LNMP环境配置(2)
php-fpm配置,Nginx配置 Nginx配置 默认虚拟主机 修改主配置文件 # vi /usr/local/nginx/conf/nginx.conf 在最后 } 符号上面写入 includ ...
- vmware搭建lnmp环境配置域名
找到nginx配置文件,修改server_name 然后找到/etc/hosts文件 修改成如下 之后在Windows本地的C盘的hosts文件中添加解析 好了,这样就可以访问了 通往牛逼的路上,在意 ...
随机推荐
- Codeforces_478_C
http://codeforces.com/problemset/problem/478/C 水. #include<stdio.h> int main() { long long a,b ...
- ELK搭建(docker环境)
ELK是Elasticsearch.Logstash.Kibana的简称,这三者是核心套件,但并非全部. Elasticsearch是实时全文搜索和分析引擎,提供搜集.分析.存储数据三大功能:是一套开 ...
- SpringBoot学习笔记 文件访问映射
通过SpringBoot可以把磁盘内所有的文件都访问到 有一张图片存放在 E://images/acti/123.jpg import org.springframework.context.anno ...
- Ambari HDP 下 SPARK2 与 Phoenix 整合
1.环境说明 操作系统 CentOS Linux release 7.4.1708 (Core) Ambari 2.6.x HDP 2.6.3.0 Spark 2.x Phoenix 4.10.0-H ...
- NR / 5G - Polar Coding
5G New Radio Polar Coding Introduction The selection of polar codes as the channel coding technique ...
- sparc v8 stack frame calling convention
main.c ; int main() { int a, b; int sum; a = ; b = ; sum = add(a, b); ; } int add(int a, int b) { in ...
- 我说我了解集合类,面试官竟然问我为啥HashMap的负载因子不设置成1!?
在Java基础中,集合类是很关键的一块知识点,也是日常开发的时候经常会用到的.比如List.Map这些在代码中也是很常见的. 个人认为,关于HashMap的实现,JDK的工程师其实是做了很多优化的,要 ...
- Lweb and String 超级大水题
Lweb and String Time Limit: 2000/1000 MS (Java/Others) Memory Limit: 65536/65536 K (Java/Others)T ...
- Windows-server-2008-R2安装Oracle-11g-R2-dataguard
一.安装环境 1.服务器环境:Windows server 2008 R2 x64 Standard 两台 CPU:8核 内存:8G 硬盘空间:1060G 2.软件:oracle 11g R2 二.安 ...
- python随用随学20200118-函数的高级特性
高阶函数 话说当年C语言和Java里好像都有这么个东西...忘了 一句话说就是函数名本身就是一个引用. 可以作为变量传递. 一个简单的例子: def power_demo(x): return x* ...