
Android 开发笔记___图像按钮__imageButton
IMAGEBUTTON
其实派生自image view,而不是派生自button。,image view拥有的属性和方法,image button 统统拥有,只是imagebutton有个默认的按钮外观。
- image button 只能显示图形
- imagebutton 上面的图片可按比例拉伸
- 只能在背景显示一张图形,但分别在前景和背景显示两张图片,实现图片叠加的效果
- 在输入法无法输入的字符和特殊字体显示的字符串,就适合用imagebutton, 先切图再显示
- 要想在文字周围放图片可以用基于text view 的 button,
- 具体在xml中设置如下属性:
- drawableTop:指定文本上方的图片
- drawableBottom:指定文本下方的图片
- drawableLeft:指定文本左边的图形
- drawableRight:指定文本右边的图片
- drawablepadding:指定图形文本间距
- 在代码中:
- setCompoundDrawables:设置文本周围图形,上下左右
- setCompoundDrawablePadding:间距
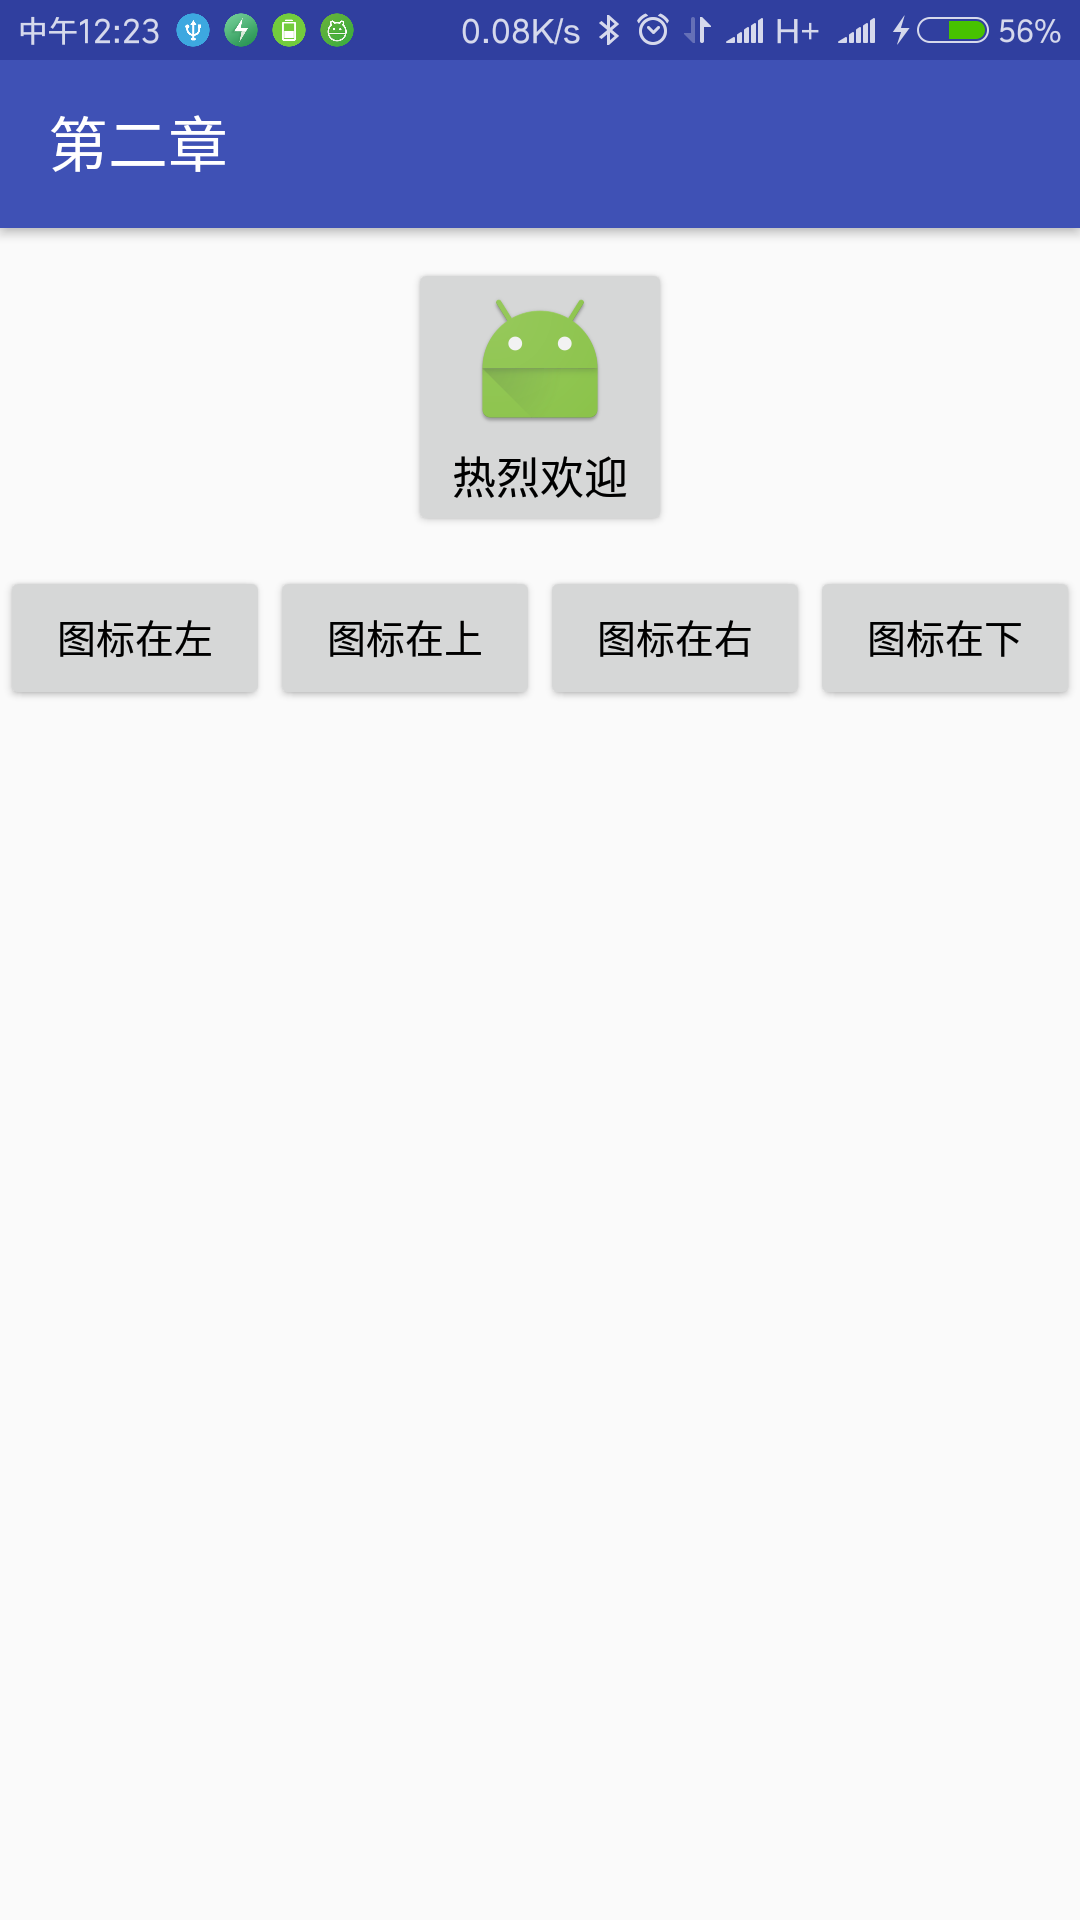
 <?xml version="1.0" encoding="utf-8"?>

 <LinearLayout xmlns:android="http://schemas.android.com/apk/res/android"

     android:layout_width="match_parent"

     android:layout_height="match_parent"

     android:orientation="vertical">

     <Button

         android:id="@+id/btn_icon"

         android:layout_width="wrap_content"

         android:layout_height="wrap_content"

         android:layout_marginTop="10dp"

         android:layout_gravity="center"

         android:drawableLeft="@mipmap/ic_launcher"

         android:drawablePadding="5dp"

         android:text="热烈欢迎"

         android:textColor="#000000"

         android:textSize="17sp" />

     <LinearLayout

         android:layout_width="match_parent"

         android:layout_height="wrap_content"

         android:layout_marginTop="10dp"

         android:orientation="horizontal">

         <Button

             android:id="@+id/btn_left"

             android:layout_width="0dp"

             android:layout_height="wrap_content"

             android:layout_weight="1"

             android:text="图标在左"

             android:textColor="#000000"

             android:textSize="15sp" />

         <Button

             android:id="@+id/btn_top"

             android:layout_width="0dp"

             android:layout_height="wrap_content"

             android:layout_weight="1"

             android:text="图标在上"

             android:textColor="#000000"

             android:textSize="15sp" />

         <Button

             android:id="@+id/btn_right"

             android:layout_width="0dp"

             android:layout_height="wrap_content"

             android:layout_weight="1"

             android:text="图标在右"

             android:textColor="#000000"

             android:textSize="15sp" />

         <Button

             android:id="@+id/btn_bottom"

             android:layout_width="0dp"

             android:layout_height="wrap_content"

             android:layout_weight="1"

             android:text="图标在下"

             android:textColor="#000000"

             android:textSize="15sp" />

     </LinearLayout>

 </LinearLayout>
java
 package com.example.alimjan.hello_world;

 import android.content.Context;

 import android.content.Intent;

 import android.graphics.drawable.Drawable;

 import android.os.Bundle;

 import android.support.v7.app.AppCompatActivity;

 import android.view.View;

 import android.widget.Button;

 /**

  * Created by alimjan on 7/1/2017.

  */

 public class class__2_3_4 extends AppCompatActivity implements View.OnClickListener {

     private Button btn_icon;

     private Drawable drawable;

     @Override

     protected void onCreate(Bundle savedInstanceState) {

         super.onCreate(savedInstanceState);

         setContentView(R.layout.code_2_3_4);

         btn_icon = (Button) findViewById(R.id.btn_icon);

         drawable = getResources().getDrawable(R.mipmap.ic_launcher);

         // 必须设置图片大小,否则不显示图片

         drawable.setBounds(0, 0, drawable.getMinimumWidth(), drawable.getMinimumHeight());

         Button btn_left = (Button) findViewById(R.id.btn_left);

         Button btn_top = (Button) findViewById(R.id.btn_top);

         Button btn_right = (Button) findViewById(R.id.btn_right);

         Button btn_bottom = (Button) findViewById(R.id.btn_bottom);

         btn_left.setOnClickListener(this);

         btn_top.setOnClickListener(this);

         btn_right.setOnClickListener(this);

         btn_bottom.setOnClickListener(this);

     }

     @Override

     public void onClick(View v) {

         if (v.getId() == R.id.btn_left) {

             btn_icon.setCompoundDrawables(drawable, null, null, null);

         } else if (v.getId() == R.id.btn_top) {

             btn_icon.setCompoundDrawables(null, drawable, null, null);

         } else if (v.getId() == R.id.btn_right) {

             btn_icon.setCompoundDrawables(null, null, drawable, null);

         } else if (v.getId() == R.id.btn_bottom) {

             btn_icon.setCompoundDrawables(null, null, null, drawable);

         }

     }

     public static void startHome(Context mContext) {

         Intent intent = new Intent(mContext, class__2_3_4.class);

         mContext.startActivity(intent);

     }

 }
Android 开发笔记___图像按钮__imageButton的更多相关文章
- Android 开发笔记___图像视图__简单截屏
<?xml version="1.0" encoding="utf-8"?> <LinearLayout xmlns:android=&quo ...
- Android 开发笔记___图像视图
<?xml version="1.0" encoding="utf-8"?> <LinearLayout xmlns:android=&quo ...
- Android 开发笔记___初级控件之实战__计算器
功能简单,实现并不难,对于初学者可以总和了解初级控件的基本使用. 用到的知识点如下: 线性布局 LinearLayout:整体界面是从上往下的,因此需要垂直方向的linearlayout:下面每行四个 ...
- Android 开发笔记___实战项目:购物车
购物车的应用很广泛,电商app基本上都有它的身影.由于它用到了多种存储方式,通过项目对数据的存储有更高层次的了解. 1.设计思路 首先看看购物车的外观.第一次进入时里面是空的,去购物页面加入购物车以后 ...
- Android 开发笔记___登陆app
package com.example.alimjan.hello_world; /** * Created by alimjan on 7/4/2017. */ import android.con ...
- Android 开发笔记___基本适配器的使用__BaseAdapter
之前用到过ArryAdapter适用于纯文本的列表数据,SimpleAdapter适用于带图标的列表数据,但在实际应用中常常有更复杂的列表,比如同一项中存在多个控件,这时候用前面的两个会比较复杂,而且 ...
- Android 开发笔记___时间选择器---timePicker
像datepicker一样,也有timepicker. 同样有timepickerdialog 所用到的方法还是一样,监听时间选择器的变化. package com.example.alimjan.h ...
- Android 开发笔记___存储方式__共享参数__sharedprefences
Android 的数据存储方式有四种,这次是[共享参数__sharedprefences] 听起来挺别扭的,平时看到的app里面,当用户删除了一些软件以后下次安装,发现原来的设置还在,这种情况就是把一 ...
- Android 开发笔记___复选框__checkbox
<LinearLayout xmlns:android="http://schemas.android.com/apk/res/android" android:layout ...
随机推荐
- DialogFragment的应用
一.DialogFragment简单介绍: 1.基本概念 DialogFrament 指一个与fragment建立了关联的Dialog, 随fragment生, 随fragment死, 即Dialog ...
- JAVA 反射(1)
getDeclaredField是可以获取一个类的所有字段. getField只能获取类的public 字段.
- apollo实现c#与android消息推送(四)
4 Android代码只是为了实现功能,比较简单,就只是贴出来 package com.myapps.mqtttest; import java.util.concurrent.Executors; ...
- EXTENDED LIGHTS OUT poj1222 高斯消元法
EXTENDED LIGHTS OUT Time Limit: 1000MS Memory Limit: 10000K Total Submissions: 6443 Accepted: 42 ...
- 超级密码 hdu1226 bfs
超级密码 Time Limit: 20000/10000 MS (Java/Others) Memory Limit: 65536/32768 K (Java/Others)Total Subm ...
- bzoj4236 JOIOJI hash 模拟
JOIOJI桑是JOI君的叔叔."JOIOJI"这个名字是由"J.O.I"三个字母各两个构成的. 最近,JOIOJI桑有了一个孩子.JOIOJI桑想让自己孩子的 ...
- 概率图模型PGM——D map, I map, perfect map
若F分布的每个条件独立性质都反映在A图中,则A图被称为F分布的D map. 若A图表现出的所有条件独立性质都在F分布中满足(与F分布不矛盾),则A图被称为F分布的I map. 弱A图既是F分布的D m ...
- PHP和JS判断变量是否定义
PHP中: 通过isset(变量名)来判断,定义返回true/未定义返回false JS中: 通过typeof来判断.
- I/P/B/SI/SP帧和PTS/DTS的关系
I frame:帧内编码帧 又称intra picture,I 帧通常是每个 GOP(MPEG 所使用的一种视频压缩技术)的第一个帧,经过适度地压缩,做为随机访问的参考点,可以当成图象.I帧可以看成是 ...
- POJ 2472 106 miles to Chicago(Dijstra变形——史上最坑的最长路问题)
题目链接 :http://poj.org/problem?id=2472 Description In the movie "Blues Brothers", the orphan ...