Angular Taskmgr 登录
一、登录module
1、先创建domain文件夹,在里面建一个user.model.ts的user领域对象。
export interface User{

    id?:string;

    email:string;

    password:string;

    name:string;

    avatar:string;

}
2、ng g m login创建一个login module.
在login下创建一个login组件。
3、在login下建立一个login-routing.module.ts子路由。
【最好为每个模块建立自己的路由】
建立路由的快捷方式。装插件Angulae7 Snippets,用ng-router-featuremodule.

import { NgModule } from '@angular/core';

import { RouterModule, Routes } from '@angular/router';

import { CommonModule } from '@angular/common';

import { LoginComponent } from './login/login.component';

import { RegisterComponent } from './register/register.component';

const routes: Routes = [

    { path: '', component: LoginComponent },

    { path: 'register', component: RegisterComponent }

];

@NgModule({

    imports: [CommonModule, RouterModule.forChild(routes)],

exports: [RouterModule]

})

export class LoginRoutingModule {}
4、配置根路由
import { NgModule } from '@angular/core';

import { Routes, RouterModule } from '@angular/router';

const routes: Routes = [

  {

    path: '', redirectTo: '/login', pathMatch: 'full'

  },

  {

    path:'login',loadChildren:'./login/login.module#LoginModule'

  }

];

@NgModule({

  imports: [RouterModule.forRoot(routes)],

  exports: [RouterModule]

})

export class AppRoutingModule { }
确保根模块中引入根路由。
import { BrowserModule } from '@angular/platform-browser';

import { NgModule } from '@angular/core';

import { AppRoutingModule } from './app-routing.module';

import { AppComponent } from './app.component';

import { CoreModule } from './core/core.module';

import { BrowserAnimationsModule } from '@angular/platform-browser/animations';

import { MatSidenavModule} from '@angular/material';

@NgModule({

  declarations: [

    AppComponent

  ],

  imports: [

    BrowserModule,

    BrowserAnimationsModule,

    AppRoutingModule,

    CoreModule,

    MatSidenavModule

  ],

  providers: [],

  bootstrap: [AppComponent]

})

export class AppModule { }
子模块导入子路由。
import { NgModule } from '@angular/core';

import { LoginComponent } from './login/login.component';

import { SharedModule } from '../shared/shared.module';

import { LoginRoutingModule } from './login-routing.module';

@NgModule({

  declarations: [LoginComponent],

  imports: [

    SharedModule,

    LoginRoutingModule

  ]

})

export class LoginModule { }
5、安装animation动画依赖
npm install --save @angular/animations
6、布局
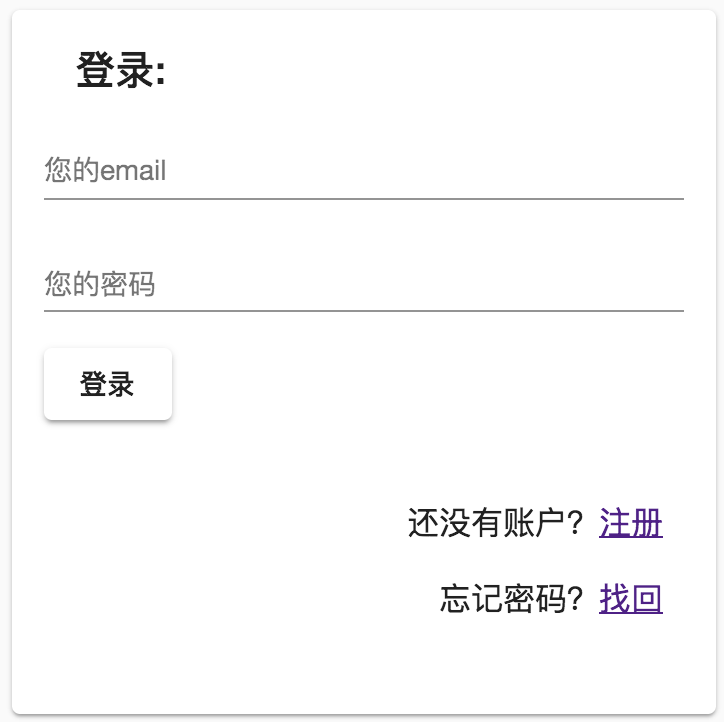
<form>

  <mat-card class="example-card">

    <mat-card-header>

      <mat-card-title>登录:</mat-card-title>

    </mat-card-header>

    <mat-card-content>

      <mat-form-field class="example-full-width" class="full-width">

        <input type="text" matInput placeholder="您的email" style="text-align: right">

      </mat-form-field>

      <mat-form-field class="example-full-width" class="full-width">

        <input type="password" matInput placeholder="您的密码" style="text-align: right">

      </mat-form-field>

      <button mat-raised-button type="button">登录</button>

    </mat-card-content>

    <mat-card-actions class="text-right">

      <p>还没有账户?<a href="">注册</a></p>

      <p>忘记密码?<a href="">找回</a></p>

    </mat-card-actions>

  </mat-card>

</form>
form {

  display: flex;

  flex-direction: column;

  justify-content: center;

  align-items: center;

  width: 100%;

  height: 100%;

}

mat-card {

  width: 20em;

  margin: 5px;

  flex: 0 0 20em;

}

.full-width {

  width: 100%;

}

.text-right {

  margin: 10px;

  text-align: end;

}
二、register Component
1、在login下面新建register组件
ng g c login/register
2、注册组件头像模块使用svg
在之前文章介绍过matIcon中可以使用svg做为资源。
通过addSvgIconSetInNamespace来添加图标集
import { MatIconRegistry } from "@angular/material";

import { DomSanitizer } from "@angular/platform-browser";

export const loadSvgResources = (ir: MatIconRegistry, ds: DomSanitizer) => {

  const imgDir = "assets/img";

  const avatarDir = `${imgDir}/avatar`;

  const sidebarDir = `${imgDir}/sidebar`;

  const dayDir = `${imgDir}/days`;

  ir.addSvgIconSetInNamespace( //通过addSvgIconSetInNamespace来添加图标集

    "avatars",

    ds.bypassSecurityTrustResourceUrl(`${avatarDir}/avatars.svg`)

  );

  ir.addSvgIcon(

    "day",

    ds.bypassSecurityTrustResourceUrl(`${sidebarDir}/day.svg`)

  );

  ir.addSvgIcon(

    "month",

    ds.bypassSecurityTrustResourceUrl(`${sidebarDir}/month.svg`)

  );

  ir.addSvgIcon(

    "project",

    ds.bypassSecurityTrustResourceUrl(`${sidebarDir}/project.svg`)

  );

  ir.addSvgIcon(

    "projects",

    ds.bypassSecurityTrustResourceUrl(`${sidebarDir}/projects.svg`)

  );

  ir.addSvgIcon(

    "week",

    ds.bypassSecurityTrustResourceUrl(`${sidebarDir}/week.svg`)

  );

  const days =[,,,,,,,,,,,,,,,,,,,,,,,,,,,,,,];

  days.forEach((d)=>{

    ir.addSvgIcon(

      `day${d}`,

      ds.bypassSecurityTrustResourceUrl(`${dayDir}/day${d}.svg`)

    );

  });

};
在注册页面中
  ngOnInit() {

    const nums = [1, 2, 3, 4, 5, 6, 7, 8, 9, 10, 11, 12, 13, 14, 15, 16];

    this.items = nums.map(d => `avatars:svg-${d}`);

  }
在模版中
      <mat-grid-list cols="8">

        <mat-grid-tile *ngFor="let item of items">

<mat-icon [svgIcon]="item"></mat-icon>

        </mat-grid-tile>
3,修改样式
让icon变圆。
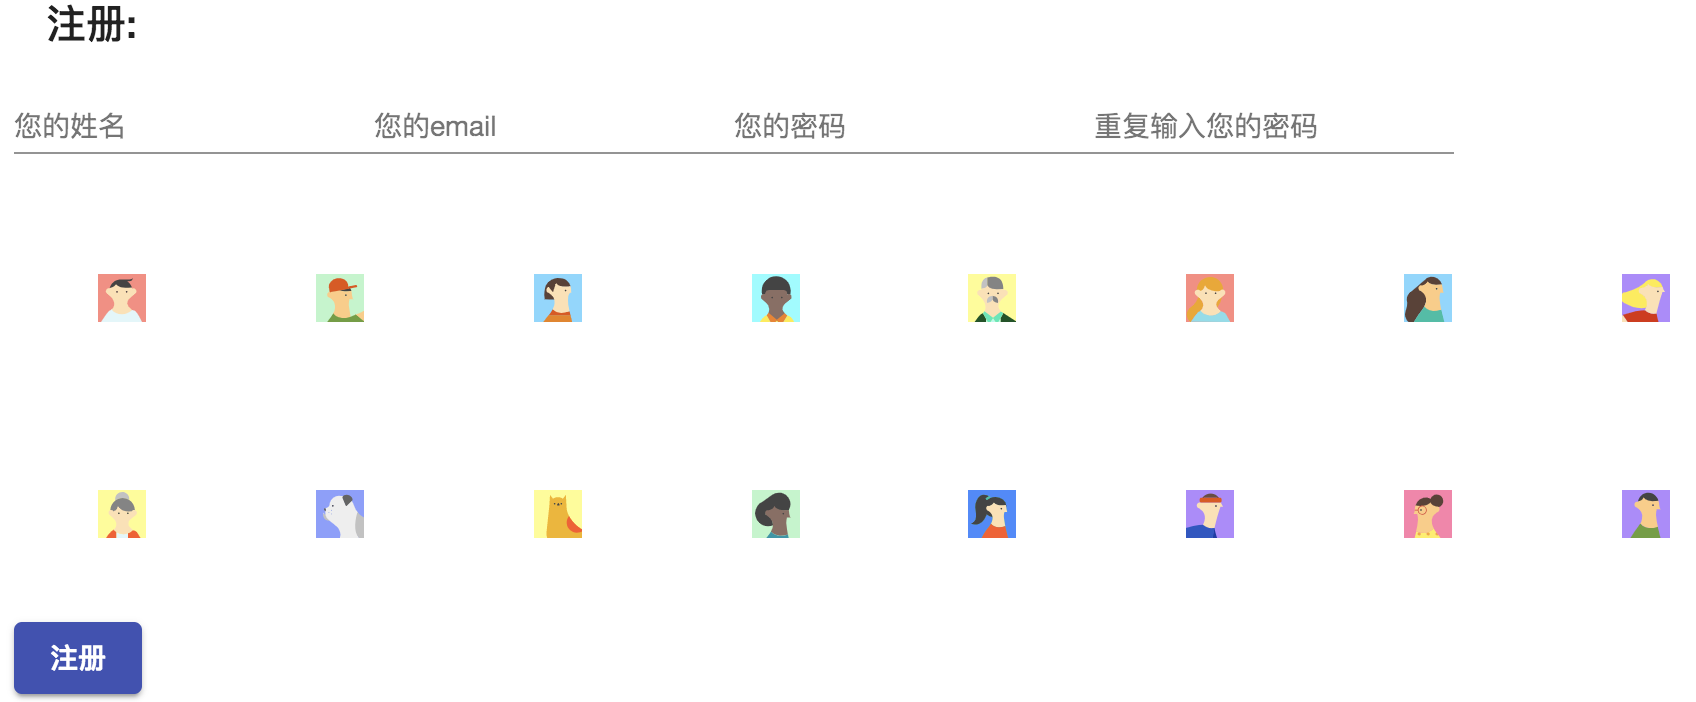
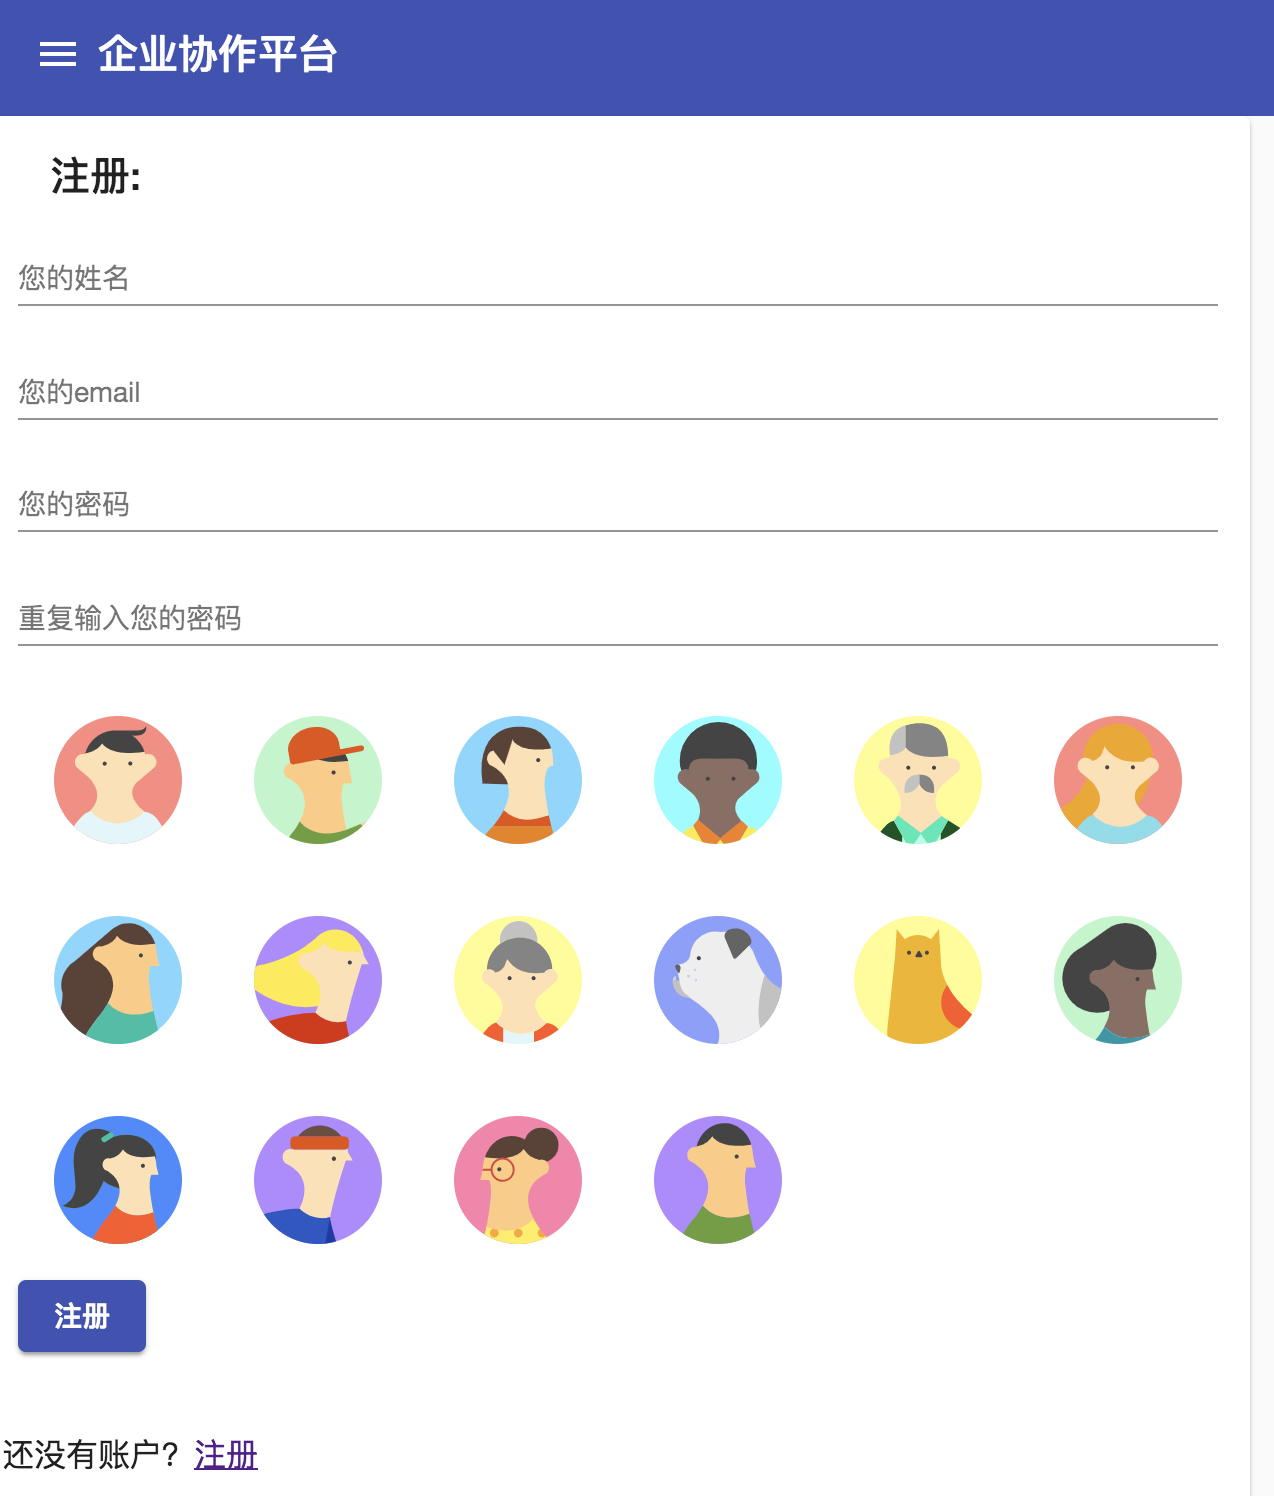
<form>

  <mat-card class="example-card">

    <mat-card-header>

      <mat-card-title>注册:</mat-card-title>

    </mat-card-header>

    <mat-card-content>

      <mat-form-field class="full-width">

        <input type="text" matInput placeholder="您的姓名" style="text-align: right">

      </mat-form-field>

      <mat-form-field class="full-width">

        <input type="text" matInput placeholder="您的email" style="text-align: right">

      </mat-form-field>

      <mat-form-field class="full-width">

        <input type="password" matInput placeholder="您的密码" style="text-align: right">

      </mat-form-field>

      <mat-form-field class="full-width">

        <input type="password" matInput placeholder="重复输入您的密码" style="text-align: right">

      </mat-form-field>

      <mat-grid-list cols="6">

        <mat-grid-tile *ngFor="let item of items">

          <mat-icon class="avatar" [svgIcon]="item"></mat-icon>

        </mat-grid-tile>

      </mat-grid-list>

      <button mat-raised-button type="button" color="primary">注册</button>

    </mat-card-content>

    <mat-card-actions class="text-right">

      <p>还没有账户?<a href="">注册</a></p>

      <p>忘记密码?<a href="">找回</a></p>

    </mat-card-actions>

  </mat-card>

</form>
mat-icon.avatar {

  overflow: hidden;

  width: 64px;

  height: 64px;

  border-radius: 50%;

  margin: 12px;

}

mat-card {

  width: 600px;

}

.full-width {

  width: 100%;

}
三、相关报错TroubleShoting
ERROR Error: Uncaught (in promise): Error: Cannot match any routes. URL Segment: 'login'
之前路由配置
AppRoutingModule里这样配置
LoginRoutingModule里这样配置
const routes: Routes = [

  {path: '', redirectTo: '/login', pathMatch: 'full'},

  {path:'login',loadChildren:'./login/login.module#LoginModule'}

];
Angular Taskmgr 登录的更多相关文章
- 使用angluar-cli的ng g component home指令出现的错误
Error: ELOOP: too many symbolic links encountered, stat '/Users/zzy/angular/taskmgr/node_modules/@an ...
- angular利用ui-router登录检查
angular利用ui-router登录检查 SAP都会有这个问题,session过期或者页面被刷新的情况下应该进入登录页. 监听ui-router的satte事件可以实现当state切换的时候检查登 ...
- Angular4--提速--提升Angular项目的首页打开速度(包含微信登录优化)
Angular项目的首页打开速度很慢,有时候会有几秒的加载时间.如果在手机端访问的话,怕是要等待十多秒,这对用户体验很差.下面参考http://www.cnblogs.com/feiyu159/p/8 ...
- angular中的 登录检查 和 过期Session清理
angular利用ui-router进行登录检查 SAP都会有这个问题,session过期或者页面被刷新的情况下应该进入登录页. 监听ui-router的satte事件可以实现当state切换的时候检 ...
- wcf 登录认证 angular 认证重定向
自定义认证管理器,分为两级:1.登陆认证.2.权限认证.权限主要是用户.角色.角色用户关系.功能(系统资源).角色功能关系,5部分决定用户的权限(视图). 两层认证都通过后,更新session的最新交 ...
- Angular之简单的登录注册
使用Angular实现了一个简单的登录注册的功能........ 涉及到的Angular知识点很少 主要是这个功能的实现...(*^__^*) 嘻嘻…… 里面涉及到的知识点记录: 1.本地存储的操作 ...
- Spring Security登录超时,angular ajax请求出错自动跳转至登录页(jQuery也适用)
公司开发采用Spring Security+AngualerJS框架,在session过期之后,ajax请求会直接出错.本文介绍如何实现出错情况下自动跳转至登录页. 整体思路是,session过期后, ...
- angular.js 验证码注册登录
css部分 header{ height: 50px; line-height: 50px; display: flex; } .callback{ text-align: left; display ...
- abp + angular 前端使用 hash ,登录界面不跳转问题
abp 项目默认的路由没有使用hash,这会导致手动刷新浏览器时,页面404错误: 解决方法网上很多,就是在路由里添加一个{useHash: true},就行了. #用Hash带来的新问题# abp框 ...
随机推荐
- Linux 下 fcitx 崩溃
killall fcitx killall sogou-qimpanel fcitx & 输入以上命令
- 题解:LOJ540游戏
题目描述 小L计划进行n场游戏,每场游戏使用一张地图,小 L 会同时使用三辆车在该地图上完成游戏. 小 L 的赛车有三辆,分别用大写字母 A.B.C 表示.地图是一张无向简单图(没有重边或自环),每次 ...
- 【学习笔记】TensorFlow
1. tf.Graph().as_default() 的作用 首先看官网上的解释: 再看博主 Joanna-In-Hdu&Hust 对此比较通俗易懂的解释(https://www.cnblog ...
- JS设置Cookie过期时间
//JS操作cookies方法! //写cookies function setCookie(name,value) { var Days = 30; var exp = new Date(); ex ...
- 移动开发day4_京东移动页面
复习 父项身上有哪些属性 可以设置 主轴方向 fd flex-direction : row; column; 主轴子项的排列方式 j justify-content: flex-start;flex ...
- SOA 和 微服务
正在读 钟华 著的<<企业IT架构转型之道 - 阿里巴巴中台战略思想与架构实战>> 一书, 参考了网上的讨论, 对SOA和微服务有了一些新的认识. 知乎上的讨论: SOA 与 ...
- 一秒钟带你走进P图世界-----(python)PIL库的使用
python-----PIL库的使用 一.什么是PIL库 1.PIL(Python Image Library)库是python语言的第三方库,具有强大的图像处理能力,不仅包含了丰富的像素.色彩操作功 ...
- Keras实现LSTM
一.先看一个Example 1.描述,输入为一个字母,输出为这个字母的下一个顺序字母 A->B B->C C->D 2.Code import numpy from keras.mo ...
- WordPress plugin Contact Form [CSRF → LFI] vulnerable 2019-03-17
# Exploit Title: Contact Form by WD [CSRF → LFI]# Date: 2019-03-17# Exploit Author: Panagiotis Vagen ...
- 不同IDE对maven项目静态资源处理
今天自己构建maven管理的web项目,参照另一位兄弟的代码,发现他的静态资源,也就是html.js之类的文件是在src/main/resource目录下的,我的在src/main/resource目 ...