RF Analyzer for Android 安卓平台连接HackRF的App
Over the last week I've been working on a new project, trying to build a spectrum analyzer for Android that works with my hackrf_android library. Now I finally reached the point were it is stable enough to be useful and I created the GitHub repository today:
https://github.com/demantz/RFAnalyzer
It is still very basic and I have a lot of ideas to extend its functionality, but I thought it's better to have testers involved as early as possible. Eventually it should evolve in something similar to GQRX, supporting different modes and devices. But that will take some time!
The new version of RF Analyzer (1.07) has now support for AM/FM demodulation! It is now also available on Google Play:
See the readme on GitHub for a more detailed description!

RF Analyzer running on a Nexus 5
In this blog I'm going to show what you can do with the app and in the end I explain how it is working internally for those who like to play with the source code. I also tried to document the code as good as possible, but it is always easier if the basic flow of the program is explained before looking at it.
What you can do with it
Right now there aren't many fancy features. The app will present you with a simple UI showing the frequency spectrum including a waterfall plot. Here is a list of what you can do right now with version 1.00:
- Browse the spectrum by scrolling horizontally
- Zoom in and out, both horizontally and vertically
- Adjust the sample rate and center frequency to match the current view of the screen by double tapping
- Auto scale the vertical axis
- Jump directly to a frequency
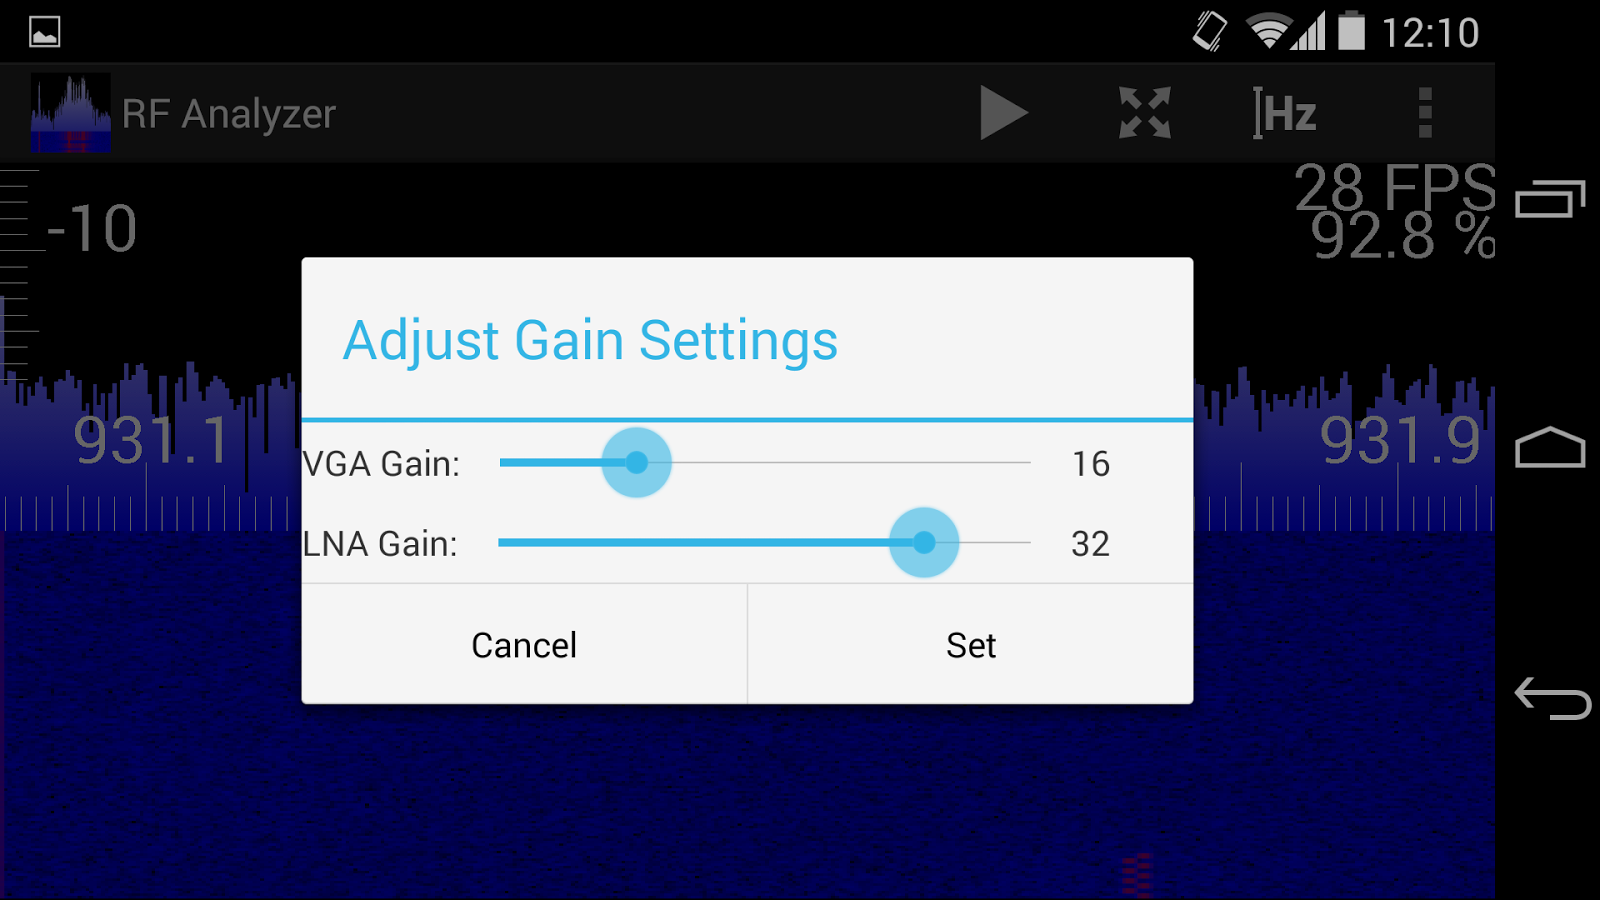
- Adjust the gain settings of the HackRF
- Select a pre-recorded file as source instead of a real HackRF
- Change the FFT size
- Setting the frame rate either to a fixed value or to automatic control
- Activate logging and showing the log file
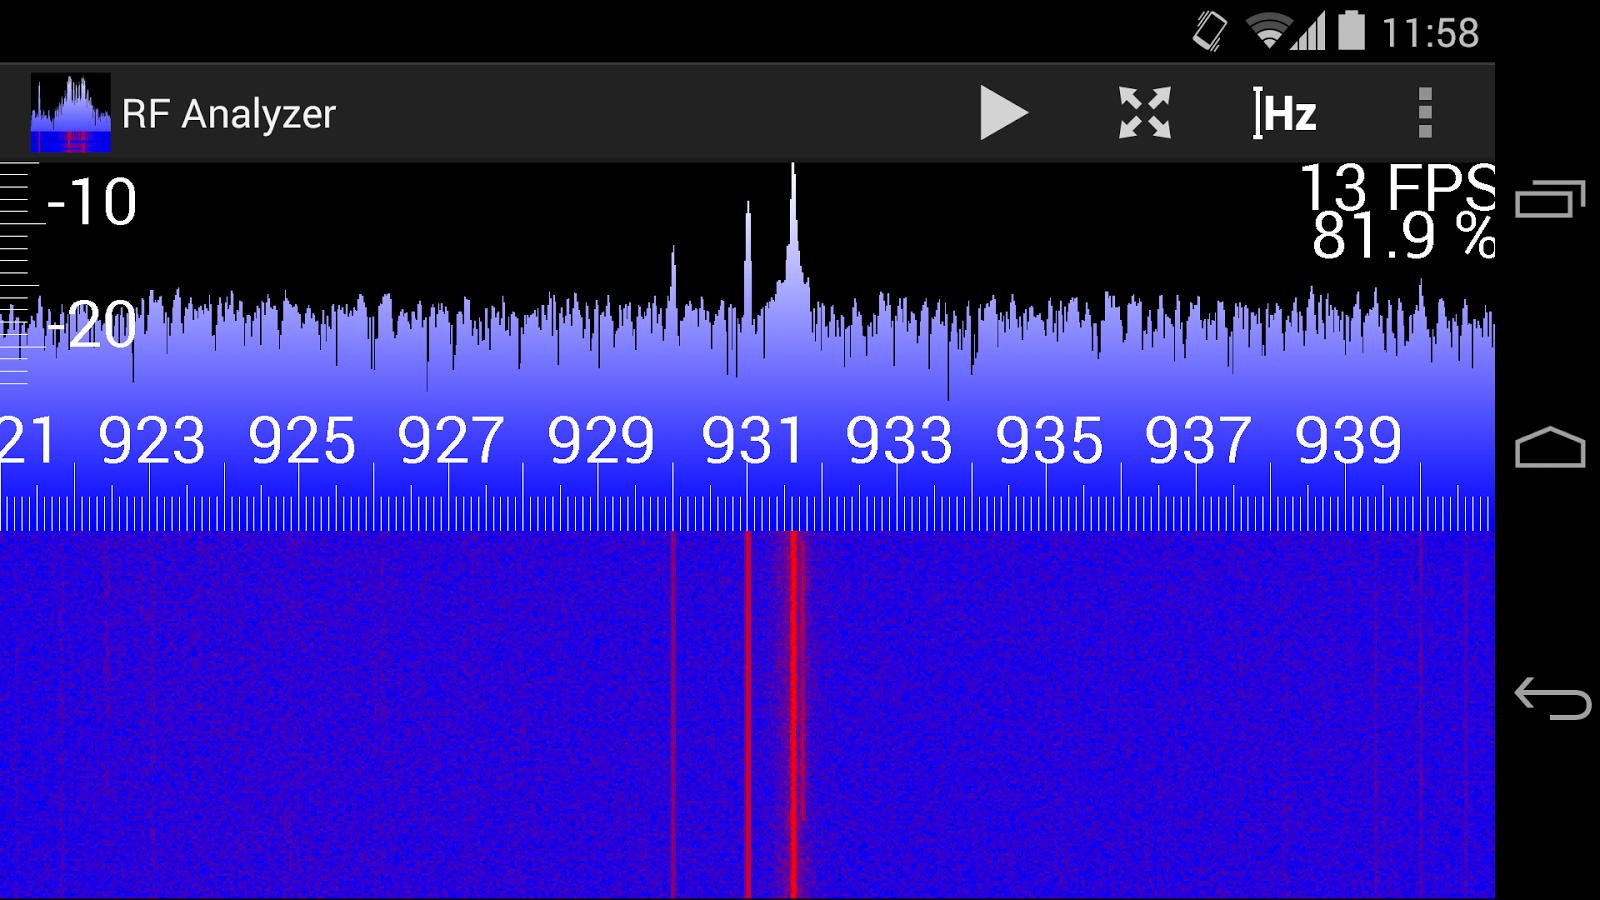
FFT at 20 Msps showing FLEX pagers at 931 MHz
Use common gestures to zoom and scroll both vertically and horizontally. Note that the vertical axis of the FFT plot also affects the colors of the waterfall plot:

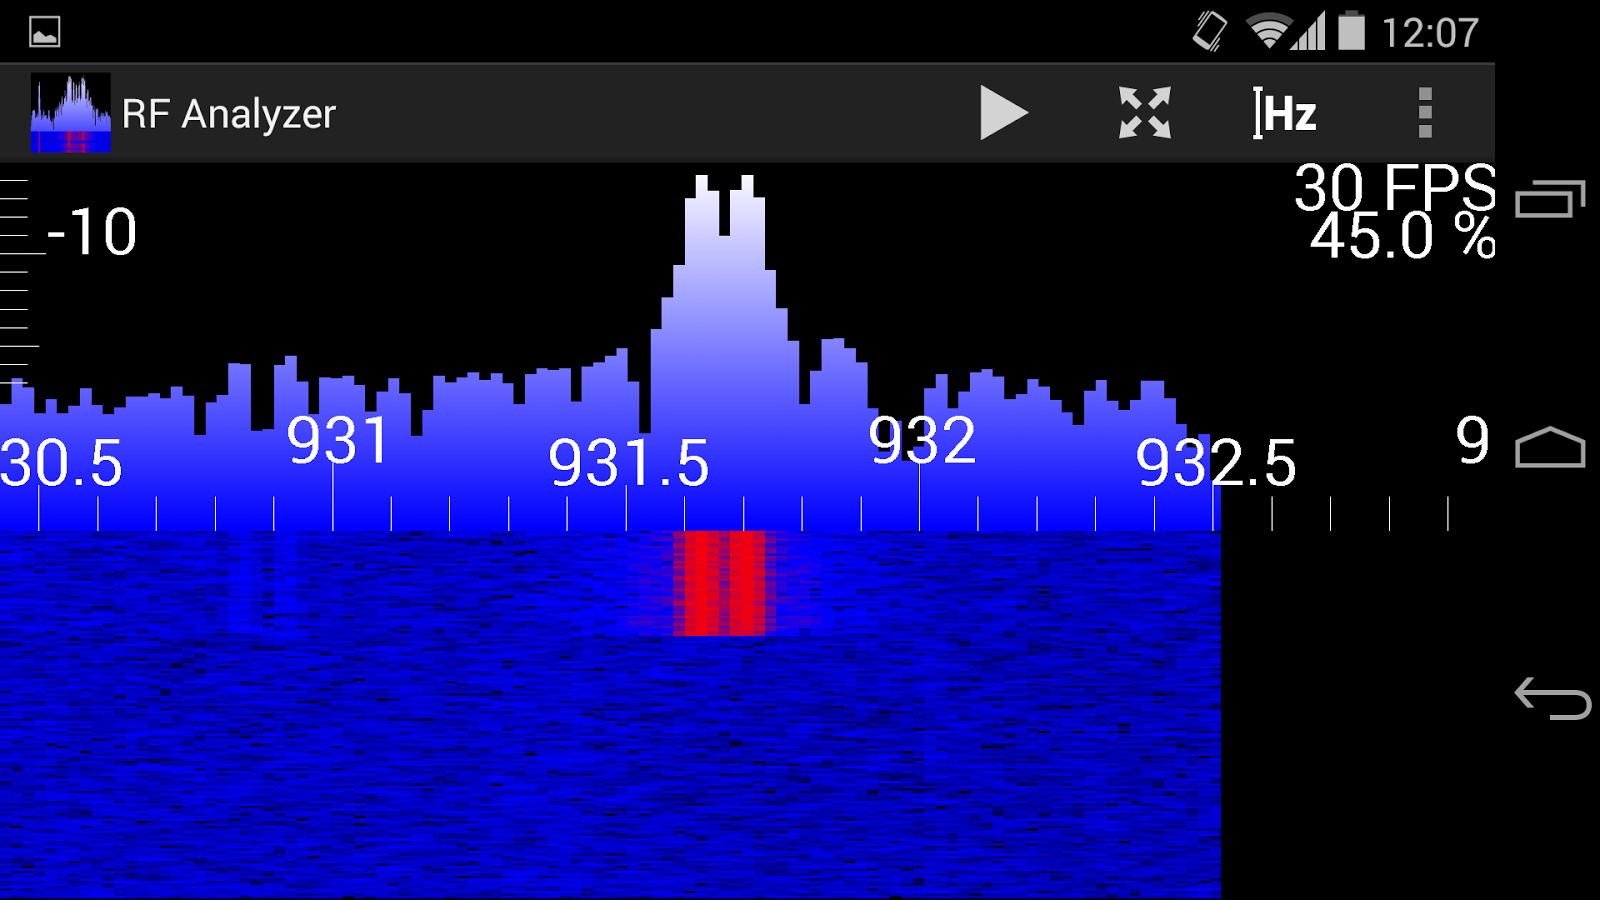
Zoomed in (both vertical and horizontal) view
If you scroll outside the current range of the FFT or if you zoom so that the resolution of the FFT is too low you can simply double tap the screen. RF Analyzer will re-tune the HackRF to the frequency currently centered on the screen and also ajust the sample rate so that the FFT covers exactly the frequency range that is currently visible:
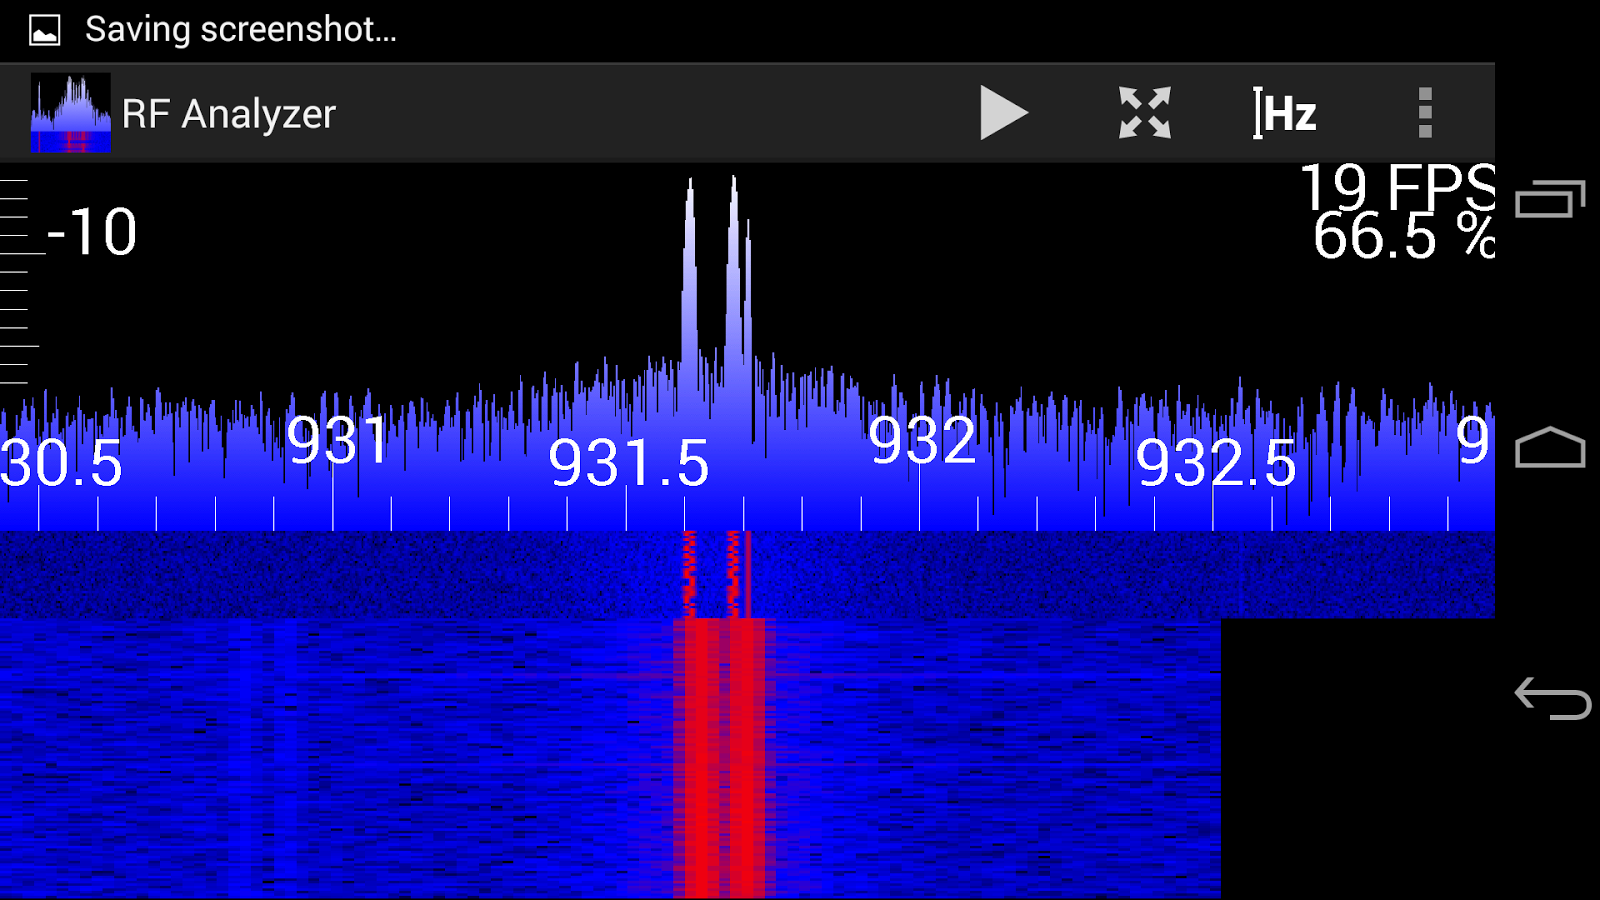
The resolution of the FFT is too low when zoomed in too closely. And we scrolled to far right that we can see the end of the FFT on the right site
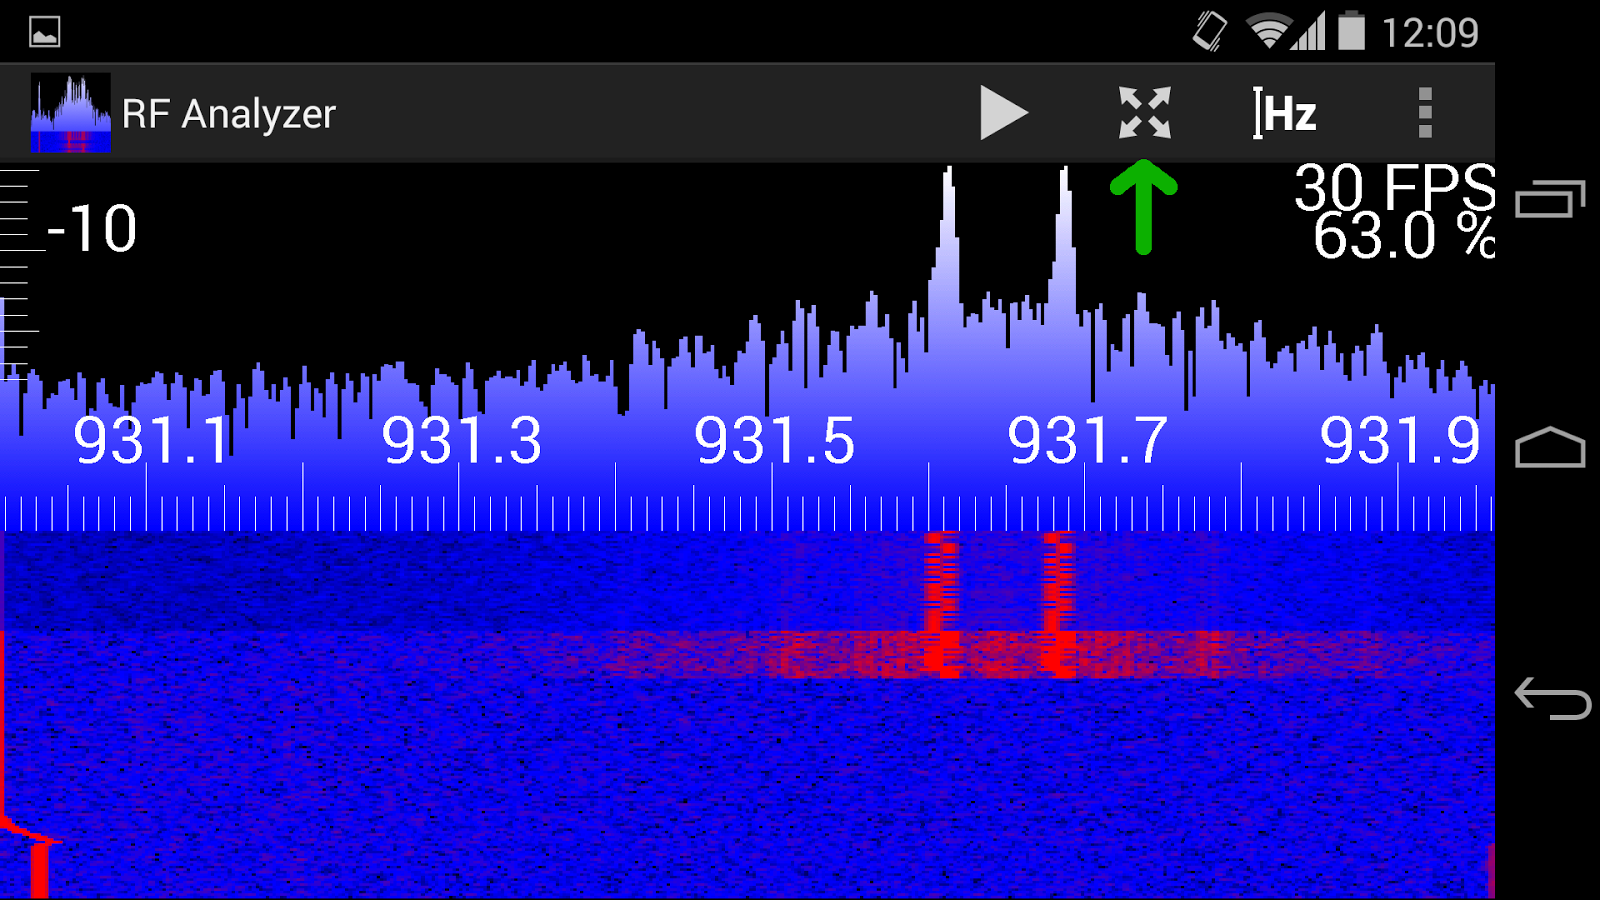
After double tapping the HackRF is tuned to 931,61 MHz (note the DC offset peak!) and the sample rate is now adjusted to about 2.5 Msps so that we see the full FFT resolution again
You can also use the autoscale button in the action bar to adjust the vertical scale so that it ranges from the minimum to the maximum of the currently visible values of the FFT:
If you want to jump to a certain frequency, use the 'set frequency' button and it will prompt you to enter a new frequency:

The gain settings of the HackRF (both VGA and LNA gain) can be accessed through the 'set gain' button in the overflow menu:
In the settings activity you can:
- Select other source types (currently only HackRF or file source)
- Set the FFT size
- Set the screen orientation (auto / landscape / portrait)
- Turn autostart on and off (so that you don't have to hit the start button every time)
- Set the frame rate to auto or a fixed value (useful if you want a linear time axis in the waterfall plot)
- Deactivate vertical zoom and scrolling (so that you don't accidentally alter the vertical scale while scrolling through frequencies)
- Turn on logging and set the location of the log file.
- Show the log file
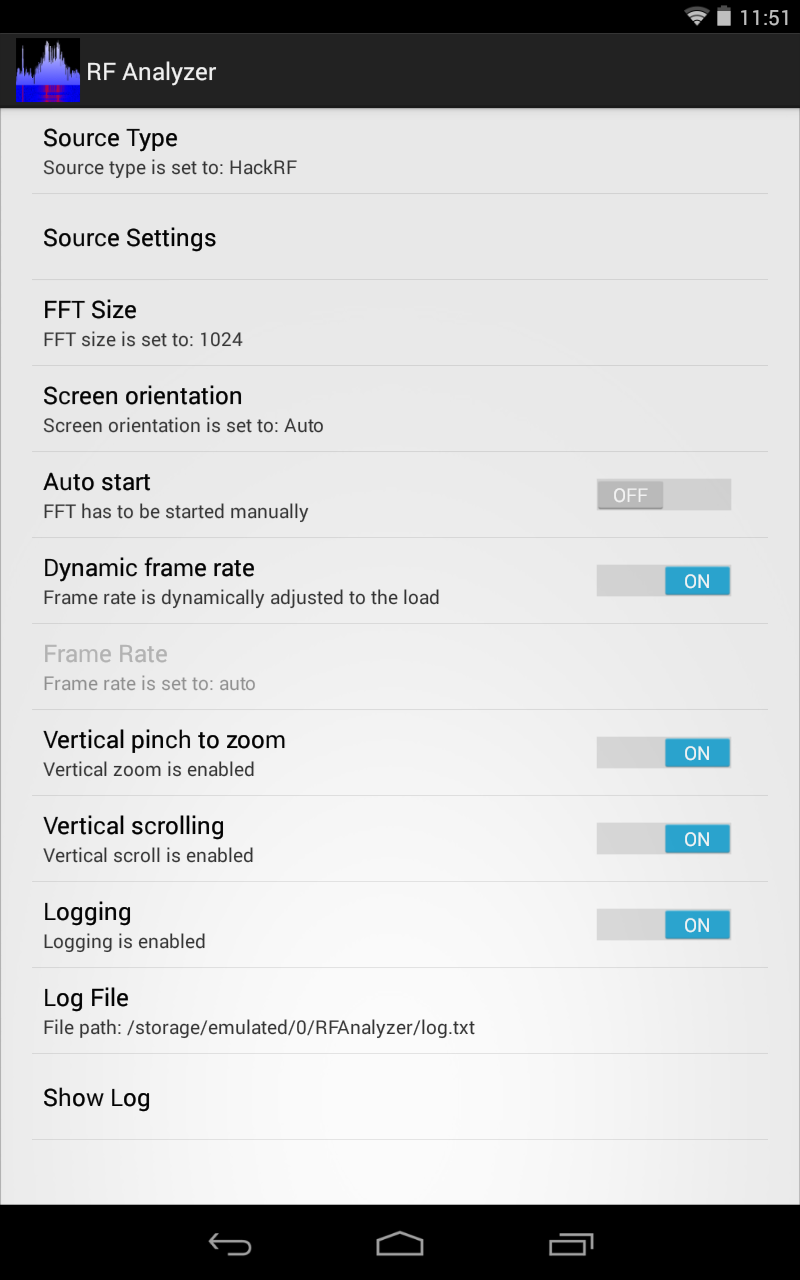
Settings Activity of RF Analyzer on a Nexus 7
Implementing the file source was helpful for debugging the application. It is also a way to test the app if you don't have an OTG cable or your phone/tablet doesn't output enough power for the HackRF. Selecting the file source type will allow you to use RF Analyzer with recorded samples from hackrf_transfer or Test_HackRF. I've uploaded a short capture of some FLEX pager signals for testing: FLEX Pager at 931MHz (2Msps)
How it works
For those who want to play with the sources of RF Analyzer (GPLv2) I want to quickly explain the internal structure of the app:
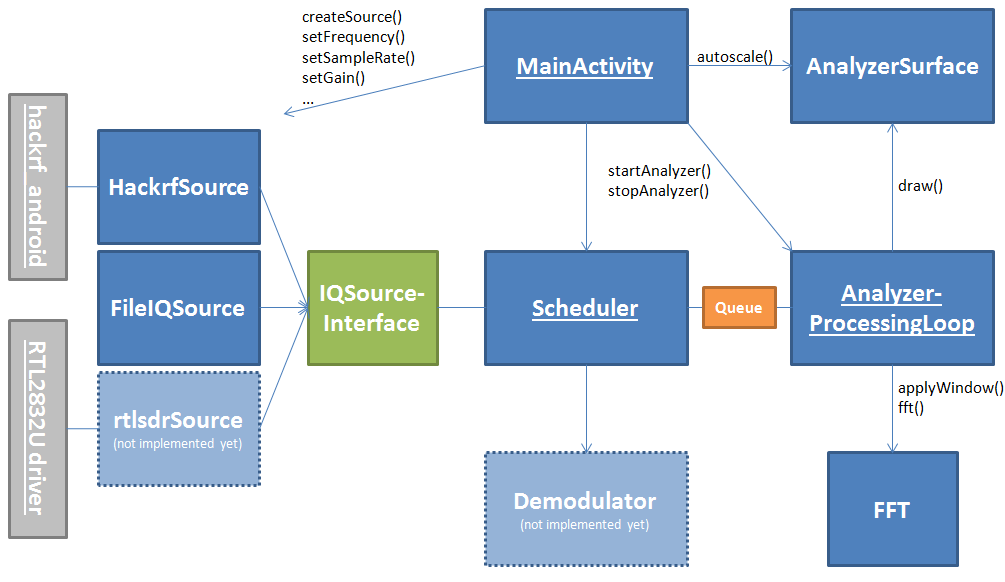
(Uncomplete) class diagram of RF Analyzer. Underlined classes are running in seperate threads. Gray elements are external modules.
To support different devices I defined a common interface that is implemented by all classes which represent sources of IQ samples. The Scheduler will continuously read samples from the source to prevent the receive buffers of the device to fill up. It forwards samples in packets of the size of the FFT to the AnalyzerProcessingLoop by inserting them in a queue. If the queue is full, the samples are thrown away in order to not block the input device. The AnalyzerProcessingLoop also runs in a separate thread and reads the sample packets from the queue, processes them with the help of the FFT class and then calls draw() on the AnalyzerSurface. This method draws the given FFT samples on a SurfaceView and also draws a new line of the waterfall plot as well as the horizontal and vertical axis.
For a more detailed impression of how the app works, have a look into the sources on GitHub. I tried my best to add helpful comments to understand the flow of the program.
If you have any questions, comments or any other input, don't hesitate to leave a comment or contact me directly on Twitter: @dennismantz
Have fun testing it! ;)
Here is the video were I demonstrate the old version of RF Analyzer:
原文地址:http://tech.mantz-it.com/2014/10/rf-analyzer-explore-frequency-spectrum.html
RF Analyzer for Android 安卓平台连接HackRF的App的更多相关文章
- Android使用蓝牙连接adb调试App
使用WiFi连接Android设备调试APP的教程非常多,可是项目中须要使用蓝牙进行通信.所以牵扯使用蓝牙调用adb. 1. 将电脑蓝牙与手机进行配对(控制面板->设备和打印机->加入 ...
- [STF手机设备管理平台]连接其它操作系统上的安卓设备实操介绍
一.背景 看到之前曾有人发贴,贴名[stf 连接各操作系统上安卓设备的操作方法分享],介绍了一下,虽然说方法和理论都有,但下述评论中还是有很多人不知如何操作,特别是不知道stf provider命令如 ...
- 【android】安卓手机连接电脑了,但是adb devices找不到设备及找到设备但无权限的问题
安卓手机连接电脑的时候,会遇到adb连接失败,adb devices为空,或者连接成功,但是显示unauthorized的情况.遇到这种情况,一般认为是手机驱动安装失败,会选择重新下载安装驱动,如果还 ...
- EasyCamera Android安卓移动视频监控单兵设备接入EasyDarwin开源流媒体云平台
前言 随着Android系统的不断更新和发展,现在越来越多的硬件产品选择用安卓系统作为运行环境,电视机,机顶盒.门禁.行车记录仪.车载系统.单兵设备等等,Android系统底层还是Linux,但对上层 ...
- 【android】安卓平台版本和API版本的对应关系
安卓平台版本和API版本对应关系
- 使用UE4公布安卓平台游戏
使用了几天的UE4 ,总算是将游戏在安卓平台执行起来了.当中遇到非常多问题,而且终于依旧有一些问题没能解决. 整体感觉是UE4这款引擎眼下还不够成熟.问题较多. 没有unity使用起来方便. 可是既然 ...
- 在Unity3D中实现安卓平台的本地通知推送
[前言] 对于手游来说,什么时候需要推送呢?玩过一些带体力限制的游戏就会发现,我的体力在恢复满后,手机会收到一个通知告诉我体力已完全恢复了.这类通知通常是由本地的客户端发起的,没有经过服务端. 在安卓 ...
- ionic3 打包安卓平台环境搭建报错解决方案总结
1.jvm虚拟机提供的运行空间小于项目所需的空间是报错.如图: 解决方法:在环境变量中配置jvm的运行内存大小,大于所需的内存即可. 其中:-Xmx512M可根据实际提示情况,进行更改,如1024M, ...
- Unity切换到安卓平台Shader丢失(opengl)
Unity安卓平台shader平台丢失 Unity的工程切换到Android平台后,运行游戏出现shader丢失 解决办法:在Unity桌面图标的快捷方式后添加 -force-gles20 示例:&q ...
随机推荐
- popUpWindow 动画无法超出窗体的解决方案
popupWindow 做动画时,当要求有一个放大动画时,动画无法超出窗体,给人的感觉是只有内容在放大,窗体不动. 这是由于窗口大小固定的原因,解决方案是加大popUpwindow的 大小. 一个比较 ...
- 使用ajax登录格式
登录页面: <!DOCTYPE html PUBLIC "-//W3C//DTD XHTML 1.0 Transitional//EN" "http://www.w ...
- web前段 弹出小例子
<html> <head> <meta charset="utf-8"> <meta name="viewport" ...
- ubuntu 到底是选择32位还是64位?
ubuntu 到底是选择32位还是64位? 2011-06-03 15:16:31 标签:ubuntu linux 休闲 cpu 职场 原文出处:官方wiki原文作者:授权许可: 创作共用协议Att ...
- C# 调用 Outlook发送邮件实例
添加引用:Microsoft.Office.Interop.Outlook using System; using System.Collections.Generic; using System.L ...
- 试用VSCode
VSCode是代码编辑器,不是IDE. 优点: 1.内置ES6代码高亮和提示,语法验证 2.除了支持到变量定义处Go to definition,还支持弹框显示变量定义出peek definition ...
- Oracle10g_Dataguard__161031
1.查看 redo log 信息 1.1.desc v$log ZC: 不明白这是查看什么信息... 1.2. 查看redo log file SQL> select * from v$log ...
- Java 实现word 中写入文字图片的解决方案
JAVA生成WORD文件的方法目前有以下两种方式: 一种是jacob 但是局限于windows平台 往往许多JAVA程序运行于其他操作系统 在此不讨论该方案; 一种是poi但是他的excel处理很程序 ...
- 与Status Bar和Navigation Bar相关的一些东西
Android Navigation Bar Status Bar 与StatusBar和NavigationBar相关的东西有两种,一是控制它们的显示与隐藏,二是控制它们的透明与否及背景. 在2 ...
- (40) Aeroo 服务安装
服务器 Odoo 8.0 操作系统: Ubuntu trusty14.04 说明:安装aeroo 要的要两个服务 areoo-docs 和 soffice 这里设定两个端口 8989 和 8100 = ...