abp(net core)+easyui+efcore仓储系统——领域层创建实体(三)
abp(net core)+easyui+efcore实现仓储管理系统目录
abp(net core)+easyui+efcore实现仓储管理系统——ABP总体介绍(一)
abp(net core)+easyui+efcore实现仓储管理系统——解决方案介绍(二)
在上二篇文章中我们简单介绍了一下ABP.TPLMS系统的概况,已经对ABP的体系结构以及项目结构有了一个初步的了解。在这一篇文章中我们主要和领域层打交道,主要是创建实体与进行迁移。接下来我们开始创建Module实体。
一、创建Module实体
实体是DDD(领域驱动设计)的核心概念之一。Eirc Evans是这样描述的实体的:“它根本上不是通过属性定义的,而是通过一系列连续性和标识定义的”。因此,实体都有Id属性并且都存储到数据库中。一个实体一般会映射到数据库的一张表。现在我们来完成以下任务:在领域层创建一个Entitys文件夹,并在这个文件夹中创建Module实体类。
1.
在Visual Studio 2017的“解决方案资源管理器”中,右键单击“ABP.TPLMS.Core”项目。 选择“添加” > “新建文件夹”。如下图。

2.将文件夹命名为“Entitys”。
3. 右键单击“Entitys”文件夹,然后选择“添加” > “类”。
将类命名为 Module,然后选择“添加”。如下图。

4.ABP中所有的实体类都继承自Entity,而Entity实现了IEntity接口;而IEntity接口是一个泛型接口,通过泛型指定主键Id类型,默认的Entity的主键类型是int类型。如下图。

5.创建Module类,肯定需要保存创建时间,可以通过实现审计模块中的IHasCreationTime来实现这种通用功能。如下图。

6. abp中实体是派生于Entity类,先看一下我们在Core层新建的Module类。代码如下:
using Abp.Domain.Entities;

using Abp.Domain.Entities.Auditing;

using Abp.Timing;

using System;

using System.Collections.Generic;

using System.ComponentModel.DataAnnotations;

using System.Text;

namespace ABP.TPLMS.Entitys

{

    public class Module:Entity, IHasCreationTime

    {

        public const int MaxLength = ;

        public Module()

        {

            this.DisplayName = string.Empty;

            this.Name = string.Empty;

            this.Url = string.Empty;

            this.HotKey = string.Empty;

            this.ParentId = ;

            this.IconName = string.Empty;

            this.Status = ;

            this.ParentName = string.Empty;

            this.RequiredPermissionName = string.Empty;

            this.RequiresAuthentication = false;

            this.SortNo = ;

            CreationTime = Clock.Now;

        }

        [Required]

        [StringLength(MaxLength)]

        public string DisplayName { get; set; }

        [Required]

        [StringLength(MaxLength)]

        public string Name { get; set; }

        [Required]

        [StringLength(MaxLength)]

        public string Url { get; set; }

        [StringLength(MaxLength)]

        public string HotKey { get; set; }

        public int ParentId { get; set; }

        public bool RequiresAuthentication { get; set; }

        public bool IsAutoExpand { get; set; }

        [StringLength(MaxLength)]

        public string IconName { get; set; }

        public int Status { get; set; }

        [Required]

        [StringLength(MaxLength)]

        public string ParentName { get; set; }

        [StringLength(MaxLength)]

        public string RequiredPermissionName { get; set; }

        public int SortNo { get; set; }

        public DateTime CreationTime { get; set; }

    }

}
在上面的Module实体类中的一些属性上我们定义了[Required]、[MaxLength]等特性用来进行输入校验的。
上面的Module实体类,没有添加Id属性,为什么呢?因为Module继承自Entity类,Entity类已经定义Id,它是该Entity类的主键。因此,所有继承Entity类的实体类的主键名都是Id。
Id(主键)的类型是可以更改的,默认是int(int32)。如果你想将Id定义为其他类型,可以在<>内写,比如Guid,long也是可以的。
Entity类重写了等号运算符(==),可以轻松地检查两个实体是否相同了(实体的Id相同则认为它们相同)。它也定义了IsTransient方法来检测它是否有Id。
IHasCreationTime接口使用一个通用的属性来描述一个实体的“创建时间”。当实现了该接口的实体类插入到数据库中时,ABP会自动地将当前的时间设置给CreationTime。
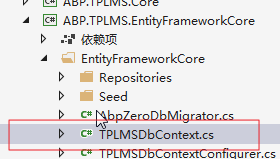
7.定义好实体之后,我们就要去DbContext中定义实体对应的DbSet,以应用Code First 数据迁移。找到我们的基础服务层,即以EntityFrameworkCore结尾的项目中,找到DbContext类,如下图,添加以下代码。
using Microsoft.EntityFrameworkCore;

using Abp.Zero.EntityFrameworkCore;

using ABP.TPLMS.Authorization.Roles;

using ABP.TPLMS.Authorization.Users;

using ABP.TPLMS.MultiTenancy;

using ABP.TPLMS.Entitys;

namespace ABP.TPLMS.EntityFrameworkCore

{

    public class TPLMSDbContext : AbpZeroDbContext<Tenant, Role, User, TPLMSDbContext>

    {

        /* Define a DbSet for each entity of the application */

        public TPLMSDbContext(DbContextOptions<TPLMSDbContext> options)

            : base(options)

        {

        }

        public DbSet<Module> Modules { get; set; }

    }

}
二、执行Code First数据迁移,
1.从菜单中选择“工具->NuGet包管理器器—>程序包管理器控制台”菜单。如下图。

2. 在PMC中,默认项目选择EntityframeworkCore对应的项目后。输入以下命令:Add-Migration AddEntityModule,创建迁移。如下图。

3. 在上面的命令执行完毕之后,创建成功后,会在Migrations文件夹下创建时间_AddEntityModule格式的类文件,这些代码是基于DbContext指定的模型。如下图。

4.在程序包管理器控制台,输入Update-Database,回车执行迁移。执行成功后,查看数据库,Moudles表创建成功。如下图。

abp(net core)+easyui+efcore仓储系统——领域层创建实体(三)的更多相关文章
- abp(net core)+easyui+efcore仓储系统——展现层实现增删改查之控制器(六)
abp(net core)+easyui+efcore仓储系统目录 abp(net core)+easyui+efcore仓储系统——ABP总体介绍(一) abp(net core)+easyui+e ...
- abp(net core)+easyui+efcore仓储系统——解决方案介绍(二)
abp(net core)+easyui+efcore仓储系统目录 abp(net core)+easyui+efcore仓储系统——ABP总体介绍(一) ABP框架 首先介绍一下abp框架,abp其 ...
- abp(net core)+easyui+efcore仓储系统——定义仓储并实现 (四)
abp(net core)+easyui+efcore仓储系统目录 abp(net core)+easyui+efcore仓储系统——ABP总体介绍(一) abp(net core)+easyui+e ...
- abp(net core)+easyui+efcore仓储系统——创建应用服务(五)
abp(net core)+easyui+efcore仓储系统目录 abp(net core)+easyui+efcore仓储系统——ABP总体介绍(一) abp(net core)+easyui+e ...
- abp(net core)+easyui+efcore仓储系统——ABP总体介绍(一)
在前面我已经介绍了ASP.NET MVC.ASP.NET Razor.WEBAPI等技术.我准备通过一个实践项目来整体应用一下之前介绍的技术.本系列是介绍基于ABP+EasyUI的Web开发框架的形成 ...
- 2019年7月16日 abp(net core)+easyui+efcore实现仓储管理系统——多语言(十)
abp(net core)+easyui+efcore实现仓储管理系统目录 abp(net core)+easyui+efcore实现仓储管理系统——ABP总体介绍(一) abp(net core)+ ...
- abp(net core)+easyui+efcore实现仓储管理系统——使用 WEBAPI实现CURD (十三)
abp(net core)+easyui+efcore实现仓储管理系统目录 abp(net core)+easyui+efcore实现仓储管理系统——ABP总体介绍(一) abp(net core)+ ...
- abp(net core)+easyui+efcore实现仓储管理系统——使用 WEBAPI实现CURD (十五)
core)+easyui+efcore实现仓储管理系统目录 abp(net core)+easyui+efcore实现仓储管理系统——ABP总体介绍(一) abp(net core)+easyui+e ...
- abp(net core)+easyui+efcore实现仓储管理系统——菜单 (十六)
系统目录 abp(net core)+easyui+efcore实现仓储管理系统——ABP总体介绍(一) abp(net core)+easyui+efcore实现仓储管理系统——解决方案介绍(二) ...
随机推荐
- c语言学习笔记(10)——结构体
------------------------------------------------------------------ # include <stdio.h> struct ...
- 详解Python模块导入方法
python常被昵称为胶水语言,它能很轻松的把用其他语言制作的各种模块(尤其是C/C++)轻松联结在一起.python包含子目录中的模块方法比较简单,关键是能够在sys.path里面找到通向模块文件的 ...
- js调查server
<script type="text/javascript"> function showUnreadNews() { $(document).ready(functi ...
- img前置显示屏装load图片
只需要设置img的background能够 <img src="" alt="" class="detailImg" > cs ...
- matlab GUI 编程
matlab 语法的简便,在 GUI 上也不遑多让呀: uigetfile [filename, pathname] = uigetfile('*.m', 'choose a m file') 1. ...
- 构建自己的PHP框架(视图装载)
完整项目地址:https://github.com/Evai/Aier 视图装载类要做的工作其实很简单: 1. 根据视图名称找到视图文件,支持文件夹 2. 更加方便,更加优雅地把变量的值传递进视图 本 ...
- [转]TensorFlow如何进行时序预测
TensorFlow 是一个采用数据流图(data flow graphs),用于数值计算的开源软件库.节点(Nodes)在图中表示数学操作,图中的线(edges)则表示在节点间相互联系的多维数据数组 ...
- WPF图片放大后模糊的解决方法
原文:WPF图片放大后模糊的解决方法 WPF中显示图片的方式很多,可以用Image控件来显示图像,或者直接设置一个控件的Background.图片的放大也很简单,直接设置显示图片的控件的Width和H ...
- Installation and Configuration Guide
Harbor can be installed by one of three approaches: Online installer: The installer downloads Harbor ...
- WPF元素绑定
原文:WPF元素绑定 数据绑定简介:数据绑定是一种关系,该关系告诉WPF从源对象提取一些信息,并用这些信息设置目标对象的属性.目标属性是依赖项属性.源对象可以是任何内容,从另一个WPF元素乃至ADO. ...