『计算机视觉』Mask-RCNN_锚框生成
Github地址:Mask_RCNN
『计算机视觉』Mask-RCNN_论文学习
『计算机视觉』Mask-RCNN_项目文档翻译
『计算机视觉』Mask-RCNN_推断网络其一:总览
『计算机视觉』Mask-RCNN_推断网络其二:基于ReNet101的FPN共享网络
『计算机视觉』Mask-RCNN_推断网络其三:RPN锚框处理和Proposal生成
『计算机视觉』Mask-RCNN_推断网络其四:FPN和ROIAlign的耦合
『计算机视觉』Mask-RCNN_推断网络其五:目标检测结果精炼
『计算机视觉』Mask-RCNN_推断网络其六:Mask生成
『计算机视觉』Mask-RCNN_推断网络终篇:使用detect方法进行推断
『计算机视觉』Mask-RCNN_锚框生成
『计算机视觉』Mask-RCNN_训练网络其一:数据集与Dataset类
『计算机视觉』Mask-RCNN_训练网络其二:train网络结构&损失函数
『计算机视觉』Mask-RCNN_训练网络其三:训练Model
一、和SSD锚框对比
Mask_RCNN的锚框本质上来说和SSD的是一样的(『TensorFlow』SSD源码学习_其三:锚框生成),
中心点的个数等于特征层像素数
框体生成是围绕中心点的
最终的框体坐标需要归一化到01之间,都是对于输入图片的相对大小
RCNN系列一般都是一个共享特征,但在Mask_RCNN结构引入了FPN结构后,和SSD一样,使用了多层特征,这样两者的锚框生成算法可以说是如出一辙了,只不过是生成策略有所微调:
SSD中不同特征层对应着不同的网格增强比例参数;Mask_RCNN不通层的比例(anchor_ratios)则完全一致
SSD每一层每一个中心点生成该层ratio+2个框;Mask_RCNN生成固定3个框
SSD中心点为feat像素偏移0.5步长;Mask_RCNN中心点直接选为feat像素位置
而基本生成方式两者完全一致:
- h乘anchor_ratios**0.5
- w除anchor_ratios**0.5
h、w初始值为给定的参考尺寸,即感受野控制实际依赖的参数为每一层的anchor_ratios和参考尺寸,对SSD:
anchor_sizes=[(21., 45.),

              (45., 99.),

              (99., 153.),

              (153., 207.),

              (207., 261.),

              (261., 315.)]
anchor_ratios=[[2, .5],

               [2, .5, 3, 1./3],

               [2, .5, 3, 1./3],

               [2, .5, 3, 1./3],

               [2, .5],

               [2, .5]]
对Mask_RCNN(h、w参考尺寸大小一致):
self.config.BACKBONE_STRIDES  = [4, 8, 16, 32, 64]      # 特征层的下采样倍数,中心点计算使用
self.config.RPN_ANCHOR_RATIOS = [0.5, 1, 2]             # 特征层锚框生成参数
self.config.RPN_ANCHOR_SCALES = [32, 64, 128, 256, 512] # 特征层锚框感受野
二、锚框生成
锚框生成入口函数位于model.py中的get_anchor函数,需要参数image_shape,保证含有[h, w]即可,也可以包含[h, w, c],
    def get_anchors(self, image_shape):

        """Returns anchor pyramid for the given image size."""

        # [N, (height, width)]

        backbone_shapes = compute_backbone_shapes(self.config, image_shape)

        # Cache anchors and reuse if image shape is the same

        if not hasattr(self, "_anchor_cache"):

            self._anchor_cache = {}

        if not tuple(image_shape) in self._anchor_cache:

            # Generate Anchors: [anchor_count, (y1, x1, y2, x2)]

            a = utils.generate_pyramid_anchors(

                self.config.RPN_ANCHOR_SCALES,  # (32, 64, 128, 256, 512)

                self.config.RPN_ANCHOR_RATIOS,  # [0.5, 1, 2]

                backbone_shapes,                # with shape [N, (height, width)]

                self.config.BACKBONE_STRIDES,   # [4, 8, 16, 32, 64]

                self.config.RPN_ANCHOR_STRIDE)  # 1

            # Keep a copy of the latest anchors in pixel coordinates because

            # it's used in inspect_model notebooks.

            # TODO: Remove this after the notebook are refactored to not use it

            self.anchors = a

            # Normalize coordinates

            self._anchor_cache[tuple(image_shape)] = utils.norm_boxes(a, image_shape[:2])

        return self._anchor_cache[tuple(image_shape)]
调用函数compute_backbone_shapes计算各个特征层shape:
def compute_backbone_shapes(config, image_shape):

    """Computes the width and height of each stage of the backbone network.

    Returns:

        [N, (height, width)]. Where N is the number of stages

    """

    if callable(config.BACKBONE):

        return config.COMPUTE_BACKBONE_SHAPE(image_shape)

    # Currently supports ResNet only

    assert config.BACKBONE in ["resnet50", "resnet101"]

    return np.array(

        [[int(math.ceil(image_shape[0] / stride)),

            int(math.ceil(image_shape[1] / stride))]

            for stride in config.BACKBONE_STRIDES])  # [4, 8, 16, 32, 64]
调用函数utils.generate_pyramid_anchors生成全部锚框:
def generate_pyramid_anchors(scales, ratios, feature_shapes, feature_strides,

                             anchor_stride):

    """Generate anchors at different levels of a feature pyramid. Each scale

    is associated with a level of the pyramid, but each ratio is used in

    all levels of the pyramid.

    Returns:

    anchors: [N, (y1, x1, y2, x2)]. All generated anchors in one array. Sorted

        with the same order of the given scales. So, anchors of scale[0] come

        first, then anchors of scale[1], and so on.

    """

    # Anchors

    # [anchor_count, (y1, x1, y2, x2)]

    anchors = []

    for i in range(len(scales)):

        anchors.append(generate_anchors(scales[i],

                                        ratios,

                                        feature_shapes[i],

                                        feature_strides[i],

                                        anchor_stride))

    # [anchor_count, (y1, x1, y2, x2)]

    return np.concatenate(anchors, axis=0)
utils.generate_pyramid_anchors会调用utils.generate_anchors来生成每一层的锚框(这一步较多的使用了函数meshgrid,介绍见『Numpy』np.meshgrid):
def generate_anchors(scales, ratios, shape, feature_stride, anchor_stride):

    """

    scales: 1D array of anchor sizes in pixels. Example: [32, 64, 128]

    ratios: 1D array of anchor ratios of width/height. Example: [0.5, 1, 2]

    shape: [height, width] spatial shape of the feature map over which

            to generate anchors.

    feature_stride: Stride of the feature map relative to the image in pixels.

    anchor_stride: Stride of anchors on the feature map. For example, if the

        value is 2 then generate anchors for every other feature map pixel.

    """

    # Get all combinations of scales and ratios

    scales, ratios = np.meshgrid(np.array(scales), np.array(ratios))

    scales = scales.flatten()

    ratios = ratios.flatten()

    # Enumerate heights and widths from scales and ratios

    heights = scales / np.sqrt(ratios)

    widths = scales * np.sqrt(ratios)

    # Enumerate shifts in feature space

    shifts_y = np.arange(0, shape[0], anchor_stride) * feature_stride

    shifts_x = np.arange(0, shape[1], anchor_stride) * feature_stride

    shifts_x, shifts_y = np.meshgrid(shifts_x, shifts_y)

    # Enumerate combinations of shifts, widths, and heights

    box_widths, box_centers_x = np.meshgrid(widths, shifts_x)    # (n, 3) (n, 3)

    box_heights, box_centers_y = np.meshgrid(heights, shifts_y)  # (n, 3) (n, 3)

    # Reshape to get a list of (y, x) and a list of (h, w)

    # (n, 3, 2) -> (3n, 2)

    box_centers = np.stack([box_centers_y, box_centers_x], axis=2).reshape([-1, 2])

    box_sizes = np.stack([box_heights, box_widths], axis=2).reshape([-1, 2])

    # Convert to corner coordinates (y1, x1, y2, x2)

    boxes = np.concatenate([box_centers - 0.5 * box_sizes,

                            box_centers + 0.5 * box_sizes], axis=1)

    # 框体信息是相对于原图的, [N, (y1, x1, y2, x2)]

    return boxes
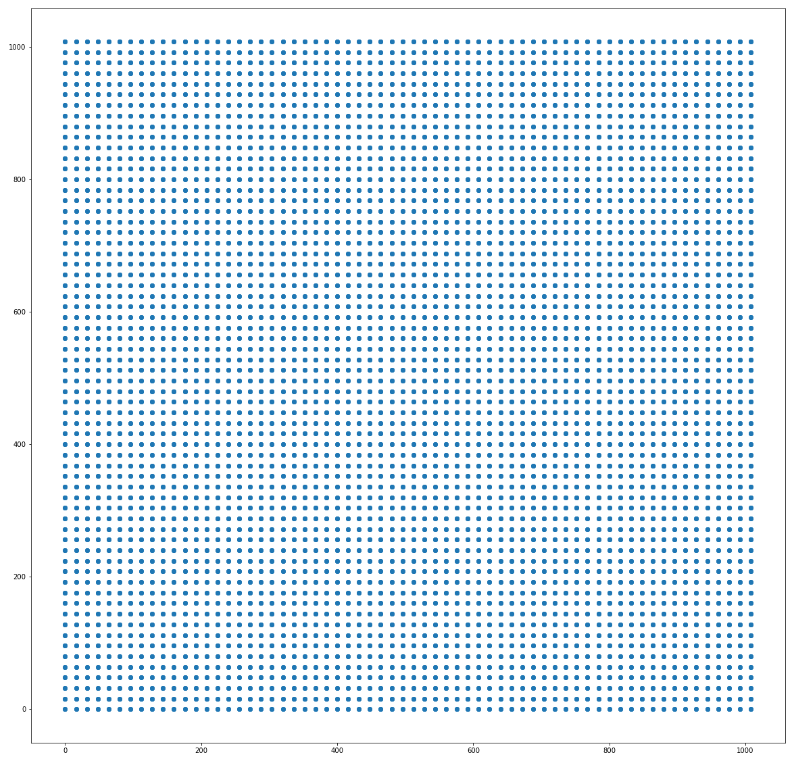
模拟某层的中心点分布
最后回到get_anchor,调用utils.norm_boxes将锚框坐标化为01之间:
def norm_boxes(boxes, shape):

    """Converts boxes from pixel coordinates to normalized coordinates.

    boxes: [N, (y1, x1, y2, x2)] in pixel coordinates

    shape: [..., (height, width)] in pixels

    Note: In pixel coordinates (y2, x2) is outside the box. But in normalized

    coordinates it's inside the box.

    Returns:

        [N, (y1, x1, y2, x2)] in normalized coordinates

    """

    h, w = shape

    scale = np.array([h - 1, w - 1, h - 1, w - 1])

    shift = np.array([0, 0, 1, 1])

    return np.divide((boxes - shift), scale).astype(np.float32)
最终返回相对坐标下的锚框,shape:[anchor_count, (y1, x1, y2, x2)]。
『计算机视觉』Mask-RCNN_锚框生成的更多相关文章
- 『计算机视觉』经典RCNN_其二:Faster-RCNN
项目源码 一.Faster-RCNN简介 『cs231n』Faster_RCNN 『计算机视觉』Faster-RCNN学习_其一:目标检测及RCNN谱系 一篇讲的非常明白的文章:一文读懂Faster ...
- 『计算机视觉』经典RCNN_其一:从RCNN到Faster-RCNN
RCNN介绍 目标检测-RCNN系列 一文读懂Faster RCNN 一.目标检测 1.两个任务 目标检测可以拆分成两个任务:识别和定位 图像识别(classification)输入:图片输出:物体的 ...
- 『计算机视觉』Mask-RCNN
一.Mask-RCNN流程 Mask R-CNN是一个实例分割(Instance segmentation)算法,通过增加不同的分支,可以完成目标分类.目标检测.语义分割.实例分割.人体姿势识别等多种 ...
- 『计算机视觉』Mask-RCNN_推断网络其三:RPN锚框处理和Proposal生成
一.RPN锚框信息生成 上文的最后,我们生成了用于计算锚框信息的特征(源代码在inference模式中不进行锚框生成,而是外部生成好feed进网络,training模式下在向前传播时直接生成锚框,不过 ...
- 『计算机视觉』Mask-RCNN_推断网络其六:Mask生成
一.Mask生成概览 上一节的末尾,我们已经获取了待检测图片的分类回归信息,我们将回归信息(即待检测目标的边框信息)单独提取出来,结合金字塔特征mrcnn_feature_maps,进行Mask生成工 ...
- 『计算机视觉』Mask-RCNN_从服装关键点检测看KeyPoints分支
下图Github地址:Mask_RCNN Mask_RCNN_KeyPoints『计算机视觉』Mask-RCNN_论文学习『计算机视觉』Mask-RCNN_项目文档翻译『计算机视觉』Mas ...
- 『计算机视觉』Mask-RCNN_训练网络其三:训练Model
Github地址:Mask_RCNN 『计算机视觉』Mask-RCNN_论文学习 『计算机视觉』Mask-RCNN_项目文档翻译 『计算机视觉』Mask-RCNN_推断网络其一:总览 『计算机视觉』M ...
- 『计算机视觉』Mask-RCNN_训练网络其二:train网络结构&损失函数
Github地址:Mask_RCNN 『计算机视觉』Mask-RCNN_论文学习 『计算机视觉』Mask-RCNN_项目文档翻译 『计算机视觉』Mask-RCNN_推断网络其一:总览 『计算机视觉』M ...
- 『计算机视觉』Mask-RCNN_训练网络其一:数据集与Dataset类
Github地址:Mask_RCNN 『计算机视觉』Mask-RCNN_论文学习 『计算机视觉』Mask-RCNN_项目文档翻译 『计算机视觉』Mask-RCNN_推断网络其一:总览 『计算机视觉』M ...
随机推荐
- Elasticsearch-->Get Started--> Exploring Your Data
Exploring Your Data Sample Dataset Now that we’ve gotten a glimpse of the basics, let’s try to work ...
- 卸载linux系统上自带的mysql
步骤: 1.打开centos命令提示符,切换为root用户 2.输入rpm -qa|grep -i mysql命令以检查系统含有的mysql插件,回车,若没有则说明无自带mysql,系统很干净.若有显 ...
- p2596 书架(Treap)
写平衡树修锅快修到死系列 我太蠢了 其实是平衡树裸体裸题 插入,删除,交换前驱或后继,查询rank和kth 维护一个pos数组,表示第i个书的编号 然后注意许许多多的细节,没了 #include &l ...
- JOISC 2014 邮戳拉力赛(基础DP)
题意 https://loj.ac/problem/2878 思路 真的神仙题,想到就很好写,想不到就写不出来. 肯定只能一个一个邮戳按顺序分析.首先,将取一枚邮戳的路径分为四种: 上行 \(\rig ...
- Python实现机器学习算法:EM算法
''' 数据集:伪造数据集(两个高斯分布混合) 数据集长度:1000 ------------------------------ 运行结果: ---------------------------- ...
- Qt button和buttons区别
假设我的鼠标左键已经按下.若移动鼠标,会发生的move事件,button返回Qt::NoButton,buttons返回LeftButton.再按下右键,会发生press事件,button返回Righ ...
- P2512 [HAOI2008]糖果传递
题目描述 有n个小朋友坐成一圈,每人有ai个糖果.每人只能给左右两人传递糖果.每人每次传递一个糖果代价为1. 输入输出格式 输入格式: 小朋友个数n 下面n行 ai 输出格式: 求使所有人获得均等糖果 ...
- 深入浅析Spring的AOP实现原理
转载来源:https://www.jb51.net/article/81788.htm AOP(Aspect-OrientedProgramming,面向切面编程),可以说是OOP(Object-Or ...
- Ubuntu 下 Python自由切换
sudo update-alternatives --install /usr/bin/python python /usr/bin/python2 100 sudo update-alternati ...
- kafka+docker+python
昨天晚上刚刚才花3小时看完<日志:每个软件工程师都应该知道的有关实时数据的统一概念>. 今天就把kafka在docker容器里运行起来,github上有几个,但都太复杂了. 我自己写个最简 ...